The Brother Buttonhole Foot is a vital accessory for sewing enthusiasts seeking precision and professionalism in their work.
This specialized attachment, designed for compatible Brother sewing machines, streamlines the creation of buttonholes.
Its engineering simplifies what can be a complex task, ensuring consistently impeccable results.
In this guide, we will explore the step-by-step process of utilizing the Brother Buttonhole Foot to fashion flawless buttonholes effortlessly.
From attaching the foot and selecting the ideal buttonhole stitch to adjusting the size and reinforcement for durability, mastering this skill will elevate your sewing projects to new heights of excellence.
Learn to harness the potential of this tool to craft impeccable buttonholes with ease.
What Is Brother Buttonhole Foot?
The Brother Buttonhole Foot is a specialized sewing machine accessory designed to simplify the creation of buttonholes in sewing projects. It is compatible with various Brother sewing machine models.
This foot attachment automates the buttonhole-making process, ensuring precise and consistent results.
The buttonhole foot typically has guides and sensors that allow it to measure the size of the button and create a perfectly sized buttonhole accordingly.
Users can select the desired buttonhole length and style on their sewing machine, and the buttonhole foot will do the rest.
It guides the fabric, controls the stitching, and stops automatically once the buttonhole is completed.
This accessory is invaluable for anyone who wants to achieve professional-looking buttonholes effortlessly and efficiently in their sewing projects.
How to Use Brother Buttonhole Foot?
Using a Brother buttonhole foot is an essential skill for anyone who enjoys sewing and wants to create professional-looking buttonholes on their garments or projects.
Brother is a well-known sewing machine manufacturer, and their buttonhole foot is designed to make the process of sewing buttonholes quick and precise.
Here’s a step-by-step guide on how to use a Brother buttonhole foot:
Gather your materials
To begin, ensure you have all the necessary materials at hand:
- A Brother sewing machine with a compatible buttonhole foot.
- Fabric with the buttons already marked or measured for placement.
- Matching thread.
- A sharp pair of scissors or a seam ripper.
- A ruler or measuring tape.
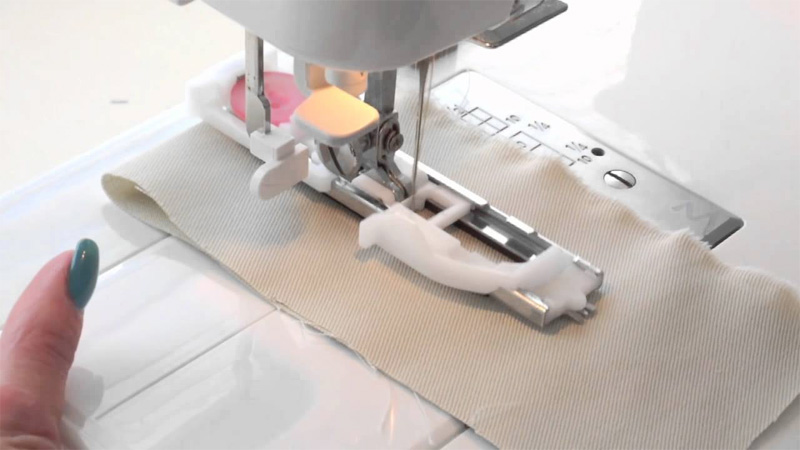
Attach the Buttonhole Foot
First, turn off your sewing machine and unplug it for safety. Next, remove the presser foot that is currently attached to your machine.
Then, attach the Brother buttonhole foot by sliding it onto the presser foot holder and lowering the presser foot lever to secure it in place.
Select the Buttonhole Stitch
Set your sewing machine to the buttonhole stitch. This can usually be done by turning the stitch selector dial or pressing a button designated for buttonholes.
Refer to your sewing machine’s manual for specific instructions on selecting the buttonhole stitch.
Adjust the Buttonhole Size
Most Brother buttonhole feet allow you to adjust the buttonhole size to match the size of your button.
Consult your sewing machine’s manual to learn how to adjust the buttonhole length. Typically, there is a knob or dial for this purpose.
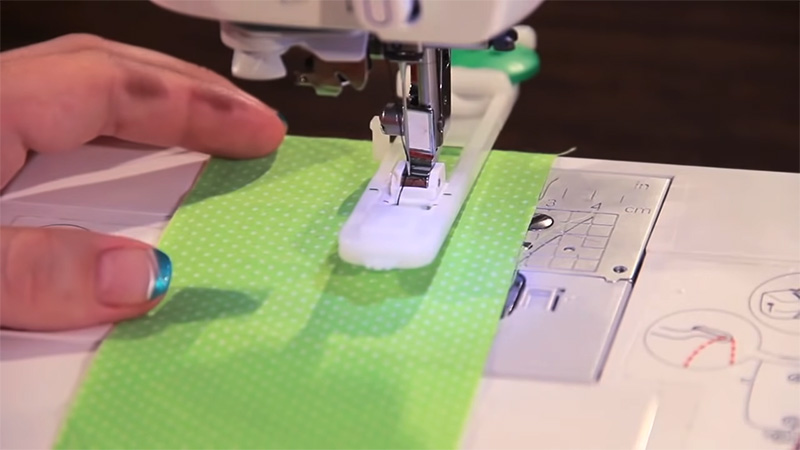
Place Your Fabric
Position your fabric under the presser foot, making sure the buttonhole markings are aligned with the center of the buttonhole foot. Lower the presser foot lever to hold the fabric in place.
Start Sewing
Begin sewing slowly, and the machine will automatically create the buttonhole. The buttonhole foot will guide the machine, and it will stitch back and forth in a precise pattern to create the buttonhole.
Continue sewing until the machine completes the entire buttonhole. The machine will usually stop automatically when finished.
Reinforce the Buttonhole (Optional)
If you want to reinforce the buttonhole, you can stitch a few extra stitches manually at the top and bottom of the buttonhole.
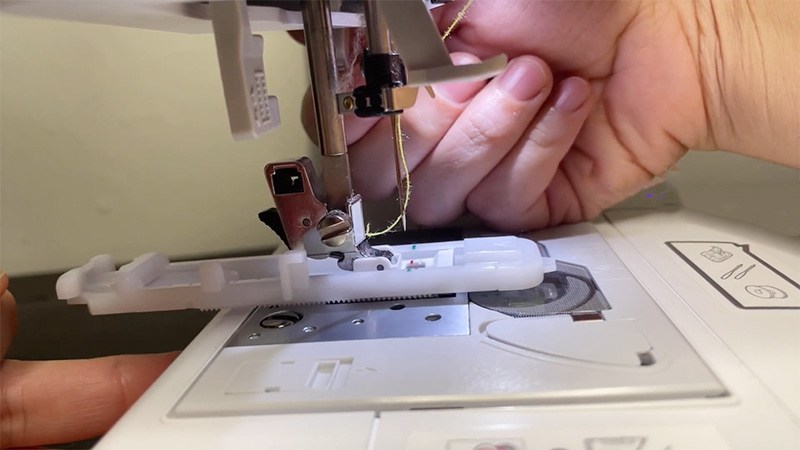
Cut the Threads
Once the buttonhole is complete, raise the presser foot lever and remove your fabric from the machine.
Carefully cut the excess thread tails at the top and bottom of the buttonhole using sharp scissors or a seam ripper.
Test the Buttonhole
Finally, place your button through the buttonhole to ensure it fits properly and that the buttonhole is the right size.
How to Install the Buttonhole Foot?
Installing a buttonhole foot on a sewing machine is a straightforward process. The exact steps may vary slightly depending on your sewing machine model, but here’s a general guide on how to install a buttonhole foot:
Turn Off the Machine
For safety, make sure your sewing machine is turned off and unplugged before starting.
Remove the Current Presser Foot
If there is a presser foot already attached to your sewing machine, raise the presser foot lever to its highest position.
Depending on your sewing machine model, there may be a lever or button at the back of the presser foot holder that you need to press or slide to release the current foot.
Prepare the Buttonhole Foot
Take the buttonhole foot designed for your sewing machine. Ensure that it’s clean and in good condition.
Attach the Buttonhole Foot
Position the buttonhole foot under the presser foot holder, aligning the small bar or peg on the foot with the holder’s groove.
Lower the presser foot lever to secure the buttonhole foot in place. You may need to gently push it up until it clicks into position.
Engage the Buttonhole Foot
Depending on your sewing machine model, there might be a lever or knob to engage or disengage the buttonhole foot. Make sure it’s engaged properly for the buttonhole function to work.
Check the Alignment
Ensure that the buttonhole foot is aligned correctly, with the needle positioned in the center of the foot’s opening. This is essential for accurate buttonhole placement.
Select the Buttonhole Stitch
On your sewing machine, select the appropriate buttonhole stitch. Most modern sewing machines have preset buttonhole stitches, so consult your machine’s manual for guidance on selecting the desired stitch.
Adjust the Buttonhole Size
If your sewing machine allows for adjusting buttonhole size, set it according to the size of your button. Consult your machine’s manual for instructions on making this adjustment.
Test on Scrap Fabric
Before sewing a buttonhole on your project, it’s a good practice to test the buttonhole settings on a scrap piece of fabric to ensure the size and stitch pattern are correct.
Begin Sewing
Once you’re confident that everything is set up correctly, place your fabric under the buttonhole foot, lower the presser foot lever, and start sewing.
The machine will automatically create the buttonhole according to the selected settings.
How to Make a Buttonhole?
Creating buttonholes is a fundamental sewing skill, and following these steps will help you make neat and precise buttonholes:
Mark the Buttonhole Position
Use a fabric pen or chalk to mark the position and direction of your buttonhole on your fabric. You can employ a ruler or seam gauge to ensure consistent spacing between buttonholes and from the fabric edge.
Prepare the Fabric
Place your fabric under the sewing machine’s presser foot, aligning the marked buttonhole position with the red line or guide on the buttonhole foot.
Ensure the fabric lays flat and smooth, and secure it in place with pins or clips if necessary.
Select the Buttonhole Stitch
Choose the appropriate buttonhole stitch on your sewing machine. Depending on your machine’s model, you may have various options for different buttonhole types, such as round-end, keyhole, or stretch buttonholes.
Consult your sewing machine’s manual for specific stitch selection details.
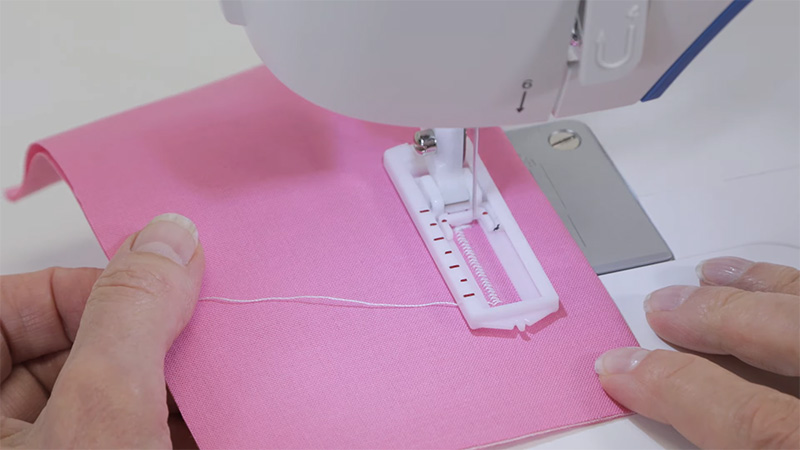
Lower the Presser Foot and Start Sewing
Lower the presser foot to secure the fabric. Begin sewing, and your machine will automatically sew one side of the buttonhole, then reverse and sew the other side, finally stopping when it reaches the preset endpoint.
Avoid pulling or pushing the fabric; instead, gently guide it with your hands to keep it in place.
Cut and Open the Buttonhole
After completing the buttonhole, cut the thread and remove your fabric from the machine. To open the buttonhole, use a seam ripper or sharp scissors.
Be careful not to cut into the stitches; cut only through the center of the buttonhole to create an opening for the button.
Repeat for Multiple Buttonholes
Repeat these steps for each additional buttonhole required for your project, ensuring consistent spacing and alignment.
Tips and Tricks for Better Buttonholes
Using precise and professional-looking buttonholes can elevate the quality of your sewing projects.
Here are some tips and tricks to help you achieve better buttonholes:
Thread Selection
Choose a thread color that complements your fabric. Ensure it’s of good quality and appropriate thickness for the fabric you’re working with.
Using a thread that matches your fabric color will help any imperfections blend in seamlessly.
Fabric Stabilization
When working with lightweight or stretchy fabrics, use stabilizers or interfacing to prevent distortion during the buttonhole stitching.
Properly stabilized fabric results in neater and more precise buttonholes.
Marking Buttonhole Placement
Take your time to mark the exact location of each buttonhole. Use fabric chalk, tailor’s tacks, or removable fabric markers to make precise placement marks. Accurate markings are crucial for evenly spaced and aligned buttonholes.
Practice on Scrap Fabric
Before sewing buttonholes on your actual project, practice on a scrap piece of fabric with the same layers, interfacing, and thread to fine-tune your settings and gain confidence in your technique.
Adjust Buttonhole Size
Make sure your buttonhole size matches the diameter of your button. Most modern sewing machines allow you to adjust the buttonhole length and width.
Test different settings on scrap fabric until you achieve the desired size and appearance.
Utilize a Buttonhole Foot
Invest in a high-quality buttonhole foot designed for your specific sewing machine.
These feet come with built-in guides that ensure even stitching and help maintain accurate buttonhole sizing.
Test Stitch Length and Tension
Before sewing the actual buttonhole, test the stitch length and tension on a fabric scrap.
Adjust these settings as necessary to achieve the desired buttonhole appearance, whether you want it denser or more delicate.
Reinforce Buttonholes
Strengthen your buttonholes by manually stitching a few extra stitches at both ends of the buttonhole, ensuring that the needle is down when you pivot. This reinforcement prevents fraying and adds durability.
FAQs
A Brother Buttonhole Foot is used to create precise and consistent buttonholes on fabrics with compatible Brother sewing machines.
To attach the foot, remove the current presser foot, align the buttonhole foot with the presser foot holder, and lower the presser foot lever to secure it in place.
Yes, most Brother Buttonhole Feet allow you to adjust the buttonhole size to match the diameter of your buttons.
The buttonhole foot works well with various fabric types, but for lightweight or stretchy fabrics, consider using stabilizers or interfacing to prevent distortion during stitching.
After sewing the buttonhole, manually stitch a few extra stitches at both ends of the buttonhole, ensuring the needle is down when you pivot.
To Wrap Up
Mastering the art of using the Brother Buttonhole Foot is a valuable skill that can elevate your sewing projects to a professional level.
This specialized accessory simplifies the intricate process of creating buttonholes, ensuring precision and consistency.
By following the step-by-step guide, you can confidently attach the foot, select the right stitch, adjust the size, and reinforce the buttonholes for added durability.
The Brother Buttonhole Foot streamlines what can be a daunting task, allowing you to achieve impeccable results effortlessly.
With practice and attention to detail, you’ll be able to incorporate perfectly tailored buttonholes into your garments and projects, adding a touch of sophistication and functionality to your creations.
Leave a Reply