The humble stitch ripper, a seemingly unassuming tool in the realm of sewing and crafting, holds a remarkable power — the ability to undo, correct, and transform.
Whether you’re a seasoned seamstress or a novice creator, understanding how to use a stitch ripper effectively is an essential skill in your repertoire.
This versatile instrument, with its sharp blade or hook, allows you to gracefully undo stitching errors, rework seams for alterations, and salvage fabric for new projects.
In this guide, we will delve into the art of using a stitch ripper, exploring the step-by-step process, essential precautions, and expert tips to wield this tool with precision and confidence.
What Is a Stitch Ripper?
A stitch ripper, also known as a seam ripper, is a small hand tool used in sewing and crafting to remove unwanted stitches or seams.
It is an essential tool for correcting mistakes in sewing projects, making alterations to garments, or repurposing fabric from old garments.
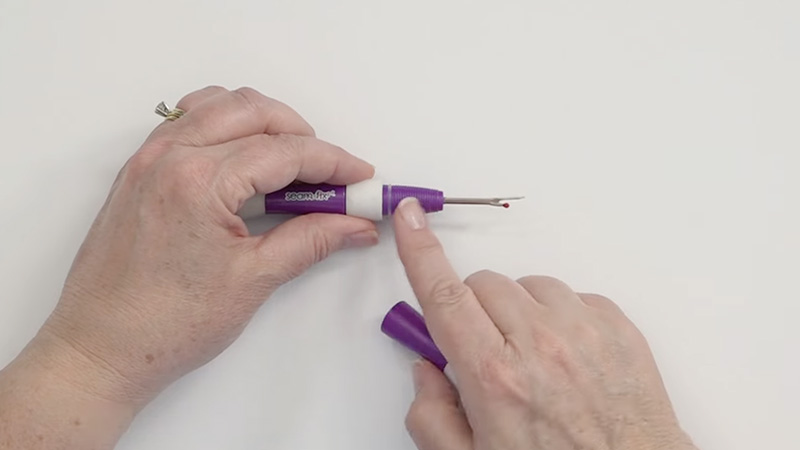
A typical stitch ripper consists of a handle, often designed for a comfortable grip, and a sharp, pointed blade or hook at one end.
The blade or hook is used to carefully cut or pick apart individual stitches without damaging the surrounding fabric.
The design of a stitch ripper allows for precise and controlled removal of stitches, making it an indispensable tool for sewers and crafters to undo sewing errors or take apart seams.
How to Use a Stitch Ripper?
A stitch ripper, also known as a seam ripper, is a handy tool used in sewing and crafting to remove unwanted stitches or seams quickly and precisely.
Whether you’re correcting a sewing mistake, taking apart a garment for alterations, or repurposing fabric from an old project, a stitch ripper is an essential tool in your sewing kit.
Here’s a step-by-step guide on how to use a stitch ripper effectively:
Gather your materials
Before you begin, it’s important to make sure you have all the necessary materials on hand:
- A stitch ripper with a comfortable grip.
- The fabric you want to remove stitches from.
- Adequate lighting: Good lighting is essential for precision work.
- Patience: Working slowly and carefully will yield better results.
Choose the Right Stitch Ripper
Stitch rippers come in various shapes and sizes. Consider your specific needs:
Larger, ergonomic handles are comfortable for extended use.
Fine, delicate work may require a smaller and more precise stitch ripper.
Ensure the ripper’s pointed tip is sharp for efficient cutting.
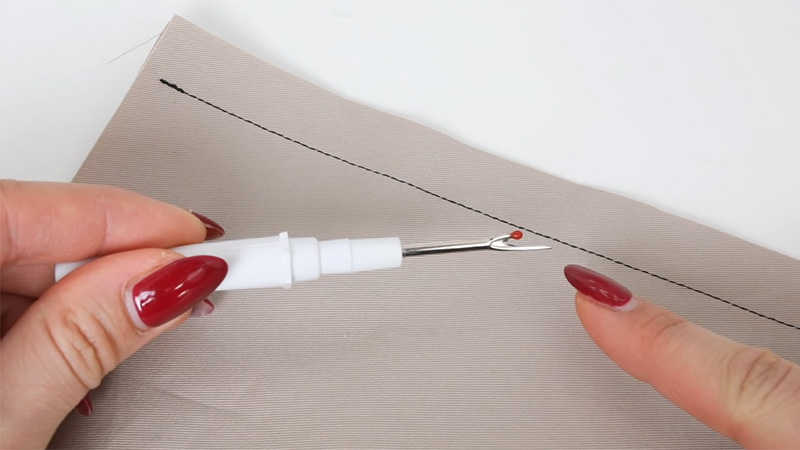
Examine the Stitches
Take a close look at the stitches you want to remove. Identify:
The direction of the stitches.
Where the thread starts and ends.
Any potential complications like multiple layers of fabric or backstitching.
Position the Fabric
Place the fabric on a flat surface with the wrong side facing up. Make sure the area you’re working on is easily accessible and well-supported to prevent stretching or distorting the fabric.
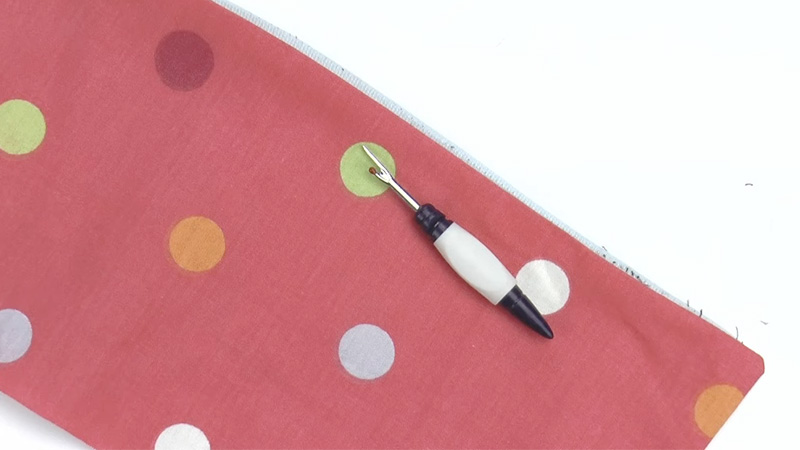
Insert the Stitch Ripper
Hold the stitch ripper like a pencil, with the pointed end facing away from you.
Gently slide the pointed tip under one of the stitches you want to remove. Avoid tugging or pulling to prevent fabric damage.
Cut the Thread
Once the stitch ripper is under the stitch, carefully push it forward to cut the thread.
Keep the ripper as close to the fabric as possible to avoid accidentally cutting the fabric itself. Repeat this process for each stitch in the seam you’re removing.
Remove Any Leftover Thread
After cutting all the stitches, inspect the fabric for any remaining bits of thread.
Use the point of the stitch ripper or your fingers to carefully pick out any lingering threads. Be gentle to avoid damaging the fabric.
Inspect the Fabric
Examine the fabric to ensure it’s in good condition after removing the stitches. Check for:
Snags or pulls that may have occurred during the stitching removal process.
Any loose or frayed threads that need further attention.
Press the Fabric
If necessary, press the fabric with an iron to smooth out any wrinkles or creases that may have formed during the seam removal process. This step is crucial if you plan to re-sew or repurpose the fabric.
Dispose of Removed Stitches
Properly dispose of the cut threads and any other remnants from the seam. A small container or trash bin nearby can help keep your work area tidy and organized.
Examples of Popular and Reliable Stitch Rippers
There are several popular and reliable stitch rippers available on the market. These brands are well-regarded by sewers and crafters for their quality and performance.
Here are some examples:
Dritz Stitch Ripper
Dritz is a reputable brand known for its sewing notions and tools. Their stitch rippers are widely available and come in various designs, including ergonomic handles and sharp blades.
Fiskars Seam Ripper
Fiskars is a well-established brand in crafting tools. Their seam rippers are known for their durability and functionality.
Many Fiskars rippers feature ergonomic handles and sharp, long-lasting blades.
Clover Seam Ripper
Clover is a trusted brand for precision sewing tools. Their seam rippers are designed with accuracy in mind, with both blade and hook-style options available.
Whether you prefer a blade or hook, Clover offers reliable options for precise seam removal.
Gingher Stitch Ripper
Gingher stitch rippers are recognized for their durability and sharp blades. These rippers are designed to withstand frequent use, and the sharp blades ensure clean and accurate stitch removal.
Gingher’s commitment to craftsmanship makes them a trusted choice among sewers.
Singer Seam Ripper
Singer, a well-known sewing machine manufacturer, also produces sewing accessories, including seam rippers. Singer’s rippers are widely available and known for their reliability.
Factors to Consider When Choosing a Stitch Ripper

When choosing a stitch ripper, there are several important factors to consider to ensure you select the right tool for your sewing and crafting needs.
Here are some key factors to keep in mind:
Blade or Hook Type
Stitch rippers typically come in two primary designs: with a blade or a hook. The choice between the two depends on your preference and the type of stitching you’ll be removing.
Blades are excellent for cutting through stitches, while hooks are better for gently pulling out threads without cutting the fabric.
Blade Sharpness
If you opt for a stitch ripper with a blade, check the sharpness of the blade. A sharp blade will make it easier to cut through stitches cleanly and quickly.
Dull blades can lead to frustration and may damage the fabric.
Handle Design and Comfort
Consider the handle design for comfort during extended use. Ergonomic handles with grips are more comfortable and reduce hand fatigue.
Choose a handle that fits your hand comfortably to ensure precise control.
Size and Length
Stitch rippers come in various sizes and lengths. Select one that feels comfortable and provides the right amount of control for your hand size and the type of work you’re doing.
Smaller rippers are great for fine detail work, while longer ones offer more reach.
Durability
Look for a stitch ripper made from durable materials. A quality ripper should last for a long time without breaking or bending during use. Metal or high-quality plastic handles are good options.
Brand and Reviews
Research the brand and read reviews from other sewers and crafters. A well-known and reputable brand often produces reliable tools.
Reviews can provide insights into the performance and durability of a specific stitch ripper.
Versatility
Some stitch rippers come with additional features, such as a built-in magnifying glass or LED light to aid in precision work. Depending on your needs, these added features may be beneficial.
Budget
Stitch rippers are available at various price points. While it’s essential to invest in a quality tool, you don’t necessarily need to break the bank.
Consider your budget and find a ripper that offers good value for the price.
Intended Use
Think about the specific tasks you’ll be using the stitch ripper for. If you’ll be working on delicate fabrics or intricate designs, a more precise and gentle hook-type ripper might be preferable.
For heavier fabrics or larger stitches, a blade-type ripper may be more suitable.
Safety Features
Some stitch rippers come with safety features such as caps or covers for the sharp end. These can help prevent accidents and injuries when the tool is not in use.
Precautions for Using Stitch Ripper
Using a stitch ripper is a common task in sewing and crafting, but it requires care to avoid accidents and damage to your fabric.
Here are some precautions to keep in mind:
Protect Your Fingers
When using a stitch ripper, it’s vital to protect your fingers from potential injuries. The sharp blade or hook at the ripper’s tip can cause cuts or punctures if not handled carefully.
To do this, maintain a firm grip on the fabric you’re working on and keep your fingers away from the ripper’s path.
By handling the fabric securely, you reduce the risk of accidentally moving your hand into the ripper’s cutting area.
Work on a Stable Surface
A stable and flat work surface is crucial for the safe and effective use of a stitch ripper.
An unstable surface can lead to shifting fabric, making it difficult to control the ripper’s movement and potentially causing damage to your project or even personal injury.
Ensure your workspace is clear and stable to provide a solid foundation for your work.
Good Lighting is Essential
Adequate lighting is essential for clear visibility when using a stitch ripper. Well-lit workspaces help you spot individual stitches, thread ends, and any irregularities in the fabric more easily.
This improved visibility reduces the chances of making mistakes or accidentally cutting the fabric.
Work Slowly and Carefully
Avoid the temptation to rush through the process of seam removal. Working slowly and with care allows for better control and precision.
Hasty movements with a stitch ripper can lead to accidents, such as cutting the fabric or your fingers. Patience is key to achieving clean and accurate results.
Use the Right Ripper for the Job
Consider the type of fabric and stitches you’re working with when choosing a stitch ripper.
Hook-style rippers are gentler and suitable for delicate fabrics or intricate stitches, while blade-style rippers are better for heavier materials. Selecting the appropriate ripper ensures safer and more effective seam removal.
Keep the Ripper Point Away from You
Always point the tip of the ripper away from your body and face while using it.
This precaution minimizes the risk of injury if the ripper were to slip or if the fabric suddenly shifts while you’re working.
Beware of Hidden Stitches
Some seams may have multiple layers, hidden stitches, or unconventional stitching patterns.
Take your time to carefully inspect the seam to ensure you’ve removed all stitches before moving on. Hidden stitches can be easily overlooked and lead to uneven results if not properly addressed.
FAQs
A stitch ripper is a sewing tool used to remove unwanted stitches or seams from fabric.
Consider factors such as the type of work you’ll be doing, the handle design for comfort, the sharpness of the blade or hook, and any additional features like ergonomic grips or built-in magnifying glasses.
Precautions include protecting your fingers from the sharp tip, working on a stable surface, ensuring good lighting, working slowly and carefully, and selecting the appropriate ripper for the job.
Yes, but it’s important to be gentle and choose the right type of ripper (hook-style is often preferred) to avoid damaging delicate fabrics like silk or chiffon.
You can maintain the sharpness of your ripper by periodically checking the blade or hook for dullness and sharpening it if needed.
To Wrap Up
Mastering the art of using a stitch ripper is a valuable skill for sewers and crafters alike.
This versatile tool empowers individuals to correct mistakes, alter garments, and repurpose fabrics with precision.
To use a stitch ripper effectively, one must choose the right tool for the task, examine stitches closely, and work methodically.
Careful attention to detail, patience, and proper handling are paramount to achieving clean results while safeguarding the fabric from unintended harm.
By following these steps and considering the intricacies of each sewing project, one can confidently wield a stitch ripper, transforming errors into opportunities for creative excellence in the world of sewing and crafting.
Leave a Reply