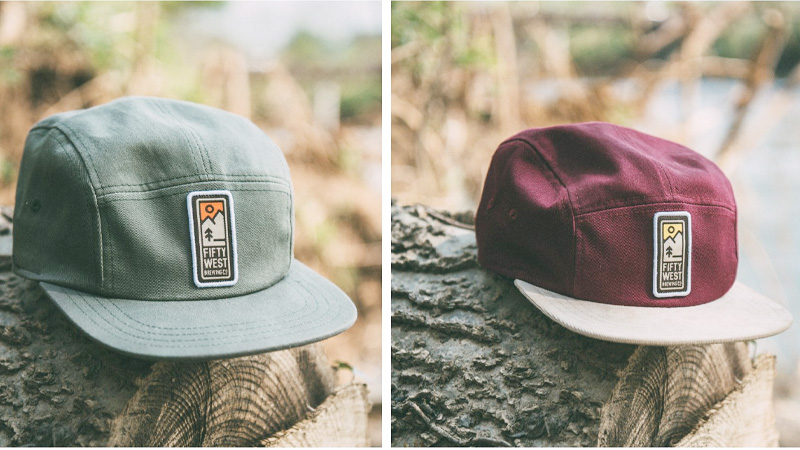
Creating your own five-panel hat is a creative and rewarding DIY project that allows you to customize your headwear to your unique style. These caps are not only fashionable but also versatile, making them suitable for various occasions.
In this guide, we will walk you through how to make a five panel hat. You’ll learn to choose the right materials, create a pattern, sew the panels together, and add finishing touches like a brim and closure.
Whether you’re a seasoned seamstress or a novice crafter, making your five-panel hat is an enjoyable way to express your creativity and stand out in a crowd.
So, let’s dive into the world of hat-making and embark on a journey to create a personalized accessory that complements your wardrobe and reflects your unique style.
How To Make A Five Panel Hat?
Creating a five-panel hat is a fun sewing project that results in a stylish accessory. Here are some simple steps:
Gather Materials
Begin by gathering your materials. You’ll need fabric for the hat’s exterior and lining, interfacing for stability, a sewing machine, thread, scissors, pins, and a five-panel hat pattern.
Prepare the Pattern
Lay out your five-panel hat pattern and cut the fabric pieces according to the pattern’s instructions. Be sure to cut one set from the exterior fabric, one set from the lining fabric, and one set from interfacing.
Fuse Interfacing
Apply the interfacing to the wrong side of the exterior fabric pieces. Follow the manufacturer’s instructions for fusing the interfacing to add structure and stability to the hat.
Sew the Front Panels
Take the two front panel pieces from your exterior fabric and sew them together along the curved top edge, right sides facing each other. Press the seam open.
Attach the Side Panels
Sew the side panels to the front panels, matching the notches and curving the fabric gently as you sew. Repeat this step for both sides, creating a circular shape.
Combine Exterior and Lining
With the right sides facing each other, place the exterior hat piece inside the lining piece, aligning the edges. Sew around the curved bottom edge, leaving a small opening for turning.
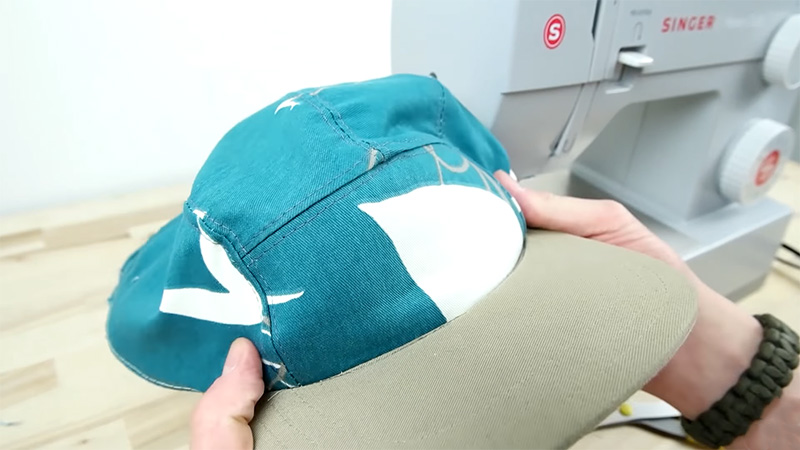
Turn and Press
Carefully turn the hat right side out through the opening. Use a blunt tool, like a chopstick, to gently push out the curves and corners. Press the hat flat, ensuring the seam allowance at the opening is folded inside.
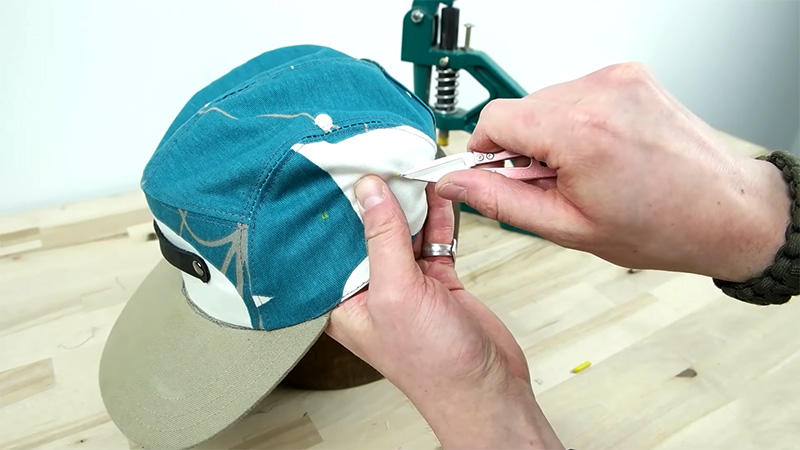
Close the Opening and Finish
Hand-stitch the opening closed using an invisible stitch or slipstitch. Then, press the hat once more to ensure it looks crisp and well-finished.
By following these steps, you can create a stylish five-panel hat that matches your style and provides a unique accessory for your wardrobe.
Best Materials To Use In A Five-Panel Hat?
A five-panel hat is a type of cap that has five pieces of fabric sewn together to form the crown and a flat brim.
Here are some materials that you can use:
Cotton
Cotton is a natural and breathable fabric that is soft and comfortable to wear. It comes in various colors, patterns, and weights, and it is easy to sew and wash. Cotton is also durable and resistant to fading and shrinking.
It is a good choice for making a five-panel hat for everyday use or casual occasions.
Denim
Denim is a sturdy and stylish fabric that is made from cotton twill. It has a distinctive blue color and a textured surface that gives it a rugged and vintage look. Denim is also durable and resistant to wear and tear.
It is a good choice for making a five-panel hat for outdoor activities or fashion statements.
Canvas
Canvas is a heavy and durable fabric that is made from cotton or linen. It has a smooth and firm surface that can hold its shape well. Canvas is also versatile and easy to dye or print on.
It is a good choice for making a five-panel hat for sports or adventure activities or for customizing your own design.
Wool
Wool is a warm and cozy fabric that is made from animal fibers such as sheep or alpaca. It has a soft and fluffy texture that can keep your head warm and comfortable in cold weather.
It is also natural and renewable, and it can absorb moisture and regulate temperature. Wool is a good choice for making a five panel hat for winter or chilly days.
Leather
Leather is a luxurious and elegant fabric that is made from animal skins such as cow or sheep. It has a smooth and glossy surface that can add some sophistication and class to your outfit.
It is also durable and resistant to water and stains, but it can be expensive and difficult to sew. Leather is a good choice for making a five panel hat for formal or special occasions.
Corduroy
Corduroy is a soft and velvety fabric that is made from cotton or synthetic fibers. It has a ribbed or wale pattern that gives it some texture and depth. Corduroy is also warm and comfortable, and it can come in different colors and thicknesses.
It is a good choice for making a five panel hat for fall or winter seasons or for adding some flair to your look.
Nylon
Nylon is a synthetic and lightweight fabric that is made from plastic fibers. It has a smooth and shiny surface that can reflect light and create some contrast.
It is also durable and resistant to water, wind, and abrasion, but it can be prone to static and pilling. Nylon is a good choice for making a five panel hat for summer or rainy days or for creating some fun effects with your hat.
7 Panel Cap Sewing Pattern
Creating a 7-panel cap is a fun sewing project that can yield a unique and stylish accessory. Each panel adds character to the cap, making it a versatile addition to your wardrobe.
Here’s a step-by-step sewing pattern:
1. Materials and Preparation
Gather your materials, including fabric, a sewing machine, matching thread, a rotary cutter or scissors, pins, and a measuring tape.
Choose a fabric that suits your style and purpose, whether it’s for fashion, sports, or sun protection.
2. Pattern Creation
Create a pattern for the cap panels on a large sheet of paper or cardboard. Typically, a 7-panel cap consists of six triangular panels and one center panel.
Ensure your pattern is symmetrical and appropriately sized for your head circumference.
3. Cutting Fabric
Lay your chosen fabric flat and pin the pattern onto it. Cut out seven panels, ensuring they mirror each other. Remember to cut two mirrored panels for the center piece to account for the lining.
4. Sewing the Panels
Place two panels right sides together, aligning the straight edges. Stitch along the straight edge with a ¼-inch seam allowance. Repeat for all panel pairs. Press the seams open.
5. Assembling the Cap
Pin the triangular panels together along their curved edges, right sides facing. Stitch along these curved edges, connecting all six panels to create the cap’s body.
6. Creating the Lining
Repeat the same process to create a lining for your cap. This will give it structure and a polished interior.
7. Finishing Touches
Place the cap body inside the lining, aligning their raw edges. Pin them together, leaving a small opening for turning. Stitch around the bottom edge, securing the cap and lining together.
Turn the cap right side out through the opening, press it neatly, and hand-stitch the opening closed.
This 7-panel cap sewing pattern allows you to experiment with various fabrics, colors, and styles, giving you the opportunity to craft a personalized accessory that suits your taste and needs.
Whether you’re making it for yourself or as a gift, enjoy the creative process and the satisfaction of wearing a cap you’ve made with your own hands.
FAQ
Can I make a five-panel hat without sewing experience?
Yes, you can. Basic sewing skills are helpful, but there are simple patterns and techniques available for beginners.
Start with easy-to-sew fabrics and follow step-by-step tutorials to create your hat.
What materials do I need to make a five-panel hat?
You’ll need fabric for the outer and inner layers, interfacing for structure, a sewing machine, thread, a measuring tape, scissors, pins, and a five-panel hat pattern.
Can I customize the size and design of my five-panel hat?
Absolutely. You can adjust the pattern to your desired size and modify the design by choosing different fabrics, colors, and patterns. Personalization is a fun aspect of creating your hat.
How long does it take to make a five-panel hat?
The time required depends on your sewing skill level and familiarity with the process. For beginners, it may take a few hours, while experienced sewists can complete one in about an hour.
Are there different closure options for five-panel hats?
Yes, you can choose from various closure options, such as adjustable straps with buckles, snap closures, or Velcro. The choice depends on your preference and the style you want for your hat.
Conclusion
As you conclude your journey on how to make a five-panel hat, you’ll likely feel a sense of accomplishment and pride in creating a custom accessory that suits your taste and needs.
This DIY project offers the opportunity to experiment with fabrics, colors, and patterns, allowing you to craft a hat that is truly one-of-a-kind. Not only will you enjoy wearing your handmade hat, but you’ll also appreciate the craftsmanship and effort that went into its creation.
Making your five-panel hat is not just about fashion; it’s about embracing your creativity and adding a personal touch to your wardrobe.
So, whether you’re making it for yourself or as a thoughtful gift, the process of crafting a five-panel hat is a fun and fulfilling endeavor that enhances your sense of style and self-expression.
Leave a Reply