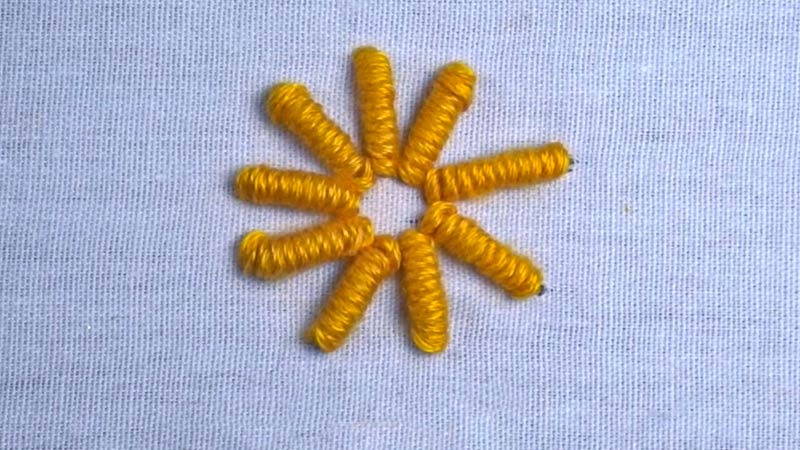
The bullion knot, an exquisite embroidery stitch reminiscent of a coiled rope, adds a touch of elegance and dimension to any needlework project.
With its graceful, spiral-like appearance, mastering the bullion knot opens up a world of creative possibilities in the realm of hand embroidery.
In this concise guide, we will demystify the process of creating this captivating stitch, empowering both beginners and experienced embroiderers to incorporate it into their designs.
Whether you aim to craft delicate floral embellishments or intricate motifs, learning how to execute a bullion knot is a valuable skill that will elevate your embroidery work to new heights.
Join us on this creative journey as we unravel the secrets of the bullion knot and bring a touch of artistic flair to your fabric creations.
What is a Bullion Knot?
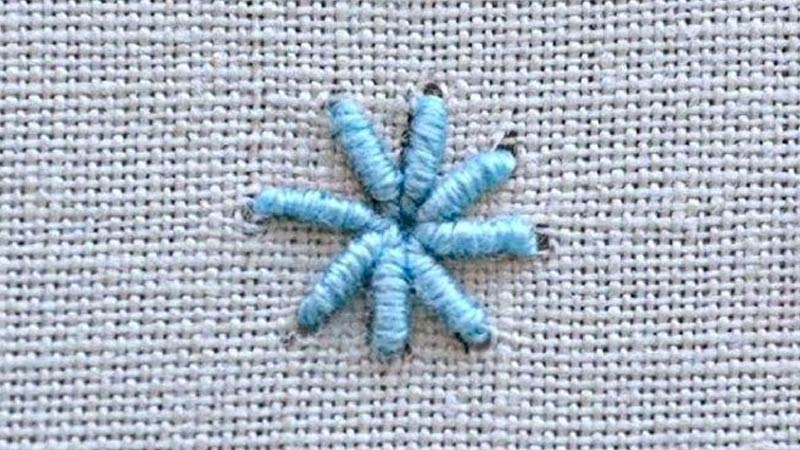
A bullion knot is an intricate hand embroidery stitch that resembles a coiled or twisted rope. It’s created by wrapping embroidery floss around a needle and then securing it to form a textured, three-dimensional knot.
Bullion knots are often used in embroidery to add decorative elements and depth to designs. These knots can vary in size and are employed both as standalone features and as part of larger patterns, offering a versatile and visually appealing technique for enhancing fabric with ornate, rope-like embellishments.
10 Easy Steps to Do a Bullion Knot
Embroidery enthusiasts, eager to elevate their stitching repertoire, can find great delight in mastering the art of the bullion knot. It’s often used in hand embroidery to create textured and three-dimensional effects in your designs.
Bullion knots can be used as standalone elements or as part of larger embroidery patterns.
Learning how to do a bullion knot can be a bit tricky at first, but with practice, you can master this beautiful stitch.
Here’s a step-by-step guide on how to do a bullion knot:
Materials You’ll Need:
- Embroidery fabric (cotton or linen works well)
- Embroidery hoop
- Embroidery floss in your desired color
- Embroidery needle (usually a sharp or crewel needle)
- Small scissors
Instructions:
Step 1: Prepare Your Fabric and Thread
Before you begin, it’s essential to prepare your embroidery materials. Secure your chosen embroidery fabric in an embroidery hoop. This not only helps maintain the fabric’s tautness but also provides stability while working on your project.
Thread your embroidery needle with a single strand of embroidery floss in a color that harmonizes with your design. Ensure that the thread is neither too long (which may lead to tangling) nor too short (which can be challenging to work with).
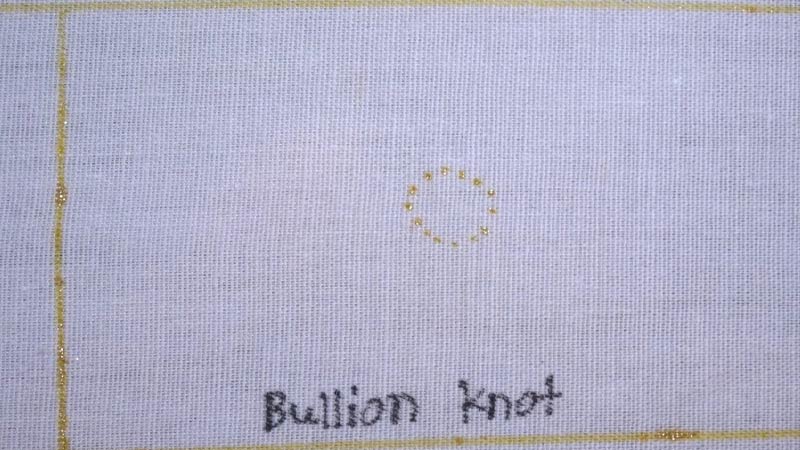
Step 2: Create the Starting Point
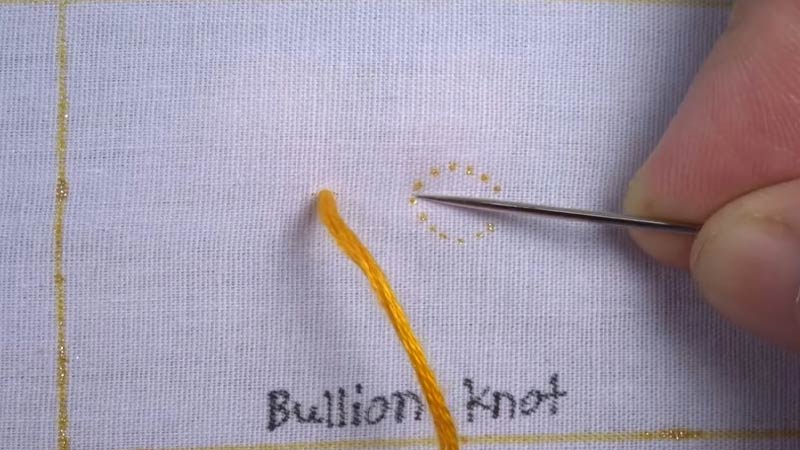
Carefully select the point on your fabric where you wish to begin your bullion knot. Insert the needle from the backside of the fabric to the front at this chosen starting point.
As you pull the thread through, leave a short tail (approximately 1 inch) on the backside. This tail will be secured later to prevent the knot from unraveling.
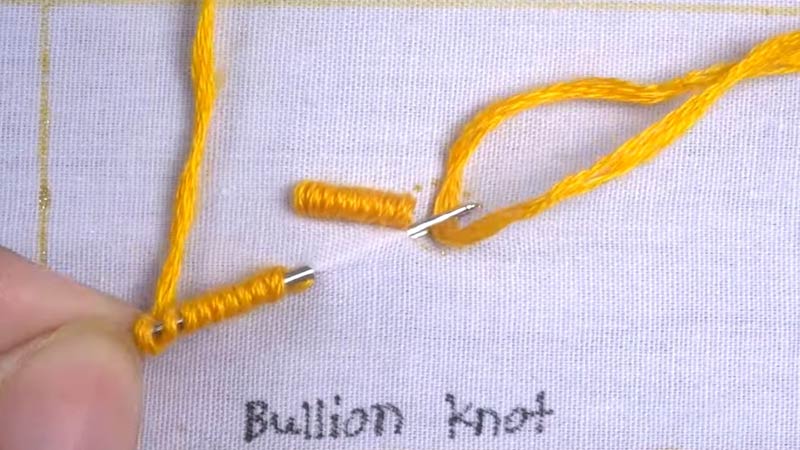
Step 3: Begin the Knot
To initiate the bullion knot, hold the needle parallel to the fabric’s surface. Use your thumb and index finger to guide the thread as you wrap it around the needle.
The number of wraps you make will dictate the size and thickness of your bullion knot. For those new to this stitch, starting with 5-7 wraps is recommended.
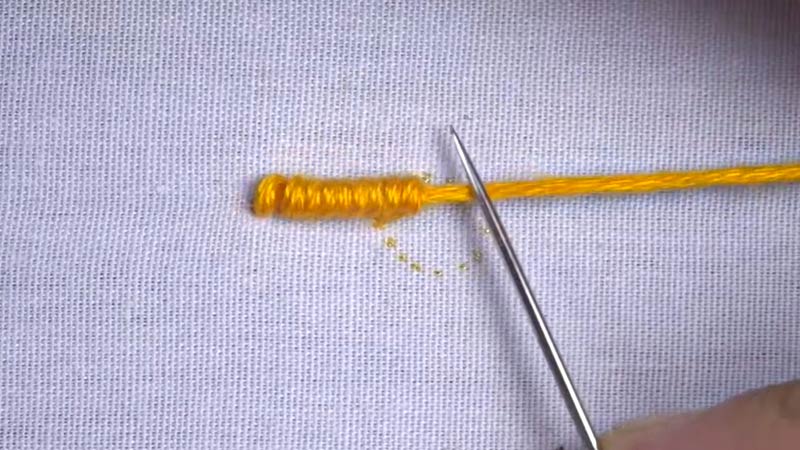
Step 4: Secure the Wraps

With the wraps in place around the needle, carefully insert the needle back into the fabric right next to the starting point.
While doing this, maintain tension on the wraps by gently pressing your thumb and index finger against them. This step is crucial to ensure that the wraps remain tight and close to the needle.
Step 5: Pull the Needle Through
With the wraps secured, gently pull the needle and the wrapped thread through to the backside of the fabric. It’s essential to maintain a firm grip on the wraps during this step to prevent them from loosening or unraveling.
Step 6: Form the Knot
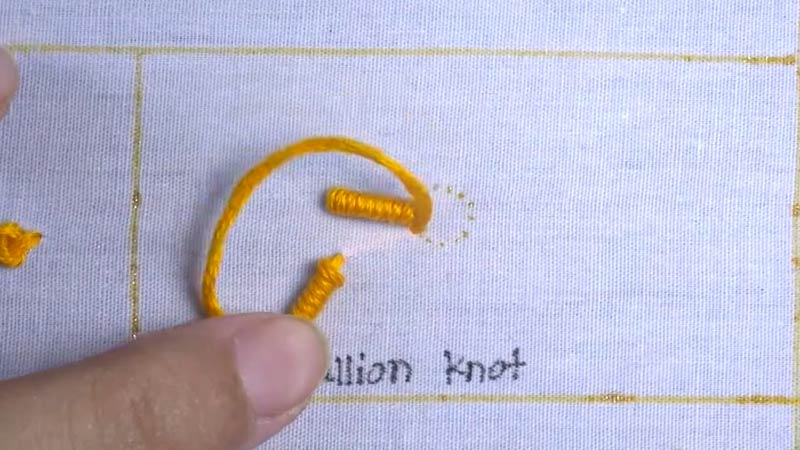
As you pull the needle through to the backside, you’ll notice that the wraps naturally form a coiled or twisted shape on the fabric’s surface. This is what creates the distinctive appearance of the bullion knot. Make sure to maintain the desired tension while pulling the needle through.
Step 7: Secure the Knot
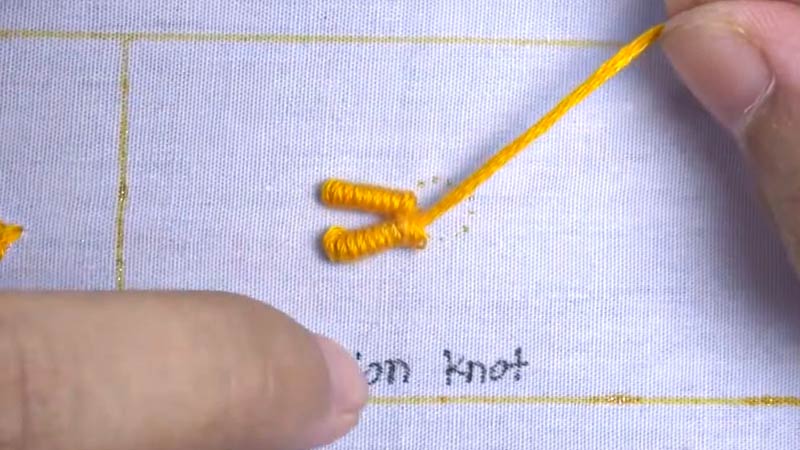
To secure the knot and prevent it from coming undone, bring the needle to the front of the fabric near the base of the knot.
However, do not pass it through the wraps. Instead, pass the needle under the wraps, creating a small loop. This loop will anchor the knot in place.
Step 8: Finish the Knot
Once you’ve created the anchoring loop, insert the needle back into the fabric very close to where it came out.
This action secures the loop and firmly locks the bullion knot in place. Ensure that the needle is passed through the fabric as near to the base of the knot as possible.
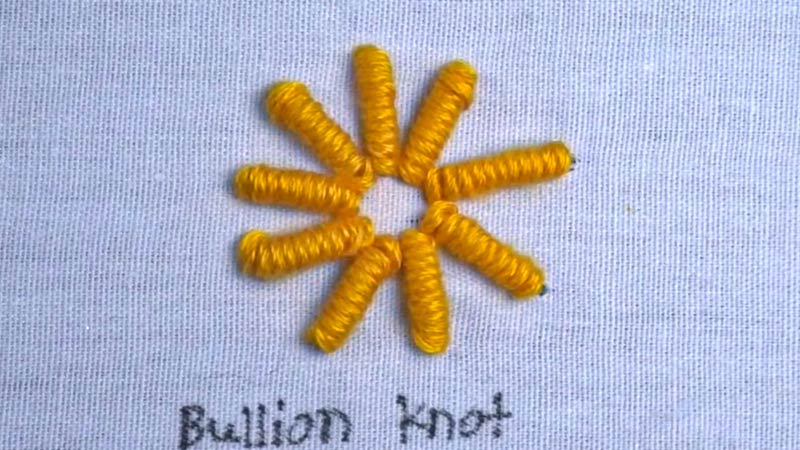
Step 9: Trim Excess Thread
Flip your embroidery fabric to the backside and carefully trim any excess thread, including the starting tail and any extra thread from forming the knot. Be cautious not to cut the knot itself or the anchoring loop.
Step 10: Practice
Bullion knots can be challenging to master initially, so be patient with yourself. The key to becoming proficient in this embroidery stitch is practice.
Experiment with different numbers of wraps and various thread colors to achieve different effects.
Over time, you’ll gain confidence and skill in creating beautiful bullion knots that add texture and dimension to your embroidery projects.
Where to Implement a Bullion Knot?
A bullion knot is a type of decorative knot often used in embroidery and other crafts. It is a raised, textured knot that can be used to create various design elements.
Here are some common places where you can implement a bullion knot:
Floral Designs
Bullion knots are a versatile choice when crafting floral designs. They are commonly used to create the intricate centers of flowers, such as the tightly coiled center of a rose, the clustered stamens of a daisy, or the delicate pistil of a daffodil.
These knots add depth and realism to your floral embroidery, making your blooms appear more lifelike.
Insect Bodies
Insect-themed embroidery projects often benefit from the use of bullion knots. The raised and textured nature of bullion knots makes them ideal for crafting the bodies of insects like butterflies, dragonflies, and bees.
These knots can give your embroidered insects a three-dimensional quality, making them pop off the fabric and adding a touch of realism to your creations.
Leaves and Vines
When working on botanical or nature-themed embroidery, bullion knots can be employed to depict the delicate veining found on leaves or the graceful tendrils of vines. These knots add a sense of delicacy and intricacy to foliage, enhancing the overall beauty of your design.
Text and Monograms
Bullion knots offer an elegant way to embroider text and monograms. Their smooth curves and versatility make them ideal for forming the loops and lines of letters.
This technique can be used to create personalized handkerchiefs, table linens, or gifts, adding a touch of sophistication and individuality to your embroidery projects.
Decorative Borders
To enhance the edges of your embroidery projects, consider incorporating bullion knots into decorative borders. These knots can add texture and visual interest to the perimeters of items like tablecloths, pillowcases, or clothing.
Whether you opt for a simple border or a more intricate design, bullion knots can elevate your work.
Embellishments
Bullion knots can serve as standalone decorative elements or be combined with other stitches to create unique patterns and designs.
Experiment with variations in size, tension, and spacing to achieve different visual effects. Whether you’re crafting flowers, geometric shapes, or abstract patterns, bullion knots can be a versatile addition to your embroidery toolbox.
Traditional Embroidery Styles
Bullion knots have a rich history in traditional embroidery styles like Brazilian embroidery, Jacobean embroidery, and stumpwork. In these styles, they are used extensively to create intricate and ornate designs.
Learning to master bullion knots can open up a world of creative possibilities within these traditional embroidery techniques.
Embroidered Jewelry
In jewelry-making projects, bullion knots can be used to create textured and eye-catching elements. For example, you can use them to craft intricate flower petals, and leaves, or even incorporate them into the design of a pendant.
The raised and tactile quality of bullion knots can add a unique dimension to your handcrafted jewelry pieces.
Crazy Quilting
Crazy quilting is known for its patchwork of irregularly shaped fabric pieces. Bullion knots can be a valuable addition to crazy quilting projects, where they can embellish seams, create decorative motifs, or add texture and dimension to the overall patchwork design.
Smocking
When smocking fabric for garments or decorative items, consider incorporating bullion knots. They can be used to add texture and interest to the gathered fabric, creating intricate patterns and designs that enhance the beauty of your smocking work.
FAQS
Yes, you can experiment with various threads like silk, metallic, or even embroidery ribbon to achieve different textures and effects with your bullion knots.
Common mistakes include pulling the wraps too tight, which can distort the knot’s shape, or not securing the wraps properly before pulling the needle through.
Absolutely! Bullion knots are excellent for creating raised or 3D elements in your embroidery.
Bullion knots can be done on various fabric types, but they tend to work best on tightly woven fabrics like linen and cotton.
If your bullion knots are unraveling, ensure that you’re securing the wraps tightly before pulling the needle through to the back.
To Recap
Mastering the bullion knot opens up a realm of artistic expression within the world of hand embroidery.
As we’ve explored in this guide, this elegant stitch can transform your needlework, adding depth, texture, and charm to your designs.
While it may require patience and practice to achieve perfection, the results are undeniably rewarding.
Whether you use bullion knots to create delicate flower petals, ornate patterns, or intricate details, they will undoubtedly become a valuable tool in your embroidery toolkit.
With each carefully coiled twist of thread, you bring your creations to life, adding a touch of sophistication and craftsmanship to every piece.
So, embrace the beauty of the bullion knot and let your imagination flourish in the world of embroidery.
Leave a Reply