Sewing a zipper into the middle of the fabric is a valuable skill for any sewing enthusiast. Whether creating a stylish garment or adding a functional element to a project, knowing how to sew a centered zipper allows you to achieve professional-looking results.
This comprehensive guide will discuss how to sew a zipper in the middle of fabric. This technique is particularly useful when you want a seamless and symmetrical look, such as on the back of a dress or the center of a pillow cover.
Don’t let the idea of sewing zippers intimidate you; with our detailed instructions, you can confidently tackle this sewing task.
So, gather your fabric, zipper, and sewing essentials and dive into the world of centered zipper installation. Your sewing projects are about to reach a new level of sophistication and functionality!
How to Sew a Zipper in the Middle of Fabric? Step-By-Step Guide
Sewing a zipper in the middle of the fabric, often called a centered zipper, is useful for various sewing projects, including garments, cushions, and bags.
It provides a clean and polished look, allowing the fabric to open and close seamlessly. This step-by-step guide will walk you through sewing a centered zipper.
Materials Needed
Fabric panels to be joined, zipper of the desired length (metal, plastic, or invisible, depending on your project), fabric marker or chalk, pins to secure the fabric while working, sewing machine with a zipper foot, matching or contrasting thread, scissors, iron and ironing board.
Prepare Your Fabric Panels
Start by preparing the two fabric panels you want to join with the zipper. Ensure the edges where the zipper will be inserted are neatly finished with a serger, zigzag stitch, or a folded and pressed seam allowance.
Determine Zipper Placement
Decide where you want to place the zipper on your fabric panels. Mark the beginning and end points of the zipper placement on both panels using a fabric marker or chalk. These marks will guide you during the installation.
Prepare the Zipper
If your zipper is longer than needed, you’ll need to trim it to the correct length. Open the zipper fully and use scissors to cut off any excess length at the top.
Prepare the Zipper Opening
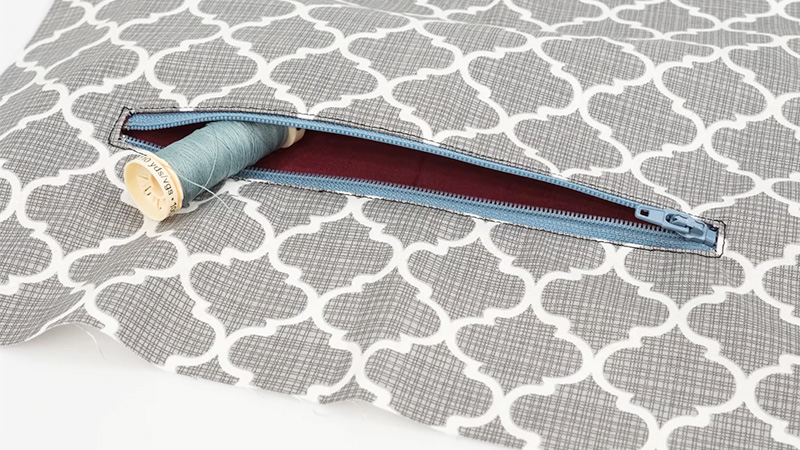
Lay one of your fabric panels right side up on a flat surface. Place the closed zipper face on top of the fabric panel, aligning the zipper’s teeth with the marked placement line. The zipper pull should be facing toward the fabric.
Pin the zipper tape in place along the marked line. Make sure the zipper teeth are centered and aligned with the line.
Attach the Zipper Foot and Start Sewing
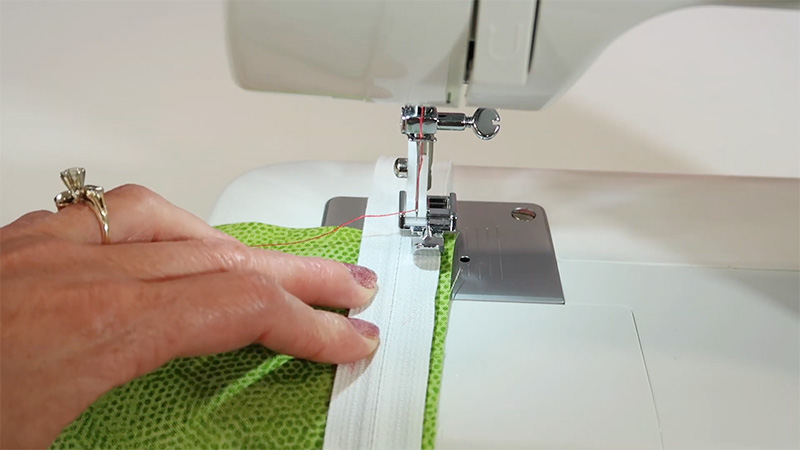
On your sewing machine, attach the zipper foot. This specialized foot lets you get close to the zipper teeth while sewing.
With the fabric panel and zipper pinned together, lower the zipper foot onto the fabric and align it with the zipper teeth.
Begin sewing carefully along the pinned edge, keeping close to the zipper teeth. Backstitch at the beginning and end of the seam to secure it.
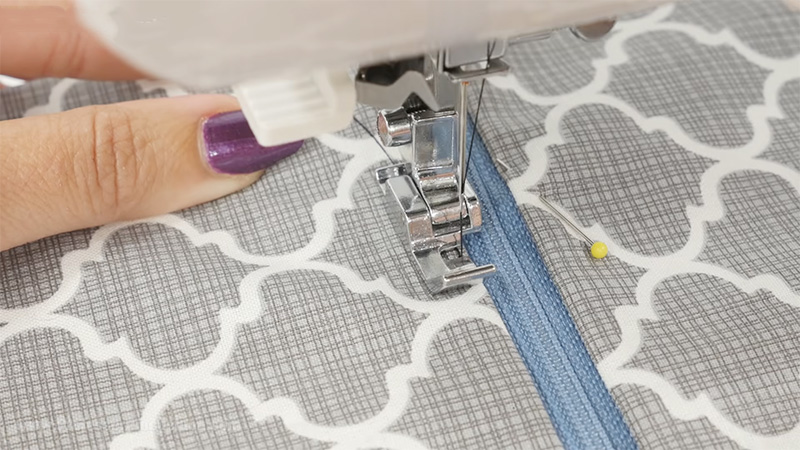
Repeat for the Other Side
Lay your second fabric panel right side up on the table. Take the other half of the zipper (the one you just sewed onto the first fabric panel) and place it face down on the second, aligning it with the marked placement line.
Pin the zipper tape in place. Sew this side of the zipper just as you did for the first side, ensuring that the zipper teeth align with the marked line.
Test the Zipper
Once both sides of the zipper are sewn, carefully unzip it to ensure it opens and closes smoothly. You may need to adjust your stitching if it’s sticking or catching on any fabric.
Complete the Seam
With the zipper in place, it’s time to sew the rest of the seam. Close the zipper to keep it out of the way. Fold your fabric panels right sides together, aligning the remaining edges along the length of the zipper. Pin the fabric panels together below the zipper.
Sew the Seam
Using the regular sewing foot on your machine, stitch along the pinned edge, starting just below the zipper stitching.
Continue sewing until you reach the bottom of the fabric panels. Remember to backstitch at the beginning and end to secure the seam.
Finish the Raw Edges
Trim any excess threads and finish the raw edges of the seam allowance. You can use a serger or zigzag stitch or fold the edges under and press them with an iron.
Open the zipper again and press the seam allowances open with an iron. This step helps create a clean and flat finish.
Close the Zipper
Close the zipper completely to ensure it functions smoothly and looks neat. Congratulations! You’ve successfully sewn a centered zipper into your fabric panels.
This skill is versatile and can be applied to various sewing projects, allowing you to create professional-looking closures.
With practice, you’ll become more confident in sewing-centered zippers, and you’ll be able to incorporate them into various garments and accessories.
Different Ways to Sew a Zipper
There are several ways to sew a zipper into your sewing projects, each with its unique application and style. Here are different methods of sewing a zipper and how to do them briefly:
Centered Zipper
It is ideal for skirts, dresses, and pillow covers. Sew the zipper along the center-back or center-front seam. Pin the zipper tape to the fabric, stitch close to the teeth, and finish the seam.
Lapped Zipper and Invisible Zipper
Suitable for skirts, pants, and dresses. Overlap one fabric edge over the other, creating a flap. Stitch the zipper underneath the flap, concealing it.
Invisible zippers are common in formal wear and dresses. A specialized invisible zipper foot is required. Pin the closed zipper behind the seam, stitch close to the coils, and open the zipper to reveal it.
Exposed Zipper and Fly Front Zipper
A trendy look for garments and bags. Stitch the zipper on the outside of the fabric, creating a decorative feature. Topstitch around the zipper for added detail.
Fly-front zippers are common in jeans, pants, and shorts. Create a fabric flap that conceals the zipper. Stitch the zipper underneath the flap, allowing for easy opening and closing.
Mock Fly Zipper and Welt Pocket Zipper
Used for decorative purposes. Stitch a zipper on the front of the fabric without an actual opening. It is ideal for adding embellishment to clothing or bags.
Welt pocket zippers are often seen on pants and jackets. Sew a zipper behind a fabric welt to create a functional pocket. Carefully stitch around the welt to secure the zipper.
Exposed Zipper with Binding
Adds a decorative element to garments or bags. Stitch the zipper on the outside of the fabric and encase it with binding tape. Topstitch along the binding for a polished look.
Zipper with Facing and Recessed Zipper
Common in dresses and blouses. Sew a zipper on a fabric panel with a facing. The facing conceals the zipper for a neat finish. Recessed zippers are used for bags, totes, and pouches.
Sew the zipper into a recessed seam, creating a sunken pocket. It is ideal for keeping the zipper hidden and the contents secure.
Continuous Zipper
Great for projects requiring a long, continuous zipper, like sleeping bags or cushions. Cut the zipper to the desired length and sew it onto the project. You can use a zipper slider to open and close it as needed.
Decorative Zipper Insert
Adds a creative touch to clothing or accessories. Stitch a contrasting or decorative zipper as an exposed feature. Consider using a decorative stitch or embroidery for added flair.
Ruffle or Pleated Zipper
Used for adding decorative ruffles or pleats to garments or accessories. Create pleats or ruffles in the fabric, then stitch the zipper behind them. The zipper adds structure and style to the design.
There are various ways to sew a zipper into your sewing projects. The choice of method depends on your project’s design, functionality, and the look you want to achieve.
You can confidently sew zippers into various garments, accessories, and home decor items with practice and the right techniques.
FAQs
What’s the difference between an invisible zipper and a regular zipper?
An invisible zipper is designed to be discreet and hidden within the seam, with only the zipper pull showing. A regular zipper, also known as a standard or visible zipper, is sewn so that the coils and the pull are visible outside the fabric.
How do I choose the right length of zipper for my project?
Measure the opening where you intend to place the zipper and select a zipper that is slightly longer than that measurement. Trimming an excess zipper is easier than working with one too short.
What type of thread should I use when sewing zippers?
Use a high-quality polyester or nylon thread that matches or complements the fabric color. These threads are strong and durable, making them ideal for zipper installations.
Can I sew a zipper by hand if I don’t have a sewing machine?
Yes, you can sew a zipper by hand using techniques like backstitch or slipstitch. Hand-sewn zippers are especially suitable for delicate fabrics or when a machine is unavailable.
How do I prevent the fabric from getting caught in the zipper teeth when sewing?
To prevent fabric from getting caught in the zipper teeth, place a tissue paper or tear-away stabilizer between the fabric and the zipper tape when you sew. This temporary barrier will help the fabric glide smoothly over the zipper coils. Remove it after sewing.
Conclusion
Congratulations! You’ve successfully learned how to sew a centered zipper into the fabric, a valuable skill that can enhance the functionality and aesthetics of your sewing projects.
By following the step-by-step guide, you’ve gained the knowledge and confidence to tackle this sewing task easily.
With this skill in your repertoire, you can create clean, polished, and symmetrical finishes, adding a professional touch to your creations.
As you continue to practice and refine your zipper sewing techniques, you’ll find that the process becomes more intuitive and efficient. Experiment with fabrics, zipper types, and project designs to further hone your expertise.
Now, armed with the knowledge from this guide, it’s time to unleash your creativity and embark on sewing projects that showcase your newfound centered zipper mastery.
Happy sewing, and enjoy the satisfaction of adding perfectly centered zippers to your future projects!
Leave a Reply