Integrating blackout lining into curtains is a transformative DIY project that brings both practicality and aesthetic refinement to window treatments.
This process involves attaching a specialized, light-blocking fabric to the reverse side of curtains, effectively enhancing their functionality.
Blackout lining grants precise control over light exposure and offers benefits such as improved insulation and enhanced privacy.
In this guide, we will explore the steps involved in seamlessly sewing blackout lining to curtains, providing you with a detailed roadmap to elevate the ambiance and functionality of your living space.
Embark on this journey to create curtains that balance style and utility harmoniously.
What Is Blackout Lining?
Blackout lining is a specialized fabric designed to enhance the functionality of curtains or drapes. It is typically made from a dense and tightly woven material that effectively blocks out light.
The primary purpose of blackout lining is to provide maximum light control, making it ideal for bedrooms, media rooms, and spaces where privacy and darkness are essential.
In addition to light blocking, blackout lining offers thermal insulation properties, helping regulate room temperature by keeping heat out in the summer and retaining it in the winter.
This fabric is often added to existing curtains to upgrade their performance. Its versatile nature makes it a valuable addition to any window treatment, offering practical benefits and an enhanced aesthetic appeal to interior spaces.
Can You Sew Blackout Lining to Curtains? Process of Sewing
Yes, you can sew blackout lining to curtains. Sewing blackout lining to curtains is a viable and effective way to enhance their functionality.
Blackout lining is a specialized fabric designed to block out light. It is an ideal addition to curtains, particularly in rooms where light control is essential, such as bedrooms or media rooms.
The process of sewing blackout lining to curtains involves several steps:
Gather Materials:
- Curtains
- Blackout lining fabric
- Measuring tape
- Scissors
- Pins
- Sewing machine or needle and thread
- Iron and ironing board
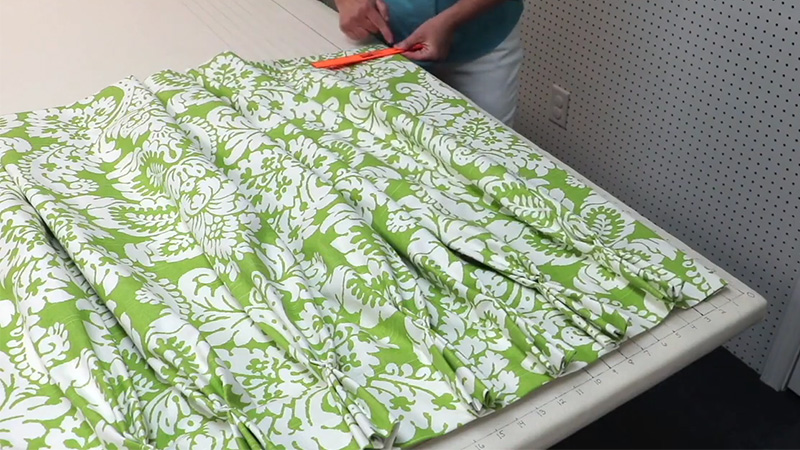
Measure and Cut the Blackout Lining
Taking precise measurements is crucial for a successful outcome. Lay out the curtains on a clean, flat surface, ensuring they are fully extended.
Use a measuring tape to gauge both the length and width accurately. When cutting the blackout lining fabric, using sharp scissors to ensure clean, even edges is prudent.
Allowing a slight excess around the edges provides room for adjustments during the sewing process, guaranteeing a snug fit.
Prepare the Curtains
This step may require some patience but is well worth the effort. If your curtains have any existing hems, trims, or other finishes, consider temporarily removing them.
This allows for a smoother integration of the blackout lining, creating a seamless, professional appearance. Note how the finishes were originally attached; you’ll want to replicate this in the final step.
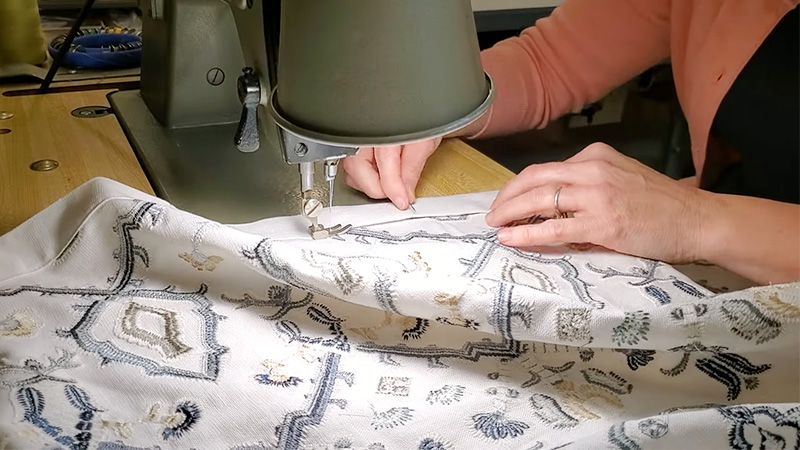
Pin the Blackout Lining
Attaching the blackout lining is critical in ensuring the curtains function as intended. Lay the blackout lining fabric on top of the backside of the curtain fabric. Take your time to align the edges accurately.
Smooth any wrinkles or folds in both fabrics to ensure the lining lies flat against the curtain. The pins should be inserted securely, creating a stable foundation for the upcoming sewing process.
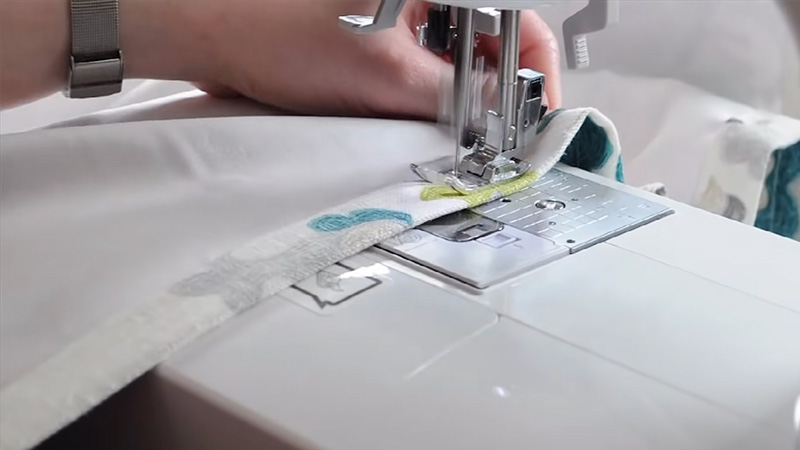
Sew the Lining to the Curtain
This is where the curtains truly come together. Select a suitable needle and thread for the curtain and blackout lining fabrics if using a sewing machine. A straight stitch or a zigzag stitch can be employed for added durability.
Take care when navigating corners and edges, ensuring the stitching is secure and even. This step is pivotal in guaranteeing a long-lasting and well-integrated final product.
Reattach any Removed Finishes
If you remove any finishes in step 3, now is the time to reattach them. Pay close attention to detail, ensuring the finishes align with the original placement.
Using the same stitching style and thread color as the initial finishes will provide a seamless, cohesive appearance.
Press the Seams
Employing an iron on a low setting is a delicate yet crucial step. Pressing the seams not only lends the curtains a polished finish but also ensures that the blackout lining lies flat and smooth against the fabric.
Take your time in this step, as it contributes significantly to the overall aesthetic and functionality of the curtains.
Hang the Curtains
With the blackout lining now integrated, it’s time to hang your curtains. Ensure that the lining is facing the window to maximize its light-blocking capabilities.
Step back and admire your handiwork – you’ve successfully transformed your curtains into a functional and stylish addition to your living space.
Benefits of Sewing Blackout Lining to Curtains
Sewing blackout lining to curtains offers a range of benefits that can enhance your window treatments’ functionality and aesthetic appeal.
Here are the key advantages:
Light Control
Blackout lining effectively blocks out light, creating a tranquil, darkened environment.
This is particularly invaluable in spaces like bedrooms, nurseries, or media rooms, where precise light control is paramount for quality sleep or optimal screen viewing.
Enhanced Privacy
With the addition of blackout lining, curtains provide an extra layer of privacy. This prevents prying eyes from peering into your home while permitting gentle natural light to filter through when desired.
Temperature Regulation
Blackout lining serves as an insulator, aiding in regulating room temperature. It keeps rooms cooler in the summer by deflecting the sun’s heat and warmer in the winter by offering an additional barrier against chilly drafts.
Energy Efficiency
By reducing the dependence on air conditioning or heating, blackout-lined curtains contribute to energy conservation, potentially resulting in lower utility bills over time. This eco-friendly aspect is both cost-effective and environmentally responsible.
Protection of Furnishings
Blackout lining offers a shield against harsh sunlight, which can lead to fading and deterioration of furnishings, carpets, and artwork. By limiting exposure to UV rays, blackout-lined curtains help preserve the longevity and vibrancy of interior decor.
Aesthetic Enhancement
Sewing blackout lining to curtains elevates their overall aesthetic appeal. The added layer of fabric provides a more luxurious and substantial look, making curtains appear more polished and refined.
Versatility in Design
Blackout lining comes in various colors and styles, allowing for versatile design choices. This ensures that you can find a lining that complements your curtains, blending seamlessly with your overall decor.
UV Protection
In addition to preserving indoor furnishings, blackout lining provides UV protection for occupants. It helps shield against harmful UV rays, reducing the risk of skin damage and other health concerns associated with prolonged sun exposure.
Customization and Personalization
Sewing blackout lining to curtains offers a level of customization. You can choose the specific blackout lining fabric that best suits your needs and preferences, allowing for a tailored window treatment solution.
Tips and Tricks to Sew Blackout Lining to Your Curtains
Sewing blackout lining to your curtains can be a rewarding DIY project, improving your window treatments’ aesthetic and functional aspects.
Here are some valuable tips and tricks to help you achieve the best results:
Choose the Right Lining Fabric
Invest in high-quality blackout lining fabric. Look for options that have a substantial weight and a dense weave. This ensures that the fabric effectively blocks out light and provides the desired level of privacy.
Additionally, consider the color of the lining fabric. Choosing a color that complements the curtain fabric will produce a cohesive and visually appealing final product.
Measure Accurately
Precision is key when it comes to measuring. Use a reliable measuring tape and take multiple measurements to ensure accuracy.
Pay close attention to the length and width of the curtains and the blackout lining fabric. Double-checking your measurements before cutting will help avoid costly mistakes.
Use Sharp Scissors
Sharp fabric scissors are essential for achieving clean, precise cuts. Dull scissors can lead to uneven edges, making the sewing process more challenging and affecting the final appearance.
Investing in a quality pair of fabric scissors will make a noticeable difference in the outcome of your project.
Prepare Your Workspace
Create a conducive working environment. Clear any clutter and ensure enough space to lay out and maneuver the fabric. Good lighting is crucial for accurate cutting and sewing, so position your workspace near a natural light source or use a well-lit area.
Press the Fabric
Before you start sewing, take the time to iron both the curtains and the blackout lining fabric. Removing any wrinkles or creases will make the sewing process smoother and result in a more professional-looking final product.
Use a low to medium heat setting on your iron to avoid damaging the fabric.
Pin Strategically
Pinning is critical to ensure that the blackout lining stays in place while you sew. Place pins perpendicular to the fabric edge and position them close together. This helps prevent any shifting or misalignment during the sewing process, resulting in a neat and even finish.
Start with a Test Stitch
Before sewing the entire curtain, doing a test stitch on a scrap piece of fabric is wise. This allows you to adjust the tension and stitch length if needed. It’s a small step to save you from potential issues later.
Sew Slowly and Carefully
Take your time sewing, especially when working on intricate or detailed sections. Sewing slowly and precisely ensures that your stitches are straight and even, resulting in a professional-looking finish.
Pay extra attention when sewing over bulky areas like seams to avoid uneven stitching.
FAQS
Can I add blackout lining to existing curtains?
Yes, you can. Sewing blackout lining to existing curtains is a great way to upgrade their light-blocking capabilities.
What type of fabric is best for blackout lining?
Look for dense, tightly woven fabrics like polyester or cotton blends. These materials effectively block out light.
Do I need special equipment to sew blackout lining to curtains?
A sewing machine, sharp fabric scissors, pins, and an iron are the basic tools you’ll need. Additionally, blackout lining fabric and matching thread are essential.
How does blackout lining affect energy efficiency?
Blackout lining provides an extra layer of insulation, helping to regulate room temperature. This can lead to energy savings by reducing the need for heating or cooling.
Can I wash curtains with blackout lining?
It’s best to check the care instructions for the curtain fabric and blackout lining. Many blackout linings are machine washable, but some may require special care.
To Wrap Up
Incorporating blackout lining into curtains is a gratifying endeavor that yields aesthetic and functional enhancements. The process outlined in this guide empowers you to craft window treatments that masterfully balance style with utility.
The resulting curtains offer precise light control and increase privacy, temperature regulation, and energy efficiency. Moreover, they safeguard furnishings from sun-induced wear and tear.
By sewing blackout lining to curtains, you’ve stepped towards creating a more comfortable, visually appealing, and environmentally conscious living space.
Embrace the beauty of this transformation as your newly enhanced curtains infuse a sense of refined sophistication into your home.
Leave a Reply