Coloring neoprene effectively is a creative endeavor that allows you to personalize and enhance various items, from clothing and accessories to sports gear and industrial components.
Neoprene, a resilient synthetic rubber, presents a unique canvas for adding vibrant hues and designs. To achieve the desired results, it’s crucial to understand the techniques, materials, and considerations involved in the process.
Whether you’re a DIY enthusiast, a sports enthusiast, or a designer, mastering the art of coloring neoprene can bring your vision to life.
In this guide, we will explore the steps, tips, and techniques to ensure your neoprene coloring projects are both visually striking and long-lasting.
What Is Neoprene?
Neoprene is a synthetic rubber material renowned for its versatile applications and resilience. Composed of polymerized chloroprene, it exhibits exceptional resistance to water, weathering, and various chemicals.
Its unique properties, including flexibility over a wide temperature range and excellent durability, make it a popular choice in industries ranging from sportswear and wetsuits to industrial gaskets and automotive components.
Neoprene’s closed-cell structure provides buoyancy, making it invaluable in water sports gear. Its insulating capabilities also find use in electrical insulation and protective sleeves.
Furthermore, neoprene’s ability to absorb shocks and vibrations renders it indispensable in the construction, automotive, and aerospace sectors. This remarkable material continues to play a pivotal role in countless applications worldwide.
How to Color Neoprene Effectively?
Coloring neoprene can be a bit tricky because it’s a synthetic rubber material. However, it can be done effectively with the right materials and techniques.
Here’s a step-by-step guide on how to color neoprene:
Materials You’ll Need:
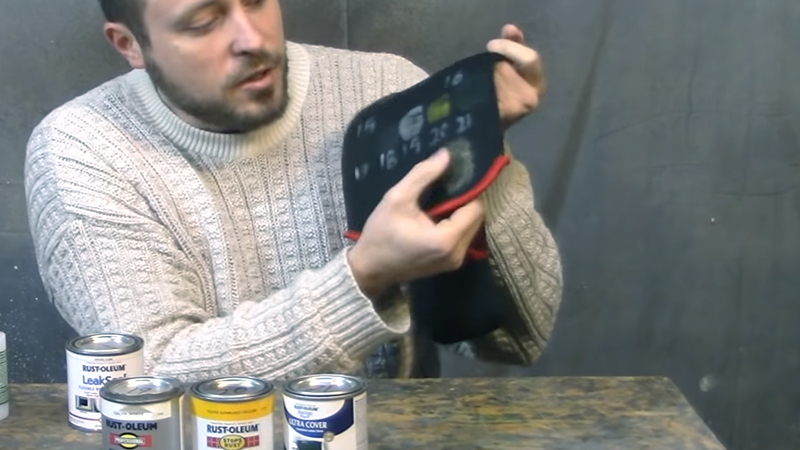
- Neoprene Paint or Dye.
- Brushes or Applicators.
- Masking Tape or Stencils.
- Clean Cloth or Sponge.
- Gloves and Protective Gear.
Steps:
Clean the Neoprene
Begin by using a gentle, non-abrasive cloth or sponge to wipe down the neoprene material. This ensures that any surface dirt, dust, or oils are removed, allowing the paint or dye to adhere effectively.
Pay special attention to seams and creases where dirt may accumulate. Allow the neoprene to air dry completely before proceeding.
Prepare the Work Area
Lay down a thick layer of newspapers or a drop cloth to protect the surface beneath the neoprene.
This precautionary measure will catch any paint or dye that might drip or splatter during the application process. It’s essential to have a clean and controlled workspace to achieve a neat and professional finish.
Test a Small Area
Choose an inconspicuous spot on the neoprene, such as an inside seam or a corner. Apply a small amount of the paint or dye and observe how it adheres and dries.
This test allows you to familiarize yourself with the application process and gauge the color intensity. It also helps you identify any potential issues before proceeding with the entire project.
Apply the Paint or Dye
Depending on the type of neoprene paint or dye you’re using, follow the manufacturer’s instructions closely. If it’s a brush-on type, use even, controlled strokes to apply the paint.
Avoid excessive buildup, which can lead to uneven drying. If it’s a spray, maintain a consistent distance and apply in smooth, overlapping passes to ensure an even coat.
Allow to Dry
Patience is key at this stage. Allow the neoprene to air dry completely. Avoid touching or manipulating the material during this time to prevent smudging or uneven drying. Ensure that the neoprene is placed in a well-ventilated area to aid in the drying process.
Apply Additional Coats
Once the first coat is dry, assess the color intensity. If you desire a deeper or more vibrant shade, proceed to apply additional coats.
Repeat the application process, allowing each coat to dry before applying the next. This incremental approach allows you to achieve the desired color intensity without over-saturating the neoprene.
Blend Colors
When working with multiple colors, consider creating a blended effect. Apply the second color while the first is still wet, allowing them to naturally merge.
Use a clean, soft cloth or sponge to gently blend the colors together. Exercise caution to avoid overworking, which can result in a muddied appearance.
Detailing
When you’re using stencils or masking tape to create specific patterns, carefully apply them at this stage. Ensure they adhere firmly to prevent any paint or dye from bleeding underneath.
Take your time to achieve crisp, clean lines, as this attention to detail will contribute to a polished final result.
Allow Final Drying
After all desired coats and detailing are complete, allow the neoprene to air dry thoroughly. Depending on the type of paint or dye used, this could take several hours or even overnight.
It’s crucial to resist the temptation to handle the neoprene until it’s completely dry to avoid any potential smudging.
Seal
For added protection and longevity of the color, consider using a neoprene-specific sealer. Follow the manufacturer’s instructions for application and drying times. This final step serves as a safeguard, preserving the color and enhancing its durability over time.
Application Techniques for Coloring Neoprene Effectively
When it comes to applying paint or dye to neoprene, there are several techniques you can use to achieve different effects.
Here are some common application techniques:
Brushing Technique
The brushing technique allows for fine control and precision. Select a high-quality, soft-bristle brush suitable for your specific neoprene paint or dye.
Apply the paint in even strokes, ensuring a consistent layer. Pay attention to detail work and intricate areas, as this technique excels in providing a clean, defined finish.
Spraying Technique
When using neoprene-specific spray paint or dye, maintain a steady hand and a consistent distance from the neoprene surface.
Begin with light, sweeping motions to avoid over-saturation. Gradually build up layers for a smooth, uniform finish. This technique is efficient for covering larger areas and can yield a professional, even coat.
Sponging Technique
Dampen a clean sponge with the paint or dye, ensuring it’s not overly saturated. Gently dab the neoprene to transfer the color.
This technique can create a textured, mottled effect, resembling natural textures or weathered surfaces. Experiment with different degrees of pressure and sponge textures for unique artistic outcomes.
Stenciling Technique
Stenciling allows for precise, repeatable patterns or designs. Secure the stencil firmly in place using masking tape or weights.
Apply the paint using a brush, sponge, or spray, ensuring even coverage within the stencil’s boundaries. Lift the stencil carefully to reveal the crisp, defined design. This technique is excellent for creating intricate, symmetrical motifs.
Blending Technique
Achieving smooth transitions between colors requires a delicate touch. Apply multiple colors while the previous layer is still wet. Use a clean cloth or sponge to gently blend the colors together.
Practice controlling the amount of pressure applied to create seamless gradients. This technique is ideal for creating depth and dimension in your neoprene coloring.
Dip Dyeing Technique
Completely submerge the neoprene in a container of diluted dye. Ensure the dye mixture is well-mixed and at the desired concentration. Agitate the neoprene gently in the dye bath to ensure even coverage.
Lift the neoprene out and allow excess dye to drain off. This technique results in a uniform, all-over color, and adjusting dye concentration can provide varying shades.
Airbrushing Technique
An airbrush allows for precise control over paint application. Select appropriate nozzles and pressure settings for your neoprene paint. Maintain consistent movement and distance from the surface.
Practice controlling the airbrush to achieve gradients, fine details, or smooth transitions. This technique is particularly effective for achieving professional-grade results.
Masking Technique
Apply masking tape or secure stencils to create sharp, defined edges or to protect specific areas from coloring. Ensure the masking material adheres securely to prevent any paint or dye bleed.
Take your time to achieve clean lines and crisp patterns. This technique is essential for creating intricate designs and geometric shapes.
Sgraffito Technique
After applying one layer of color, use a fine tool to scratch or etch designs into the surface. This reveals the original color beneath, creating intricate, textured designs with contrast.
Experiment with different tools and pressure levels to achieve desired effects. This technique is excellent for adding depth and complexity to your neoprene coloring.
Dry Brushing Technique
Load a small amount of paint onto a dry brush, then remove most of it on a paper towel.
Apply the brush lightly to the neoprene surface. This technique creates a subtle, weathered effect. Use it strategically to add dimension and highlight specific areas of your neoprene project.
Alternative Ways for Coloring Neoprene Effectively
Besides traditional paint or dye, there are alternative methods you can use to color neoprene effectively.
Here are some options:
Fabric Markers
Fabric markers are an excellent choice for adding intricate details or creating custom designs on neoprene. They offer fine control, allowing you to draw, write, or color directly onto the material.
After applying the markers, it’s recommended to heat-set the design with an iron to ensure long-lasting results.
This process helps the ink bond with the neoprene fibers, making the design more resistant to washing or rubbing.
Heat Transfer Vinyl (HTV)
HTV is a versatile option for adding vibrant and detailed designs to neoprene. To use HTV, first, create your design using a cutting machine or by hand. Then, apply heat and pressure using a heat press or iron to transfer the vinyl onto the neoprene.
This method offers precise control over the design, making it ideal for creating logos, text, or complex patterns. HTV is available in a wide range of colors, finishes, and textures, allowing for endless creative possibilities.
Fabric Paint Pens
Fabric paint pens are a convenient tool for adding fine details, outlines, or intricate patterns to neoprene. They provide precise control over the application, making them suitable for freehand drawing or adding small embellishments.
Fabric paint pens are available in various tip sizes, allowing for both fine lines and broader strokes. They’re also designed to adhere well to synthetic materials like neoprene, ensuring the colors remain vivid and durable.
Adhesive Backed Fabric Sheets
Adhesive-backed fabric sheets are a quick and easy way to add color and patterns to neoprene.
Simply cut out the desired shapes or designs from the sheets and peel off the backing to reveal the adhesive side. Press the adhesive side onto the neoprene surface, ensuring it adheres securely.
These sheets come in a wide variety of colors, patterns, and textures, making them a versatile option for customization. They can be layered, overlapped, or mixed to create unique and eye-catching designs.
Iron-On Transfers
Iron-on transfers allow for the application of detailed, full-color designs to neoprene. First, print or create your design on transfer paper using an inkjet or laser printer.
Then, use a hot iron to transfer the image onto the neoprene. The heat activates the ink, causing it to adhere to the fabric.
This method is ideal for adding photographs, intricate graphics, or colorful illustrations to neoprene surfaces. It provides a high level of detail and color vibrancy.
Fabric Dyes and Paints
Specialized neoprene fabric dyes and paints are formulated to adhere effectively to neoprene material.
They come in a variety of colors and can be applied using brushes, sponges, or other application tools. It’s important to follow the manufacturer’s instructions for preparation, application, and drying times.
Additionally, consider sealing the painted surface with a neoprene-specific sealer for added protection and longevity.
Airbrushing
Airbrushing offers precise control over color application and is especially useful for creating gradients, shading, and intricate details on neoprene.
It involves using an airbrush gun to spray a fine mist of neoprene-specific paint onto the surface. This technique is commonly used in customizing apparel, costumes, and sportswear.
Practice and experimentation with airbrush techniques will help achieve the desired results.
Sublimation Printing
Sublimation printing is a heat-transfer process that allows for full-color, high-resolution images to be permanently embedded into the neoprene fibers.
It involves printing a mirrored image onto sublimation paper using special sublimation inks. The paper is then placed onto the neoprene and heat-pressed, causing the ink to vaporize and penetrate the material.
The result is a vibrant, long-lasting, and washable design. Sublimation is commonly used in the production of sportswear, accessories, and promotional items.
Tips and Considerations
Before you embark on your neoprene coloring project, it’s essential to keep in mind a few key tips and considerations. These insights will help you achieve the best results possible.
Here are some valuable points to bear in mind:
Choose High-Quality Neoprene Paint
Start by selecting paint or dye specifically designed for neoprene materials. Using the right products ensures proper adhesion, color vibrancy, and longevity. Check the manufacturer’s recommendations and instructions for compatibility.
Clean and Prepare the Neoprene Surface
Thoroughly clean the neoprene surface to remove dirt, dust, and oils before applying any paint or dye.
A clean surface ensures better adhesion and a more even finish. Use a gentle, non-abrasive cloth or sponge for this purpose.
Test on a Small Area First
Always perform a test on a small, inconspicuous area of the neoprene before applying the paint or dye to the entire surface.
This allows you to assess color accuracy, adhesion, and drying time and make necessary adjustments.
Consider Multiple Coats
Achieving the desired color intensity often requires applying multiple coats of paint or dye.
Allow each coat to dry completely before adding another layer. Patience during this process results in a more vibrant finish.
Protect and Mask Areas as Needed
When working with intricate designs or patterns, use masking tape or stencils to protect specific areas from the paint or dye. Proper masking ensures clean lines and prevents color bleed.
Experiment with Techniques
Neoprene offers a versatile canvas for creativity. Experiment with various application techniques, such as brushing, spraying, sponging, or stenciling, to achieve different effects and textures.
Practice these techniques on a spare piece of neoprene to build your skills.
Maintain Consistency with the Dye Bath
If dip dyeing is your chosen method, ensure that the dye bath maintains consistent color concentration.
Stir the dye thoroughly and periodically throughout the project to prevent color variations on the neoprene surface.
Allow for Ample Drying Time
Proper drying time is crucial for a successful neoprene coloring project. Rushing this step can lead to smudging or uneven coloring. Ensure the neoprene is fully dry before handling or wearing the item.
FAQs
What type of paint or dye should I use for neoprene?
It’s crucial to use a paint or dye specifically designed for neoprene. Regular fabric paints may not adhere properly.
Can I use spray paint for neoprene?
Yes, you can use a neoprene-specific spray paint. Follow the manufacturer’s instructions for best results.
How do I prevent color bleed when stenciling on neoprene?
Ensure that the stencil is securely adhered to the neoprene surface. Use masking tape or weights to hold it in place and apply paint carefully.
Is it necessary to seal the neoprene after coloring?
While not mandatory, using a neoprene-specific sealer can provide added protection and enhance the longevity of the color.
Can I mix different colors of neoprene paint to create custom shades?
Yes, you can experiment with blending neoprene paints to achieve unique and custom color combinations.
Wrap Up
Mastering the art of coloring neoprene effectively opens up a world of creative possibilities. Neoprene’s versatility, resilience, and durability make it an ideal canvas for personalizing and enhancing a wide range of items.
Whether you’re aiming to add a pop of color to your wardrobe, customize sporting equipment, or create intricate designs on industrial components, the techniques and tips discussed in this guide can help you achieve your vision.
By choosing the right materials, applying the appropriate techniques, and following best practices, you can ensure that your neoprene coloring projects are not only visually appealing but also long-lasting and resistant to wear and tear.
So, unleash your creativity and embark on colorful neoprene adventures with confidence.
Leave a Reply