Achieving the proper tension in an embroidery hoop is a pivotal aspect of the embroidery process, influencing the overall quality of stitched designs.
The question of how tight an embroidery hoop should be is central to ensuring a smooth and precise stitching experience.
Striking the perfect balance is crucial. Too tight, and the fabric may distort, affecting the outcome; too loose, and the stitches may become uneven.
Factors like fabric type, hoop size, and personal preference influence this delicate equilibrium.
This guide delves into the considerations and techniques essential for maintaining optimal tension and fostering a foundation for successful and visually appealing embroidery projects.
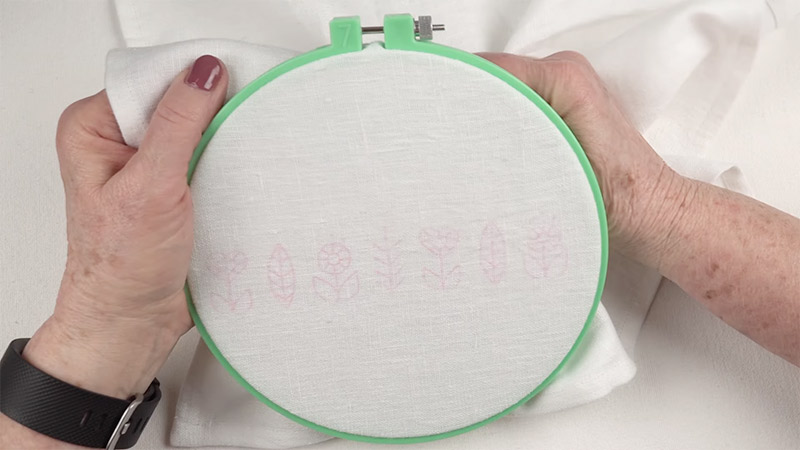
How Tight Should an Embroidery Hoop Be?
Choosing the proper tension for your embroidery hoop is crucial to the success of your embroidery project.
The tension of the fabric within the hoop affects the overall appearance of the stitches and the ease of stitching.
Here are some guidelines on how tight an embroidery hoop should be:
Firm, Not Too Tight
Achieving the ideal firmness in your embroidery hoop is a delicate balance. You want the fabric to be taut enough to prevent any shifting during stitching, ensuring a stable surface.
However, it’s equally crucial to avoid excessive tightness. When the fabric is stretched too tightly, it can distort the weave, leading to uneven stitches and potentially leaving unwanted imprints on the fabric once the hoop is removed.
Striking this balance is essential for your embroidery project’s overall success and appearance.
Slight Resistance
As you press down on the fabric within the hoop, there should be a subtle resistance.
This resistance indicates the fabric is tensioned correctly, providing a secure foundation for your stitches. However, avoiding a tension level that feels like a drumhead is essential.
A slight bounce is acceptable, but the fabric should remain stable to facilitate smooth and controlled stitching. This delicate tension ensures that your needle moves through the fabric with precision.
Even Tension Across the Fabric
Maintaining consistent tension across the entire fabric surface is crucial to achieving high-quality embroidery.
If the tension varies across different fabric sections, it can result in irregular stitches and an uneven appearance.
Regularly check and adjust the tension as needed to ensure a balanced stretch. This attention to detail contributes to the overall professional look of your embroidery project.
Consider Fabric Type
Different fabrics have unique characteristics, which should be considered when determining the appropriate tension.
Delicate fabrics like silk or organza may require a gentler stretch to avoid damage, while sturdier fabrics like denim or canvas can withstand a slightly tighter hold.
Before starting your actual embroidery project, experiment with a scrap piece of fabric to find the optimal tension for the specific material you’re working with.
Avoid Warping
One of the risks associated with excessive tightness in an embroidery hoop is fabric warping or distortion.
Pay close attention to the edges of the fabric, as these are particularly susceptible to becoming uneven or misshapen.
By avoiding overly tight tension, you can preserve the integrity of the fabric and ensure that it maintains a flat, undistorted surface throughout the embroidery process.
Regular Checks
Tension is not static in embroidery; it can change over time, especially during extended stitching sessions. Regularly check the tension of the fabric within the hoop as you progress with your embroidery project.
Periodic adjustments will help maintain an optimal level of tension, preventing any loosening that could compromise the stability of the fabric and the quality of your stitches.
Consider Hoop Size
The size of the embroidery hoop plays a role in determining the required tension. Larger hoops generally demand more tension to stabilize the fabric adequately.
Conversely, smaller hoops may need less tension to prevent unnecessary distortion. Consider the size of your hoop and the fabric you’re working with, adjusting the tension accordingly to ensure a secure and even surface for your embroidery.
How to Keep Embroidery Hoop Tight?
Keeping your embroidery hoop tight is essential for creating neat and uniform stitches.
Here are steps and tips to help you maintain the tension in your embroidery hoop:
Select the Right Size Hoop
Choosing the appropriate size hoop is not only about the dimensions of your project but also about ensuring optimal tension and ease of stitching.
If the hoop is too large for your design, you may struggle to maintain proper tension across the fabric, leading to uneven stitches.
On the other hand, a too small hoop can distort the fabric, making it challenging to work on your embroidery comfortably.
Ideally, the hoop should comfortably accommodate the entire area you plan to embroider, allowing you to work efficiently without compromising the integrity of the fabric.
Tighten the Screw Securely
The initial step of securing the fabric in the hoop is crucial for establishing the foundation of tension.
Ensure that you tighten the screw or fastening mechanism securely, providing a stable surface for your embroidery. However, exercise caution not to overtighten, as excessive force can lead to fabric distortion.
Striking the right balance in tightness sets the stage for maintaining consistent tension throughout the embroidery process, contributing to the overall quality of your stitches.
Adjust the Tension Periodically
Embroidery is dynamic, and fabric tension can change over time, especially during extended stitching sessions.
Regularly checking and adjusting the tension is essential to counteract any loosening.
By periodically tightening the screw, you can uphold the desired level of tension, preventing any slack that could impact the precision and uniformity of your stitches.
Reposition the Fabric
When transitioning to different sections of your design, it’s beneficial to loosen the screw, reposition the fabric, and then tighten the screw again.
This practice ensures that the fabric remains consistently taut and stable, facilitating smooth transitions between various areas of your embroidery.
Repositioning the fabric when needed allows for flexibility in your stitching approach without compromising overall tension.
Use Gripper Hoops or No-Slip Hoops
Gripper hoops, or no-slip hoops, offer a practical solution to prevent fabric slippage during embroidery.
The rubberized or textured edges of these hoops provide an extra layer of grip on the fabric, ensuring it stays securely in place.
Utilizing gripper hoops contributes to a more stable working surface, promoting consistent tension and minimizing the need for frequent adjustments during your stitching process.
Stabilize with Fabric Interfacing
Working with delicate or stretchy fabrics that tend to lose tension efficiently requires additional measures for stabilization.
Attaching fabric interfacing to the back of the fabric before placing it in the hoop provides an extra layer of support.
This stabilizing technique helps maintain overall stability, preventing the fabric from stretching out of shape and ensuring a more controlled embroidery experience.
Avoid Overstretching
While maintaining a taut fabric is crucial, avoiding overstretching is equally important. Excessive tension can lead to fabric distortion and compromise the quality of your stitches.
Aim for a firm yet gentle pull that maintains stability without causing unnecessary strain on the fabric fibers.
Striking the right balance ensures a comfortable working surface while preserving the integrity of the fabric.
Check for Uneven Tension
Regularly inspecting your fabric for signs of uneven tension is a proactive approach to achieving a polished and professional-looking embroidery project.
If certain areas appear looser than others, promptly make adjustments by repositioning the fabric or tightening the screw in those specific areas.
Consistent tension contributes significantly to the overall aesthetic appeal of your finished embroidery.
Consider Hoop Material
The choice of hoop material plays a role in its ability to maintain tension. Wooden hoops, plastic hoops, and metal hoops each have unique characteristics.
Experimenting with different hoop materials lets you discover which works best for your specific fabric and project requirements.
Consider factors such as the hoop’s weight, grip, and fabric flexibility you are embroidering.
Store Hoops Properly
Proper storage of embroidery hoops when not in use is essential for maintaining their shape and functionality. Avoid leaving the fabric in the hoop for extended periods, as this can lead to the fabric losing its tension.
Removing the fabric after each session and storing the hoops in a cool, dry place helps prevent warping or changes in the hoop’s shape.
Storing your hoops thoughtfully ensures they remain in optimal condition for future embroidery projects.
How to Use Embroidery Hoop?
Using an embroidery hoop correctly is essential for achieving neat and professional-looking embroidery stitches.
Here’s a step-by-step guide on how to use an embroidery hoop:
Select the Right Hoop
Choosing the appropriate embroidery hoop is the foundational step in ensuring the success of your embroidery project.
Consider the size of your design and opt for a hoop that complements it. Smaller hoops work well for intricate and petite designs, providing better control and maneuverability.
Conversely, larger hoops are suitable for expansive projects, offering ample space for stitching without frequent repositioning.
Paying attention to the hoop size ensures that your fabric remains correctly tensioned, facilitating a smoother and more enjoyable embroidery experience.
Separate the Hoop Rings
Understanding the anatomy of the embroidery hoop is crucial before delving into your stitching endeavor.
Most hoops consist of two rings, the inner and outer rings. Gently loosen the screw or fastening mechanism on the outer ring to separate it from the inner one. This allows you to position your fabric properly.
I am placing the inner ring underneath the fabric, and the outer ring on top sets the stage for achieving the optimal tension needed for precise and even stitches.
Center the Fabric
Positioning your fabric accurately within the hoop is a pivotal step that directly impacts the outcome of your embroidery.
Ensure the section you intend to embroider is centered over the inner ring. Take a moment to smooth out any wrinkles or folds in the fabric, guaranteeing your stitches an even and stable surface.
This meticulous attention to detail sets the foundation for a polished and professional-looking embroidery project.
Place the Outer Ring
With your fabric centered, delicately position the outer ring on the inner ring. Strive for a balanced tension that pulls the fabric taut without overstretching it.
This equilibrium ensures that the fabric remains stable during the embroidery process, preventing distortions in the weave that could affect the overall appearance of your stitches.
Tighten the Screw or Fastening Mechanism
Gradually tighten the screw or fastening mechanism on the outer ring. Exercise caution to tighten it just enough to secure the fabric in place. Over-tightening should be avoided, as it can lead to fabric distortion.
Finding the right balance in tension at this stage is pivotal for maintaining the integrity of the fabric while providing the stability necessary for precise stitching.
Check for Even Tension
After securing the fabric, thoroughly check for even tension across the entire surface. This step is crucial in ensuring the fabric is uniformly stretched within the hoop.
Address any unevenness by making necessary adjustments. A consistently taut surface sets the stage for producing uniform stitches and showcases a high level of craftsmanship.
Start Embroidering
Now that your fabric is securely positioned within the hoop, it’s time to embark on the creative embroidery journey. Thread your needle with the desired embroidery floss and begin stitching.
The taut surface the hoop provides is a stable canvas, making it easier to create even stitches with precision.
As you immerse yourself in the stitching process, you’ll find that the proper tension established earlier enhances the overall quality of your embroidery work.
Reposition the Hoop as Needed
As your embroidery progresses, the need to reposition the hoop may arise, especially for projects with varied design elements.
Loosen the screw or fastening mechanism, allowing you to adjust the fabric as necessary. Once the adjustments are made, tighten the hoop again.
This flexibility in repositioning ensures that you can seamlessly access different areas of your design without compromising the tension or stability of the fabric.
Finish and Remove the Hoop
Upon completing your embroidery masterpiece, the final step involves loosening the screw or fastening mechanism on the outer ring.
This releases the fabric from the hoop. Carefully remove the fabric, taking note of the well-maintained tension and absence of distortions.
To add the finishing touch, you may want to gently press the embroidered fabric with a cool iron, removing any lingering hoop marks and presenting your project in its best possible form.
What to Use Instead of Embroidery Hoop? 9 Several Alternatives
While embroidery hoops are commonly used to provide stability and tension to the fabric during embroidery, you can use alternative methods and tools if you don’t have a hoop or prefer a different approach.
Here are several alternatives to embroidery hoops:
1. Embroidery Frames
Embroidery frames provide a reliable alternative to traditional hoops for maintaining fabric tension during embroidery.
These frames typically consist of two adjustable bars that can be manipulated to fit the dimensions of your fabric.
Customizing the frame size ensures a snug fit, preventing any excess slack in the fabric. Some embroidery frames are equipped with stands, offering the convenience of hands-free stitching.
This feature allows artisans to work on their embroidery projects without the need to hold the frame, promoting comfort and reducing hand fatigue during extended stitching sessions.
2. Scroll Frames
Scroll frames present an innovative solution to fabric tensioning, particularly advantageous for larger embroidery projects.
Covert frames allow the fabric to be rolled or scrolled as needed by combining two bars, one positioned at the top and the other at the bottom.
This feature facilitates easy access to different areas of your design without frequent repositioning.
Scroll frames are precious for expansive projects, offering a practical solution to maintain consistent tension across your work.
3. Q-Snap Frames
Q-snap frames, constructed from PVC pipes that seamlessly snap together, form a sturdy square or rectangular frame for embroidery.
The fabric is secured onto the frame using clips, ensuring a taut surface conducive to precise stitching.
The ease of assembly and disassembly makes Q-snap frames convenient, especially for those who prefer a quick tool to set up and dismantle. This flexibility makes them suitable for various embroidery projects of different sizes.
4. Tambour Embroidery Hoops
Tambour embroidery hoops provide a unique twist on traditional hoop designs. Featuring a circular frame with an adjustable screw mechanism, tambour hoops operate similarly to regular embroidery hoops but may offer a different aesthetic.
They are often favored for tambour or bead embroidery, where a specific tension is crucial for the success of the intricate stitching involved.
The adjustable screw allows for precise control over the tension, catering to the specific requirements of these specialized embroidery techniques.
5. Stretching Fabric Over a Board
Without a dedicated embroidery frame or hoop, stretching fabric over a board is a practical alternative.
This method involves securing the fabric with clips or pins, creating a flat and taut surface for embroidery. It is essential to choose a sturdy board to avoid any damage to the fabric.
This uncomplicated approach ensures a stable working surface, making it accessible for embroiderers who may not have specialized tools.
6. Handheld Embroidery
Handheld embroidery requires a steady hand and precise control and is a viable option for smaller projects or intricate details.
This method involves holding the fabric in your hand while stitching, providing a more flexible approach to embroidery.
However, it may not be as suitable for larger or more complex designs due to the need for meticulous tension management.
When employing this more hands-on technique, achieving even tension is crucial for obtaining neat and uniform stitches.
7. Basting or Tacking Fabric
Basting or tacking fabric to a stabilizing material offers a temporary yet effective solution for fabric tension during embroidery.
Securing the fabric to another piece of fabric or interfacing with temporary stitches creates a stable foundation for stitching.
This method is beneficial for projects where the back of the fabric won’t be visible, as the temporary stitches can be easily removed after completing the embroidery.
8. Tapestry or Quilting Frames
Tapestry or quilting frames, although not specifically designed for embroidery, can be repurposed to serve this purpose effectively. These frames often feature adjustable bars that securely hold the fabric in place.
While not as specialized as embroidery frames, they offer a practical solution for maintaining tension and stability during stitching.
9. Hoopless Embroidery Techniques
Specific embroidery techniques, such as free-motion or hand embroidery without a hoop, provide alternative approaches that do away with additional support structures.
These methods require a high level of skill and control, as the absence of a hoop necessitates careful tension management directly on the fabric.
While these techniques may demand more expertise, they offer greater flexibility in movement, allowing for intricate and artistic stitching styles without the constraints of a traditional hoop.
FAQs
What happens if I make my embroidery hoop too tight?
Excessive tightness can distort the fabric’s weave and leave imprints, affecting the overall appearance of stitches.
Can I use the same tension for all types of fabric?
No, optimal tension varies by fabric type experiment on a scrap piece before starting your project.
How often should I check and adjust hoop tension?
Periodically check and adjust during extended stitching sessions to maintain stable fabric tension.
Are there signs of tension issues?
Yes, like fabric distortion or sagging. Regularly inspect for these signs and make adjustments accordingly.
Can I reposition the fabric without compromising tension?
Yes, loosen the hoop, adjust the fabric, and tighten again to access different design areas while maintaining tension.
To Recap
Mastering the art of determining how tight an embroidery hoop should be is fundamental to embroidery.
Striking the delicate balance between tautness and flexibility is an ongoing process influenced by fabric characteristics, project size, and personal stitching preferences.
The proper tension not only ensures even and polished stitches but also prevents fabric distortion and enhances the overall visual appeal of the embroidery.
Regular checks, adjustments, and thoughtful considerations of factors like hoop material contribute to a successful stitching experience.
Ultimately, a well-maintained tension in the embroidery hoop is the key to transforming needle and thread into intricate works of art.
Leave a Reply