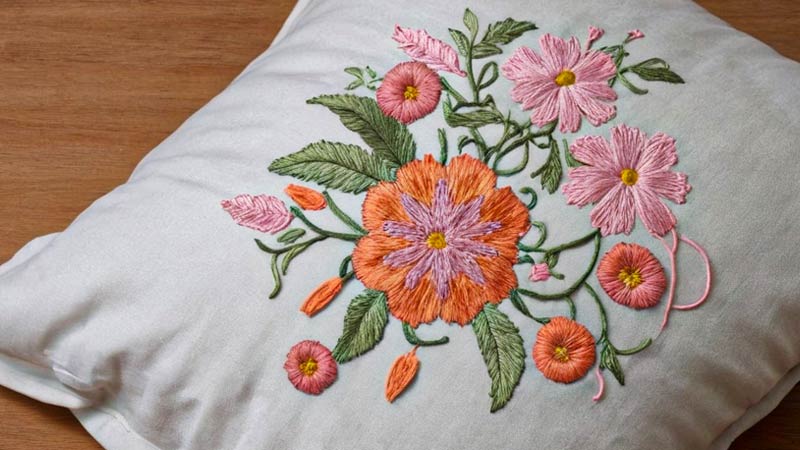
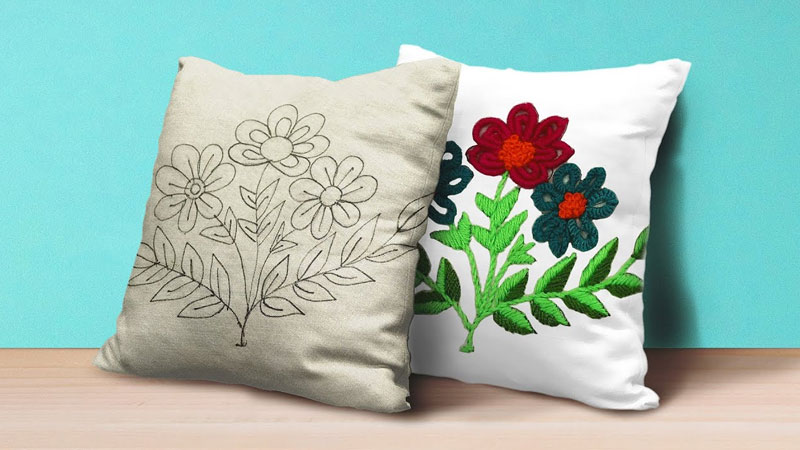
Embroidering a pillowcase by hand is a delightful and personalized way to enhance your home decor. This intricate craft allows you to infuse your unique style into everyday items, turning a simple pillowcase into a work of art.
The process involves selecting a design, preparing the fabric, and mastering various embroidery stitches to bring your vision to life.
Whether you choose floral motifs, geometric patterns, or personalized monograms, hand embroidering a pillowcase offers a creative outlet for expression.
This guide will explore step-by-step instructions, providing insights into the techniques and tips needed to create a beautifully embroidered pillowcase that reflects your individuality and craftsmanship.
How to Hand Embroider a Pillowcase? Step-By-Step Guide
Hand embroidery on a pillowcase is a delightful way to add a personal touch and artistic flair to your bedding.
Whether you’re a beginner or an experienced embroiderer, here’s a step-by-step guide to help you hand embroider a pillowcase:
Materials Needed:
- Pillowcase.
- Embroidery Hoop.
- Embroidery Needle.
- Embroidery Floss.
- Scissors.
- Embroidery Patterns or Stencils.
- Water-Soluble Fabric Marker or Pencil.
Step-by-Step Guide:
Prepare Your Pillowcase
Begin by setting the stage for your embroidery project. Thoroughly iron the pillowcase to create a smooth and wrinkle-free canvas for your artistic endeavors.
As the foundation, insert the pillowcase into the embroidery hoop, ensuring that the chosen area is centered and taut, ready to embrace your creative expression.
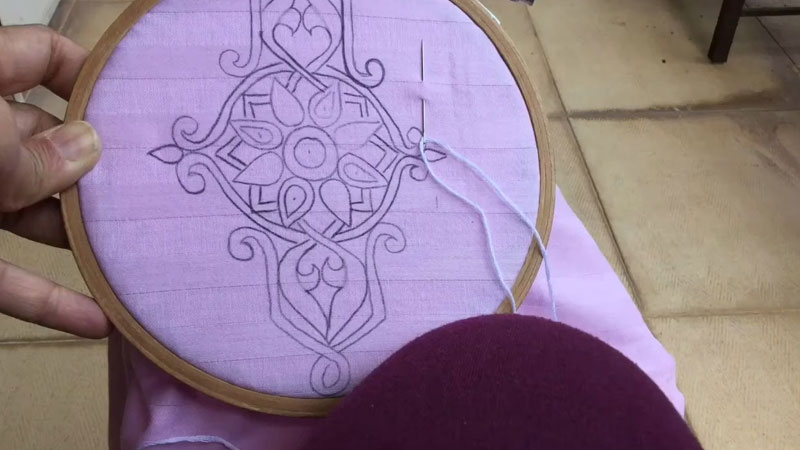
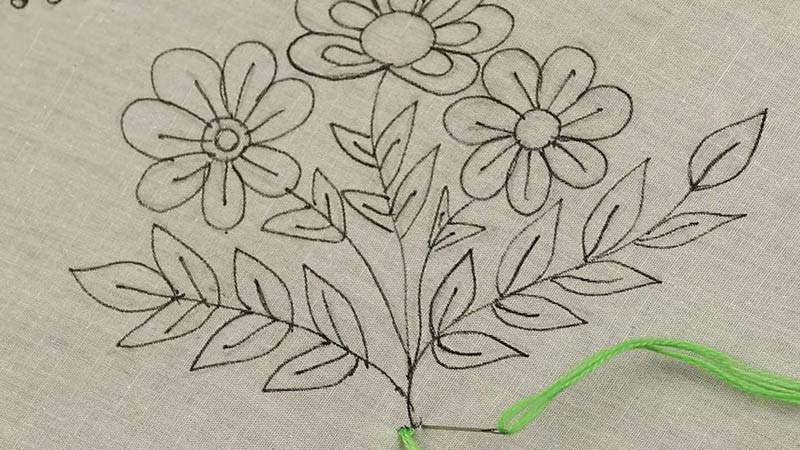
Choose a Design
Embarking on an embroidery journey requires a vision. Choose a design that resonates with your style and aligns with your skill level.
Simple motifs like flowers, initials, or geometric shapes are ideal for beginners, providing an enjoyable starting point for your artistic exploration.
Transfer the Design

Transferring your chosen design onto the pillowcase is crucial in bringing your vision to life. Lay the embroidery pattern on top of the fabric, or opt for a stencil.
Use a water-soluble fabric marker or a pencil to delicately trace the design onto the fabric, ensuring clarity and visibility of the lines that will guide your needlework.
Thread the Needle
Preparing your needle and thread is an art in itself. Separate the embroidery floss into the desired number of strands, typically opting for two to three strands for most projects.
Thread the needle with the chosen embroidery floss, securing it with a knot at the end. This marks the initiation of your journey into the intricate world of hand embroidery.
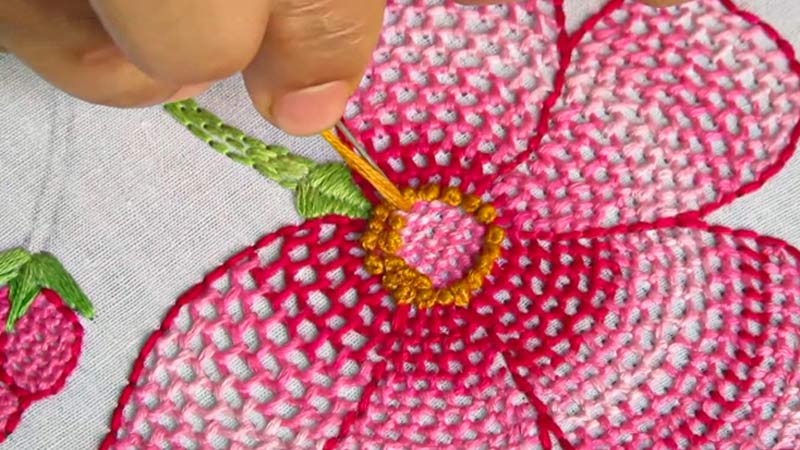
Start Stitching
With the needle in hand and the design before you, initiate your stitching journey. Begin with foundational stitches such as the backstitch for outlining or the satin stitch for filling in areas.
Follow the traced lines meticulously, allowing your creativity to flow through the rhythmic movement of your needle.
Experiment with Different Stitches
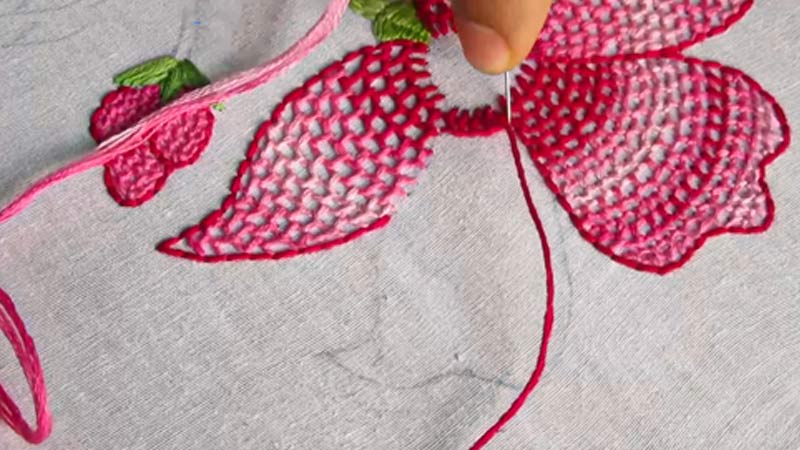
As your project evolves, experiment with an array of embroidery stitches. Introduce French knots for intricate details, employ chain stitches to create textural effects, or incorporate lazy daisies for a whimsical touch.
Each stitch adds a layer of nuance, transforming your pillowcase into a unique work of art.
Secure the Threads
A well-executed embroidery piece requires secure threads. Knot the thread on the backside of the fabric when starting and finishing a section.
This simple yet essential step ensures the longevity and stability of your stitches, contributing to the overall durability of your masterpiece.
Continue Embroidering
Embroidery is a process that unfolds gradually. Work steadily, paying attention to the details that make your design come alive.
Take breaks to step back and evaluate your progress, making any necessary adjustments to maintain the coherence and harmony of your embroidered creation.
Finish and Secure the Embroidery
Approaching the completion of your design, take care to tie off the thread on the backside of the fabric. Trim any excess thread with precision, ensuring a neat and polished finish.
If a water-soluble marker was employed in the tracing process, diligently follow the instructions to remove the markings and unveil the true beauty of your embroidered creation.
Final Touch

With your embroidery journey’s culmination, apply the final touch to your masterpiece.
Iron the embroidered area on the reverse side, setting the stitches and presenting your pillowcase with a refined and polished aesthetic.
This concluding step adds a professional touch to your handcrafted creation, making it ready to adorn your living space with style and personality.
How Do You Attach Embroidery to a Pillow?
Attaching embroidery to a pillow is the final step in bringing your handcrafted masterpiece to life. Here’s a guide on how to seamlessly attach your embroidery to a pillow:
Materials Needed:
- Embroidered Fabric.
- Pillow Form or Insert.
- Needle and Thread.
- Scissors.
- Pins.
Step-by-Step Guide:
Prepare the Pillow Fabric
Begin by setting the foundation for your embroidery attachment. Ensure that the fabric intended for your pillow is clean and impeccably pressed.
The goal is to provide a smooth canvas for your embroidered masterpiece. If there are any wrinkles or creases, take the time to iron the fabric carefully, guaranteeing a pristine surface that will enhance the overall presentation of your pillow.
Position the Embroidery
With your pillow fabric ready, the next step is to position the embroidered fabric thoughtfully. Center it on the pillow fabric, aligning it according to your desired placement.
Pin the corners or edges of the embroidery to secure it in place. This step ensures that your embroidery will be ideally situated on the pillow, serving as the focal point of your decorative creation.
Thread the Needle
Embark on the actual attachment process by threading a needle with a suitable thread length. Choose a thread color that seamlessly blends with the fabric or the embroidery.
Secure the thread by tying a knot at the end, readying your needle for the meticulous work of joining the layers together.
Attach the Embroidery
Commence the attachment process from one corner or edge of the embroidery. Employ small and discreet stitches, carefully sewing through the embroidered and pillow fabric.
The objective is to create a seamless connection, ensuring that the embroidery is securely affixed to the pillow fabric without compromising the aesthetic integrity of your handiwork.
Sew Around the Edges
Gradually move along the edges of the embroidery, maintaining a consistent and even stitching pattern.
This step is pivotal in ensuring that the entire perimeter of your embroidery is firmly and evenly attached to the pillow fabric.
Pay attention to detail, and let the rhythm of your stitches contribute to the overall craftsmanship of your attached embroidery.
Corners and Curves
Exercise patience and precision when navigating corners or curves in your embroidery design.
Create smaller stitches to negotiate these intricate areas smoothly, ensuring the attachment remains neat and visually pleasing. This attention to detail will elevate the professionalism of your finished product.
Finish with a Knot
As you complete the sewing process around the entire perimeter, secure your work with a tight and reliable knot on the backside of the fabric.
This final knot is crucial in preventing any unraveling and reinforces the durability of your attached embroidery.
Trim Excess Thread
Once the attachment is secure, turn your attention to the finishing touches. Carefully trim any excess thread with sharp scissors, ensuring a clean and polished appearance. Be cautious not to cut too close to the knot, leaving an ample length of thread for stability.
Inspect and Adjust
Take a moment to inspect your attached embroidery. Ensure that it is securely fastened and lays flat and smooth on the pillow fabric.
Make any necessary adjustments to maintain a tidy and professional appearance, guaranteeing that your handcrafted creation meets the highest standards of craftsmanship.
Insert the Pillow Form
Complete your project by inserting the pillow form or insert into the pillowcase. Allow it to fill out the embroidered cover, showcasing your meticulous handiwork in full glory.
This final step transforms your embroidered fabric into a functional and aesthetically pleasing decorative pillow, ready to adorn your living space with style and personality.
Pillowcase Embroidery Patterns Free
Finding free pillowcase embroidery patterns can be an exciting way to explore your creativity and add a personal touch to your bedding.
Some various online resources and communities offer a wide array of patterns suitable for different skill levels.
Here’s a list of free pillowcase embroidery patterns:
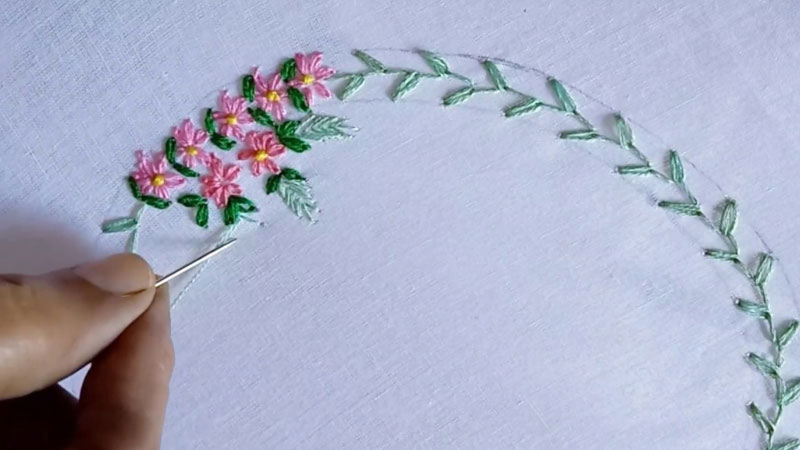
Simple Floral Designs
Embrace the timeless beauty of nature with simple floral embroidery patterns. Delicate flowers, leaves, or vines can be charming additions to your pillowcases, offering a sense of tranquility and elegance.
These patterns are particularly suitable for beginners, providing an excellent opportunity to experiment with various stitches and create a captivating, organic look.
Monogram or Initials
Inject a sense of personalization into your bedroom by embroidering monograms or initials onto your pillowcases. This classic and sophisticated design adds a touch of individuality to your bedding.
With a wide variety of free fonts and styles available, you can easily find a monogram or initial pattern that suits your preferences, creating a bespoke and refined touch to your decor.
Geometric Shapes
Consider incorporating geometric shapes into your pillowcase embroidery for a modern and versatile look.
Clean lines and contemporary designs, such as chevrons, triangles, or hexagons, can complement a variety of bedroom aesthetics. Geometric patterns provide a visually appealing and stylish touch to your bedding.
Quirky Animals or Characters
Add a playful and whimsical element to your pillowcases with free embroidery patterns featuring cute animals or characters. These designs are perfect for children’s rooms and inject fun and personality into your decor.
Choose from various charming creatures to create a lighthearted and imaginative atmosphere.
Nature-inspired Themes
Connect with the beauty of the outdoors by exploring free embroidery patterns inspired by nature.
Whether it’s trees, birds, or butterflies, these nature-themed designs add a serene and calming atmosphere to your bedroom.
Capture the essence of the natural world through your stitches, bringing a touch of the outdoors inside.
Seasonal and Holiday Patterns
Celebrate the changing seasons and holidays with festive embroidery patterns. From snowflakes for winter to flowers for spring or pumpkins for fall, you can find a variety of free designs to suit every occasion.
These patterns let you rotate your pillowcases with the seasons, keeping your bedroom decor fresh and lively.
Quotes and Words
Express your personality and sentiments through embroidered quotes, words, or phrases.
Choose from many free font patterns available online to bring motivational, inspirational, or even humorous messages to your pillowcases. This personal touch adds a unique and meaningful dimension to your bedroom decor.
Vintage and Retro Designs
Transport your bedroom to a bygone era by embracing the charm of vintage and retro embroidery patterns.
From Art Deco motifs to retro florals, these designs evoke a sense of nostalgia and can add a distinctive touch to your bedroom decor. Embrace the elegance and sophistication of the past with these timeless patterns.
Lace or Filigree Patterns
Elevate your pillowcase embroidery with intricate and delicate lace or filigree patterns. While these designs may be more challenging, the stunning and sophisticated result is worth the effort.
These detailed and visually captivating patterns create a touch of luxury and refinement.
Mandalas and Bohemian Patterns
Immerse yourself in the intricate and visually captivating world of mandalas and bohemian-inspired patterns.
These designs offer an opportunity for detailed stitching and can become a focal point in your bedroom.
Explore the mesmerizing symmetry and creativity of mandalas, adding a touch of bohemian flair to your bedding.
How to Hand Embroider a Name on a Pillowcase?
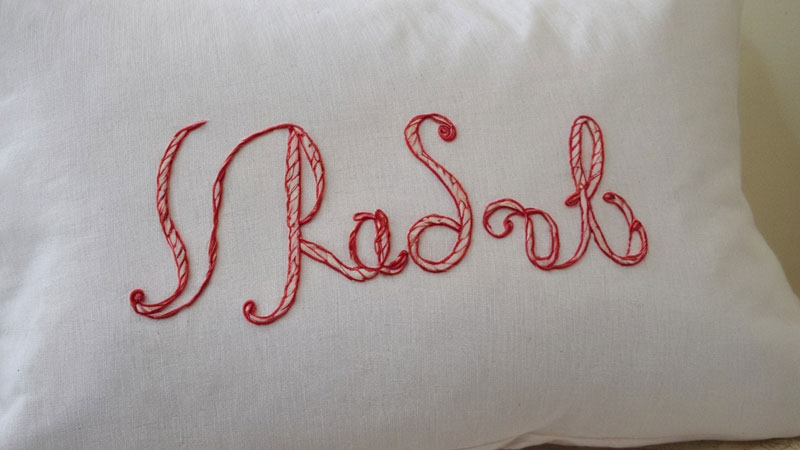
Embroidering a name on a pillowcase adds a personalized and charming touch to your bedding.
Here’s a step-by-step guide on how to hand embroider a name on a pillowcase:
Materials Needed:
- Pillowcase.
- Embroidery Hoop.
- Embroidery Needle.
- Embroidery Floss.
- Water-Soluble Fabric Marker or Pencil.
- Scissors.
Step-by-Step Guide:
Choose the Font and Size
When deciding on the font and size for the name, consider the overall aesthetic you want to achieve. Simple fonts are advisable for legibility, especially if the name is essential to your embroidery.
Experiment with different styles to find one that complements the mood and theme you envision for your personalized pillowcase.
Additionally, consider the pillowcase size and choose a font that fits well within the available space without appearing cramped or overwhelming.
Prepare the Pillowcase
Preparing the pillowcase is crucial to ensure a smooth canvas for your embroidery. Start by washing and ironing the pillowcase, eliminating any wrinkles or impurities affecting the stitching process.
The fabric’s cleanliness and smoothness contribute to the embroidered name’s overall professional appearance.
Insert the pillowcase into the embroidery hoop, centering the area where you plan to embroider the name and securing it for easy stitching.
Transfer the Name
With the pillowcase ready, transfer the chosen name onto the fabric. Place the embroidery pattern or stencil on the pillowcase, ensuring proper alignment and spacing.
Use a water-soluble fabric marker or a pencil to trace the name onto the fabric, ensuring the letters are evenly distributed and aligned.
This step sets the foundation for your embroidery and ensures the name is positioned precisely as intended.
Thread the Needle
Select the appropriate number of strands for your embroidery floss, typically opting for 2-3 strands for a name. Thread the needle with the chosen embroidery floss and tie a secure knot at the end.
The thickness of the embroidery floss should complement the font size and the overall design, ensuring that the name stands out prominently.
Start Stitching
Commence the stitching process by working on the first letter of the name. Employ a basic backstitch for clear and defined lines, mainly if you aim for a straightforward and classic appearance.
Follow the traced lines carefully, maintaining precision and consistency in your stitches as you bring the first letter to life.
Continue with the Name
Progress through each letter of the name, adhering to the traced lines and maintaining a uniform stitching pattern.
If your chosen font involves cursive writing, pay attention to the fluidity and flow of the letters, ensuring a seamless and aesthetically pleasing result. Take your time to create a name that is both legible and visually appealing.
Secure the Threads
To enhance the longevity of your embroidery, secure the threads by knotting them on the backside of the fabric when starting and finishing each letter.
This simple yet crucial step prevents unraveling and ensures the stability of your stitches over time.
Finishing Touches
As you complete the embroidery of the entire name, finalize the stitching by tying off the thread securely on the backside of the fabric.
Use scissors to trim any excess thread, leaving the finished embroidery neat and polished.
Remove Tracing Marks
If a water-soluble fabric marker was used for tracing, follow the instructions to remove the markings.
This typically involves lightly dampening or washing the fabric, allowing the traced lines to disappear, leaving only the beautifully embroidered name behind.
Press the Embroidery
To set the stitches and give the embroidered area a polished look, iron the reverse side of the pillowcase.
This step adds a professional touch, enhancing the overall presentation of your personalized creation. Ensure the iron is set to an appropriate temperature for the fabric to avoid damage.
FAQs
What Stitch Is Used in Making Pillowcases?
Embroidery on pillowcases often involves using various stitches to achieve different effects.
What Stabilizer to Use on Pillowcases?
When embroidering pillowcases, it’s recommended to use a lightweight, tear-away stabilizer.
Wrap Up
Hand embroidering a pillowcase is a rewarding journey that allows for creative expression and personalization in home decor.
With careful preparation, thoughtful design choices, and mastery of embroidery techniques, a simple pillowcase transforms into a unique and cherished piece of art.
From choosing stitches that enhance the design to meticulously threading needles and securing threads, the process is a blend of skill and artistic vision.
As you press the embroidered masterpiece and set the stitches, the satisfaction derived from crafting a personalized pillowcase is both tangible and enduring.
Hand embroidery adorns your living space and reflects the craftsmanship and individuality infused into every stitch.
Leave a Reply