Embroidery enthusiasts often find themselves entangled in the vibrant world of threads, needles, and artistic expression.
Amidst the array of tools, one seemingly simple yet crucial practice stands out – putting embroidery floss on a bobbin.
But why is this methodical organization so essential to the craft? Why put embroidery floss on a bobbin?
As we unravel the intricacies of this seemingly mundane task’s intricacies, we discover its transformative impact on the creative process.
From enhancing efficiency during projects to preserving the longevity of your precious threads, the act of winding embroidery floss onto a bobbin unveils a tapestry of benefits.
Join us as we delve into the “why” behind this ritual, shedding light on how such a seemingly small step can thread its way into the heart of every embroidery project, bringing both practicality and aesthetic finesse to the art form.
Why Put Embroidery Floss on a Bobbin?
While some may consider it a mere organizational task, the act of winding embroidery floss onto a bobbin carries a multitude of benefits, both practical and aesthetic.
Here are the reasons why this seemingly simple practice holds such importance in the realm of embroidery.
Organization and Efficiency
At its core, putting embroidery floss on a bobbin is an organization method. With countless colors and types of embroidery floss available, maintaining a tidy and accessible workspace becomes essential.
Bobbins provides a structured way to store and categorize different threads, allowing artists to locate the exact color needed for a particular project easily.
Efficiency is a natural byproduct of this organizational approach. By neatly winding each color onto its designated bobbin with the embroidery floss organizer, creators streamline their workflow, minimizing interruptions and maximizing productivity.
Thread Preservation
Embroidery floss is an investment, often comprised of various materials and colors that contribute to the overall aesthetic of a project.
Failure to store threads properly can lead to tangling, fraying, and color distortion, ultimately diminishing the quality of the finished piece.
The embroidery floss bobbin serves as a guardian, protecting the integrity of each strand. When embroidery floss is wound onto a bobbin, it is neatly contained and shielded from external elements that may cause damage.
Visual Appeal and Color Coordination
Beyond the practical aspects, using bobbins enhances the visual appeal of an embroidery workspace.
A neatly arranged collection of colorful bobbins conveys a sense of order and creates an inspiring and inviting atmosphere.
The aesthetic presentation of organized threads can serve as a muse, sparking creativity and motivating artists to engage with their projects more passionately.
Portability and Convenience
Embroidery is not confined to a single workspace; artists often create in various settings. The portability of bobbins adds a layer of convenience to this mobile craft.
Compact and lightweight, bobbins allow artists to carry a diverse selection of threads without the bulk and disarray of loose skeins.
Whether attending a stitching group, traveling, or simply working in different rooms, the organized nature of bobbins ensures that artists have their entire palette readily available.
Waste Reduction and Eco-Friendly Practices
The use of bobbins also aligns with sustainable and eco-friendly principles. Unlike disposable packaging or excessive plastic, bobbins provide a reusable and environmentally conscious solution for thread storage.
By investing in durable, long-lasting bobbins, artists contribute to waste reduction and promote responsible consumption within the crafting community.
Tradition and Craftsmanship
Beyond its contemporary applications, the practice of putting embroidery floss on a bobbin carries a sense of tradition and craftsmanship.
Many seasoned embroiderers have passed down this technique through generations, underscoring its timeless relevance.
In adopting this practice, contemporary artists connect with a heritage of needlework, acknowledging the role of thoughtful organization in the evolution of the craft.
How Do You Put Embroidery Floss on a Bobbin?
Putting embroidery floss on a bobbin is fundamental in organizing your materials for stitching projects.
This process ensures easy access to different thread colors and helps preserve the quality of your embroidery floss. Here’s a comprehensive guide on how to use floss bobbins:
Prepare the Floss
Before you begin, gather all the necessary materials. Start by selecting the color of embroidery floss you want to wind onto the bobbin. Unravel a thread length, usually around 18-24 inches, depending on your preference and the size of your bobbins.
Cut the Floss
Use your scissors to cut the floss at one end. Working with manageable lengths is often easier, so you might want to cut a few strands at once if you’re organizing multiple colors.
To prevent unraveling, secure one end of the floss. You can tie a simple knot at the top or use the existing wrapper on the skein to anchor the thread.
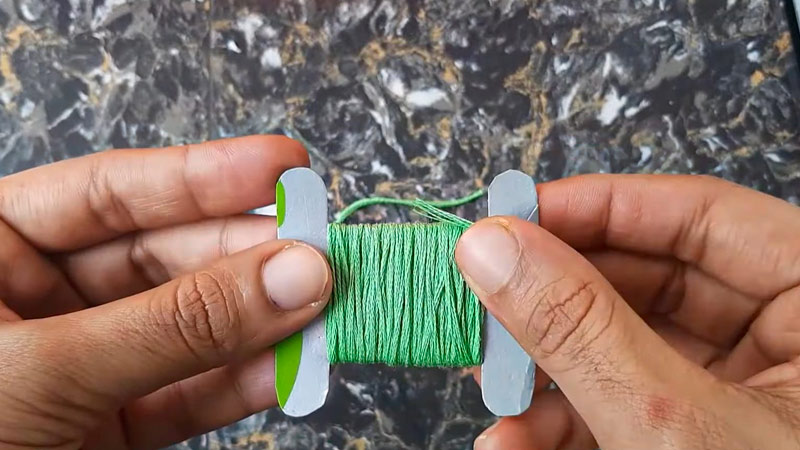
Insert the Floss
Take the loose end of the floss and insert it into one of the notches on the bobbin. If your bobbin has a small hole, you can also thread the floss through it to anchor it securely.
Hold the bobbin in one hand and start winding the floss around it with the other. Keep the wraps neat and close together, covering the entire length of the bobbin. Ensure not to overlap or bunch the floss, as this may lead to tangling.
Even Distribution
As you wind the floss, ensure an even distribution across the bobbin. This helps with organization and prevents uneven tension when you use the thread in your projects.
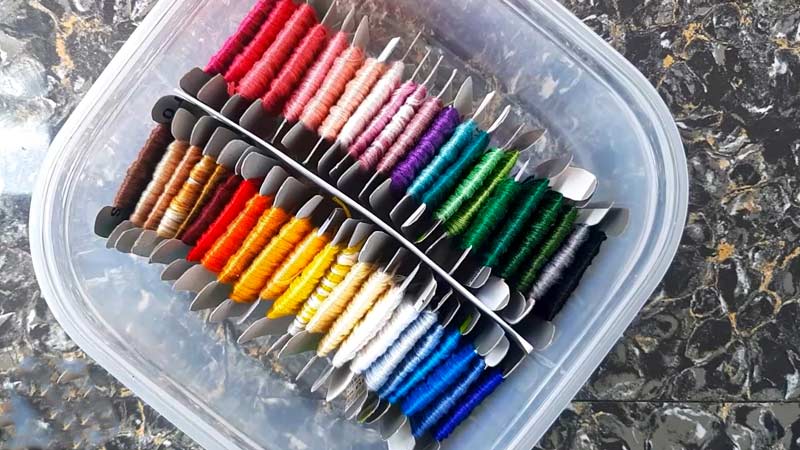
Repeat for Other Colors
If you have more embroidery floss colors to organize, repeat the process for each one. This systematic approach helps maintain order and makes your entire collection easily accessible.
Store your bobbins in a container or organizer designed for embroidery supplies. This can be a plastic box, a dedicated embroidery floss organizer, or a simple zip-top bag. Keeping them in one place ensures you can quickly locate the colors you need for your projects.
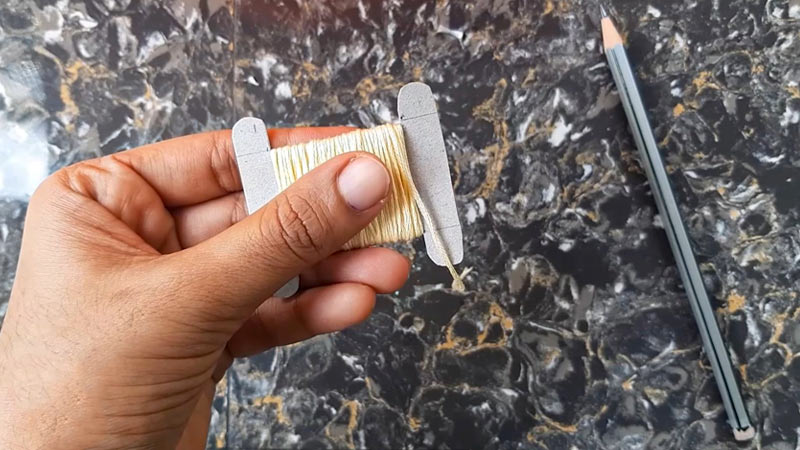
Label the Bobbin
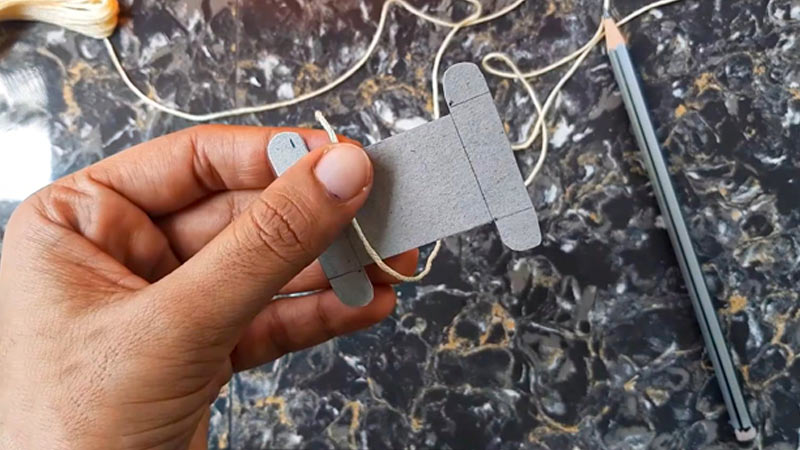
Once you’ve wound the floss onto the bobbin, consider labeling it with the color number or any other relevant information. This makes it easier to identify the color at a glance, especially when you have a collection of bobbins.
After you’ve wound the floss, secure the loose end by tucking it into one of the notches or holes on the bobbin. This keeps the floss in place and prevents unwinding.
Tips and Tricks
Achieving a well-organized and efficient embroidery workspace involves more than just winding embroidery floss onto bobbins.
Elevate your bobbin-winding game with these practical tips and tricks to streamline your process and enhance the overall stitching experience.
Use Bobbin Winders
If your embroidery floss collection seems to grow faster than you can organize it, consider investing in a bobbin winder. This handy tool automates the winding process, allowing you to breeze through the task efficiently.
Not only does it save time, but it also ensures a uniform and consistent tension across all your bobbins. Bobbin winders come in various types, from handheld devices to electric machines.
Sort by Color Families
Enhance the accessibility of your embroidery floss by organizing bobbins according to color families or shades.
This methodical arrangement makes locating complementary colors for your projects a breeze, saving you valuable time during the creative process.
Keep Tension Consistent
Maintaining consistent tension while winding the floss is the key to a well-organized and tidy bobbin. Avoid loose wraps or stretching by paying attention to the pressure applied during the winding process.
Consistency in tension ensures that each bobbin is neatly wound, ready to contribute to the precision of your embroidery stitches.
Regularly Update Labels
As you reuse bobbins for different colors over time, keeping labels accurate and up-to-date is essential. This simple practice prevents confusion and ensures that you can quickly identify the color you need for your next creative venture.
If you frequently change thread colors on a bobbin, invest in removable labels or a labeling system that allows easy updates.
Consider Plastic Bobbins
While cardboard bobbins are commonplace, consider upgrading to plastic bobbins for enhanced durability.
Plastic bobbins are less prone to wear and tear, offering a sturdier foundation for your wound floss. Additionally, their smoother surface facilitates a seamless winding experience.
FAQs
Do you need a bobbin for embroidery?
Yes, bobbins are essential for embroidery. They hold the lower thread in place, allowing the needle to create stitches on the fabric. Using a bobbin ensures proper tension and contributes to the overall quality of your embroidery work.
Can you use embroidery floss in a sewing machine?
Yes, you can use embroidery floss in a sewing machine. However, ensuring that the machine’s needle, thread, and fabric are compatible is crucial.
Thicker embroidery floss may require a larger needle, and adjustments to tension may be necessary for optimal stitching results.
How do you organize embroidery floss?
Organizing embroidery floss involves winding it onto bobbins. Cut a manageable length of floss, secure one end on the bobbin, wind the floss evenly, and secure the loose end. Consider sorting bobbins by color families, using labels, and storing them in a designated container for easy access.
How do you prevent embroidery floss from tangling?
To prevent embroidery floss tangling, cut a suitable length, secure one end, and wind it onto a bobbin evenly. Store bobbins in an organized manner, avoiding overlap. Using a bobbin winder can also help maintain consistent tension, reducing the likelihood of tangled threads.
Can you mix different brands of embroidery floss in a project?
Mixing different brands of embroidery floss is generally acceptable, but it’s essential to consider factors like thread thickness and texture. Testing a small sample before committing to a project ensures that the threads work well together and achieve the desired result.
Conclusion
The seemingly simple act of putting embroidery floss on a bobbin is a pivotal thread in the rich embroidery tapestry.
Beyond mere organization, this practice emerges as a cornerstone of efficiency, ensuring a smooth and enjoyable creative journey.
As we’ve explored, the bobbin becomes a silent ally in preserving the integrity of your threads, making each embroidery project a testament to both skill and care.
So, next time you embark on a stitching adventure, remember the hidden beauty in this ritual – a subtle yet indispensable part of the artistic process.
Embrace the rhythm of winding threads onto bobbins, for in doing so, you enhance your craft and weave a connection between tradition and innovation.
Let the bobbin guide your needle through the canvas of imagination and creation, ensuring that every stitch tells a story of precision and the artistry of embroidery.
Leave a Reply