Embarking on a ribbon embroidery project can be a delightful journey, but the frustration of encountering puckering can quickly turn joy into dismay.
The intricate art of ribbon embroidery is meant to enhance your creations, not leave you questioning your skills.
If you’re wondering ‘Why does my ribbon embroidery pucker,’ this guide is for you. In this exploration, we delve into the perplexing issue of puckering in ribbon embroidery – a challenge that many enthusiasts face.
Each aspect plays a crucial role in the final outcome, from the choice of materials to the subtleties of technique.
Join us as we unravel the intricacies behind this common concern, offering insights and solutions to ensure that your ribbon embroidery projects unfold smoothly, without a hint of puckering to disrupt the beauty of your creations.
Let’s embark on a journey to elevate your ribbon embroidery skills and banish puckering from your artistic endeavors.
Why Does My Ribbon Embroidery Pucker?
Embarking on the exquisite journey of ribbon embroidery can be both thrilling and challenging. One common challenge that often perplexes enthusiasts is the unwelcome appearance of puckering in their delicate creations.
Understanding the reasons behind this issue is crucial for overcoming it and elevating your ribbon embroidery skills.
Choice of Fabric
The foundation of any embroidery project lies in the fabric chosen. Puckering can occur when the fabric lacks stability or has too much stretch.
Opt for a tightly woven fabric with some weight to provide a stable canvas for your ribbon embroidery, reducing the likelihood of puckering.
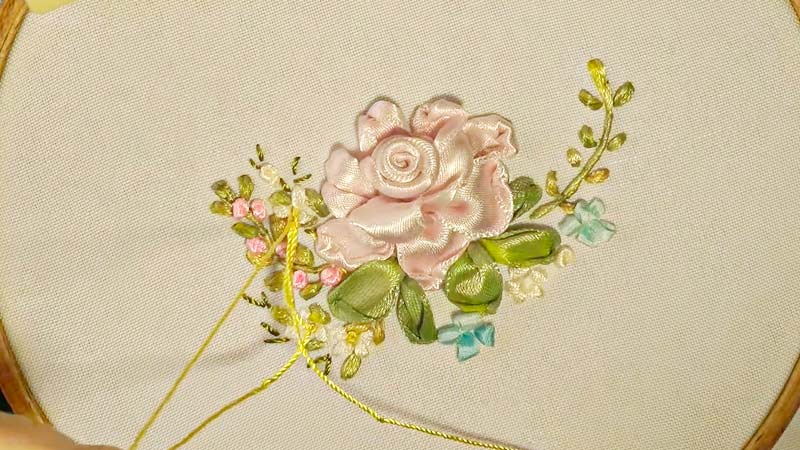
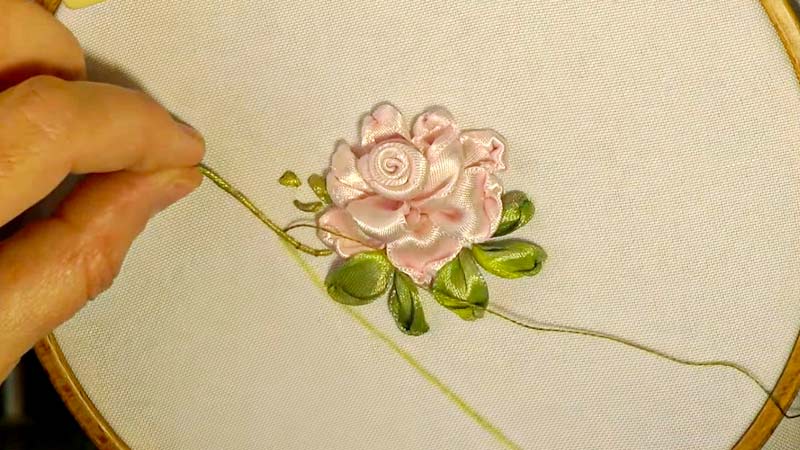
Ribbon Selection
Not all ribbons are created equal. Puckering may arise if you use ribbons that are too stiff or slippery. Experiment with different ribbon materials and textures to find the right balance. Silk and satin ribbons, for example, tend to work well to achieve a smooth, puckering-free finish.
Needle Size
The size of your needle plays a significant role in preventing puckering. A too large needle can create larger holes in the fabric, contributing to puckering.
On the other hand, a needle that is too small may struggle with certain ribbon materials. Finding the right needle size for your specific project is key to minimizing puckering.
Thread Tension
Proper tension in your thread is a delicate balance. If the tension is too tight, it can lead to puckering, while too loose tension may result in messy and uneven embroidery.
Regularly check and adjust your thread tension as you work through your ribbon embroidery project to maintain a smooth surface.
Stitching Technique
The way you execute your stitches can greatly impact the outcome. Puckering may occur if you pull the ribbon too tightly or if your stitches are uneven.
Practice a gentle and consistent stitching technique, allowing the ribbon to lay naturally on the fabric without unnecessary tension.
Hooping Techniques
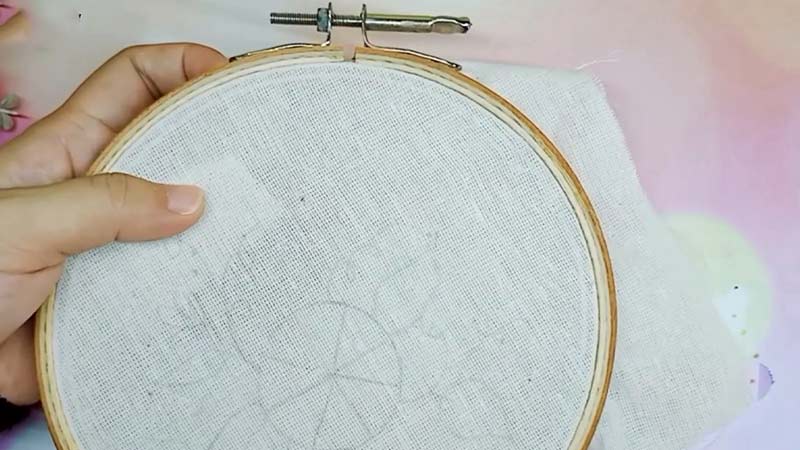
Improper hooping is a common culprit for puckering issues. Ensure that your fabric is taut and evenly stretched within the embroidery hoop. Avoid over-tightening, as this can distort the fabric and lead to puckering.
Take the time to secure your fabric properly in the hoop before starting your ribbon embroidery.
Design Complexity
Intricate and dense designs may contribute to puckering, especially if the fabric is not adequately stabilized.
Consider simplifying your design or breaking it into manageable sections, providing better control over the embroidery process and minimizing the risk of puckering.
Stabilizers and Backing
Using a stabilizer or backing fabric is a smart strategy to prevent puckering. These materials support the fabric, reducing the strain on the stitches and minimizing the chances of puckering.
Experiment with different stabilizers to find the one that best complements your chosen fabric and ribbon.
Environment and Humidity
Environmental factors can influence the behavior of both fabric and ribbon. High humidity can cause certain fabrics to stretch, leading to puckering.
Be mindful of your working environment and consider factors like temperature and humidity, adapting your approach accordingly to maintain optimal conditions for your ribbon embroidery.
Preparing Your Fabric
Preparation is key to a successful ribbon embroidery project. Washing and pressing your fabric before starting can eliminate any shrinkage or distortion contributing to puckering.
Take the time to prepare your canvas, ensuring a smooth and stable foundation for your artistic endeavors.
How to Sew Ribbon Without Puckering?
Sewing ribbon without puckering requires a combination of thoughtful preparation, precise technique, and attention to detail. Here’s a comprehensive guide to help you achieve smooth and puckering-free ribbon embroidery.
Choose the Right Ribbon
Selecting the appropriate ribbon is the first step to prevent puckering. Opt for ribbons with a texture and weight suitable for your project. Silky and satin ribbons often work well, providing a smooth surface and reducing the likelihood of puckering.
Prepare Your Fabric
Start with a well-prepared fabric. Wash and press your fabric beforehand to eliminate any shrinkage or distortions. A smooth and stable fabric foundation is essential for achieving a flawless ribbon-sewn surface.
Thread Tension
Maintain proper tension in your thread to avoid puckering. Adjust the tension on your sewing machine according to the thickness and texture of the ribbon and fabric. Regularly check and adjust the tension as needed during your sewing process.
Stitching Technique
Adopt a gentle and consistent stitching technique. Avoid pulling the ribbon too tightly, as this can lead to puckering.
Allow the ribbon to lay naturally on the fabric without unnecessary tension. Experiment with different stitch lengths and techniques to find the one that suits your project.
Experiment with Stitch Settings
Explore different stitch settings on your sewing machine. Depending on the ribbon and fabric combination, certain stitch patterns and lengths may yield better results in preventing puckering. Test various settings on scrap fabric before starting your actual project.
Consider Stabilizers
Using stabilizers can significantly reduce the chances of puckering. Place a stabilizer underneath your fabric or ribbon to provide extra support. Stabilizers help distribute the tension evenly, preventing distortion and puckering during sewing.
Avoid Overcrowding Stitches
Ensure that your stitches are evenly spaced and avoid overcrowding. Dense stitching can contribute to puckering, especially if the fabric is not adequately stabilized. Maintain a balanced and consistent stitch pattern throughout your ribbon-sewing project.
Hooping Techniques
If you’re using an embroidery hoop, properly hoop your fabric. Taut but not overly tight hooping prevents distortion and helps maintain the stability of the fabric during sewing. Adjust the hoop tension according to the requirements of your ribbon-sewing project.
Test and Adjust
Before committing to your main project, conduct tests on scrap fabric using the same materials and settings. This allows you to identify potential issues and make necessary adjustments to prevent puckering. Testing is a valuable step in achieving a polished final result.
Controlled Pressure
Control the pressure you apply when guiding the ribbon through the sewing machine. Gentle and controlled handling prevents unnecessary stretching of the fabric, reducing the risk of puckering.
How to Keep Embroidery from Puckering?
Preventing embroidery from puckering involves a combination of thoughtful preparation, proper technique, and attention to detail. Here’s a guide to help you keep your embroidery projects smooth and avoid fabric puckering when embroidering:
Correct Needle and Thread Selection
Choose the right needle and thread for your embroidery project. A too large needle can create larger holes, contributing to puckering. Use a needle suitable for your fabric and consider the thread weight in relation to the design complexity.
Mind Your Stitch Length
Experiment with stitch length settings. Longer stitches may help prevent puckering, especially on delicate fabrics. Adjust the stitch length based on the intricacy of your design and the characteristics of your chosen fabric.
Controlled Stitching Speed
Moderate the speed of your embroidery machine. Stitching too quickly can lead to uneven tension and puckering. Find a speed that allows for precise stitching while maintaining control over the embroidery process.
Embroider in Sections
For large or intricate designs, consider breaking the embroidery into smaller sections. This approach allows you to control the fabric and stabilizer better, minimizing the risk of puckering as you work through each section.
Use the Right Hoop
Choose an appropriate hoop for your embroidery project. If you’re using a hoop that is too small, it can lead to overcrowding, distortion, and puckering embroidery. Opt for a hoop that accommodates your design size, providing enough space for smooth stitching.
Minimize Dense Stitching
Intricate and densely stitched designs can contribute to puckering. Simplify your design if possible, or use techniques like underlay stitches to provide additional stability and reduce the strain on the fabric.
Environmental Considerations
Be aware of environmental factors such as humidity to avoid embroidery puckering. High humidity can affect fabric behavior, so try to maintain a stable and comfortable working environment.
FAQs
Why is My Machine Embroidery Puckering?
Machine embroidery can pucker for various reasons, such as incorrect tension, inappropriate stabilizer, or using the wrong needle. Ensure proper tension settings, choose the right stabilizer for your fabric, and use the correct needle size to minimize puckering.
How do you fix puckered fabric in machine embroidery?
To fix puckered fabric in machine embroidery, try adjusting the tension settings on your machine. Experiment with different stabilizers, ensuring they match your fabric type.
Using a suitable needle size and slowing down the embroidery speed can also help reduce puckering.
Can Fabric Choice Cause Embroidery Puckering?
Yes, the choice of fabric plays a significant role in embroidery puckering. Opt for stable, tightly woven fabrics with some weight. Fabrics that are too lightweight or stretchy may be prone to distortion and puckering during embroidery.
How to Prevent Puckering in Delicate Fabrics?
Preventing puckering in delicate fabrics involves using the right stabilizer and needle. Choose a stabilizer that provides ample support without adding unnecessary bulk.
Use a fine needle appropriate for delicate fabrics to minimize the risk of puckering.
How do you remove puckering from embroidery after it’s done?
If you’ve already completed the embroidery and notice puckering, try gently steaming the fabric without direct contact. Place a pressing cloth between the fabric and the iron, and lightly press.
If the puckering persists, consider removing the stitches in the affected area and restitching or applying a fabric relaxer to ease the tension. Always test on a scrap piece first.
Conclusion
Mastering ribbon embroidery involves a delicate dance between creativity and precision. You now know how to prevent puckering successfully.
Our journey to understand and address puckering has illuminated the importance of thoughtful material selection, technique refinement, and patience.
As you apply these insights to your future projects, remember that every stitch contributes to the tapestry of your artistic expression.
Embrace the learning process, celebrate successes and challenges, and let your ribbon embroidery reflect your skills and the passion that fuels your craft.
With newfound knowledge, may your future creations be adorned with the elegance and fluidity that ribbon embroidery promises, free from the frustration of puckering.
May the thread of inspiration guide your needle, transforming each stitch into a testament to your artistic journey. Embrace the joy of ribbon embroidery, where every pucker becomes a stepping stone to perfection.
Leave a Reply