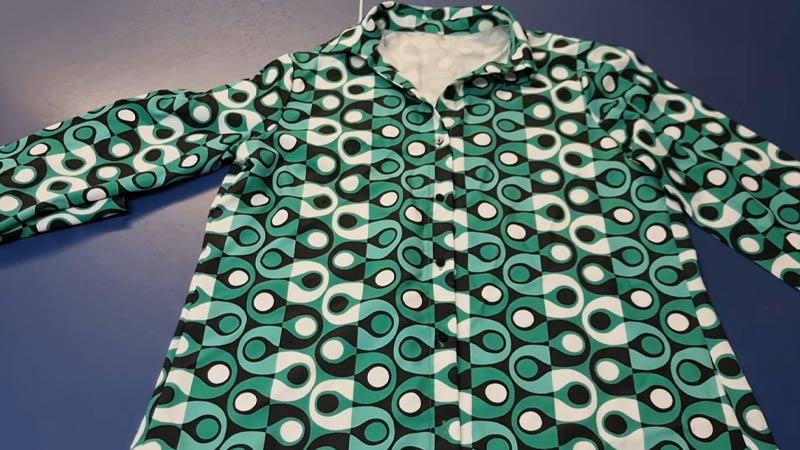
A curved hem is a decorative and functional finish for a piece of clothing. It adds visual interest to a garment and can balance out the proportions of the piece. A curved hem can be used on a variety of garments, including dresses, skirts, and tops.
To change a straight hem to a curved hem, you will need a few basic tools and materials. These include a sewing machine, thread, scissors, pins, and an iron. With these tools, you can easily transform a straight hem into a stylish and unique curved hem.
Changing a straight hem to a curved one isn’t as complex as it may seem. This blog post will guide you through the process step by step, empowering you to breathe new life into your wardrobe and redefine your style.
Whether it’s a dress, skirt, or top, this transformation can elevate your fashion game, adding a touch of sophistication and uniqueness to your attire. Unlock your creativity and dive into the world of DIY fashion as we explore how to achieve that coveted curved hem.
How to Change a Straight Hem to a Curved Hem?
Changing a straight hem to a curved hem is a sewing technique that can add a unique and stylish touch to garments.
Whether you’re altering an existing garment or creating a new one, the process involves careful planning, precise measurements, and skillful sewing.
Below are detailed instructions on how to change a straight hem to a curved hem.
Tools and Materials
Before you begin, gather the following tools and materials:
- Garment in Need of Alteration: This could be a dress, skirt, or any garment with a straight hem that you want to change to a curved hem.
- Measuring Tape: For taking accurate measurements.
- Chalk or Fabric Marker: To mark the new hemline on the fabric.
- Sharp Scissors: For cutting fabric.
- Pins: To secure fabric layers during sewing.
- Sewing Machine or Needle and Thread: Depending on your preference and the fabric type.
- Iron: For pressing seams and creating a polished finish.
Steps to Change a Straight Hem to a Curved Hem:
Step 1: Assess the Garment
Begin by examining the garment and determining the desired length of the curved hem. Consider factors such as style, fabric drape, and the overall look you want to achieve.
Step 2: Choose the Curve
Decide on the shape of the curve. Common options include a subtle curve, a high-low hem, or a more dramatic curve at the sides. This decision will guide your measurements and cutting.
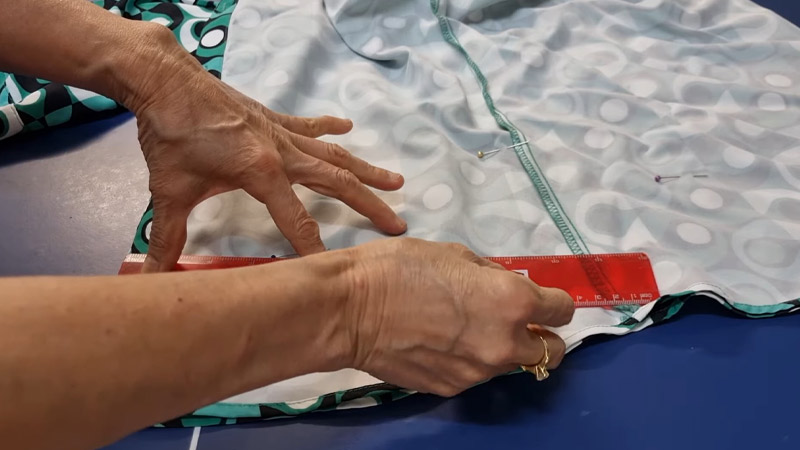
Step 3: Measure and Mark
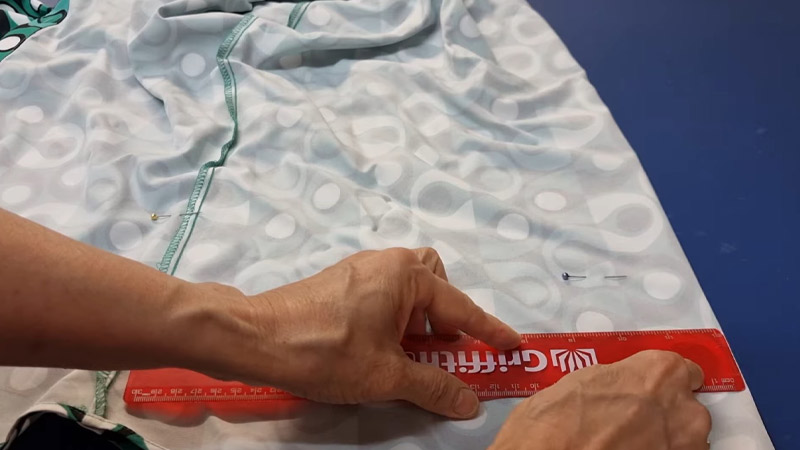
With the garment on a flat surface, use a measuring tape to measure the desired length of the new hem. Mark this length with chalk or a fabric marker at various points around the hem.
For a curved hem, the marks will be at different distances from the original hemline, depending on the curve you’ve chosen.
Step 4: Connect the Marks

Connect the marked points smoothly to create the curve. You can use a French curve or freehand it, depending on the shape you want. Ensure that the curve is consistent and visually appealing.
Step 5: Add Seam Allowance
Add a seam allowance to the curved hemline. A standard allowance is 1/2 inch (1.27 cm), but you can adjust it based on your preferences and the fabric type. Extend the curve line by this amount.
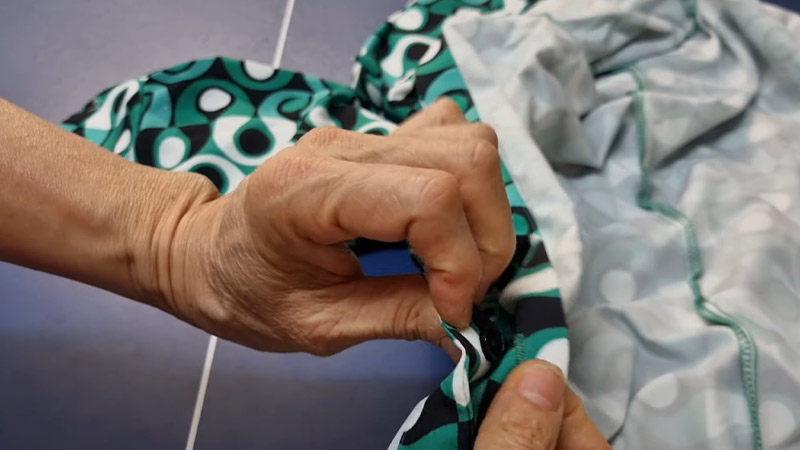
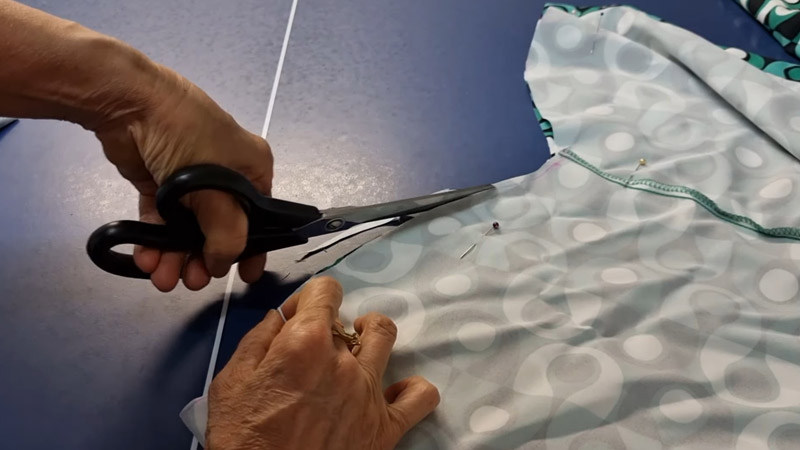
Step 6: Cut Along the New Hemline
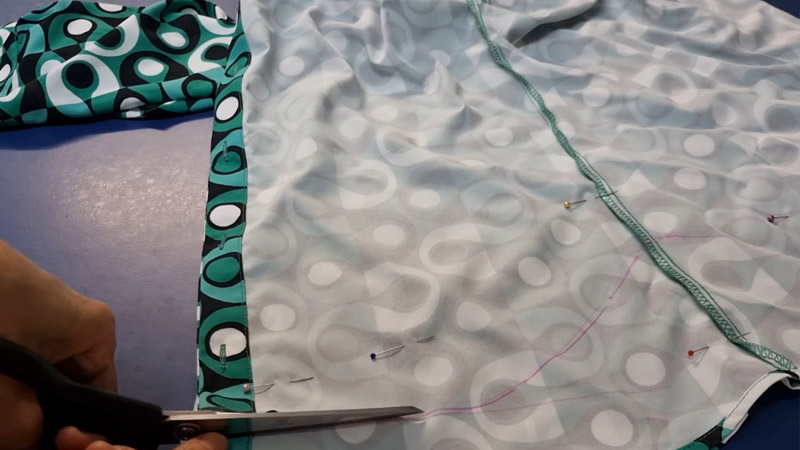
Carefully cut along the marked and extended curved hemline. Take your time to ensure a clean and precise cut. If you’re working with delicate fabrics, consider finishing the edge with a serger or a zigzag stitch to prevent fraying.
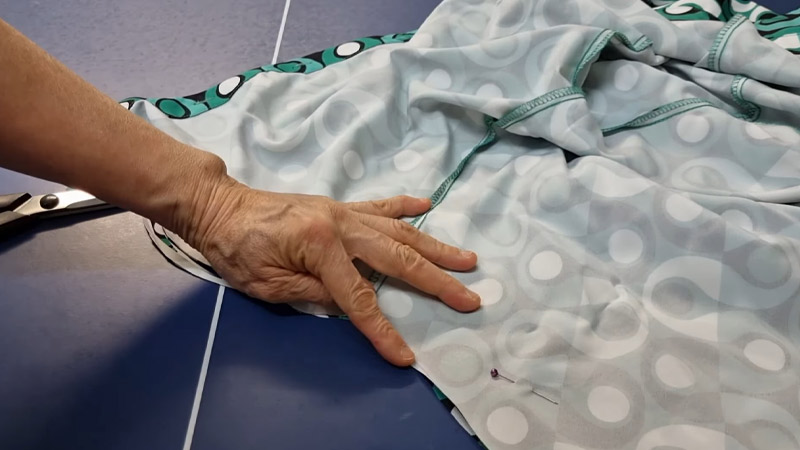
Step 7: Press the Hem
Fold the hem along the seam allowance and press it with an iron. This step will create a crisp edge and make it easier to sew.
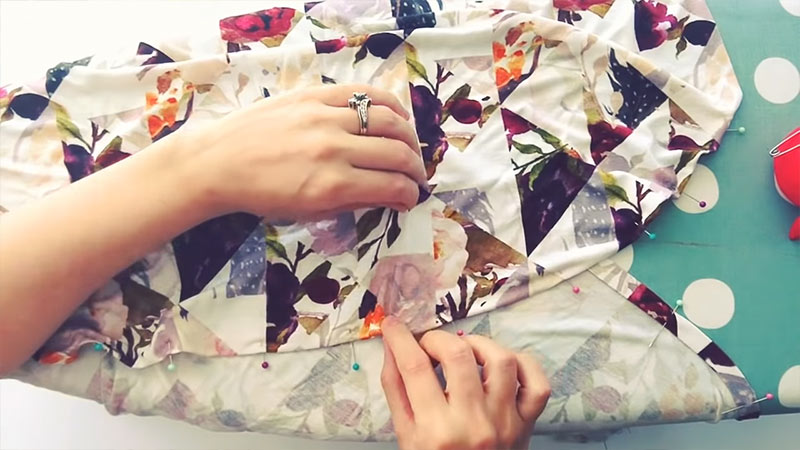
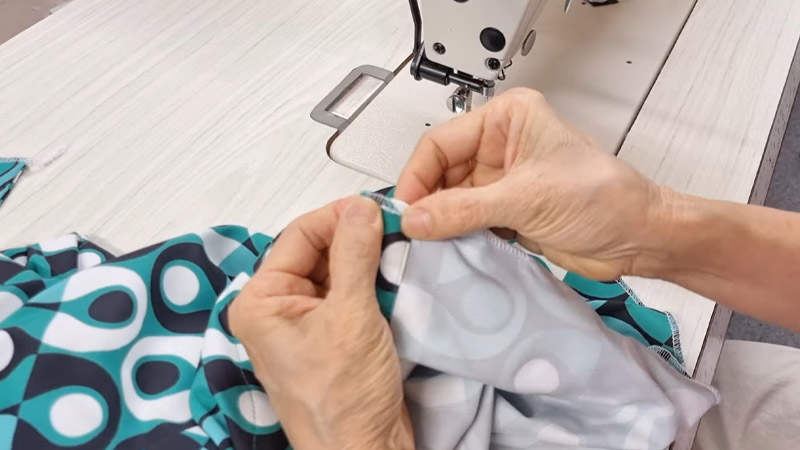
Step 8: Pin the Hem in Place
Pin the folded hem in place, securing it to the wrong side of the fabric. Place pins perpendicular to the edge to make it easier to remove them while sewing.
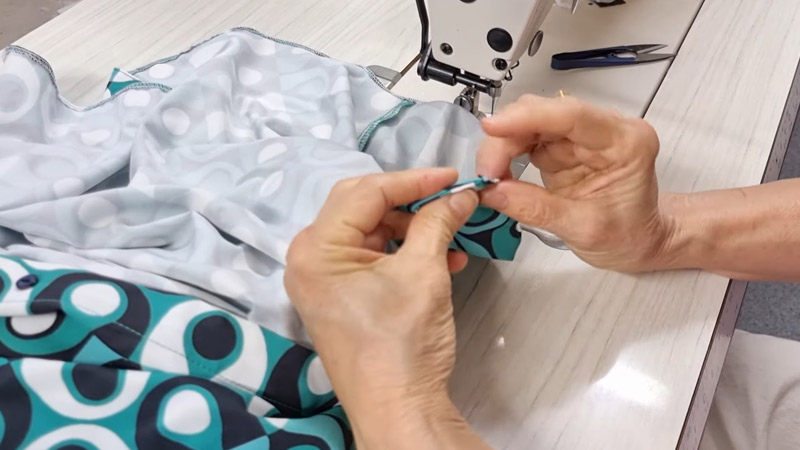
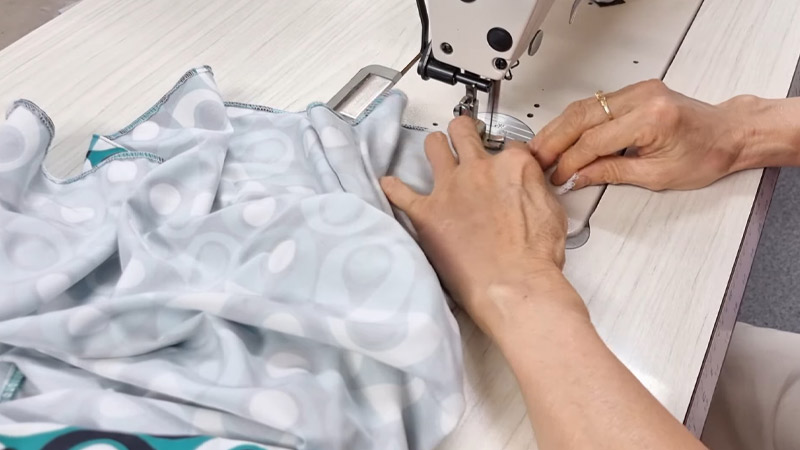
Step 9: Sew the Hem
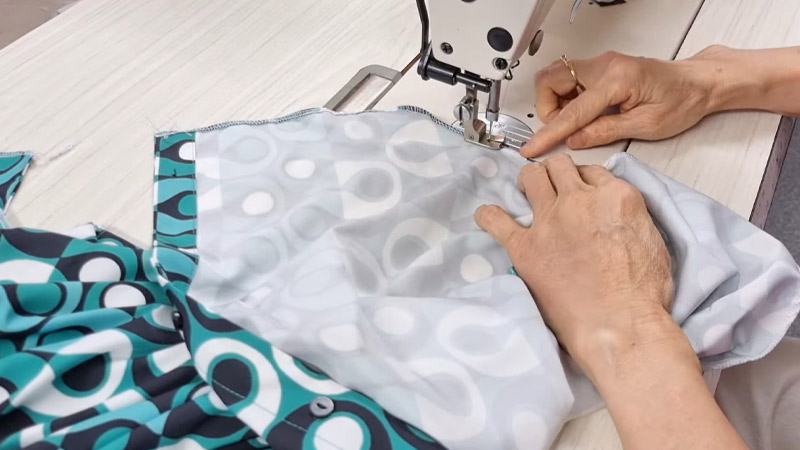
Use a sewing machine or hand-sew the hem in place. Choose a stitch that suits the fabric and provides a secure finish. If you want an invisible hem, you can use techniques like the blind hem stitch.
Step 10: Finish the Raw Edge (Optional)
If your fabric tends to fray, you may want to finish the raw edge. You can use a serger, a zigzag stitch, or bias tape to encase the raw edge and prevent fraying.
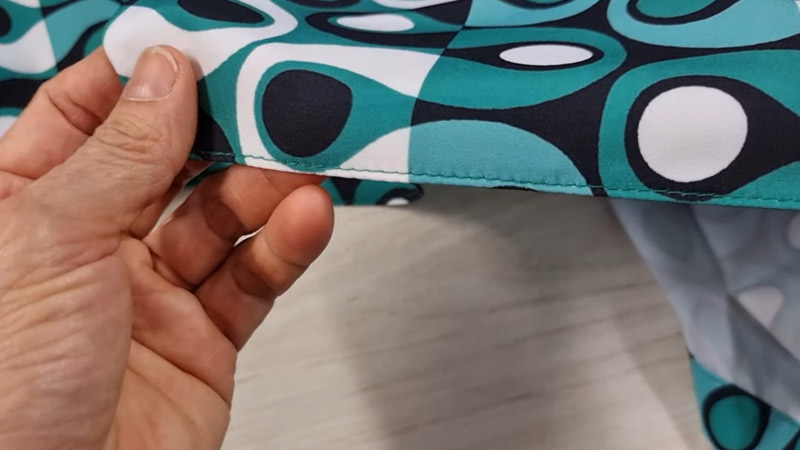
Step 11: Press Again
After sewing, press the hem again to set the stitches and ensure a polished finish. Pay special attention to the curved areas to maintain the desired shape.
Step 12: Try On and Make Adjustments
Once the hem is complete, try on the garment to check the length and the shape of the curved hem. Make any necessary adjustments based on your preferences.
By following these steps, you can successfully change a straight hem to a curved hem, adding a customized and fashionable element to your garments.
Whether you’re altering existing pieces or creating new ones, this sewing technique allows for creative expression and personalization in your wardrobe.
Tips to Change a Straight Hem to a Curved Hem
Changing a straight hem to a curved hem is a sewing technique that can add a stylish and flattering detail to garments. Whether you’re altering an existing piece or working on a sewing project, here are some tips to help you achieve a professional-looking curved hem:
1. Measure Carefully
Take accurate measurements to determine the desired length of the curved hem. Consider the style of the garment and the overall look you want to achieve. Measure from the same reference point around the hem to ensure consistency.
2. Use a French Curve or Template
To create a smooth and consistent curve, consider using a French curve or a template. These tools are designed for drawing and cutting curves in sewing projects and can help you achieve a more polished result.
3. Mark the Hemline Clearly
Use chalk or a fabric marker to mark the new hemline. Ensure that your markings are clear and easily visible, especially if you’re working with fabrics that are dark or patterned.
4. Choose the Right Curve Shape
Consider the overall design of the garment and the effect you want. You can opt for a subtle curve, a high-low hem, or a more dramatic curve at the sides.
The shape of the curve can significantly impact the look of the finished garment.
5. Practice on Scrap Fabric
If you’re uncertain about the curve or the technique, practice on scrap fabric first. This allows you to refine your skills and test different curve shapes before working on the actual garment.
6. Add Seam Allowance
Remember to add seam allowance when marking the new hemline. A standard allowance is usually around 1/2 inch (1.27 cm), but you can adjust it based on your preference and the fabric type.
7. Consider Fabric Drape
Keep in mind the drape of the fabric when choosing the curve. Lighter fabrics may drape differently than heavier ones, and the curve shape can affect the way the fabric falls.
8. Secure Fabric Layers with Pins
Pin the fabric layers securely when cutting and sewing. Placing pins perpendicular to the edge makes it easier to remove them while sewing.
This helps prevent shifting and ensures that the layers stay aligned.
9. Press the Hem
Before sewing, fold the hem along the seam allowance and press it with an iron. This creates a crisp edge and makes it easier to sew.
Pressing is especially important when working with curved hems to maintain a clean and professional finish.
10. Use Appropriate Stitches
Choose the right stitch for sewing the hem. A straight stitch or a narrow zigzag stitch may be suitable for many fabrics. For a more invisible finish, consider using a blind hem stitch.
11. Adjust as Needed
After sewing, try on the garment and check the length and shape of the curved hem. If adjustments are needed, make them before finishing the raw edges and pressing the final hem.
12. Experiment with Finishing Techniques
Depending on your preference and the fabric type, experiment with different finishing techniques for the raw edge.
Options include using a serger, a zigzag stitch, or bias tape to encase the raw edge and prevent fraying.
13. Quality Thread and Needles
Use high-quality thread appropriate for your fabric type. Also, ensure that you are using the correct needle for your sewing machine and fabric. This helps prevent thread breakage and ensures smooth sewing.
14. Check for Evenness
Before finalizing the hem, check for evenness by comparing the length at different points. This is particularly important for curved hems to maintain a balanced appearance.
15. Enjoy the Process
Sewing is a creative and enjoyable process. Enjoy experimenting with different curve shapes, fabric choices, and finishing techniques. Each project provides an opportunity to enhance your sewing skills.
Changing a straight hem to a curved hem can elevate the look of a garment, adding visual interest and a touch of sophistication.
By following these tips and taking your time with the process, you can achieve a beautifully curved hem that enhances the overall design of your clothing.
Mistakes to Avoid While Straightening Hem to a Curved Hem
When transforming a straight hem into a curved hem, it’s essential to approach the process with precision and attention to detail. Avoiding common mistakes ensures a polished and professional finish.
Here are six mistakes to steer clear of when straightening a hem to a curved hem:
Inaccurate Measurements
Taking inaccurate measurements can result in an uneven or ill-fitting curved hem. If measurements are inconsistent around the hemline, the curve may not flow smoothly.
Double-check your measurements, ensuring they are taken accurately from the same reference point around the entire hem. Use a measuring tape for precision.
Uneven Curve Shape
Creating an uneven or irregular curve can detract from the aesthetic appeal of the garment. A poorly shaped curve may look awkward and unbalanced.
Use a French curve or template to guide the curve, ensuring a smooth and consistent shape. Take your time when connecting the marked points to create an aesthetically pleasing curve.
Skipping the Seam Allowance
Neglecting to add a seam allowance to the new hemline can result in a hem that is too short. This mistake may lead to difficulties when sewing and finishing the hem.
Always add the desired seam allowance to the curved hemline before cutting. Common seam allowances range from 1/2 inch to 1 inch, depending on the garment and fabric type.
Rushing the Cutting Process
Hasty or imprecise cutting can lead to jagged or uneven edges. Cutting along the curved hemline requires careful attention to detail.
Take your time when cutting, following the marked curve precisely. Sharp fabric scissors or rotary cutters can help achieve clean and smooth edges.
Ignoring Fabric Characteristics
Different fabrics behave differently, and neglecting to consider the characteristics of the fabric can lead to complications. For instance, delicate fabrics may fray easily when cut.
Consider the type of fabric you’re working with. Finish the raw edges appropriately with techniques like serging, zigzag stitching, or bias tape to prevent fraying.
Neglecting to Press the Hem
Skipping the pressing step before sewing the hem can result in an uneven and wrinkled appearance. Pressing is crucial for achieving a polished finish.
Before sewing, fold the hem along the seam allowance and press it with an iron. This creates a crisp edge, making it easier to sew and contributing to a professional look.
By avoiding these common mistakes, you can enhance the success of transforming a straight hem into a curved hem.
Take your time, pay attention to detail, and approach the process with patience for a garment that showcases a well-executed curved hem.
How to Change A Curved Hem to a Straight Hem?
Changing a curved hem to a straight hem is a relatively straightforward alteration that can give a garment a different look or feel. Here are six easy steps to guide you through this process:
Tools and Materials
Garment with a Curved Hem: This could be a dress, skirt, or any garment with a curved hem that you want to change to a straight hem.
- Measuring Tape: For taking accurate measurements.
- Chalk or Fabric Marker: To mark the new hemline on the fabric.
- Sharp Scissors: For cutting fabric.
- Pins: To secure fabric layers during sewing.
- Sewing Machine or Needle and Thread: Depending on your preference and the fabric type.
- Iron: For pressing seams and creating a polished finish.
Steps to Change a Curved Hem to a Straight Hem:
Step 1: Assess the Garment
Begin by examining the garment and determining the desired length of the new straight hem. Consider the style of the garment and how the change will affect its overall look.
Step 2: Measure and Mark
With the garment on a flat surface, use a measuring tape to measure the desired length of the new straight hem.
Mark this length with chalk or a fabric marker at various points around the hem. Ensure that your marks are consistent.
Step 3: Connect the Marks
Connect the marked points to create a straight line. You can use a ruler or a straight edge to ensure that the line is even and perpendicular to the grain of the fabric.
Step 4: Add Seam Allowance
Add a seam allowance to the straight hemline. A standard allowance is 1/2 inch (1.27 cm), but adjust it based on your preferences and the fabric type. Extend the straight line by this amount.
Step 5: Cut Along the New Hemline
Carefully cut along the marked and extended straight hemline. Take your time to ensure a clean and precise cut. If you’re working with delicate fabrics, consider finishing the edge with a serger or a zigzag stitch to prevent fraying.
Step 6: Press and Sew the Hem
Fold the hem along the seam allowance and press it with an iron. This creates a crisp edge and makes it easier to sew.
Pin the folded hem in place, secure it to the wrong side of the fabric, and sew using a straight stitch on a sewing machine or by hand.
By following these easy steps, you can successfully change a curved hem to a straight hem, giving your garment a different and tailored look.
Table 1: Curved Hem Techniques
| Technique | Pros | Cons |
|---|---|---|
| Hem facing | The professional finish helps keep them in place | Extra work, requires cutting and attaching a strip of fabric |
| Basting and gathering | Simple, adjustable, allows for a custom fit | May create extra bulk, may be difficult to get a perfect curve on stiffer fabrics |
| Topstitching | Adds stability, decorative touch | Extra work, may not work well on very lightweight fabrics |
| Ironing with steam | Quick, easy, can help remove wrinkles and set the seam | May not work well on very lightweight fabrics, and may not create a strong enough hold on hems |
Table 2: Recommended Stitch Length for Different Fabrics
| Fabric Type | Recommended Stitch Length (in mm) |
|---|---|
| Cotton | 2.5-3.0 |
| Silk | 1.5-2.0 |
| Denim | 3.0-3.5 |
| Wool | 2.5-3.0 |
| Knits | 2.0-2.5 |
FAQs
This technique can be used on a variety of fabrics, but it may work better on some fabrics than others. Lightweight, drapey fabrics may work best, as they are easier to gather and shape into a curve. Stiffer, more rigid fabrics may be more difficult to work with, but it is still possible to create a curved hem with these fabrics with a little extra effort.
Yes, this technique can be used to shorten a garment by cutting off the excess fabric and creating a curved hem. Just be sure to measure and mark the desired length carefully, and keep in mind that the finished length will be slightly shorter due to the gathers.
Yes, you can use this technique to create a curved hem on a circular garment, such as a skirt or dress. Just be sure to measure and mark the desired length carefully, and keep in mind that the gathers may be more pronounced on a circular garment due to the added fabric.
To shorten a dress with a curved hem, measure the desired length, mark the new hemline, and cut along the marked line. Add a seam allowance, fold, and press the hem. Pin it in place, then sew using a straight stitch or a suitable stitch for the fabric type, securing the new length.
Conclusion
We covered the steps involved in changing a straight hem to a curved hem.
We discussed preparing the fabric by measuring and marking the desired length and cutting off the excess fabric, sewing the curved hem by pinning the fabric in place, sewing a basting stitch, gathering the fabric to create a curve, adjusting the gathers as needed, and sewing a final seam to hold the gathers in place.
We also covered finishing the hem by pressing it with an iron and optional topstitching for added stability.
We also offered some tips and tricks for success, including considering using a hem facing to finish the edge of the fabric for a more professional look, practicing on a scrap piece of fabric before starting on the final project, and using a contrasting thread color to make the basting stitches easier to remove later.
We encourage you to try this technique on your own garments for a unique and stylish finish. With a little practice and patience, you’ll be able to transform a straight hem into a beautifully curved hem in no time.
Leave a Reply