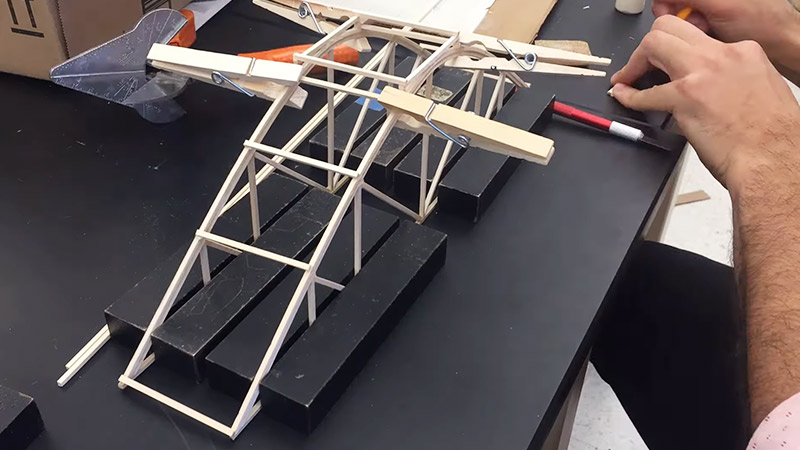
Introduction: Balsa wood is a lightweight and strong material that is commonly used in model building, and other craft projects, but it can be prone to damage and may need to be strengthened. There are several methods for making balsa wood stronger, each with its own benefits and drawbacks.
These methods include applying epoxy resin, using a reinforcing material, and lamination. Each method has its own unique benefits and drawbacks, and the cost and effectiveness can vary. Choosing the right method for your project depends on a variety of factors, including the desired strength, weight, cost, and ease of execution.
In this guide, we will discuss each of these methods in detail, including the tools and materials required, and step-by-step instructions for each method, as well as their comparison in terms of cost and effectiveness, and any additional notes that should be taken into consideration.
This guide is intended to provide an overview of the different methods available to make balsa wood stronger, and to help you make an informed decision when choosing the right method for your project.
Applying Epoxy Resin
Applying epoxy resin is a popular method for making balsa wood stronger because it creates a durable and protective layer on the surface of the wood.
Here is a step-by-step guide for applying epoxy resin to balsa wood, along with a list of the tools and materials you will need:
Tools and Materials:
- Epoxy resin and hardener
- Mixing cups and stir sticks
- Plastic sheeting or paint drop cloths
- Paintbrushes or foam rollers
- Gloves
- Protective eyewear
- Ventilation mask
- Heat gun or torch (optional)
Step-by-step guide:
- Cover your work area with plastic sheeting or paint drop cloths to protect your floor or table.
- Mix the epoxy resin and hardener together in a mixing cup according to the manufacturer’s instructions.
- Wear gloves, protective eyewear, and a ventilation mask while working with the epoxy resin.
- Use a paintbrush or foam roller to apply a thin coat of epoxy to one side of the balsa wood piece.
- Use a heat gun or torch to pop any bubbles in the epoxy. Be careful not to overheat the epoxy as it may discolor or burn
- Allow the epoxy to dry according to the manufacturer’s instructions.
- Apply a second coat of epoxy to the opposite side of the balsa wood piece.
- Allow the epoxy to dry completely before handling the balsa wood.
Note: It’s also important to note that Epoxy needs a certain temperature range to cure properly usually between 60-90°F, if the temperature is too low it will take longer to cure or might not cure at all. Also, before applying epoxy, the surface must be clean, dry, and free of dust or debris.
Using a Reinforcing Material
Using a reinforcing material is another method for making balsa wood stronger. This method involves adding a layer of strong and durable material, such as fiberglass or carbon fiber, to the surface of the balsa wood.
Here is a step-by-step guide for using a reinforcing material to strengthen balsa wood, along with a list of the tools and materials you will need:
Tools and Materials:
- Epoxy resin and hardener
- Fiberglass or carbon fiber fabric or tape
- Mixing cups and stir sticks
- Plastic sheeting or paint drop cloths
- Paintbrushes or foam rollers
- Scissors or a utility knife
- Gloves
- Protective eyewear
- Ventilation mask
- Heat gun or torch (optional)
Step-by-step guide:
- Cover your work area with plastic sheeting or paint drop cloths to protect your floor or table.
- Mix the epoxy resin and hardener together in a mixing cup according to the manufacturer’s instructions.
- Wear gloves, protective eyewear, and a ventilation mask while working with the epoxy resin and reinforcing material.
- Use scissors or a utility knife to cut the fiberglass or carbon fiber fabric or tape to the appropriate size for the balsa wood piece.
- Use a paintbrush or foam roller to apply a thin coat of epoxy to one side of the balsa wood piece.
- Apply the fiberglass or carbon fiber fabric or tape to the epoxy-coated side of the balsa wood, smoothing out any wrinkles or bubbles.
- Use a heat gun or torch to pop any bubbles in the epoxy. Be careful not to overheat the epoxy as it may discolor or burn.
- Allow the epoxy to dry according to the manufacturer’s instructions.
- Repeat steps 5 through 8 on the opposite side of the balsa wood piece.
- Allow the epoxy to dry completely before handling the balsa wood.
As before, it’s important to keep in mind the curing temperature for epoxy and make sure the surface is clean, dry, and debris-free before applying the epoxy. Also, the epoxy should be applied in a thin coat to prevent it from weighing down on the balsa wood and distorting its shape
Lamination
Lamination is a method of making balsa wood stronger by gluing multiple thin layers of balsa wood together. This method is particularly effective at increasing the structural strength of balsa wood while maintaining its lightweight properties.
Here is a step-by-step guide for laminating balsa wood, along with a list of the tools and materials you will need:
Tools and Materials:
- Thin sheets of balsa wood
- Wood glue or epoxy resin
- Plastic sheeting or paint drop cloths
- Paintbrushes or foam rollers
- Clamps or heavy weights
- Sandpaper
- Gloves
- Protective eyewear
- Ventilation mask (if using epoxy resin)
Step-by-step guide:
- Cover your work area with plastic sheeting or paint drop cloths to protect your floor or table.
- Cut the thin sheets of balsa wood to the appropriate size for the balsa wood piece you want to strengthen.
- Apply a thin layer of wood glue or epoxy resin to one side of one of the balsa wood sheets using a paintbrush or foam roller.
- Carefully place another balsa wood sheet on top of the glued or resin-coated sheet, aligning the edges as closely as possible.
- Repeat steps 3 and 4, stacking additional balsa wood sheets on top of each other.
- Clamp or weigh down the laminated balsa wood stack to apply pressure while the glue or resin dries.
- Allow the glue or resin to dry according to the manufacturer’s instructions.
- Once dry, remove the clamps or weights and sand the surface of the laminated balsa wood to smooth out any rough spots.
- Repeat the process for the opposite side
Note that in this method, it is important to choose the right glue, PVA or Epoxy are common choices and both will work fine. If using Epoxy, it is important to follow the precautions mentioned earlier.
It’s also recommended to use thin sheets of balsa wood to avoid adding too much weight to the structure.
Comparison Between Each Method
Cost:
Applying epoxy resin is generally more expensive than the other two methods because it requires the purchase of specialized epoxy products, including the resin and hardener, as well as additional materials such as mixing cups and stirs sticks.
Using a reinforcing material such as fiberglass or carbon fiber can also be more expensive because these materials are typically more expensive than wood glue or balsa wood itself. Lamination is the cheapest method as it only requires glue or adhesive and multiple thin sheets of balsa wood.
Effectiveness
Applying epoxy resin can be very effective at making balsa wood stronger by creating a protective layer that seals and protects the wood from moisture and other forms of damage. However, epoxy can be difficult to work with and may add a significant amount of weight to the balsa wood.
Using a reinforcing material such as fiberglass or carbon fiber can also be effective, but this method requires a significant amount of skill and precision to be done correctly.
Lamination is considered the most effective for making balsa wood stronger because it increases the structural strength of the wood while still maintaining its lightweight properties. This method has the added advantage of being easy to execute and also creating different desired shapes.
Comparison Table of Methods for Strengthening Balsa Wood
| Method | Cost | Effectiveness | Additional notes |
|---|---|---|---|
| Epoxy Resin | High | High | Difficult to work with, adds weight |
| Reinforcing Material | Moderate to High | Moderate to High | Requires precision and skill |
| Lamination | Low | High | Easy to execute and maintain lightweight properties |
You can use this table as a reference to quickly compare the methods and their associated cost, effectiveness, and additional notes. Keep in mind, this is a summary and each situation might have different requirements and these factors can change.
FAQs
The methods described in this guide are specifically tailored to balsa wood, and while some of them may be able to be used on other types of wood, they may not be as effective or have different results. If you are planning to use a different type of wood, it is best to consult with a professional or do some research to determine the best method for that particular type of wood.
Epoxy resin is the most commonly used resin for making balsa wood stronger because of its durability and versatility. However, other types of resins such as polyester or polyurethane resin can also be used. However, these resins may have different properties, including different cure times, strength, and durability, and may require different application techniques. It’s best to consult with a professional or do some research to determine the best type of resin for your project.
These methods are primarily used on raw balsa wood before construction. If the model has already been built, the process of applying these methods may be more difficult and may require disassembling the model. In addition, it might be difficult to achieve the desired results.
These methods are primarily used for indoor projects, However, the methods are specifically designed to increase the strength and durability of balsa wood, so they can potentially be used in outdoor projects. Keep in mind that outdoor projects may require additional protection from UV radiation and other weather conditions. It’s best to consult with a professional or do some research to determine the best method for your outdoor project.
The number of layers needed will depend on the desired strength and thickness of the balsa wood piece. Typically, using more layers will increase the strength of the balsa wood, but it may also add weight. As a general rule, using 4-6 layers is a good starting point, but you can adjust the number of layers based on your project’s requirements.
Conclusion
Making balsa wood stronger can be achieved through different methods including applying epoxy resin, using a reinforcing material, and lamination. Each of these methods has its own unique benefits and drawbacks.
Applying epoxy resin is the most expensive method but it is effective at making balsa wood stronger. Using a reinforcing material such as fiberglass or carbon fiber can also be effective but it is costly.
Lamination is the most cost-effective and also the most effective method for making balsa wood stronger. It is easy to execute and maintain lightweight properties. The best method for you will depend on your individual needs, preferences, and budget.
Keep in mind that outdoor projects may require additional protection and consult with a professional or do some research before starting a project, also it’s important to follow the safety precautions.
These methods were described with balsa wood, but it’s important to keep in mind that other types of wood may have different results.
Leave a Reply