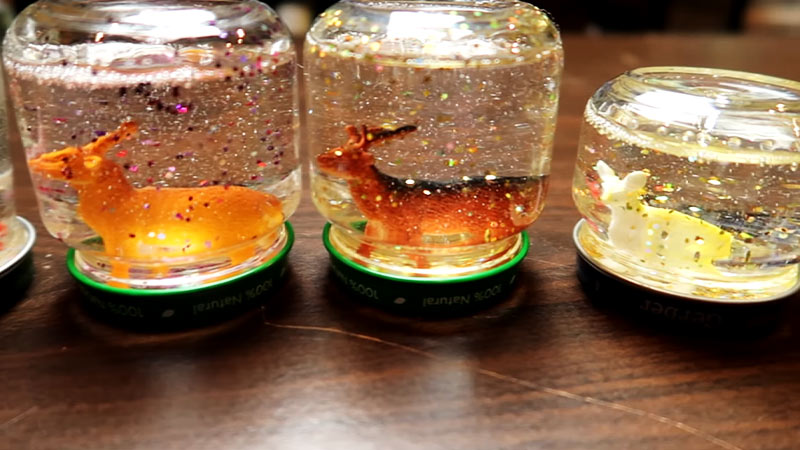
Snow globes are a classic holiday decoration that brings a touch of winter wonderland to any home. These small, clear containers are filled with a liquid such as water or alcohol, along with small decorative elements like beads, glitter, or sequins.
When the container is shaken, the decorative elements are suspended in the liquid, creating a snowy effect. Snow globes can be purchased pre-made, but they can also be easily made at home with a few simple materials.
In this guide, we will explore the various methods for making a snow globe at home and provide step-by-step instructions for each method.
Using a Clear Plastic Jar
A snow globe is a fun and festive way to bring a little winter wonderland into your home. You can make your own snow globe using a clear plastic jar, vegetable oil, rubbing alcohol, food coloring, and any other decorative elements you like such as beads, glitter, or sequins.
Step-by-step guide:
- Gather your materials: You will need a clear plastic jar with a tight-fitting lid, vegetable oil, rubbing alcohol, food coloring, and any decorative elements you want to include.
- Fill the jar about 1/4 full with rubbing alcohol: Pour the rubbing alcohol into the jar until it reaches about 1/4 of the way up the jar.
- Add a drop of food coloring: Choose your desired color and add a drop of food coloring to the rubbing alcohol in the jar.
- Add beads, glitter, or sequins: Drop any decorative elements you want to include into the jar.
- Pour in vegetable oil: Carefully pour vegetable oil into the jar until it is about 3/4 full.
- Tightly screw on the lid: Make sure the lid is screwed on tightly to prevent any leaks.
- Gently shake the jar: Hold the jar securely and gently shake it to create the snowy effect.
- Let the oil settle: Set the jar down and allow the oil to settle again.
Tools needed:
- Clear plastic jar with a tight-fitting lid
- Vegetable oil
- Rubbing alcohol
- Food coloring
- Beads, glitter, or sequins (optional)
Using a Clear Glass Jar
A snow globe is a fun and festive way to bring a little winter wonderland into your home. You can make your own snow globe using a clear glass jar, vegetable oil, rubbing alcohol, food coloring, and any other decorative elements you like such as beads, glitter, or sequins.
Step-by-step guide:
- Gather your materials: You will need a clear glass jar with a tight-fitting lid, vegetable oil, rubbing alcohol, food coloring, and any decorative elements you want to include.
- Fill the jar about 1/4 full with rubbing alcohol: Pour the rubbing alcohol into the jar until it reaches about 1/4 of the way up the jar.
- Add a drop of food coloring: Choose your desired color and add a drop of food coloring to the rubbing alcohol in the jar.
- Add beads, glitter, or sequins: Drop any decorative elements you want to include into the jar.
- Pour in vegetable oil: Carefully pour vegetable oil into the jar until it is full.
- Tightly screw on the lid: Make sure the lid is screwed on tightly to prevent any leaks.
- Gently shake the jar: Hold the jar securely and gently shake it to create the snowy effect.
- Let the oil settle: Set the jar down and allow the oil to settle again.
Tools needed:
- Clear glass jar with a tight-fitting lid
- Vegetable oil
- Rubbing alcohol
- Food coloring
- Beads, glitter, or sequins (optional)
Using a Clear Plastic Bottle
A snow globe is a fun and festive way to bring a little winter wonderland into your home. You can make your own snow globe using a clear plastic bottle, vegetable oil, rubbing alcohol, food coloring, and any other decorative elements you like such as beads, glitter, or sequins.
Step-by-step guide:
- Gather your materials: You will need a clear plastic bottle with a tight-fitting cap, vegetable oil, rubbing alcohol, food coloring, and any decorative elements you want to include.
- Fill the bottle about 1/4 full with rubbing alcohol: Pour the rubbing alcohol into the bottle until it reaches about 1/4 of the way up the bottle.
- Add a drop of food coloring: Choose your desired color and add a drop of food coloring to the rubbing alcohol in the bottle.
- Add beads, glitter, or sequins: Drop any decorative elements you want to include into the bottle.
- Pour in vegetable oil: Carefully pour vegetable oil into the bottle until it is full.
- Tightly screw on the cap: Make sure the cap is screwed on tightly to prevent any leaks.
- Gently shake the bottle: Hold the bottle securely and gently shake it to create the snowy effect.
- Let the oil settle: Set the bottle down and allow the oil to settle again.
Tools needed:
- Clear plastic bottle with a tight-fitting cap
- Vegetable oil
- Rubbing alcohol
- Food coloring
- Beads, glitter, or sequins (optional)
Using a Clear Glass Bottle
A snow globe is a fun and festive way to bring a little winter wonderland into your home. You can make your own snow globe using a clear glass bottle, vegetable oil, rubbing alcohol, food coloring, and any other decorative elements you like such as beads, glitter, or sequins.
Step-by-step guide:
- Gather your materials: You will need a clear glass bottle with a tight-fitting cap, vegetable oil, rubbing alcohol, food coloring, and any decorative elements you want to include.
- Fill the bottle about 1/4 full with rubbing alcohol: Pour the rubbing alcohol into the bottle until it reaches about 1/4 of the way up the bottle.
- Add a drop of food coloring: Choose your desired color and add a drop of food coloring to the rubbing alcohol in the bottle.
- Add beads, glitter, or sequins: Drop any decorative elements you want to include into the bottle.
- Pour in vegetable oil: Carefully pour vegetable oil into the bottle until it is full.
- Tightly screw on the cap: Make sure the cap is screwed on tightly to prevent any leaks.
- Gently shake the bottle: Hold the bottle securely and gently shake it to create the snowy effect.
- Let the oil settle: Set the bottle down and allow the oil to settle again.
Tools needed:
- Clear glass bottle with a tight-fitting cap
- Vegetable oil
- Rubbing alcohol
- Food coloring
Beads, glitter, or sequins (optional)
Comparison Between Each Method
Making a snow globe can be a fun and festive activity for all ages. There are several different methods for creating your own snow globe, including using a clear plastic jar, clear glass jar, clear plastic bottle, or clear glass bottle.
In this comparison, we will examine the differences between these methods and determine which one is the most cost-effective and effective overall.
Cost Comparison
- Clear plastic jar: This method is relatively cheap, as clear plastic jars can be easily found at most dollar stores or discount stores for a low price.
- Clear glass jar: This method may be slightly more expensive, as clear glass jars can be more difficult to find and may be priced higher than plastic jars.
- Clear plastic bottle: This method is also relatively cheap, as clear plastic bottles can be easily found at most dollar stores or discount stores for a low price.
- Clear glass bottle: This method may be the most expensive, as clear glass bottles can be more difficult to find and may be priced higher than plastic bottles or jars.
Efficiency Comparison
- Clear plastic jar: This method is effective at creating a snow globe, as the plastic material is lightweight and easy to handle. The plastic material also does not break easily, making it a safe option for children to use.
- Clear glass jar: This method is also effective at creating a snow globe, as the glass material is clear and allows for a clear view of the inside contents. However, the glass material may be more fragile and prone to breaking, making it less suitable for children to use.
- Clear plastic bottle: This method is effective at creating a snow globe, as the plastic material is lightweight and easy to handle. The plastic material also does not break easily, making it a safe option for children to use.
- Clear glass bottle: This method is effective at creating a snow globe, as the glass material is clear and allows for a clear view of the inside contents. However, the glass material may be more fragile and prone to breaking, making it less suitable for children to use.
Overall Comparison
Based on cost and efficiency, the clear plastic jar and clear plastic bottle methods are the most cost-effective and effective options for creating a snow globe. These methods are cheap, easy to handle, and safe for children to use.
The clear glass jar and clear glass bottle methods may be slightly more expensive and fragile, but they still offer a clear view of the inside contents. Ultimately, the choice of method will depend on personal preference and the availability of materials.
Comparison Table
| Method | Cost | Effectiveness | Safety for Children |
|---|---|---|---|
| Clear plastic jar | Cheap | Effective | Safe |
| Clear glass jar | Expensive | Effective | Less Safe |
| Clear plastic bottle | Cheap | Effective | Safe |
| Clear glass bottle | Expensive | Effective | Less Safe |
FAQs
Yes, you can use other types of oil such as mineral oil or baby oil in your snow globe. However, vegetable oil is a common choice because it is clear and relatively inexpensive.
Yes, you can use other types of containers such as a small fish tank or a large mason jar to make a snow globe. Just make sure the container is clear and has a tight-fitting lid or cap.
Yes, you can use other types of decorative elements such as small figurines, plastic snowflakes, or small holiday ornaments. Just make sure the elements are small enough to fit inside the container and do not interfere with the movement of the oil and alcohol.
Yes, you can add water to your snow globe instead of alcohol. However, the water may not mix as well with the oil and may not create as much of a snowy effect as the alcohol.
Yes, you can use other types of food coloring such as gel or powder food coloring. Just make sure to mix the food coloring with the alcohol or water before adding it to the snow globe to ensure it is evenly distributed.
Conclusion
Making a snow globe is a fun and festive activity that can be enjoyed by people of all ages. There are several different methods for creating a snow globe, including using a clear plastic jar, clear glass jar, clear plastic bottle, or clear glass bottle.
Each method has its own advantages and disadvantages, such as cost and effectiveness, but all can produce a beautiful and unique snow globe. Ultimately, the choice of method will depend on personal preference and the availability of materials.
Leave a Reply