Utilizing a sanding block in drawing introduces a unique fusion of traditional artistic expression and tactile craftsmanship.
This unconventional approach involves incorporating the textured nuances of a sanding block into the creative process, transforming conventional drawings into tactile and visually intriguing pieces.
The sanding block becomes a tool for both shaping and refining the drawing surface, allowing artists to explore the interplay between texture, shadow, and form.
This innovative technique challenges the boundaries of traditional art forms, inviting artists to engage with their work on a multi-sensory level.
Through this exploration, the marriage of fine art and craftsmanship unveils a novel avenue for artistic expression, pushing the boundaries of creativity and sensory experience.
What Is a Sanding Block Used for in Drawing?
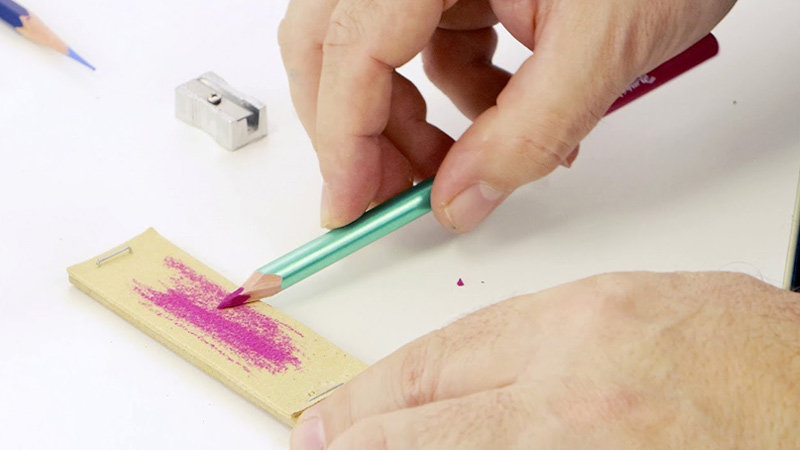
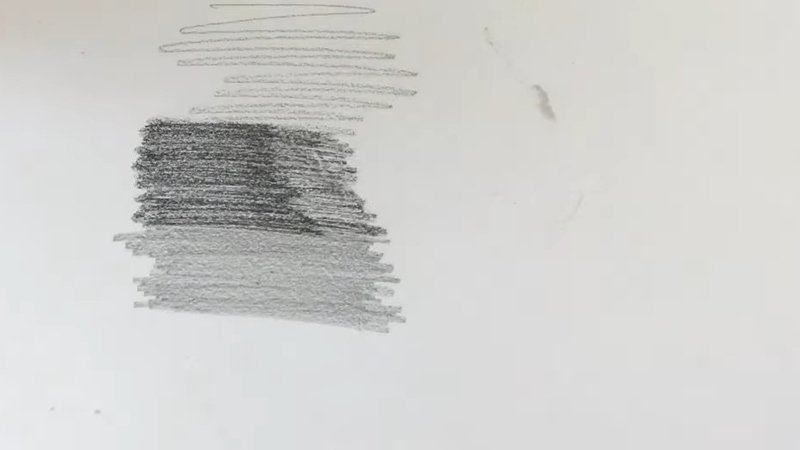
A sanding block, traditionally associated with woodworking, finds an innovative application in drawing as a tool for texture manipulation.
In artistic contexts, a sanding block becomes a tactile instrument, altering the surface of the drawing medium.
Artists utilize it to create unique textures, add depth, and introduce a sensory dimension to their artwork.
By rubbing the sanding block over the drawing surface, they can achieve varying degrees of smoothness or roughness, pushing the boundaries of traditional drawing techniques.
This unconventional use of a sanding block in drawing offers artists a novel means to experiment and enrich their creative expressions with added visual and tactile nuances.
Steps on How to Use Sanding Block Drawing?
Using a sanding block in the drawing is an innovative technique that adds a unique tactile dimension to your artwork.
Here’s a step-by-step guide on how to effectively use a sanding block in your drawing process:
Selecting the Right Sanding Block
Consider the specific needs of your artwork, such as the scale and nature of the textures you aim to achieve.
A medium to fine grit provides a good balance for most drawing applications, but if you seek more pronounced textures, you might explore coarser grits.
Assess the material of the sanding block. Foam blocks offer flexibility, allowing for contouring to curved surfaces, while hard blocks provide more precision and control, especially for detailed work.
Prepare Your Drawing Surface
Before starting, ensure that your drawing medium is applied consistently and securely to the surface.
The stability of a high-quality paper or drawing board is essential to prevent unintended removal or damage during the sanding process.
Consider the absorbency of the paper; more absorbent surfaces may respond differently to sanding compared to smoother or coated papers.
Identify Areas for Texture Manipulation
Take a thoughtful approach to identifying areas for texture manipulation. Consider the thematic elements of your artwork.
For landscapes, sandy or rocky textures may be appropriate, while fabric textures can enhance the realism of clothing or drapery.
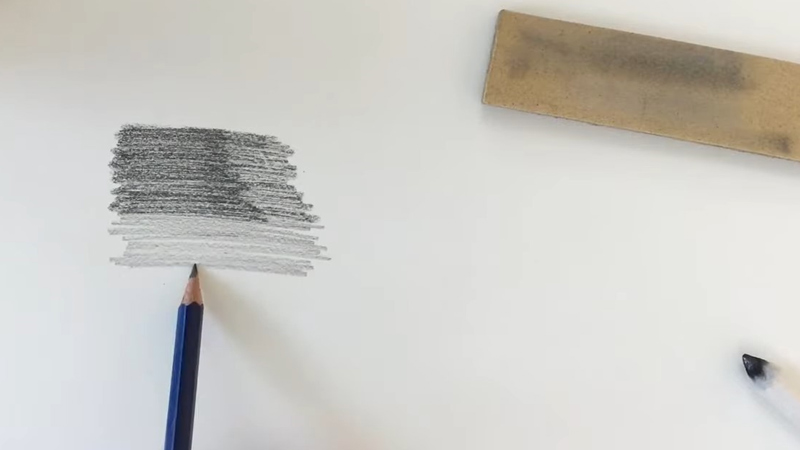
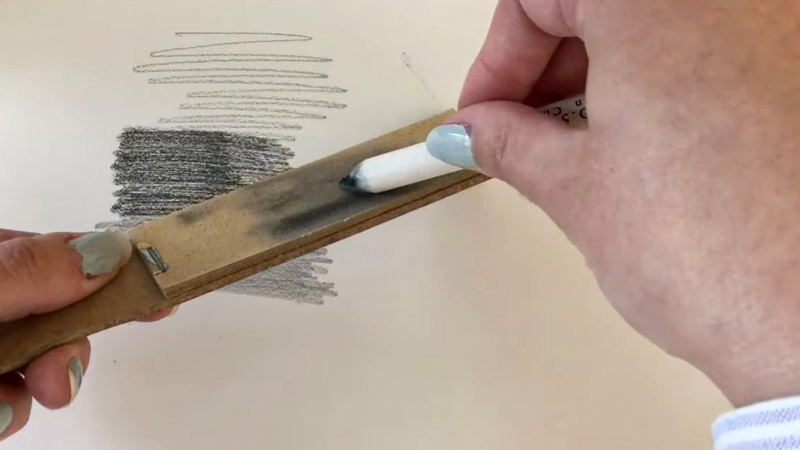
Start Sanding
Initiate the sanding process with a light touch, gradually increasing pressure based on the desired effect.
Different drawing mediums respond uniquely to the sanding block, so be attentive to how graphite, charcoal, or pastels interact with the abrasive surface.
Experiment with stroke angles and directions to diversify the textures. Horizontal, vertical, or circular motions can produce distinct results.
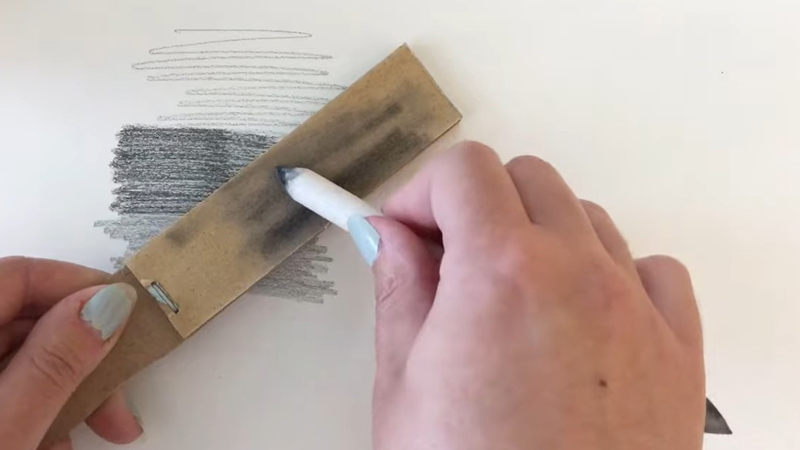
Blend and Smooth
Recognize the dual functionality of the sanding block. In addition to adding texture, it serves as a blending tool.
Smooth transitions between textured and non-textured areas contribute to a visually cohesive composition.
Use the sanding block to create gradients and seamlessly integrate different elements within your drawing.
Selective Texture Enhancement
Approach texture enhancement strategically. Focus on areas that serve as focal points or demand heightened emphasis.
By selectively enhancing texture, you guide the viewer’s gaze, contributing to the overall narrative and visual impact of your artwork.
Experiment with Layering
When working with multiple layers or various drawing mediums, use sanding between layers to your advantage.
This technique can reveal underlying textures and create an intricate interplay between different elements. Layered sanding introduces complexity and depth to your artwork.
Clean the Drawing Surface
Regularly cleaning the drawing surface is crucial during the sanding process. A soft brush helps remove generated debris, ensuring a clear view of the evolving textures.
This practice also prevents unwanted particles from interfering with the sanding or adhering to the drawing surface.
Evaluate and Adjust
Take breaks to step back and evaluate the evolving textures in your artwork. Assess how the sanding enhances or alters the overall composition.
Make adjustments as needed, fine-tuning the balance between smooth and textured areas to achieve the desired visual and tactile harmony.
Seal the Artwork
If you decide to preserve the textured effects, applying a fixative or clear sealant is optional but recommended.
This step not only protects the artwork from smudging but also safeguards it against environmental factors, making it suitable for display or regular handling. Choose a fixative that doesn’t alter the appearance of the textured surfaces.
What to Consider When Using Sanding Block in Drawing?
When incorporating a sanding block into your drawing process, several considerations can enhance the effectiveness and success of this unconventional technique.
Here’s a guide on what to consider when using a sanding block in drawing:
Drawing Surface Quality
Opt for a high-quality drawing surface that complements the abrasive nature of the sanding block.
The paper or board should have a smooth and even texture to allow for consistent results. Experiment with different surfaces to find the one that best suits your drawing style and desired effects.
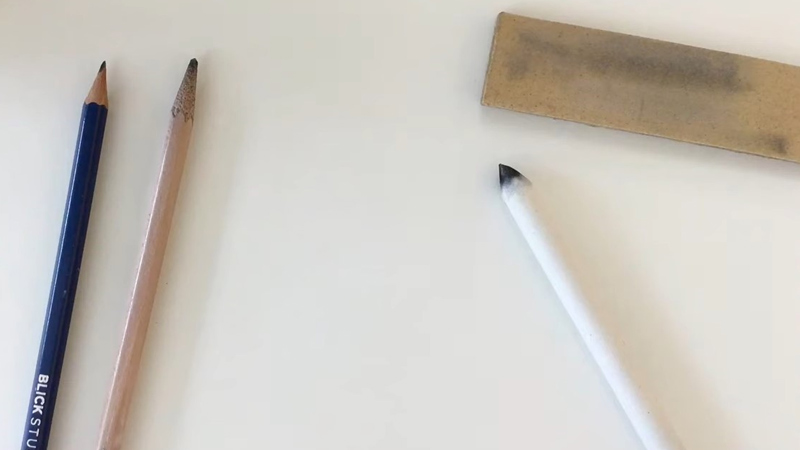
Sanding Block Grit
Understand the impact of grit on the texture you want to achieve. Coarser grits, like 120, create more pronounced textures suitable for bold effects, while finer grits, such as 220, offer subtler results.
Tailor your choice of grit to the specific visual and tactile qualities you envision for your artwork.
Drawing Medium Compatibility
Be mindful of how different drawing mediums interact with the sanding block. Graphite, charcoal, pastels, and other materials may respond differently to abrasion.
Conduct small tests to observe how each medium behaves and adjust your technique accordingly to achieve the desired effects.
Controlled Pressure
Practice using controlled pressure when sanding. Gradually increase or decrease pressure based on the desired outcome.
Avoid excessive force, as it may compromise the integrity of the drawing surface or lead to unintended removal of the medium. A gentle touch allows for nuanced control over the texture.
Sanding Block Material
Consider the material of the sanding block about the textures you want to create.
Foam blocks offer flexibility and are suitable for broader strokes, while hard blocks provide precision and are ideal for detailed work.
Choose the block material that aligns with your artistic goals and the specific areas of your drawing you intend to enhance.
Protective Measures
Prioritize your safety by wearing gloves to shield your hands from the abrasive surface of the sanding block.
Additionally, consider using a mask to prevent inhaling particles that may be released during the sanding process, especially if you are working on a larger scale.
Strategic Texture Application
Plan the application of texture strategically. Identify key areas in your drawing where texture can enhance the overall visual impact.
Think about the narrative of your artwork and apply texture thoughtfully to elements like landscapes, fabrics, or specific details to add depth and interest.
Experimentation
Embrace the spirit of experimentation. The beauty of using a sanding block lies in its unpredictability.
Explore different stroke angles, pressures, and directions to discover a variety of textures.
Allow yourself the freedom to be surprised by the unexpected results that may enrich your artistic expression.
Layering Techniques
Explore layering techniques when working with multiple drawing mediums or layers. Sanding between layers can expose underlying textures, creating a dynamic interplay of different elements within your artwork.
This layering adds complexity and depth, contributing to a more intricate visual experience.
Cleaning the Surface
Regularly clean the drawing surface with a soft brush during the sanding process. This ensures a clear view of the evolving textures and prevents unwanted debris from interfering with the sanding.
A clean surface enables you to make informed decisions as you refine and adjust the texture in your artwork.
Assessment and Adjustment
Periodically step back and assess the evolving textures in your artwork. Consider the overall composition and the balance between smooth and textured areas.
Make adjustments as needed, refining your technique to achieve the desired visual and tactile harmony that enhances the impact of your drawing.
Sealing
If preservation is a concern, consider applying a fixative or clear sealant. Choose a product that protects without compromising the appearance of the textures.
This step is particularly relevant if you plan to display or handle the artwork regularly, ensuring the longevity of your textured effects.
FAQs
What is a sanding block drawing?
Sanding block drawing involves using a sanding block to manipulate the texture of a drawing surface, adding a tactile element to traditional artwork.
How does it enhance artwork?
It enhances artwork by introducing unique textures, providing depth and visual interest to drawings.
Can any sanding block be used?
Yes, artists can experiment with different grits and materials for varied textures.
What are the benefits?
It adds a tactile dimension, offering opportunities for unique textures, enhanced shading, and pushing traditional drawing boundaries.
Suitable for specific drawing styles?
Sanding block drawing is versatile and can complement various styles, adapting to individual artistic preferences for distinctive, textured artworks.
To Recap
The integration of a sanding block into the realm of drawing unveils a captivating synergy between artistic imagination and tactile manipulation.
This unconventional method not only elevates the visual appeal of artworks but also adds a sensory dimension to the creative process.
The marriage of traditional drawing techniques with the textural influence of a sanding block opens new avenues for artists to express themselves, breaking free from conventional constraints.
As creators experiment with this unique fusion, they embark on a journey that transcends the ordinary, producing works that engage not only the eyes but also the sense of touch.
The sanding block becomes a versatile tool, enhancing the artistic landscape and pushing the boundaries of creative exploration.
Leave a Reply