Choosing the right sewing machine needle for mesh fabrics is pivotal in achieving successful and professional sewing outcomes.
Mesh, a delicate and often stretchy material, demands a needle that can penetrate without causing snags or damage.
The ideal choice is a ballpoint or stretch needle. These needles are designed to navigate through the open weave of mesh without causing any harm, ensuring a smooth sewing process.
Understanding the unique requirements of mesh fabric allows for selecting the appropriate needle, contributing to the overall success of your sewing project.
This guide will delve into the specifics of using the right needle and other essential tips for seamlessly sewing mesh fabrics.
What Sewing Machine Needle for Mesh Fabric?
When sewing mesh fabric, it is best to use a ballpoint needle designed to slip between the fabric’s fibers instead of piercing them.
This helps prevent snags and runs in the delicate mesh material. It is recommended to use a needle size in the range of 70/10 to 80/12 for sewing mesh, as it is suitable for the fineness of the fabric and helps create neat, non-damaging stitches.
Additionally, it is essential to match the thread with the fiber of the mesh. A strong polyester thread is often a good choice for sewing most types of mesh, as it can withstand the stretch and stress on the fabric.
By using the appropriate needle and thread for sewing mesh, you can ensure that your stitches are strong and durable without causing damage to the fabric.
How to Sew Mesh Fabric Together? Step-By-Step Guide
Sewing mesh fabric requires some special considerations due to its open and airy nature. Mesh is commonly used for sports jerseys, lingerie, beachwear, and other applications.
Here’s a step-by-step guide on how to sew mesh fabric together:
Materials and Tools:
- Mesh Fabric.
- Thread.
- Needles.
- Pins or Clips.
- Scissors.
- Seam Tape or Clear Elastic.
Steps:
Prepare Your Fabric
Before diving into your mesh fabric project, washing and pressing the fabric is crucial. This step removes any manufacturing residue and pre-shrinks the material, preventing distortion after sewing. Use a gentle cycle and mild detergent, and avoid using fabric softeners.
Once washed, press the mesh with a low heat setting to smooth out wrinkles and prepare it for cutting. This careful preparation ensures that your finished garment maintains its shape and size over time.
Cutting
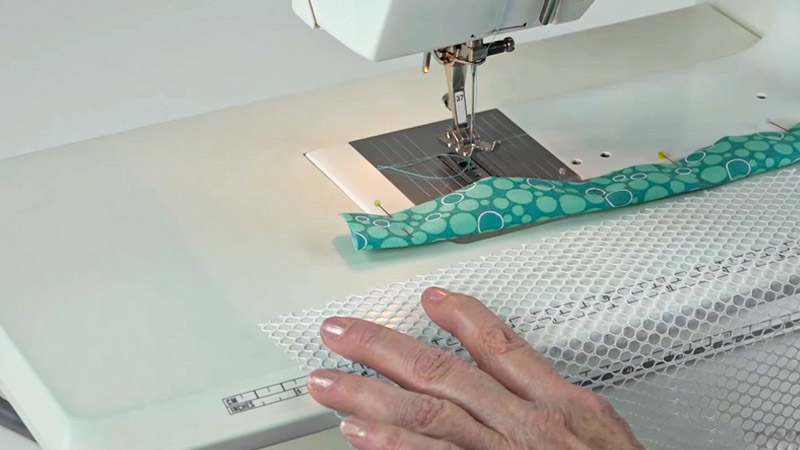
When cutting mesh fabric, opt for sharp scissors to achieve clean edges. However, unlike with more substantial fabrics, using pins to secure your pattern may leave noticeable holes in the mesh.
Instead, consider using pattern weights or heavy objects to hold the fabric in place while cutting. This ensures precision without compromising the integrity of the mesh.
Take your time during cutting to avoid stretching or distorting the fabric, as the mesh can be particularly sensitive to handling.
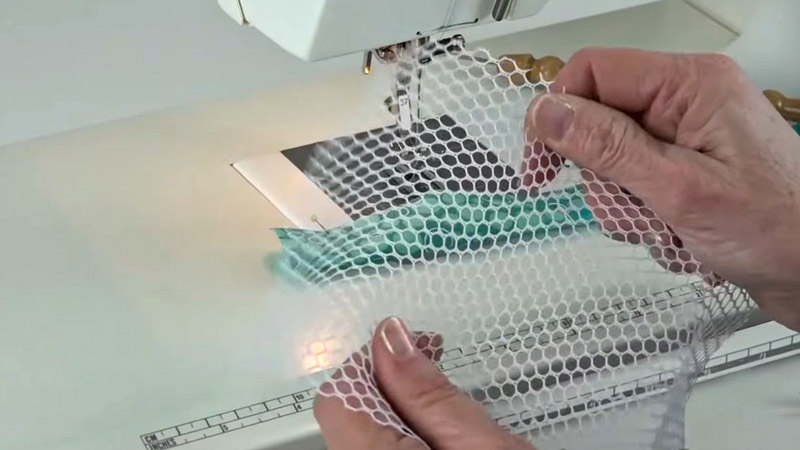
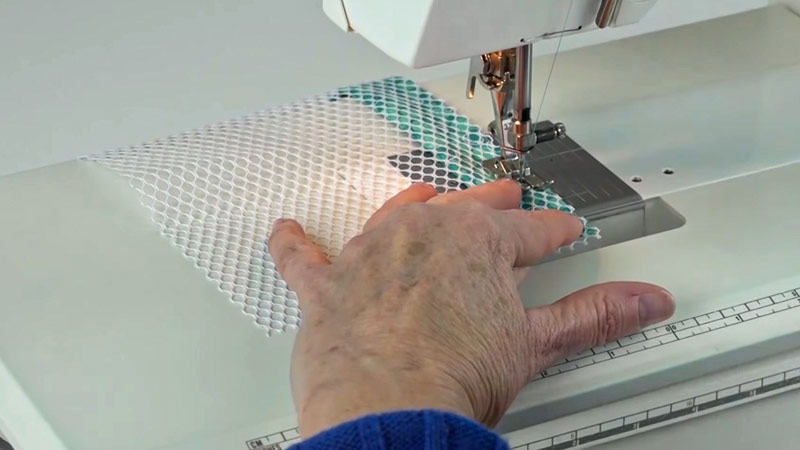
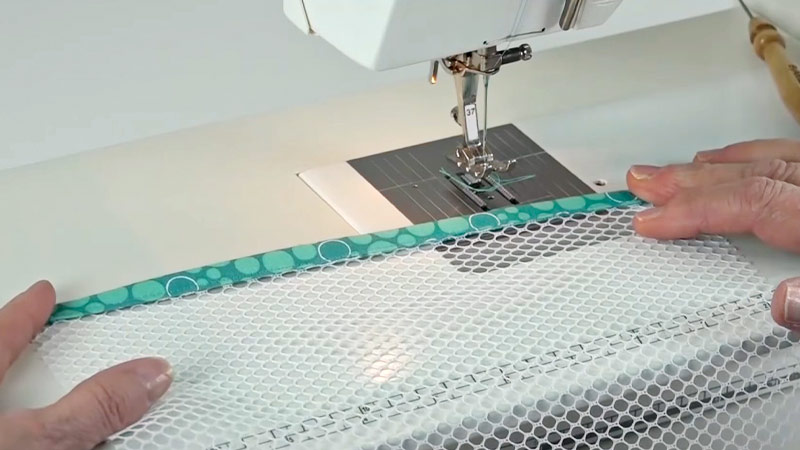
Needle and Thread
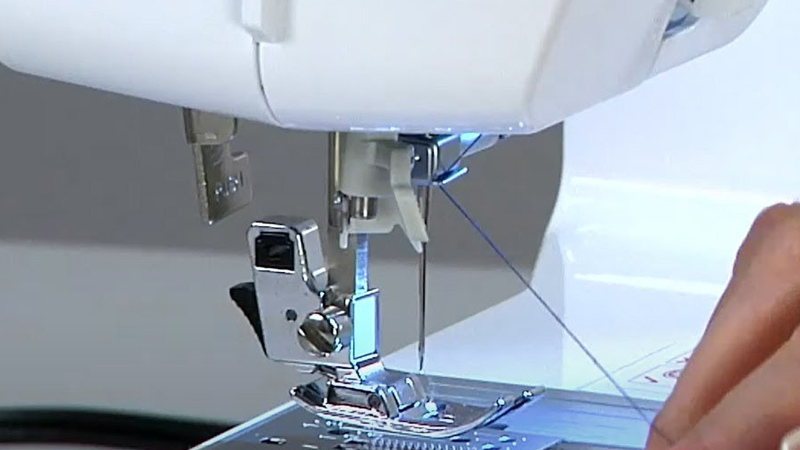
Selecting the appropriate needle is crucial when working with mesh. A ballpoint or stretch needle is ideal, as it penetrates the fabric without snagging or tearing.
Ensure your sewing machine is equipped with this type of needle before starting your project. Additionally, use a lightweight thread that matches the color of your mesh for seamless blending.
The right needle and thread combination contributes to smooth stitching and prevents damage to the delicate mesh fibers.
Adjust Stitch Length

Mesh fabric is delicate; standard stitch length may cause puckering or pulling. Lengthen your stitch slightly to create a more open and accommodating seam.
This adjustment helps maintain the mesh’s natural drape and prevents unsightly distortions in the finished project.
A longer stitch length is significant when working with lightweight mesh, as it minimizes tension on the fabric and promotes a smoother, more professional appearance.
Testing:
Before committing to your actual project, take the time to test the machine settings on a scrap piece of mesh.
This allows you to fine-tune the tension and stitch length, ensuring that your sewing machine is optimized for the specific characteristics of your mesh fabric.
Testing also allows confirmation that your chosen needle and thread combination produces the desired results, preventing any surprises during the sewing process.
Pin or Clip Seam Allowances
When securing mesh fabric pieces together, be mindful of pin placement. Place pins or clips within the seam allowance rather than through the main fabric to avoid visible holes in the finished project.
This technique ensures that any potential markings are concealed within the seam. Additionally, consider using clips designed for delicate fabrics to minimize the risk of snags or damage to the mesh.
Seam Finishing
To enhance the durability of your seams and prevent fraying, consider using clear elastic or seam tape. Apply it along the raw edges before sewing to provide extra stability, especially in areas that may undergo stress.
This step is particularly beneficial for garments with high wear and tear, such as shoulder seams. The clear elastic or seam tape is a supportive element, ensuring that your finished project maintains its structural integrity over time.
Handling Stretch
If your mesh fabric has stretch properties, adapt your stitching accordingly. Use a stretch or narrow zigzag stitch to accommodate the fabric’s elasticity.
This ensures that the seams remain flexible and comfortable, allowing the garment to move with the body.
Testing the stretch stitches on a scrap piece of mesh is particularly important to gauge how well the fabric responds to movement and achieves the desired flexibility level in your finished garment.
Stabilize Seams
For added stability, especially in areas prone to stress, such as shoulder seams, consider incorporating clear elastic or seam tape along the seam lines.
This extra reinforcement helps distribute tension and prevents the fabric from pulling or distorting over time.
It’s a valuable addition, especially in garments subject to repeated stretching or movement.
Carefully secure the clear elastic or seam tape during the sewing process to ensure it effectively reinforces these high-stress areas.
Pressing
Use a low heat setting on your iron when pressing seams open or to one side. Mesh fabric is susceptible to heat damage, so exercise caution.
Always employ a pressing cloth to protect the fabric surface, ensuring the mesh maintains its integrity and structure. Gentle heat is critical to achieving crisp seams without compromising the mesh’s delicate nature.
Hemming
Choose a narrow zigzag stitch or a rolled hem for hems on mesh fabric. These options preserve the flexibility and lightness of the mesh while providing a neat and secure edge.
Experiment with scrap pieces to determine which hemming technique works best for your project.
The goal is to maintain the overall aesthetic and functionality of the mesh, ensuring that the hem complements the fabric’s natural characteristics.
Practice Patience
Sewing with mesh can be intricate, so embrace the learning process. Take your time, especially when working on intricate details or areas that require precision.
Practice on scrap pieces to familiarize yourself with the unique characteristics of the mesh and refine your sewing skills before tackling the main project. Patience ensures a polished and professional outcome.
As you gain experience, you’ll become more adept at handling mesh fabric and producing high-quality, durable creations.
How to Sew Mesh Fabric by Hand?
Sewing mesh fabric by hand requires a careful and patient approach due to the material’s delicate nature.
Follow these steps for a successful hand-sewing experience with mesh:
Materials and Tools:
- Mesh Fabric
- Needle
- Thread
- Pins or Clips
- Scissors
- Thimble
Steps:
Prepare Your Fabric

Before sewing mesh fabric, a thorough wash and pressing session are essential. Use a gentle detergent and a delicate wash cycle to prevent damage to the delicate fibers.
Press the mesh with a low heat setting to ensure the fabric is wrinkled-free. This step enhances the appearance of your finished project and aids in accurate cutting by preventing distortion.
Cutting
Precision begins with the right tools. Choose sharp scissors to cut through the mesh cleanly without causing fraying or snags.
Employ weights or clips to secure the fabric to maintain stability during cutting. This precaution guarantees accurate cuts, reducing the risk of accidental damage to the mesh.
Needle and Thread
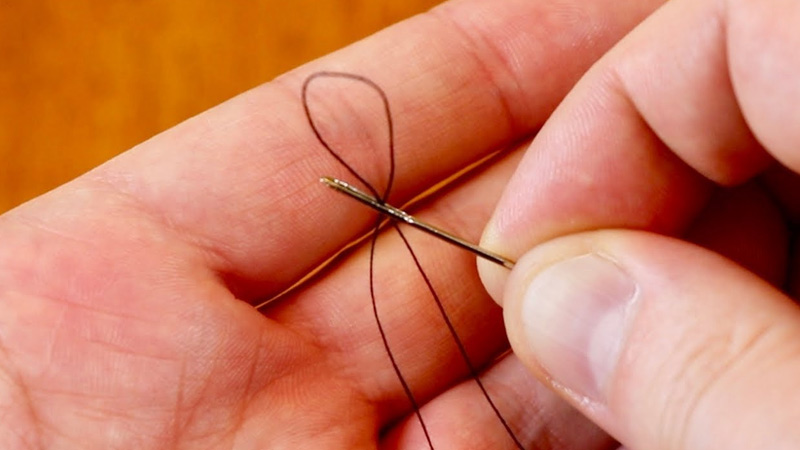
Opt for a single strand of lightweight thread that complements the mesh color. This reduces bulk in the seams and ensures a seamless blend.
Knot the end securely, preventing the thread from slipping through during the hand-sewing process, offering stability and preventing unraveling.
Choose the Right Stitch
Select a hand-sewing stitch based on your project’s needs. The running stitch is suitable for simple seams, while the backstitch provides added strength. Maintain tiny, even stitches to preserve the integrity of the mesh.
The choice between the running stitch and backstitch depends on the specific demands of your project.
Pin or Clip Seam Allowances
When joining mesh fabric pieces, strategically position pins or clips within the seam allowance.
This prevents visible holes in the mesh and minimizes the risk of damaging the delicate fibers. Restrict the use of pins to reduce distortion, favoring clips or weights when possible.
Start Stitching
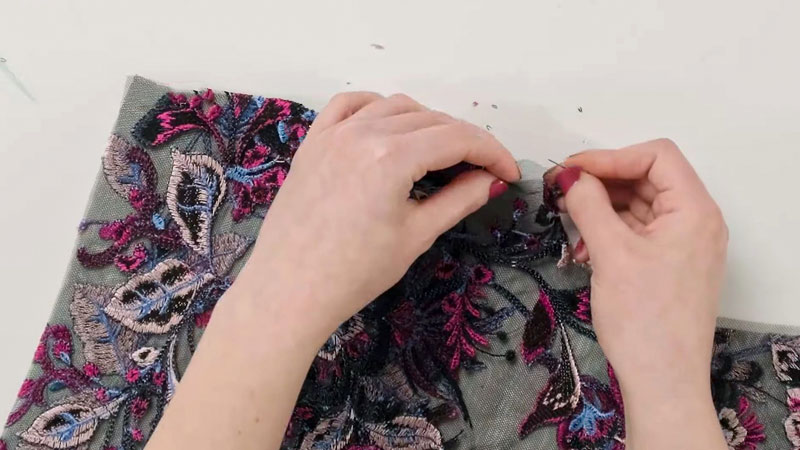
Embark on the hand-sewing journey by stitching along the designated seam line. Consistency in stitch length is crucial for both aesthetics and structural integrity.
Exercise control to avoid pulling the thread too tightly and distorting the mesh. A systematic and controlled pace contributes to the precision of your hand-sewn mesh project.
Securing the Ends:
Secure the ends of your stitching by tying a knot at the final stitch. For enhanced stability, incorporate backstitching at the seam’s beginning and end.
This double reinforcement not only prevents the thread from unraveling but also fortifies the overall strength of the seam.
Seam Finishing
For projects where visible edges matter, consider finishing raw edges with a narrow hem using a slipstitch. This optional step elevates the project’s professionalism, contributing to a polished and refined appearance.
Handling Stretch
If your mesh fabric boasts stretch properties, adjust your stitching technique accordingly. Use a slightly longer stitch and allow some give during hand-sewing to accommodate the fabric’s elasticity. This meticulous adjustment ensures that the seams maintain flexibility and comfort.
Practice Patience
Hand-sewing mesh requires patience. Invest time to ensure each stitch is meticulous and even, particularly if the mesh has an open weave.
This patient approach not only refines your craftsmanship but also contributes significantly to the overall quality of the finished project.
Pressing
While optional, pressing can add a final touch of refinement to your hand-sewn mesh project.
Use a low heat setting on an iron and a pressing cloth to delicately press seams open or to one side. This careful step ensures a crisp finish without compromising the delicate nature of the mesh.
Finishing Touches
Upon completing the hand-sewing process, carefully trim any excess thread. Inspect your hand-sewn mesh project for loose stitches or areas that may benefit from additional reinforcement.
This meticulous examination guarantees a well-crafted and durable final product, ready to showcase the unique qualities of mesh fabric.
FAQs
What type of needle is best for sewing mesh fabric?
The best needle for sewing mesh is a ballpoint or stretch needle. These needles are designed to work with mesh fabrics’ delicate and stretchy nature, preventing snags or damage.
Is it necessary to pre-wash mesh fabric before sewing?
Yes, pre-washing mesh fabric is recommended. It removes any manufacturing residues, pre-shrinks the material, and prevents distortion after sewing.
Should I finish the raw edges of the mesh seams?
Finishing the raw edges with a serger, zigzag stitch, or clear elastic is recommended. This stabilizes the seams and prevents fraying.
To Recap
Selecting the right sewing machine needle for mesh fabrics is critical to achieving impeccable results in your sewing projects.
Choosing a ballpoint or stretch needle proves indispensable when working with delicate and stretchy mesh materials, ensuring smooth penetration without causing snags or damage.
This thoughtful consideration significantly contributes to the overall success of your sewing endeavors, allowing you to create garments that not only showcase the unique characteristics of mesh but also boast professional and polished finishes.
As you continue to master the art of sewing with mesh, the proper needle choice stands as a foundational element, enhancing your ability to work with finesse and precision.
Leave a Reply