A basting stitch on a sewing machine is the unsung hero of the sewing world, a humble yet indispensable technique that forms the foundation of precision and perfection in crafting garments, quilts, and various fabric creations.
This often-overlooked stitch is a temporary, easily removable, and strategically placed thread that acts as a guiding hand during the sewing process.
It serves a multitude of crucial roles, from fitting adjustments to pattern alignment and quilting layer stability.
This versatile tool allows sewers to experiment, correct, and fine-tune their projects before committing to permanent seams, making it an invaluable asset in the repertoire of every sewing enthusiast.
What Is a Basting Stitch on a Sewing Machine?
A basting stitch on a sewing machine is a temporary, long and loose stitch used to hold fabric pieces together temporarily.
Unlike regular stitches, basting stitches are not meant to provide structural integrity to the final project but serve as a guide or placeholder during the sewing process.
Sewing machines have specific settings for basting stitches, which include a longer stitch length and lower tension.
These stitches are handy in various sewing scenarios. For instance, when fitting a garment, basting stitches can hold pieces together so you can check the fit before making permanent seams.
They’re also useful for securing fabric layers in place before quilting or adding details like pockets and zippers.
Once the desired adjustments or placements are confirmed, basting stitches are easily removed, leaving no permanent marks.
This flexibility and convenience make basting stitches an essential technique for sewers aiming for precision and ease in their projects.
Types of Basting Stitches
Basting stitches are essential in sewing for various purposes, such as temporarily holding fabric layers together or providing guidelines for more permanent stitching.
There are several types of basting stitches, each serving specific needs:
Hand Basting Stitch
Basting stitch by hand is a sewing technique where long, loose stitches are created through fabric layers using a needle and thread. It’s often used for delicate fabrics or when precise placement is required.
Machine Basting Stitch
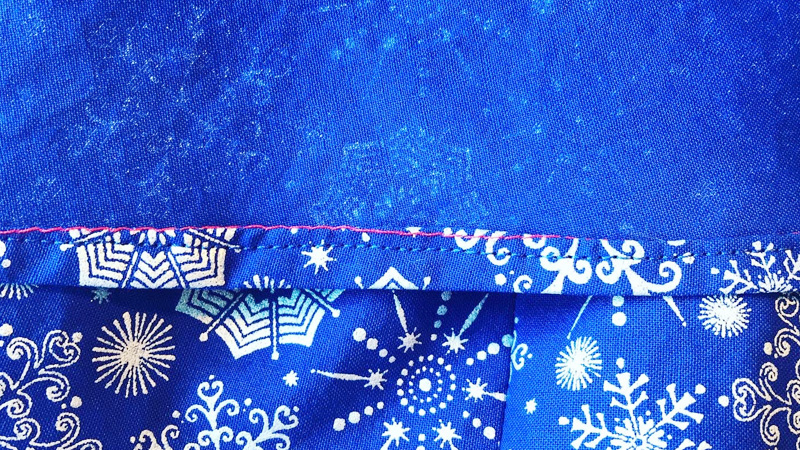
Machine basting involves using a sewing machine with longer stitch lengths and lower tension settings. It’s used to temporarily secure fabric layers together or hold pieces in place before permanent stitching.
Tailor’s Tacks
Tailor’s tacks are small thread loops made through fabric layers to mark important points like notches, darts, or other critical areas on the fabric.
Thread Tracing
Thread tracing uses a single strand of contrasting thread to mark sewing lines or pattern outlines, particularly in intricate designs.
Diagonal Basting
Diagonal basting stitches are sewn at an angle across fabric layers, providing extra stability and preventing fabric shifting.
Running Basting Stitch
Running basting involves creating a continuous line of long stitches, commonly used for gathering fabric or temporarily securing seams.
Cross Basting
Cross-basting combines both horizontal and vertical stitches to form a grid-like pattern. It’s ideal for securing multiple layers of fabric, such as quilting layers.
Blind Basting Stitch
Blind basting entails concealing stitches between fabric layers to create an invisible hold, often used in tailoring for linings or facings.
Stay Stitching
Stay stitching is a row of regular-length stitches placed just inside the seam allowance to stabilize fabric edges and prevent stretching or distortion.
Dissolvable Basting
Dissolvable basting uses water-soluble thread or stabilizer to create temporary stitches that disappear upon exposure to water. It’s suitable for holds in fabrics that cannot be ironed.
Applications of Basting Stitches
Basting stitches have a wide range of applications in sewing and are valuable for various purposes in different sewing projects.
Here are some common applications of basting stitches:
Fitting Garments
Basting stitches temporarily hold fabric pieces together during garment fitting, allowing for adjustments before permanent seams are sewn.
Pattern Matching
In sewing projects that require precise pattern, stripe, or plaid alignment, basting stitches assist in accurate pattern matching.
Securing Zippers and Buttons
Basting stitches ensure that zippers and buttons are correctly positioned before permanent attachment.
Quilting
For quilting projects, basting stitches hold the quilt top, batting, and backing layers in place temporarily to prevent shifting during quilting.
Gathering Fabric
Basting stitches create controlled and even gathers in fabric, commonly used for ruffles, sleeves, or decorative elements.
Appliqué Placement
When attaching appliqué pieces to a background fabric, basting stitches secure them temporarily in the desired position before permanent stitching.
Pleats and Tucks
Basting stitches help create and maintain pleats, tucks, or folds in the fabric until they are sewn down permanently.
Hemming and Cuffs
Temporary basting stitches are used to hold hems or cuffs in place, ensuring even folds before final stitching.
Tailoring and Alterations
In tailoring and alterations, basting stitches mark and temporarily hold fabric for adjustments, such as sleeve shortening or seam alterations.
Adding Pockets
Basting stitches position pockets accurately on garments, ensuring level and symmetrical placement before permanent attachment.
Complex Construction
In intricate sewing projects with multiple layers or sections, basting stitches assist in keeping everything organized and in place during assembly.
Temporary Holds
Basting stitches provide a quick and easy way to temporarily secure fabric or other materials, such as attaching trims or interfacing, especially when pins or clips are not suitable.
Testing Stitch Lines
Before sewing permanent seams, basting stitches allows sewers to test the placement of stitch lines and make adjustments as needed without damaging the fabric.
Sewing with Delicate Fabrics
Basting stitches offer stability when working with delicate or easily distorted fabrics, ensuring that sewing proceeds smoothly without causing damage.
Creating Guidelines
Basting stitches serve as guidelines for various sewing techniques, including topstitching, attaching bias tape, or adding decorative elements, ensuring precision and accuracy.
How to Sew Basting Stitches
Sewing basting stitches is a straightforward process that involves temporarily joining fabric layers together with long, loose stitches.
Here’s a step-by-step guide on how to sew basting stitches using a sewing machine:
Materials You’ll Need:
- Sewing machine
- Fabric to be basted
- Thread
- Sewing machine needle
- Seam gauge
Steps:
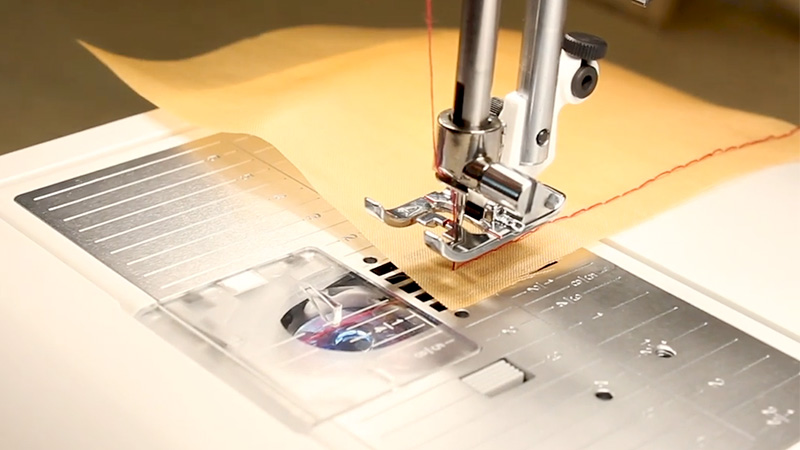
Prepare Your Machine
Start by setting up your sewing machine. Choose a straight stitch with a longer stitch length. Typically, a stitch length of around 4 to 5 millimeters is suitable for basting.
Thread the Machine
Thread your sewing machine with a contrasting thread color. This will make it easier to spot and remove the basting stitches later.
Insert a New Needle
If your sewing machine needle is old or dull, consider replacing it with a fresh one to ensure smooth stitching.
Adjust Tension
Depending on your fabric and sewing machine, you may need to make slight tension adjustments. Lowering the tension can help create looser stitches suitable for basting.
Mark Your Stitch Line
Use chalk or fabric markers to mark the path where you want your basting stitches to go. Marking is especially helpful for precise placement.
Begin Stitching
Position your fabric layers under the sewing machine presser foot, aligning them along the marked line or where you want to baste.
Lower the presser foot to hold the fabric in place. Start sewing by gently pressing the foot pedal, maintaining a steady, even pace.
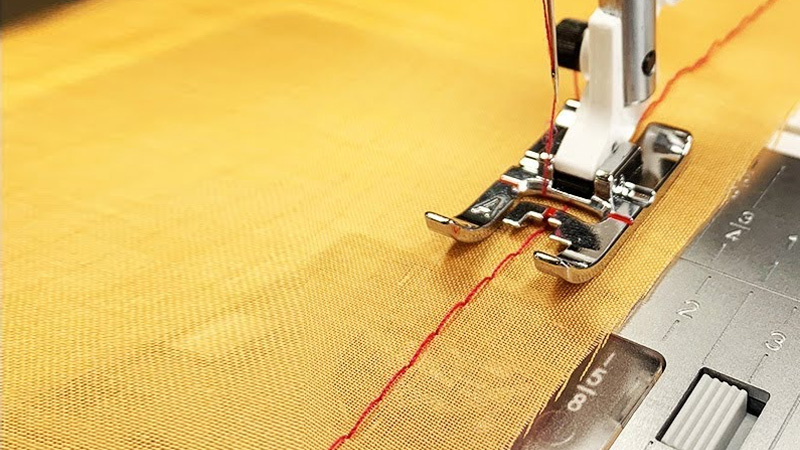
Aim for long and loose stitches, allowing the fabric to move freely. Avoid backstitching at the beginning or end of the basting stitches, as they should be easy to remove later.
Continue Basting
Stitch along the marked line or your desired area, ensuring even spacing of the stitches and not making them too tight. You can eyeball the stitch placement if you didn’t make markings.
End the Basting Line
When you reach the end of the basting area, leave a few inches of thread tail. Lift the presser foot and gently pull the fabric from under the foot.
Secure the Thread
Tie one or two knots at the start and end of the basting stitches to prevent them from unraveling prematurely. Be cautious not to tie them too tightly, as you’ll need to remove these knots later.
Inspect and Adjust
After sewing the basting stitches, double-check their length, looseness, and even spacing. Make any necessary adjustments.
Remove Excess Thread
Trim any long thread tails at both ends of the basting stitches to avoid tangling. Your basting stitches are now in place, securely holding your fabric layers temporarily.
You can proceed with fitting, adjusting, or sewing other components of your project with confidence, knowing that the basting stitches can be easily removed when needed.
To remove them, gently pull the thread tails at one end, and the stitches should come out smoothly.
Tips for Effective Basting
Effective basting is crucial for achieving precise and professional sewing results. Here are some tips to help you baste effectively:
Use the Right Stitch Length
Set your sewing machine to a longer stitch length (around 4 to 5 millimeters) for basting. Longer stitches are easier to remove and create a temporary hold without damaging the fabric.
Choose a Contrasting Thread Color
Use a thread color that contrasts with your fabric. This makes it easier to see the basting stitches and ensures you don’t accidentally sew over them during permanent stitching.
Adjust Tension
Depending on your fabric and sewing machine, you may need to adjust the tension slightly to create loose stitches. Looser stitches are easier to remove and provide a temporary hold without distorting the fabric.
Mark Your Guidelines
When precision is essential, mark your sewing guidelines with chalk or fabric markers. Clear guidelines ensure that your basting stitches follow the correct path.
Start and Finish with Extra Thread
Begin and end your basting stitches with a few inches of extra thread. This excess thread makes it easier to remove the basting stitches when you’re done.
Avoid Backstitching
Unlike permanent seams, you don’t need to backstitch at the beginning and end of basting stitches. Leaving long thread tails is sufficient for securing them temporarily.
Maintain Even Stitch Spacing
Keep the spacing between your basting stitches even. This ensures that the fabric layers are held consistently and prevents bunching or distortion.
Don’t Pull the Fabric
While basting, let the fabric feed through the machine naturally. Avoid pulling or stretching it, as this can affect the accuracy of the basting.
Practice Proper Thread Tension Control
Be mindful of thread tension control as you sew. Ensure that the thread flows smoothly without getting tangled or causing issues during basting.
Regularly Inspect Your Work
Periodically stop and inspect your basting stitches for any issues such as skipped stitches or uneven spacing. Fix any problems promptly.
Knot Securely
When tying knots at the beginning and end of basting stitches, make them secure enough to prevent unraveling but not so tight that they are difficult to remove.
Remove Basting Stitches Promptly
Once you no longer need the basting stitches, remove them promptly. Gently pull one thread tail, and the stitches should come out easily.
Practice Patience
Basting can be a bit time-consuming, but it’s worth the effort for precise results. Take your time to ensure your basting is well-executed.
Use Basting Spray
In some cases, you can use temporary basting spray to secure fabric layers together before stitching. Be sure to follow the manufacturer’s instructions for application and removal.
Basting Stitches vs. Straight Stitches
Basting stitches and straight stitches are two fundamental types of stitches used in sewing, and they serve distinct purposes in the sewing process.
Below, we’ll explore the key differences between basting stitches and straight stitches through a comparison table:
| Aspect | Basting Stitches | Straight Stitches |
| Stitch Length | Longer (typically 4-5 mm) | Variable, but often shorter |
| Purpose | Temporary hold | Permanent seam |
| Hold Duration | Temporary, meant for removal | Permanent, intended to last |
| Usage | 1. To hold fabric temporarily during fitting and adjustments. 2. Pattern matching. 3. Quilting preparations. 4. Gathering fabric. | 1. To create permanent seams in clothing and other projects. 2. Decorative stitching. 3. Topstitching. |
| Stitch Appearance | Typically longer, looser, and easily removable. | Shorter, tighter, and permanent. |
| Backstitching | Not required; knots can be used to secure the stitches temporarily. | Commonly used to lock stitches at the beginning and end of seams for permanence. |
| Thread Color | Often contrasting for visibility when removing. | Matched to fabric for a discreet finish. |
| Removal Ease | Easily removed by pulling one thread, leaving minimal marks. | Permanent and not meant to be removed. |
| Common Situations | Fitting garments, pattern matching, quilting preparations, adjusting gathers. | Creating seams, hems, cuffs, topstitching, and decorative stitching. |
FAQS
What is a basting stitch on a Brother sewing machine?
A basting stitch on a Brother sewing machine is the same as on any other sewing machine.
Can you use a basting stitch for gathering fabric?
Yes, basting stitches are often used for gathering fabric, especially when creating ruffles or gathering the waist of a garment.
Is it possible to use basting stitches for securing trims or embellishments?
Absolutely! Basting stitches are handy for temporarily attaching trims, lace, or embellishments to the fabric.
Can basting stitches be used in machine embroidery projects?
Yes, basting stitches play a vital role in machine embroidery.
What’s the difference between hand basting and machine basting stitches?
Hand basting is done manually with a needle and thread, offering more precision but taking longer. Machine basting is quicker and suitable for larger areas but may be less precise.
Wrap Up
In sewing, the basting stitch on a sewing machine emerges as a versatile ally, facilitating precision and creativity in equal measure.
Its transient nature, characterized by long, loose stitches, allows sewers to finesse their craft. From achieving impeccable garment fittings to aligning patterns flawlessly and securing quilting layers, the basting stitch provides a foundation for sewing success.
Its utility extends even further, serving as a tool for experimentation and risk-free exploration in the realm of fabric manipulation.
Ultimately, the basting stitch empowers sewers to refine their projects, correct imperfections, and unleash their creative potential, making it an indispensable asset in the sewing world.
Leave a Reply