The process of making a simple T-shirt may seem like a straightforward endeavor, but beneath its apparent simplicity lies a complex web of manufacturing stages and intricate craftsmanship.
The time it takes to create a T-shirt varies significantly depending on several factors, including the production method, materials used, and the level of detail involved.
In this exploration, we will delve into the intricacies of T-shirt manufacturing, shedding light on the different steps involved and the time required for each. From cotton cultivation and spinning to cutting sewing, and quality control, each phase plays a vital role in determining the overall production duration.
Understanding this process not only grants insight into the world of fashion but also underscores the importance of sustainable practices and efficient production techniques in the modern apparel industry.
How Long Does It Take To Make A T-Shirt
The time required to make a T-shirt depends on various factors such as sewing experience, complexity of the design, and familiarity with the sewing machine. For an experienced sewer using a basic T-shirt pattern, it can take anywhere from 1 to 2 hours.
However, for beginners or those crafting a more intricate design, it may take longer, ranging from 2 to 4 hours or more.
Additional time is needed for cutting, pinning, stitching, and finishing touches like hems and pressing. T-shirt sewing times vary widely, with practice and familiarity with the process leading to faster completion.
Factors Affecting the Time Duration of Making a T-Shirt
The time it takes to make a T-shirt can vary significantly depending on several factors. Here are some key points to consider when estimating the time required to make a T-shirt:
Sewing Experience
The experience level of the person making the T-shirt plays a significant role. Experienced sewers will generally work more quickly and efficiently than beginners.
Beginners may take longer as they become familiar with the sewing machine and techniques.
Pattern Selection
Choosing a T-shirt pattern can impact the time required.
Simple, basic T-shirt patterns with fewer pieces and minimal design details are faster to sew than complex patterns with multiple components, such as raglan sleeves or intricate necklines.
Cutting and Preparation
Preparing the fabric, including cutting out the pattern pieces, marking notches, and transferring markings, can take some time. It’s essential to take care during this step to ensure accurate sewing.
Fabric Type
The type of fabric used affects sewing time. Lightweight and stable knit fabrics like jersey may be quicker to work with than more challenging materials like stretchy or delicate knits.
Technique
Sewing techniques such as serging, using a zigzag stitch, or a twin needle can impact the time needed. Each technique has its own setup and requirements that can add to or reduce sewing time.
Sewing Machine Speed
Sewing machines with adjustable speeds allow the sewer to control the pace. Faster sewing speeds can reduce production time, but they require more precision to avoid mistakes.
Additional Details
If you decide to add extra details to your T-shirt, such as pockets, appliques, or embellishments, these will require additional time for cutting, placement, and sewing.
Finishing and Hemming
Hemming the sleeves, bottom, and neckline, as well as finishing any raw edges, takes time and attention to detail. The method chosen, whether using a cover stitch machine or a regular sewing machine, can affect the time required.
Trial and Error
Beginners may need to unpick stitches or redo certain sections, which can add time to the sewing process. More experienced sewers are likely to make fewer mistakes and work more efficiently.
Batch Production
If you’re making multiple T-shirts at once, you can save time on certain steps, such as cutting and machine setup.
However, you’ll still need to account for the total time spent, considering the complexity of each T-shirt.
On average, an experienced sewer can complete a basic T-shirt in a few hours, while a beginner might take longer, potentially a day or more.
Complex designs or additional details can extend the time needed.
It’s important to plan your sewing project accordingly, allowing extra time for learning, practicing, and troubleshooting, especially if you’re new to sewing or working with specific fabrics.
Materials You’ll Need to Make a Shirt
To make a shirt, you’ll need a variety of materials and tools. Here’s a comprehensive list of what you’ll need:
Materials
- Fabric: Choose a fabric appropriate for your shirt’s design and purpose. Common choices include cotton, linen, silk, denim, jersey, or a blend of these materials.
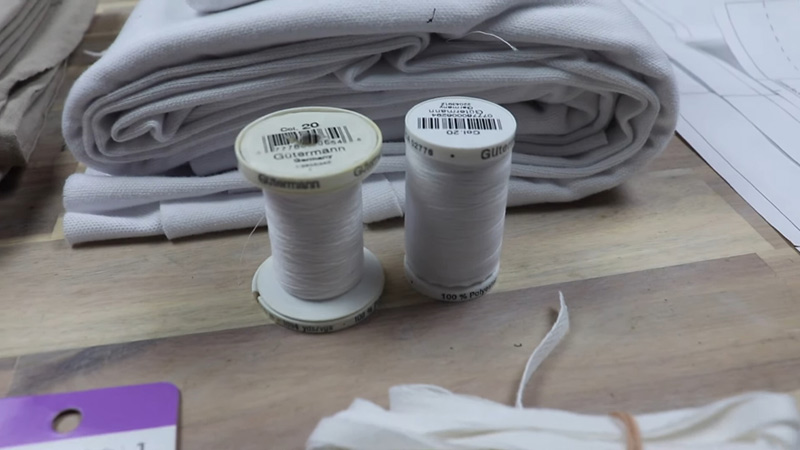
- Thread: Select a thread that matches or complements the fabric. Polyester or cotton thread is suitable for most shirt fabrics.
- Interfacing: This is a material used to reinforce areas like collars, cuffs, and button plackets. Choose interfacing that matches your fabric weight and type.
- Buttons or Snaps: Depending on your shirt’s design, you’ll need buttons (with extras for spares) or snaps for closures.
- Fusible Web or Hem Tape: This is optional but can be useful for securing hems or seam allowances.
- Pattern: If you’re not drafting your own pattern, you’ll need a shirt pattern that matches your desired style and size.
Tools
- Sewing Machine: A basic sewing machine with straight and zigzag stitches is essential for sewing a shirt.
- Scissors: Fabric scissors for cutting fabric and paper scissors for cutting the pattern.
- Pins and Needles: Straight pins for holding fabric pieces together and sewing needles for hand-sewing.
- Measuring Tools: A tape measure, ruler, and a clear sewing gauge can help with accurate measurements and marking.
- Iron and Ironing Board: Essential for pressing seams and setting fabric.
- Seam Ripper: Useful for removing stitches if you make mistakes.
- Fabric Marking Tools: Fabric chalk, washable fabric markers, or tailor’s tacks for marking pattern lines and sewing guidelines.
- Pattern Weights or Pins: If using a paper pattern, weights or pins to secure it to the fabric for cutting.
- Buttonhole Foot: If your sewing machine doesn’t have one-step buttonhole functionality, you’ll need a buttonhole foot.
- Serger (Optional): A serger (overlock machine) can be used to finish seams and prevent fraying, but it’s not essential.
- Pattern Tracing Paper (Optional): If you plan to reuse your paper pattern, you may want pattern tracing paper to create a duplicate.
- Tracing Wheel (Optional): Used with pattern tracing paper to transfer pattern markings onto fabric.
- Presser Feet: Different presser feet may be required for various sewing tasks, such as a zipper foot for inserting zippers or a walking foot for working with stretchy fabrics.
Before you start your project, ensure you have all the necessary materials and tools ready. Careful preparation can make the sewing process smoother and more enjoyable, resulting in a well-crafted shirt.
How To Make A T-Shirt
Making a basic T-shirt involves a series of steps that can be broken down into five main stages. Here’s a simplified guide on how to make a T-shirt:
Step 1: Prepare Your Fabric and Pattern
- Pre-wash your fabric: This step is essential to prevent shrinkage after your T-shirt is made. Follow the care instructions for your fabric.
- Lay out your fabric: Place your fabric on a clean, flat surface, ensuring it’s free from wrinkles and folds.
- Cut out your pattern pieces: Use the T-shirt pattern to cut out the front and back pieces, sleeves (if applicable), and neckband. Make sure to follow the pattern’s guidelines for size and any necessary adjustments.
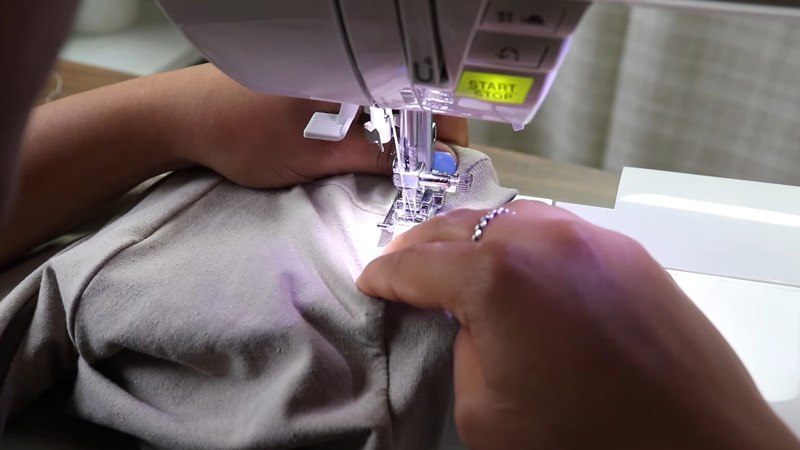
Step 2: Sew the Shoulder Seams
- Place the front and back pieces right sides together: Align the shoulder edges of the front and back pieces, matching the notches and edges.
- Pin or clip the shoulder seams: Secure the fabric layers together.
- Sew the shoulder seams: Use a straight stitch on your sewing machine to sew along the shoulder seams, typically using a 3/8-inch (1 cm) seam allowance.
- Press the seams: Open the shoulder seams and press them flat with an iron.
Step 3: Attach the Sleeves (if applicable)
- Lay the shirt flat: With the right side of the shirt facing up, position the sleeve pieces right sides down onto the armholes.
- Pin or clip the sleeves: Match the notches and edges, then secure the sleeves to the shirt.
- Sew the sleeves: Stitch the sleeves to the shirt using a straight stitch and a 3/8-inch (1 cm) seam allowance. Be careful not to stretch the fabric while sewing.
- Press the seams: After sewing, press the seam allowances toward the sleeves.
Step 4: Create and Attach the Neckband
- Prepare the neckband: Fold the neckband piece in half lengthwise, with the right sides facing each other. Press it flat.
- Sew the neckband: Stitch the short ends of the neckband together, creating a loop.
- Mark the neck opening: Divide the neck opening into quarters and mark it with pins.
- Attach the neckband: Match the quarter marks on the neckband with those on the shirt’s neck opening, ensuring the right sides are together. Pin or clip the neckband in place.
- Sew the neckband: Stitch the neckband to the shirt, stretching it slightly to fit the opening evenly. Use a stretch or zigzag stitch.
- Press the neckband: After sewing, press the neckband away from the shirt.
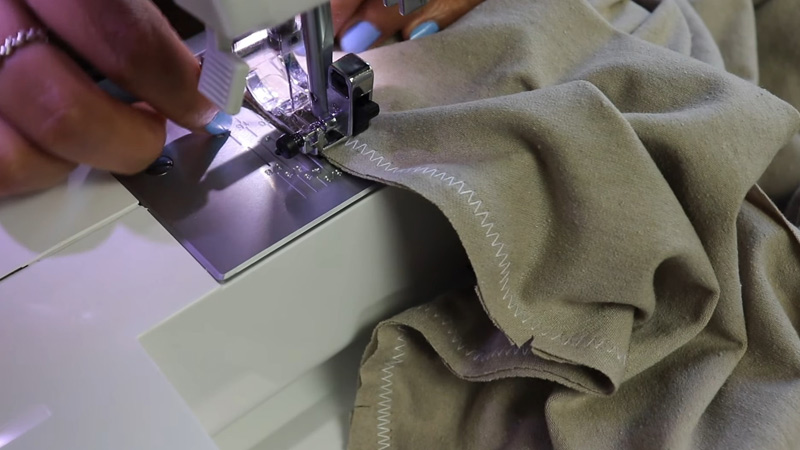
Step 5: Hem the Sleeves and Bottom
- Fold the sleeve and bottom hems: Fold the raw edges of the sleeves and the bottom of the shirt up by about 1 inch (2.5 cm) to create a hem.
- Press the hems: Use an iron to press the folded hems in place.
- Sew the hems: Stitch the folded hems down using a stretch or zigzag stitch, ensuring they are even and secure.
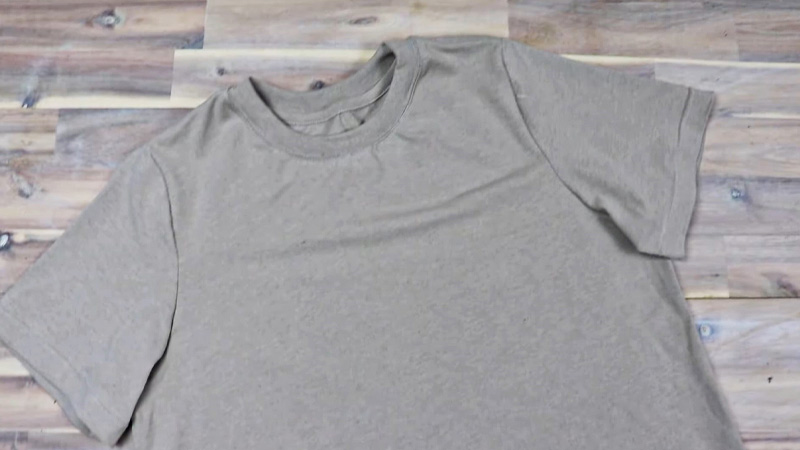
Congratulations, you’ve completed your basic T-shirt! Customize your shirt with different fabrics, colors, and design details as you become more experienced. Always follow your specific pattern’s instructions for the most accurate results.
FAQs
How long does it take to sew a shirt?
The time it takes to sew a shirt varies based on factors like sewing experience and complexity. For an experienced sewer, it can take around 1 to 2 hours, while beginners might need 2 to 4 hours or more, including cutting, stitching, and finishing.
How long does it take to make a shirt?
Making a shirt typically takes 1 to 4 hours, depending on sewing proficiency, design intricacy, and preparation time. Experienced sewers complete basic shirts faster, while beginners might take longer due to learning and precision requirements.
How long to sew a shirt?
Sewing a shirt generally requires 1 to 4 hours, with variations depending on sewing skill, shirt design complexity, and fabric choice. Skilled sewers can finish a basic shirt faster, whereas novices may need more time for learning and accuracy.
How long does it take to sew a shirt with a sewing machine?
When using a sewing machine, sewing a shirt typically takes 1 to 4 hours, encompassing tasks like cutting fabric, machine stitching, and final touches. Speed and efficiency increase with sewing experience, allowing experienced sewers to complete shirts more quickly.
Conclusion
The journey of creating a T-shirt is far from instantaneous. It demands careful planning, skilled labor, and adherence to stringent quality standards.
Depending on factors such as design complexity, volume, and automation, the time required can range from a few minutes in mass-production facilities to several hours in artisanal workshops.
Moreover, sustainable practices are becoming increasingly important in the industry, influencing production timelines.
As consumers, appreciating the craftsmanship and time invested in making a simple garment like a T-shirt can foster a deeper connection to the products we wear.
This insight into the duration and complexities of T-shirt production reminds us of the significance of responsible consumption and the need to support environmentally friendly and ethical practices in the fashion world.
Leave a Reply