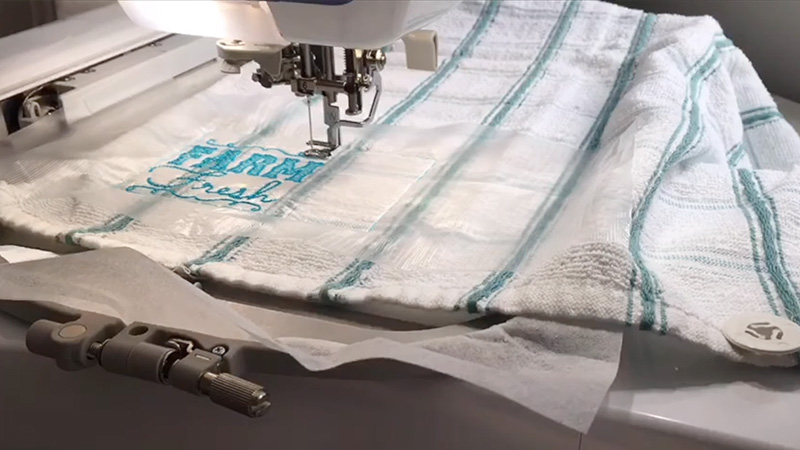
Embroidery, the art of adorning fabric with intricate designs, is a craft that demands precision and attention to detail. One essential technique in this creative journey is the addition of a basting box or stitch.
This humble yet crucial step is the foundation for every embroidery project, anchoring the fabric and stabilizer in place, ensuring proper alignment, and preventing unwanted puckering.
Whether you’re a novice looking to master the basics or an experienced embroiderer seeking to perfect your art, understanding the significance of the basting box/stitch is paramount.
In this exploration, we’ll delve into adding a basting box or stitch, unraveling its importance in achieving flawless and exquisite embroidery.
What is a Basting Box or Stitch in Embroidery?
A basting box or stitch is a temporary, large, and loose stitch that holds the fabric and stabilizer together during the initial stages of an embroidery project.
It’s typically made with a contrasting thread color or easily removable thread like water-soluble thread, so it’s easily distinguishable from your main embroidery design.
Basting serves as a guide for proper hoop placement and helps prevent fabric shifting or puckering while embroidering.
How to Add a Basting Box for Embroidery?
Adding a basting box for embroidery is an essential step to ensure that your fabric stays taut and secure in the embroidery hoop while you work on your project.
A basting box is essentially a temporary frame that holds your fabric in place, making it easier to create precise and accurate stitches. Follow these steps to add a basting box for embroidery:
Materials you’ll need:
- Embroidery Hoop: Select an appropriate-sized embroidery hoop for your project. The hoop should comfortably fit around the area you want to embroider.
- Fabric: Choose the fabric you want to embroider on. Ensure it is clean, ironed, and cut to the appropriate size for your hoop.
- Needle and Thread: Use a large, blunt needle and contrasting thread to create the basting stitches. The contrasting thread makes it easier to see and remove later.
- Scissors: You’ll need scissors to trim excess fabric and thread.
Steps to add a basting box for embroidery:
Prepare Your Fabric
Start by preparing your fabric. Make sure it’s clean, and if necessary, iron out any wrinkles or creases. Cut the fabric to the desired size, leaving some extra around the edges for securing it in the hoop.
Place Fabric in the Hoop
Loosen the screw on your embroidery hoop and separate the inner and outer rings. Lay your fabric over the inner ring, ensuring it’s centered and taut.
Place the outer ring over the fabric and the inner ring. Tighten the screw until the fabric is held securely but not stretched too tightly.
Mark Your Design Area
Use a fabric marker or tailor’s chalk to mark the area where you want to embroider. This will help you visualize the design boundaries and ensure your stitches stay within the desired area.
Create Basting Stitches
Thread your needle with contrasting thread and tie a knot at the end. Start from the center of your marked design area and work your way out. Create long, even basting stitches around the perimeter of the design area.
These stitches should be about 1 inch apart. Make sure to keep them outside the marked design area.
Secure the Basting Stitches
When you’ve completed the basting stitches around the entire design area, tie a knot at the end to secure the thread. This will keep your fabric taut and prevent it from shifting as you embroider.
Begin Embroidering
With the basting box in place, you can now start embroidering within the marked design area. The basting stitches will hold the fabric securely, making it easier to create neat and precise stitches.
Removing the Basting Stitches
Once your embroidery is complete, carefully remove the basting stitches by gently snipping the contrasting thread and pulling it out. Be cautious not to damage your embroidery stitches or fabric.
Finish Your Project
After removing the basting stitches, you can finish your embroidery project as desired. This may involve washing and pressing your work, framing it, or incorporating it into another project.
Stitches for Embroidery
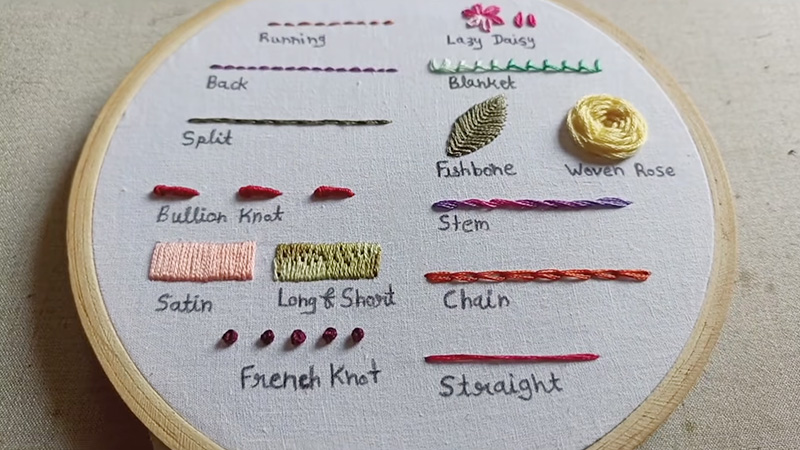
Embroidery is a creative and versatile craft that involves embellishing fabric with decorative stitches using thread or yarn. Whether you’re new to embroidery or an experienced hand, it’s crucial to master the basic stitching techniques to create beautiful designs.
Here’s a guide on stitches for embroidery:
Backstitch
Begin by bringing the needle up from the back of the fabric at the start of your design. Insert the needle back into the fabric a short distance away and bring it up again. Continue this process to create a solid line of stitching.
Running Stitch
Similar to the backstitch, start by bringing the needle up from the back of the fabric. Insert the needle back into the fabric and bring it up again, creating evenly spaced stitches. This stitch is ideal for dashed lines or decorative outlines.
Satin Stitch
Start by bringing the needle up from the back of the fabric on one side of the shape you want to fill. Insert the needle back into the fabric on the opposite side of the shape and bring it up again close to the first stitch.
Continue stitching closely together until the entire shape is filled, creating a smooth, satin-like surface.
French Knot
Begin by bringing your needle up from the back of the fabric at the desired location. Wrap the thread around the needle a few times, depending on the desired knot size.
Carefully insert the needle back into the fabric near the starting point, making sure to hold the thread wraps in place with your thumb. Gently pull the needle through the wraps and fabric, creating a knot on the surface.
Chain Stitch
Start by bringing the needle up from the back of the fabric and making a small stitch. Bring the needle up again inside the loop created by the previous stitch.
Continue this process, creating a chain-like pattern. The length of the stitch and spacing can vary for different effects.
Cross Stitch
Cross stitches are commonly used to create geometric or patterned designs. Begin by making an ‘X’ shape with two diagonal stitches, crossing in the center. Complete each ‘X’ stitch by making one diagonal stitch and then the other.
What Is the Difference Between Basting and Stitching in Embroidery?
Basting and stitching are two distinct sewing techniques, each serving specific purposes in the world of sewing and embroidery.
Here are the key differences between basting and stitching:
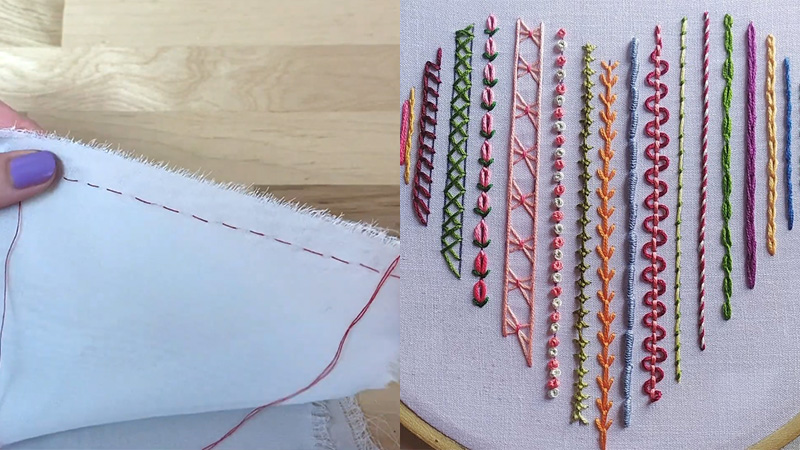
Basting
- Temporary: Basting is a temporary sewing technique used to hold fabric layers or pieces together temporarily. It’s intended to be removed later in the sewing process.
- Loose and Large Stitches: Basting stitches are typically longer and more spaced out than regular sewing stitches. They are loose and often made with a contrasting thread color or easily removable thread like a water-soluble thread.
- Alignment and Fitting: Basting is commonly used for tasks like aligning fabric pieces before sewing, fitting garments, or securing layers of fabric or fabric and stabilizer in embroidery.
- Easy Removal: Basting stitches can be easily removed by pulling on the thread or using a seam ripper once their purpose has been served.
Stitching
- Permanent: Stitching, on the other hand, is a permanent sewing technique. It involves creating secure and durable connections between fabric layers or pieces that are meant to stay in place.
- Various Stitch Types: Stitching encompasses a wide range of stitches, including straight stitches, zigzag stitches, satin stitches, and many more, depending on the specific sewing or embroidery task.
- Strength and Durability: Stitching is meant to withstand wear and tear, so it’s done with the goal of creating long-lasting and secure seams or designs.
- Permanent Connection: Unlike basting, stitching is not intended to be removed after the sewing or embroidery project is complete. It forms a permanent part of the finished item.
Why You Need to Basting Box or Stitch for Embroidery?
Adding a basting box or stitch in embroidery is crucial for several important reasons.
Here are the reasons:
Secures Fabric and Stabilizer
Embroidery involves the repeated puncturing of fabric with a needle, which can cause the fabric to shift, especially with complex or dense designs. A basting box or stitch serves as a firm anchor, holding the fabric and stabilizer in place.
This stability is essential to maintain the alignment of the design and ensure that each stitch falls exactly where it’s intended.
Prevents Fabric Puckering
One of the most common issues in embroidery is fabric puckering, where the fabric wrinkles or gathers during stitching.
Basting provides uniform tension across the fabric and stabilizer, preventing uneven pulling and reducing the risk of puckering. This results in a smoother, more professional-looking embroidery.
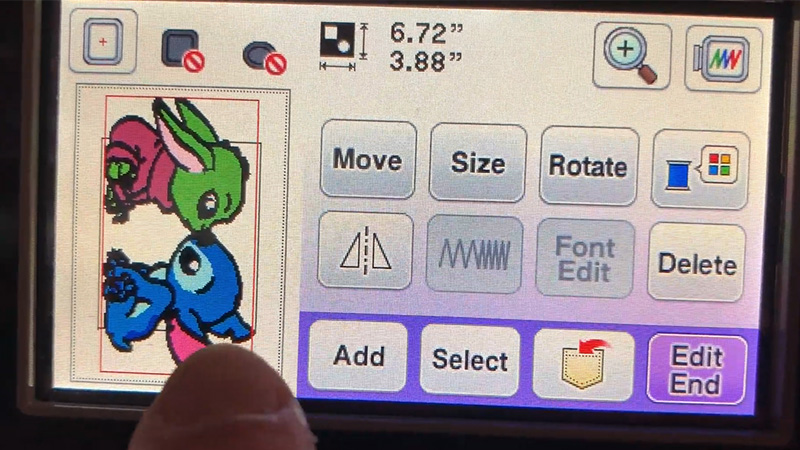
Aids in Design Placement
Precise design placement is critical in embroidery, especially when you’re working on specific motifs, monograms, or logos.
A basting box or stitch acts as a guide, helping you center the design or align it with reference points on your fabric accurately. This is particularly valuable for ensuring symmetry and balance in your embroidery.
Minimizes Fabric Distortion
As the embroidery machine’s needle repeatedly penetrates the fabric, it can stretch or distort the material over time. Basting stabilizes the fabric and prevents this distortion, ensuring that your design retains its intended shape and proportions.
Prevents Thread Tangles
Loose fabric layers can create obstacles for the embroidery thread, leading to thread entanglement or breakage.
By securely basting the fabric, you create a smooth and consistent surface for the needle to pass through, reducing the likelihood of thread-related issues during the embroidery process.
Professional-Looking Results
Whether you’re embroidering for personal pleasure or business, achieving a polished and professional appearance is typically the goal.
Proper basting ensures that your design stays precisely where you want it, resulting in a neater and more refined final product that meets the high standards of embroidery enthusiasts and clients alike.
Time and Material Savings
Basting isn’t just about improving the quality of your embroidery; it’s also about efficiency.
When fabric shifts or puckers during embroidery, you may need to stop and reposition the fabric or, in worst-case scenarios, discard the project entirely. Basting minimizes these setbacks, saving you time and reducing material wastage.
Easier Hooping
Hooping fabric and stabilizer can be a challenging aspect of embroidery, especially for beginners or when working with large or intricate designs. A basting box or stitch simplifies this process by providing clear guidelines.
It acts as a visual reference for positioning your fabric within the embroidery hoop, making hooping more manageable and less prone to errors.
Is a Basting Box Applicable to All Fabric?
A basting box can be used on most fabrics, but its applicability may vary depending on the type and characteristics of the fabric.
Here are some considerations for using a basting box on different types of fabric:
Stable Fabrics
Basting boxes work well on stable and woven fabrics like cotton, linen, and denim. These fabrics are less likely to stretch or distort during embroidery, so a basting box can help ensure precise design placement and prevent any shifting.
Knit Fabrics
Knit fabrics, such as jersey or interlock, have more stretch and elasticity than woven fabrics. When working with knits, it’s important to use a lightweight stabilizer and be cautious with the tension of your basting stitches.
Some embroiderers prefer using temporary adhesive spray or a “no-show” mesh stabilizer for knits instead of a basting box.
Sheer or Delicate Fabrics
Sheer or delicate fabrics like organza, chiffon, or silk may not be suitable for traditional basting stitches because the stitches can damage the fabric.
In such cases, using a water-soluble stabilizer or a gentle adhesive stabilizer can be a better choice for securing the fabric.
Heavyweight Fabrics
Heavyweight fabrics like canvas or denim may require stronger basting stitches or even double basting to ensure stability. The choice of basting thread and stitch length may need to be adjusted accordingly.
Stretch Fabrics
Fabrics with a significant amount of stretch, like spandex or Lycra blends, can be challenging to work with using traditional basting stitches.
In such cases, it’s important to use the appropriate stretch-friendly stabilizer and consider alternatives like adhesive sprays or pins for temporary fabric stabilization.
Faux Leather and Vinyl
Faux leather and vinyl can be used in embroidery projects, but basting stitches may leave visible holes or marks. It’s advisable to use an adhesive stabilizer or clips to secure these materials.
Pile Fabrics
Fabrics with a pile, such as velvet or terry cloth, may require extra attention when applying a basting box to ensure that the stitches don’t crush or mat the pile. Using a water-soluble or lightweight stabilizer can help mitigate this issue.
FAQS
While basting boxes are incredibly useful, they are typically more necessary for larger or intricate designs, stretchy or delicate fabrics, or when using multiple hoopings. For simpler, smaller projects on stable fabrics, you may not need a basting box.
Yes, you can also use a water-soluble stabilizer or a fabric adhesive stabilizer to prevent fabric fraying.
Yes, it’s essential to remove the basting stitches once your embroidery is finished.
Absolutely! Both basting boxes and stay stitches can be created by hand using a sewing needle and thread.
Yes, when using metallic threads for embroidery, be cautious with your basting or stitches.
To Recap
In embroidery, the techniques of adding a basting box or a stay stitch emerge as invaluable tools, ensuring the precision and beauty of your creations.
These seemingly subtle steps play a pivotal role in maintaining fabric stability, preventing fraying, and aligning complex designs.
The strategic use of basting boxes enhances the embroiderer’s control, particularly for sizable or intricate projects. Stay stitches, on the other hand, act as guardians against fraying, especially in delicate fabrics.
Whether by machine or hand, their applications offer a symphony of craftsmanship and practicality, elevating your embroidery to a realm of professionalism and perfection. Mastery of these techniques empowers embroiderers to turn their visions into exquisite, lasting artistry.
Leave a Reply