Quilting is an age-old craft that weaves together creativity and precision. Whether you’re a seasoned quilter or just starting your quilting journey, proper basting is one crucial step to achieving beautiful, wrinkle-free quilts.
Basting holds the quilt top, batting, and backing together, ensuring they stay in place during the quilting process.
In this comprehensive guide, we’ll explore the best ways to baste a quilt, demystifying the process and giving you the confidence to create quilts that are a testament to your skills.
We’ll cover everything from traditional safety pins to modern spray-basting techniques. Discover the tools, tips, and tricks that will make your basting process efficient and effective so you can focus on what you love most – quilting.
Whether you’re quilting for yourself, as a gift, or to showcase your artistry, this guide will help you achieve the perfect foundation for your quilting masterpiece.
Best Ways to Baste a Quilt
Proper basting ensures that your quilt stays smooth and wrinkle-free, making the quilting process more manageable and producing a beautiful finished product.
Let’s explore the best ways to baste a quilt, covering various methods and offering tips and tricks.
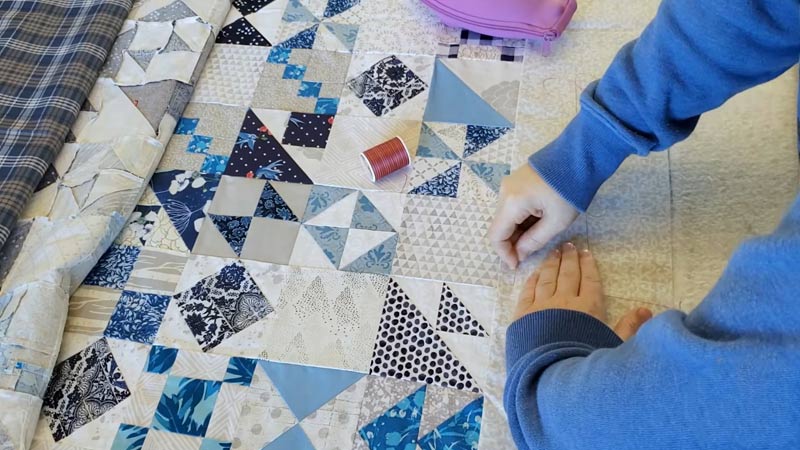
1. Pin Basting
Basting a quilt with pin basting is a traditional method that uses safety pins to secure your quilt’s layers temporarily. Follow these step-by-step instructions to baste your quilt with pin basting:
Prepare Your Workspace
Find a large, clean, flat surface to lay out your quilt sandwich. Ensure that the area is free from debris that could snag your quilt. Start by laying your quilt backing on the flat surface, with the wrong side facing up.
Smooth it out to remove any wrinkles or folds.
Layer Your Quilt Sandwich
Place the quilt batting on top of the backing fabric, ensuring it’s centered and smooth. Finally, lay your quilt top on the batting, aligning the edges with the backing fabric. Your quilt sandwich should now be fully assembled, with the quilt top facing up.
Begin Pinning
Start in the center of your quilt and work your way outward. This helps distribute any wrinkles or puckers evenly. Take a curved safety pin and insert it through all three layers of the quilt sandwich (quilt top, batting, and backing).
Start about 4-6 inches from the center and secure the pin. Place pins in a grid-like pattern, spacing them approximately 4-6 inches apart. Pay close attention to the corners and edges, as these areas shift during quilting.
Corners and Edges
As you go, make sure that the layers remain smooth and taut. Smooth out any wrinkles or bubbles before inserting the pins. When you reach the corners and edges, take extra care to secure them well. You may need to place more pins in these areas to prevent shifting.
Complete the Basting
Continue pinning until you’ve secured the entire quilt. The layers should be held together firmly, and there should be no visible wrinkles or puckers.
Before you start quilting, carefully check for loose or open safety pins. Ensure that all pins are securely closed to avoid any accidents while quilting.
That’s it! Your quilt is now basted and ready for quilting. With the layers securely held together, you can confidently proceed with your quilting designs, knowing your quilt will remain smooth and wrinkle-free throughout the process.
2. Thread Basting
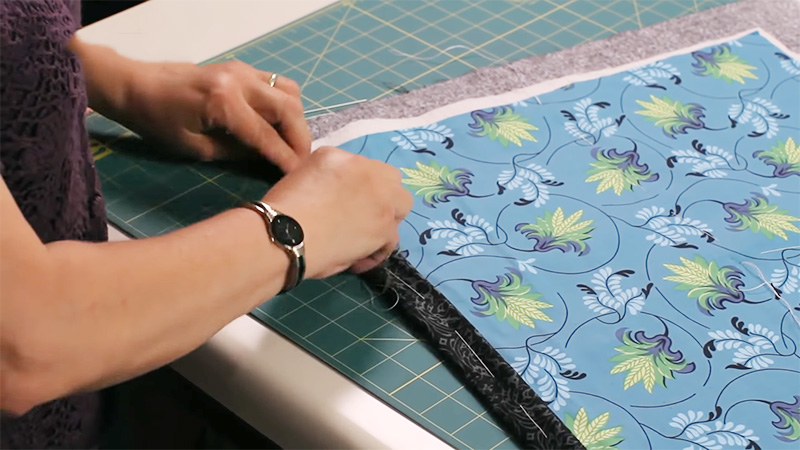
Thread basting is a technique used to temporarily secure the layers of a quilt together with long stitches of thread. This method allows for precise control over the basting process.
Here’s a step-by-step guide on how to thread-baste a quilt:
Prepare Your Workspace
Find a clean and flat surface to lay out your quilt sandwich. Make sure the area is free from debris that could snag your quilt. Begin by laying your quilt backing on a flat surface, with the wrong side facing up.
Smooth it out to remove any wrinkles or folds. Place the quilt batting on top of the backing fabric, ensuring it’s centered and smooth.
Thread Your Needle
First, lay your quilt top on the batting, aligning the edges with the backing fabric. Your quilt sandwich should now be fully assembled, with the quilt top facing up.
Thread a hand-sewing needle with a long piece of basting thread. It’s helpful to use a contrasting color to your quilt fabric to make the thread easily visible.
Begin Stitching
Starting in the center of your quilt, make long stitches through all three layers of the quilt sandwich (quilt top, batting, and backing). The stitches should be about 4-6 inches apart.
Insert the needle through the layers, pull it through, and leave a tail of thread on both the top and bottom sides of the quilt. This tail will make it easier to remove the basting stitches later.
Check for Smoothness
Continue making parallel rows of stitches, moving outward from the center. Ensure the stitches are loose enough to be easily removed when quilting but tight enough to hold the layers together.
As you go, periodically check that the layers remain smooth and taut. Smooth out any wrinkles or bubbles before making the next stitch.
Corners and Edges
When you reach the corners and edges, take extra care to secure them well with basting stitches. These areas tend to shift during quilting.
Continue stitching until you’ve covered the entire quilt with basting stitches. The layers should be held together firmly, and there should be no visible wrinkles or puckers.
Remove Excess Thread
Trim any excess basting thread from the quilt’s top and bottom. Be careful not to cut the quilt fabric itself. Now, your quilt is thread-basted and ready for quilting. The layers are securely held together, allowing you to quilt your design confidently.
When you’re done with the quilting process, you can easily remove the basting stitches by gently pulling the threads.
Thread basting is a precise method that provides excellent control, making it a popular choice for quilters who want to ensure a smooth and well-basted quilt.
3. Spray Basting

Spray basting is a modern and convenient method used to temporarily secure the layers of a quilt together using a specialized basting spray adhesive.
It’s an excellent option to achieve a smooth and wrinkle-free quilt without pins or hand stitching. Here’s how to spray-baste a quilt:
Collect the Materials
You’ll need basting spray, a quilt top, batting, quilt backing, a well-ventilated area, and a clean surface.
Choose a well-ventilated area, preferably outdoors, or ensure that the room you’re working in is well-ventilated. Basting spray can be strong-smelling and should not be inhaled in excess.
Layer Your Quilt Sandwich
Begin by laying your quilt backing on a flat surface, with the wrong side facing up. Smooth it out to remove any wrinkles or folds. Place the quilt batting on top of the backing fabric, ensuring it’s centered and smooth.
Finally, lay your quilt top on the batting, aligning the edges with the backing fabric. Your quilt sandwich should now be fully assembled, with the quilt top facing up.
Apply Basting Spray
Find a clean and flat surface to lay out your quilt sandwich. Make sure the area is free from debris that could affect the adhesive. Shake the basting spray can thoroughly to mix the adhesive.
Holding the can approximately 10-12 inches from the quilt sandwich, spraying a light, even coat of basting spray onto the wrong side of the quilt top, covering the entire surface. Be sure to follow the manufacturer’s instructions for your specific spray.
Smooth and Press
Work systematically from one end to the other, ensuring you cover the entire quilt top evenly with the adhesive. Carefully place the sprayed quilt top onto the batting, aligning the edges with the backing fabric.
The adhesive will hold the layers together. Use your hands to gently smooth and press down on the quilt top to ensure it adheres well to the batting. Pay particular attention to the edges and corners to prevent any shifting.
Allow the Spray to Dry
Let the quilt sandwich sit undisturbed for a few minutes, allowing the basting spray to dry and set. The drying time may vary depending on the spray brand, so follow the manufacturer’s recommendations.
After the spray has dried, trim any excess batting and backing fabric to match the size of your quilt top. Now, your quilt is spray-basted and ready for quilting. The layers are securely held together, and you can confidently proceed with your quilting designs.
One of the advantages of spray basting is that there are no pins to remove, making the quilting process smoother and more efficient. Remember to follow safety precautions when using the adhesive spray in a well-ventilated area.
FAQs
What is quilting?
Quilting is a sewing technique that involves stitching together multiple layers of fabric to create a padded, multi-layered textile. It’s often used to make blankets, bedspreads, and decorative textiles. Quilting can be both a practical craft and a form of artistic expression.
What is the purpose of quilting batting?
Quilting batting, also known as quilt wadding, is the middle layer of a quilt sandwich, situated between the quilt top and backing. Its primary purpose is to provide insulation and loft to the quilt, making it warm and cozy.
Batting also adds dimension and texture to the finished quilt.
What’s the difference between hand quilting and machine quilting?
Hand quilting involves sewing the layers of a quilt together with hand-stitched designs. It’s a traditional and time-consuming method but allows for intricate, personalized quilting patterns. On the other hand, machine quilting uses a sewing machine to stitch the layers together.
How do I choose the right quilting thread?
The choice of quilting thread depends on your project. Select a thread color that complements or contrasts with your fabric for visible quilting lines.
Consider the thread weight (thickness) based on your desired quilting effect; finer threads are more subtle, while thicker threads create bold lines.
What is binding in quilting?
Binding is the finishing edge that surrounds the outer perimeter of a quilt. It conceals the raw edges of the quilt layers and provides a clean, polished look. Quilt binding is typically made from half-ed fabric strips and sewn around the edges of the quilt.
Conclusion
Basting a quilt may seem like a small step in the grand scheme of quilting, but its importance cannot be overstated. It’s the foundation upon which your entire quilting project rests.
Remember, whether you choose thread basting, safety pins, or the convenience of spray basting, the key is to take your time and ensure that all layers are smooth and secure.
The extra effort you put into basting will pay off when you easily quilt and create a finished piece free of wrinkles and puckers.
As you continue your quilting journey, don’t forget to experiment and find the best basting method for you and your specific project.
With practice, your basting skills will improve, and you’ll be well on your way to creating stunning quilts that will be cherished for generations.
Leave a Reply