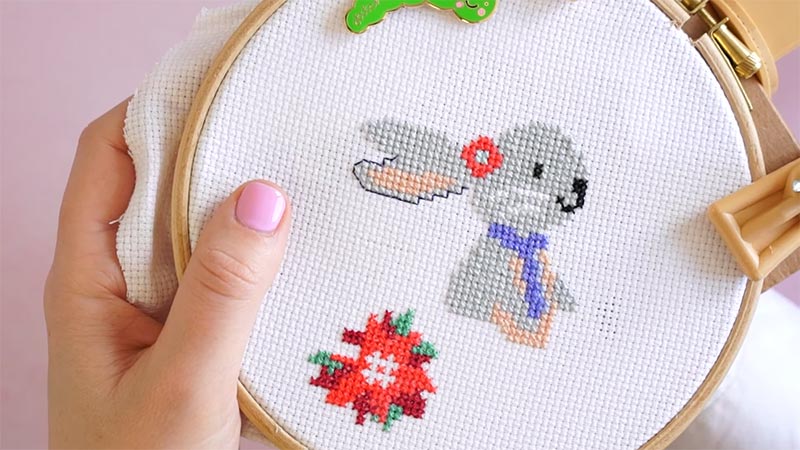
Cross stitch, a cherished needlework craft, has timeless appeal, and the choice of fabric plays a pivotal role in the creative process.
Linen, with its rustic charm and delicate weave, is a popular canvas for cross-stitch enthusiasts. This natural textile, woven from flax fibers, adds a touch of elegance to every project. But can you cross-stitch on linen effectively?
In this exploration, we’ll delve into the art of cross-stitching on linen fabric, discovering the steps, techniques, and considerations that make it a preferred choice for many, whether you’re a novice or a seasoned cross-stitch aficionado.
Linen’s unique texture and classic look make it a canvas for creating intricately detailed and treasured needlework.
Can You Do Cross Stitch on Linen?
Yes, you can absolutely do cross-stitch on linen! In fact, linen is a popular choice of fabric for many cross-stitch enthusiasts due to its unique texture and classic appearance. Cross stitching on linen can result in a beautifully delicate and intricate piece of needlework.
Here are some key points to consider when working with linen for cross stitch:
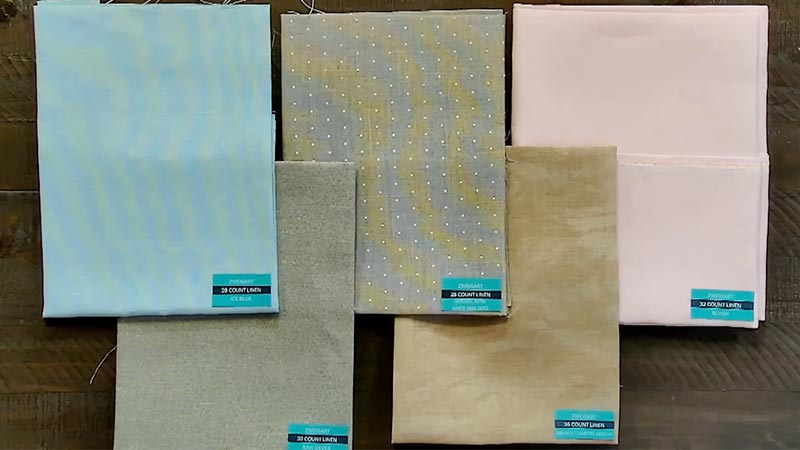
Linen Fabric
Linen, crafted from flax fibers, is a highly regarded choice for cross-stitch projects. Its natural and slightly irregular texture gives your work a classic and timeless look.
Linen comes in a variety of thread counts, typically referred to as “counts per inch” or “threads per inch.” These counts range from 28 to 40 threads per inch.
The choice of thread count depends on your personal preference and the level of detail you want to achieve.
Lower thread counts, such as 28-count or 32-count linen, will result in larger, more visible stitches, while higher thread counts, like 36-count or 40-count, allow for finer, more detailed work.
Needles and Thread
Select an appropriate needle for your chosen linen. A sharp, fine needle is recommended, as linen can be delicate. The type of thread used for cross stitch (commonly referred to as floss) is suitable for linen as well.
However, you may need to adjust the number of strands you use depending on the thread count. It’s typical to use 2 strands of floss on 28 or 32-count linen and 1 strand on higher counts. This adjustment ensures that your stitches are proportional to the fabric’s thread count.
Fabric Preparation
Linen has a tendency to fray, so it’s a good practice to prepare your fabric before starting your cross-stitch project.
This can be done by treating the edges of the fabric with a fray-check solution or by folding and hemming them. This prevents the fabric from unraveling as you work on your project.
Stitching Technique
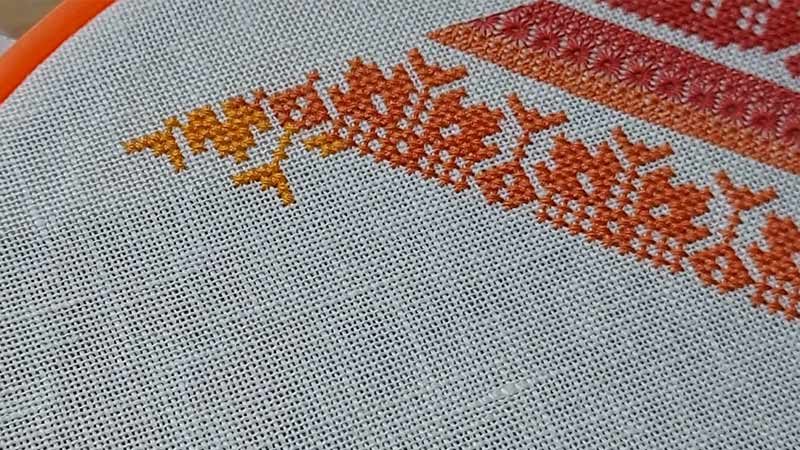
The cross stitch technique remains consistent, whether you’re using linen or Aida cloth. It’s important to maintain even tension in your stitches.
The slightly open weave of linen can make irregular stitches more noticeable. To keep your fabric taut and your stitching consistent, consider using a hoop or frame. This helps ensure that your stitches are neat and uniform.
Washing and Care
After completing your cross-stitch project on linen, it’s crucial to handle it with care. Always adhere to the care instructions for the specific type of linen and thread you’ve used.
Typically, you should gently hand wash your completed piece, avoiding wringing or rubbing it vigorously, as this can lead to damage.
Finishing and Framing
Once your cross stitch is finished, you can explore various options for finishing and displaying your project.
You can frame it for wall art, turn it into a decorative pillow, use it as a centerpiece for clothing, or explore other creative uses.
How to Cross Stitch on Linen Fabric?
Cross-stitching on linen fabric can be a delightful and rewarding experience. Linen’s unique texture and classic appearance can add an elegant touch to your cross-stitch projects.
Here’s a step-by-step guide on how to cross-stitch on linen fabric:
Materials You’ll Need:
- Linen Fabric
- Embroidery Hoop or Frame
- Embroidery Needles
- Cross Stitch Floss
- Scissors
- Pattern
Steps:
Step 1: Prepare the Fabric

Begin by selecting a linen fabric that suits your project’s desired size. It’s often recommended to cut the fabric with some extra around the edges to allow for framing or finishing. This extra margin ensures that you have enough fabric to work with.
To prevent fraying, especially for the cut edges, you can apply a fray-check solution or fold and hem the edges.
This prevents the fabric from unraveling as you work on your project and gives it a clean, finished look.
Step 2: Secure the Fabric in an Embroidery Hoop or Frame
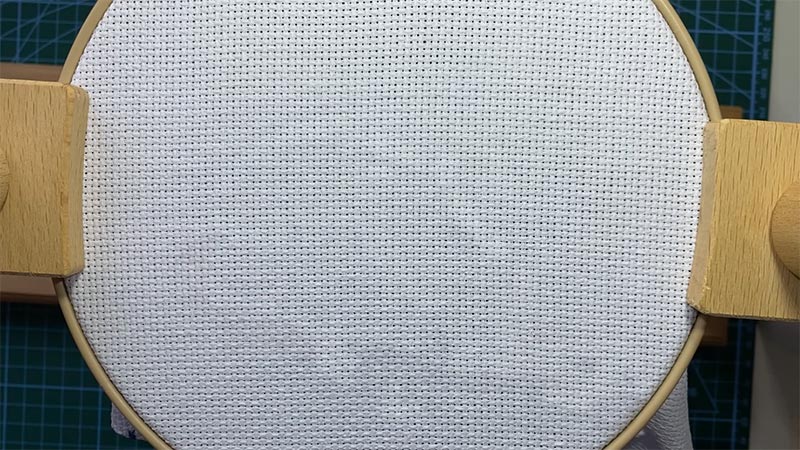
To keep the linen fabric taut while you stitch, place it in an embroidery hoop or frame. It’s important to ensure that the fabric is evenly stretched, not too loose, but not overly tight.
Proper tension in the hoop or frame will help maintain the fabric’s stability as you create your cross stitches.
Step 3: Thread your Needle
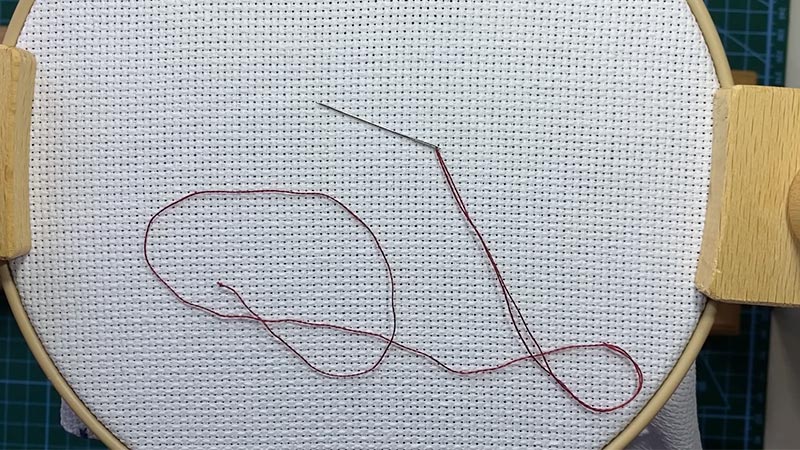
Choose a suitable embroidery needle that is sharp and fine. The choice of needle size depends on the thread count of your linen and your comfort with the needle.
Threading your needle with the appropriate number of floss strands is crucial. For lower thread counts like 28 or 32, it’s common to use two strands, while higher thread counts might require only one strand. Make sure the floss is securely threaded through the eye of the needle.
Step 4: Start Stitching
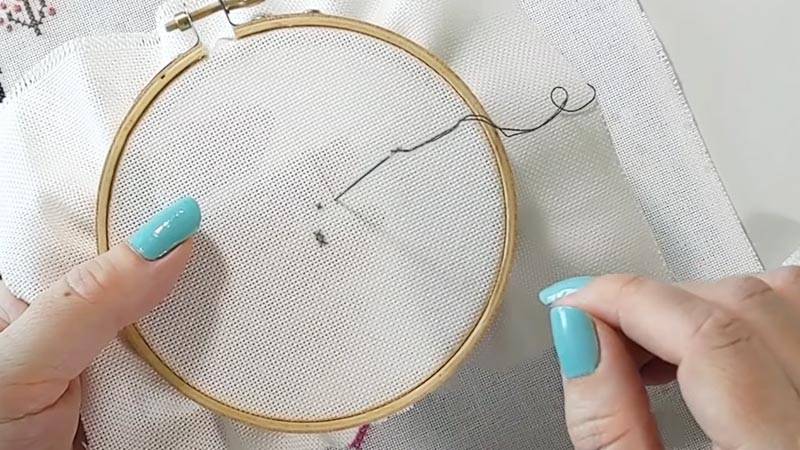
Refer to your cross stitch pattern or chart as you begin your stitching. Cross stitches are typically created by making two diagonal stitches that form an “X” shape.
It’s common practice to start your stitching from the center of your design and work your way outward.
Following the pattern’s instructions for color changes and stitch placement is essential to achieve the intended design.
Step 5: Maintain Even Tension
To create a neat and uniform appearance, it’s important to maintain even tension while stitching. Work one cross stitch at a time, ensuring that each “X” you create is consistent in size and shape. Avoid pulling the stitches too tightly, as this can distort the fabric or cause puckering.
Step 6: Finishing Stitches
When you reach the end of a thread or complete a section of your design, secure the thread at the back of the fabric.
This can be done by making small knots or by weaving the thread under existing stitches on the backside. This keeps the back of your work tidy and ensures that your stitches are secure.
Step 7: Continue Stitching
Continue working on your project, following the pattern, until you’ve completed all the required stitches. As you progress, you’ll see your design taking shape on the linen fabric.
Step 8: Finishing and Framing
Once your cross stitch is finished, you can explore various options for finishing and displaying your project.
Many people choose to frame their cross stitch as wall art, but you can also turn it into a decorative pillow, use it as an embellishment for clothing, or get creative with other uses.
Step 9: Care and Washing
If you decide to wash your cross stitch project, it’s essential to follow the care instructions for the specific type of linen and floss you’ve used.
Hand washing is often recommended, and avoid any vigorous rubbing or wringing to prevent damage to your finished work.
How to Cross Stitch on 32 Count Linen?
Cross stitching on 32-count linen is a delightful and precise needlework technique that can produce intricate and beautiful designs.
Here’s a step-by-step guide on how to cross-stitch on 32-count linen fabric:
Materials You’ll Need:
- 32-Count Linen Fabric
- Embroidery Hoop or Frame
- Embroidery Needles
- Cross Stitch Floss
- Scissors
- Cross Stitch Pattern
Steps:
Prepare the Fabric
Begin by cutting your 32-count linen fabric to the desired size for your project. Leave extra fabric around the edges to allow for framing or finishing.
To prevent fraying, treat the edges of the fabric with a fray-check solution or by folding and hemming them. This will help prevent the fabric from unraveling as you work.
Secure the Fabric in an Embroidery Hoop or Frame
Place the linen fabric in an embroidery hoop or frame, ensuring it is taut but not excessively stretched. Tightening the hoop or frame will keep the fabric steady as you stitch, making it easier to work with the fine linen fabric.
Thread your Needle
Thread your embroidery needle with two strands of cross stitch floss. Double-check that the strands are securely threaded through the eye of the needle.
Start Stitching
Refer to your cross stitch pattern or chart to begin stitching. Cross stitches on 32-count linen are created with two diagonal stitches forming an “X” shape.
Start from the center of your design and work your way outward, following the pattern’s instructions for color changes and stitch placement.
Maintain Even Tension
It’s crucial to maintain even tension in your stitches to achieve a neat and uniform appearance. Work one cross stitch at a time, ensuring that each “X” you create is consistent in size and shape. Avoid pulling the stitches too tightly, as this can distort the fabric.
Finishing Stitches
Secure the thread at the back of your work as you reach the end of a thread or complete a section. This can be done by making small knots or by weaving the thread under existing stitches on the backside of the fabric.
Continue Stitching
Continue working on your project, following the pattern’s instructions, until you’ve completed all the required stitches. The fine linen fabric is ideal for capturing intricate details in your design.
Finishing and Framing
Once your cross stitch is finished, you can explore various options for finishing and displaying your project. Framing it as wall art is a common choice, but you can also use it to create decorative pillows or embellishments for clothing.
Care and Washing
If you choose to wash your cross-stitch project, follow the care instructions for your specific linen and floss.
Hand washing is often recommended, and avoid vigorous rubbing or wringing to protect your finely stitched design.
What Other Fabrics Can You Cross Stitch on Except Linen?
Cross stitch is a versatile craft, and you can work on a variety of fabrics apart from linen, depending on the look and texture you want for your project.
Here are some popular alternatives to linen for cross-stitching:
Aida Cloth
Aida is one of the most widely used fabrics for cross stitch. It is a cotton fabric with a clear grid of holes that make it easy to count and stitch.
Aida cloth comes in different counts (threads per inch), such as 14-count or 18-count, allowing you to choose the level of detail in your design.
Evenweave Fabric
Evenweave is a cotton or linen fabric with an even, consistent thread count in both directions, making it easier to achieve precise, symmetrical stitches.
It’s available in various thread counts and can have a smoother or more textured surface, depending on your preference.
Hardanger Fabric
Hardanger fabric is a specialty fabric used for Hardanger embroidery, a form of counted thread embroidery. It’s typically a 22-count fabric that is perfect for creating delicate and lacy designs.
Jobelan
Jobelan is a blended fabric made from cotton and modal. It’s known for its softness and is available in various thread counts, offering a smooth, fine surface for cross-stitching.
Lugana
Lugana is a cotton and viscose blend fabric that comes in a variety of thread counts. It’s prized for its softness and excellent stitch definition.
Waste Canvas
Waste canvas is not a fabric per se but a temporary grid that you place on your chosen fabric. You stitch your cross-stitch design onto the waste canvas, then remove the grid threads, leaving your design behind on the fabric. It allows you to cross-stitch on virtually any fabric, including clothing items and accessories.
Monk’s Cloth
Monk’s cloth is a loosely woven cotton fabric with a grid-like structure. It’s often used for Swedish or Huck embroidery, but it can also be used for cross-stitching if you enjoy the rustic look.
Plastic Canvas
Plastic canvas is a sturdy, rigid, and gridded material made of plastic. It’s ideal for creating three-dimensional cross-stitch projects, such as ornaments and decorations.
Soluble Canvas
Soluble canvas is a water-soluble fabric that allows you to cross-stitch on items that can’t be traditionally stitched, like clothing or fabrics with irregular textures. Once your design is complete, you dissolve the canvas in water, leaving your design intact.
Linens and Fabrics with Unique Textures
You can experiment with various natural and synthetic fabrics that have unique textures, such as burlap, denim, or even silk. These fabrics can add a distinct character to your cross-stitch projects.
FAQS
Is it challenging to cross-stitch on high-thread-count linen?
Cross stitching on linen with a high thread count, like 40-count, can be more intricate and demanding due to the finer weave.
Can you cross-stitch on colored linen?
Yes, you can cross-stitch on colored linen. Colored linen can add depth and character to your projects, and you’ll need to adjust your floss colors accordingly to ensure they show up well.
Can linen be used for other forms of embroidery besides cross stitch?
Absolutely. Linen is a versatile fabric used for various forms of embroidery, including crewel, blackwork, and Hardanger embroidery, each of which can showcase the fabric’s unique texture and beauty.
Can linen be used for larger cross-stitch projects?
Linen can be used for larger cross-stitch projects, but it may require more time and patience due to its delicate nature.
Last Words
Cross stitching on linen is a craft that merges tradition and timeless elegance. The delicate, rustic texture of linen fabric offers a unique canvas for creating intricate and treasured needlework.
Throughout this exploration, we’ve discovered that working with linen, whether in standard or high-thread-count variations, presents a canvas for captivating detail and beauty.
While it demands patience and precision, the final results are worth the effort. Linen’s versatility extends beyond cross stitch, offering a canvas for various embroidery techniques.
Whether you’re a novice or a seasoned enthusiast, linen invites you to embark on a creative journey where every stitch becomes a thread in the rich tapestry of your artistic expression.
Leave a Reply