Embroidery is a timeless craft that allows you to infuse your personal touch into fabrics and textiles, transforming ordinary pieces into works of art. One of the versatile and visually appealing embroidery techniques is the couching stitch.
If you’re a beginner looking to expand your embroidery repertoire or an experienced crafter seeking a relaxing project, you’ve come to the right place.
In this comprehensive ‘couching Stitch – easy embroidery step by step’ guide, we’ll take you through the art of couching stitch.
Whether you’re adding decorative touches to clothing, creating unique home décor, or simply indulging in a satisfying creative pursuit, couching stitch can elevate your embroidery game.
With its straightforward approach and stunning results, you’ll soon be crafting beautiful designs with ease.
Join us as we unravel the secrets of couching stitch, from the essential tools you’ll need to mastering the technique, and explore inspiring project ideas.
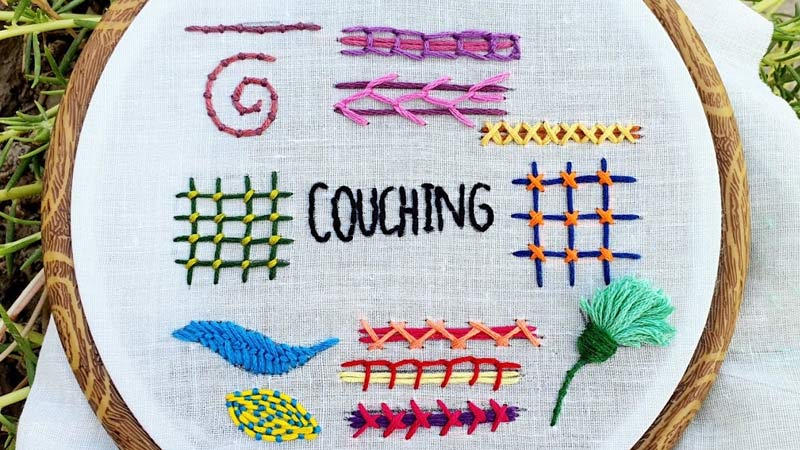
Couching Stitch: Easy Embroidery Step-by-Step
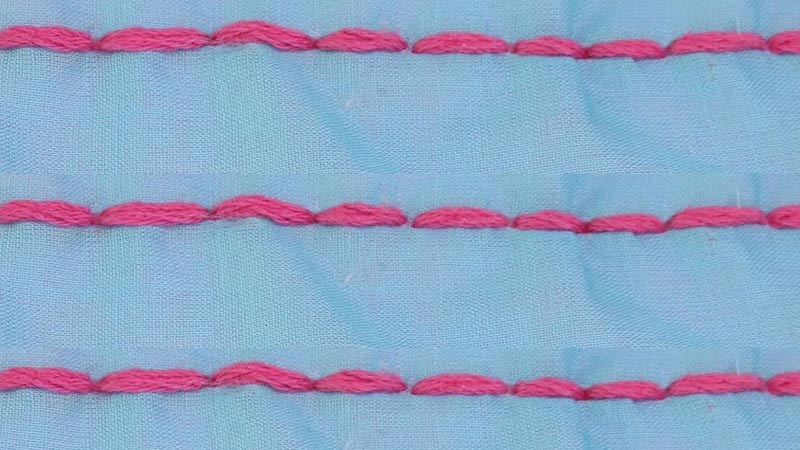
Couching stitch is a simple embroidery technique that involves securing one thread or yarn with another thread on the fabric’s surface. Here’s a step-by-step guide to help you get started:
Materials You’ll Need
Embroidery hoop, fabric, embroidery thread or yarn, and needle.
Select Fabric and Thread the Needle
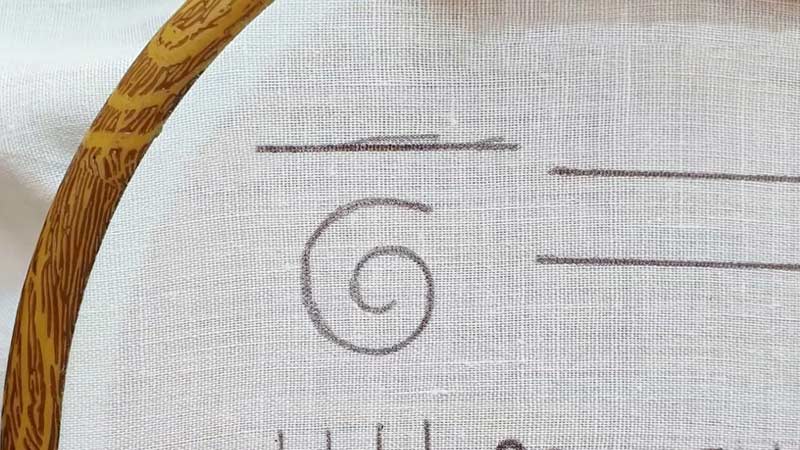
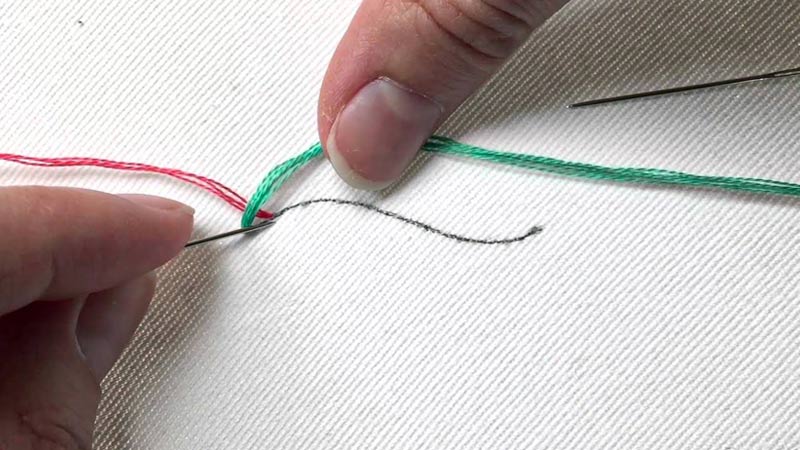
Start by selecting your fabric and placing it in the embroidery hoop. Tighten the hoop to keep the fabric taut. Thread your needle with the yarn or thread you want to couch. You can use a contrasting color for a decorative effect.
Start the Stitch
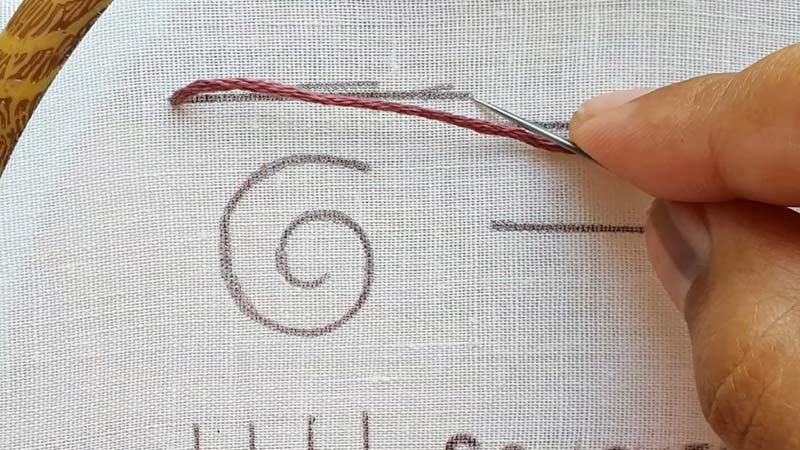
Bring the threaded needle up from the backside of the fabric to the front, where you want to start your couching stitch.
Hold the yarn or thread you want to couch over the fabric surface, parallel to the desired line or shape you want to create.
Anchor the Needle

With your other hand, bring the needle down over the held thread and through the fabric. Make sure to leave a small tail of the held thread on the fabric’s surface.
Continue making small stitches, evenly spaced, over the held thread to secure it in place. You can vary the stitch length depending on your design.
Tie a Knot
When you reach the end of the area you want to couch, secure the thread by taking your needle to the backside of the fabric and tying a knot.
Trim any excess thread or yarn on the backside. Repeat these steps as needed to create your desired design or pattern.
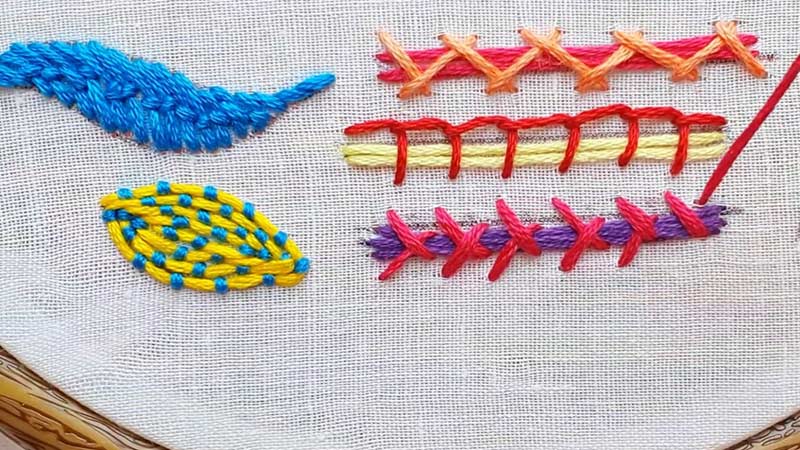
Couching stitch is versatile and can be used for various decorative elements in embroidery, including outlining shapes or filling in areas with different textures.
Experiment with different thread or yarn combinations to achieve unique effects in your embroidery projects.
When to Use the Couching Stitch?

Couching stitch is a versatile embroidery technique that can be used in various situations. Here are some common scenarios in which you might choose to use couching stitch:
Outlining
Couching can be used to create bold, decorative outlines for shapes, letters, or motifs in your embroidery design. It adds dimension and texture to your outlines.
Filling
When you want to fill in an area with a textured or thicker thread, you can use couching to secure that thread in place. This is particularly useful for creating textured backgrounds or filling large areas efficiently.
Adding Texture
Couching can be used to introduce different textures and materials into your embroidery. You can couch ribbon, yarn, or even metallic threads to create unique and eye-catching textures.
Blending Colors
If you want to blend two or more colors of thread seamlessly, couching can help you achieve a smooth transition. Lay one thread over the other and couch them together to create a gradual color shift.
Embellishments
Couching is excellent for adding decorative elements to your embroidery, such as beads, sequins, or other small embellishments. It keeps them securely attached to your fabric.
Dimensional Effects
When you want to add depth and dimension to your embroidery, couching can help by elevating certain threads or materials above the fabric surface, creating a 3D effect.
Out-of-the-Ordinary Threads
When working with unconventional threads or materials like wire, raffia, or novelty yarn, couching is often the best way to secure them in place since they can’t be easily threaded through a needle.
In essence, couching stitch is a valuable technique whenever you want to add texture, dimension, or unique elements to your embroidery project.
It offers flexibility and creativity in your stitching, making it a great choice for both traditional and contemporary embroidery designs.
Alternatives to the Couching Stitch
If you’re looking for alternatives to the couching stitch in embroidery, there are several techniques you can explore, each offering unique effects and applications. Here are some popular alternatives:
Backstitch
Backstitch is a basic embroidery stitch used for outlining and creating fine, continuous lines. It’s a good alternative for simple, solid outlines.
Split Stitch
Split stitch is similar to backstitch but provides a textured, rope-like appearance. It’s suitable for outlining and adding a bit of dimension.
Chain Stitch
Chain stitch is a looped stitch that can be used for both outlining and filling. It creates a continuous line with a decorative twist.
Satin Stitch
Satin stitch is used for filling in shapes with smooth, solid color. It gives a polished, satin-like finish and is excellent for creating bold, colorful designs.
French Knots
French knots are often used for adding small, raised dots or textured details. They can be an alternative for couching when you want to add dimension or small accents.
Bullion Knots
Bullion knots create long, twisted knots that can be used for creating textured lines or filling in small areas. They can be an alternative to couching for certain textures.
Running Stitch
Running stitch is a simple, straight stitch used for decorative effects, outlining, or creating dashed lines.
Feather Stitch
Feather stitch is a decorative stitch often used for creating vine-like patterns, borders, or decorative edges.
Seed Stitch
Seed stitch involves creating small, scattered stitches to fill in areas with texture. It’s an alternative to couching for creating a speckled or textured effect.
Stem Stitch
Stem stitch is another option for creating continuous lines with a slightly twisted appearance. It’s often used for outlining and adding texture.
Cross Stitch
Cross stitch is a counted thread embroidery technique used to create pixelated designs with a cross-shaped stitch. It’s suitable for detailed patterns and images.
Long and Short Stitch
Long and short stitch, also known as shading or needle painting, is used for creating realistic color gradients and shading effects in embroidery.
The choice of stitch depends on your design, the effect you want to achieve, and your personal preference. Experimenting with different stitches and combinations can help you create unique and visually appealing embroidery projects.
What Tools to Use for a Couching Stitch?
To perform a couching stitch in embroidery, you will need several essential materials and tools:
Embroidery Fabric
Choose a fabric suitable for your project. Common choices include cotton, linen, or even specialty fabrics like felt or canvas.
Embroidery Hoop
An embroidery hoop helps keep your fabric taut and flat while you work. It’s especially important for achieving even stitches. Choose an appropriate size for your project.
Embroidery Thread or Yarn
The thread or yarn you use for couching can vary depending on your design. You can use regular embroidery floss, specialty threads, metallic threads, yarn, or any other thread-like material. The color and thickness should complement your design.
Needle
Select an embroidery or tapestry needle with an eye large enough to accommodate the thread or yarn you are using. The needle should also be sharp enough to easily pierce the fabric.
Scissors
Sharp embroidery scissors are essential for cutting threads and trimming excess thread after completing your couching stitches.
Design or Pattern
Have a clear idea of the design or pattern you want to create with your couching stitches. You can sketch it directly onto the fabric or use a pre-printed or traced design.
Backing Fabric (Optional)
If you want to prevent the backside of your embroidery from showing through or protect it, you can use a backing fabric.
Marking Tools (Optional)
Depending on your design, you may need marking tools like fabric pens or chalk to draw guidelines or design elements onto your fabric. Once you have these materials ready, you can start your couching stitch embroidery project.
Remember to choose the appropriate thread or yarn for the desired effect, and practice your stitching technique on a scrap piece of fabric if you’re new to couching to ensure you achieve the desired look in your final embroidery piece.
FAQs
What is a couching stitch in embroidery?
A couching stitch is a technique in embroidery where one thread or yarn is laid across the fabric surface, and another thread is used to secure it in place with small stitches. It’s often used for decorative effects and adding texture to embroidery designs.
What types of threads or yarns are suitable for couching?
Couching can be done with a wide variety of threads and yarns, including embroidery floss, metallic threads, ribbon, wool, and specialty fibers. The choice depends on the desired texture and effect in your embroidery project.
When should I use a couching stitch in my embroidery projects?
Couching is ideal for outlining shapes, adding dimension, incorporating unique textures, blending colors, securing embellishments, and creating decorative effects. Use it when you want to achieve these specific design elements.
Can I combine couching with other embroidery stitches?
Yes, you can combine couching with various embroidery stitches to create intricate and layered designs.
For example, you might use couching for outlining and then fill in the shapes with different filling stitches like satin stitch or seed stitch.
Do I need a special needle for couching stitches?
While you can use a regular embroidery or tapestry needle for couching, some embroiderers prefer using a larger-eyed needle, especially when working with thicker threads or yarns. This makes threading the needle easier and ensures smooth stitching.
Conclusion
The couching stitch is a fantastic addition to your embroidery toolkit, offering endless possibilities for creativity and expression.
Whether you’re embellishing a garment, personalizing a gift, or simply enjoying the therapeutic rhythm of needle and thread, this technique is both versatile and accessible.
As you’ve learned in this step-by-step guide, mastering the couching stitch is within your reach. Armed with the right knowledge and a bit of practice, you can create stunning designs that showcase your unique style and artistic flair.
So, whether you’re a beginner eager to embark on your embroidery journey or an experienced crafter seeking new horizons, don’t hesitate to explore the world of couching stitch.
Let your creativity flow, and watch as your embroidery projects come to life with texture, color, and personality. Now, it’s time to pick up your needle, select your threads, and start your next couching stitch project.
Leave a Reply