Setting up a new Cricut machine is the gateway to a world of creative possibilities in crafting and personalization. Whether you’re a seasoned DIY enthusiast or just beginning your creative journey, knowing how to set up your Cricut is the first step to unleashing your imagination.
This guide will walk you through How to Set Up Your New Cricut, from unboxing to calibration and software installation. By the end of this tutorial, you’ll be well-prepared to embark on a crafting adventure limited only by your creativity.
So, let’s dive in and explore the straightforward process of preparing your Cricut for the countless projects and designs that await.
How To Set Up Your New Cricut?
Setting up your new Cricut machine is the first exciting step toward unleashing your creativity in the world of crafting and personalization. Here’s a step-by-step guide to help you get started:
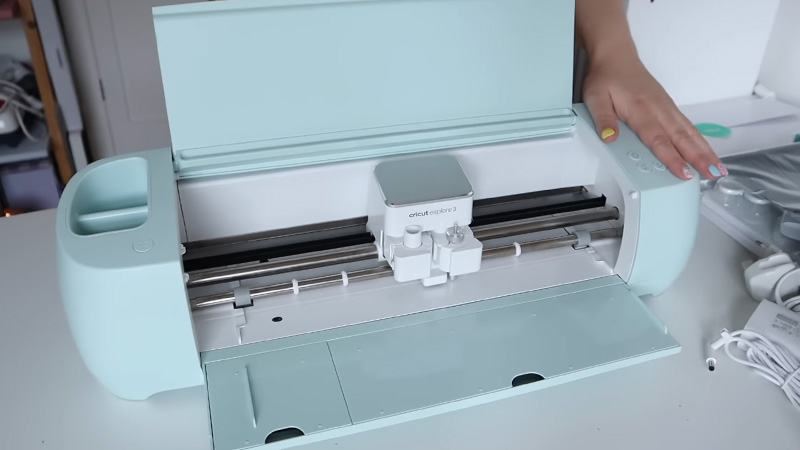
Unbox and Inspect
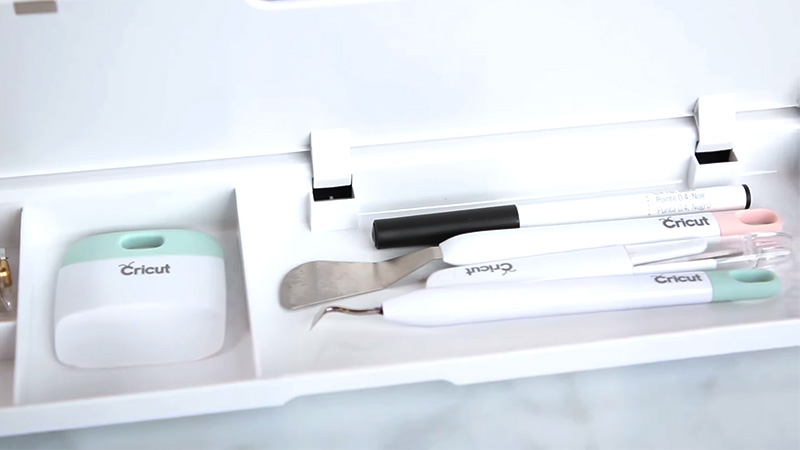
Begin by carefully unboxing your Cricut machine and accessories. Check that all components, including the machine, cords, and any included materials or tools, are present and undamaged. This ensures a smooth setup process.
Choose the Right Location
Select an appropriate location for your Cricut, preferably a clean, flat, and well-ventilated workspace near an electrical outlet. Make sure there’s enough room for the machine and your materials.
Plug In and Power On
Connect your Cricut to a power source using the provided power cord. Turn on the machine by pressing the power button. You’ll see the Cricut logo on the display, indicating that it’s booting up.
Connect to a Device
Depending on your Cricut model, you can connect to your computer, tablet, or smartphone via Bluetooth or USB cable. Follow the setup instructions for your specific model to establish a connection with your device.
Install Design Software
Install the Cricut Design Space software on your computer or download the app to your mobile device. This is where you’ll create and edit designs before sending them to your Cricut machine for cutting or writing.
Calibration and Material Selection
Follow the prompts in the Cricut Design Space to calibrate your machine, which helps ensure precise cutting. Select the material you’ll be working with; this is crucial for setting the right pressure and speed settings on your Cricut.
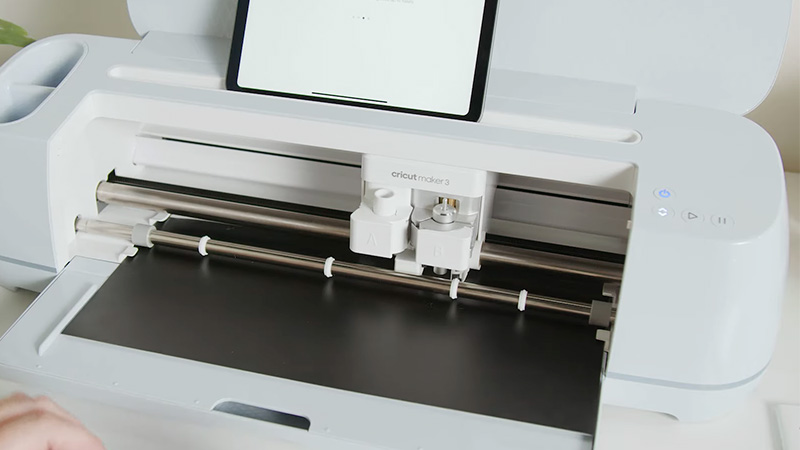
Load Materials and Start Crafting
Once your Cricut is connected and calibrated, load your chosen material onto the cutting mat and feed it into the machine. In the Design Space, select or create your project, and then hit the “Make It” button. Your Cricut will cut, write, or score the design according to your specifications.
With these seven straightforward steps, you’ll be well on your way to exploring the creative possibilities that your Cricut machine has to offer. Remember to refer to your machine’s user manual for specific setup instructions tailored to your model.
Materials You’ll Need For Setting Up Your New Cricut
Here’s a table listing the materials you’ll need for setting up your new Cricut machine:
| Materials | Description |
| Cricut Machine | The Cricut machine of your choice |
| Power Cord | To connect your Cricut to a power source |
| Device (Computer/Smartphone) | For installing Cricut Design Space software |
| USB Cable (if applicable) | For connecting your Cricut to your device |
| Bluetooth (if applicable) | To establish a wireless connection with your device |
| Cutting Mat | To hold and feed materials into the Cricut |
| Materials for Practice | Such as scrap paper or cardstock for calibration |
| Cricut Design Space Software | To create, edit, and send designs to your Cricut |
These materials are essential for a smooth setup and initial use of your Cricut machine. Ensure you have them on hand to make the most of your crafting experience.
How Long Does It Take To Set Up A New Cricut Machine?
Setting up a new Cricut machine is a relatively straightforward process, and the time it takes can vary depending on your familiarity with the equipment and the specific model you have.
On average, the setup can take anywhere from 15 minutes to an hour, and occasionally longer if you encounter any technical issues.
Here’s a breakdown of the time required for each step in the setup process:
Unboxing and Inspection (5-10 minutes)
This initial step involves unboxing your Cricut machine and ensuring that all components are present and in good condition. It’s a quick but essential task to make sure everything is ready for setup.
Choosing the Location (2-5 minutes)
Selecting an appropriate workspace with good lighting and access to an electrical outlet usually takes just a few minutes.
Plugging In and Powering On (2-5 minutes)
Connecting the machine to the power source and powering it on is a straightforward process, taking a few minutes at most.
Connecting to a Device (5-10 minutes)
Depending on your familiarity with Bluetooth or USB connections, establishing a connection between your Cricut and your computer, tablet, or smartphone can take a little longer.
Installing Design Software (10-20 minutes)
Downloading and installing the Cricut Design Space software on your device may take a bit longer, especially if you need to create a Cricut account or update the software.
Calibration and Material Selection (5-10 minutes)
Calibrating your Cricut machine and selecting the appropriate material can take a few minutes to ensure accurate cutting.
Loading Materials and Starting a Project (5-15 minutes)
Preparing your cutting mat, loading materials, and launching your first project in Cricut Design Space can vary in time, depending on the complexity of your chosen design.
In total, setting up a new Cricut machine typically ranges from 15 minutes for those familiar with the process to around an hour for newcomers, especially if they encounter any technical hiccups.
Regardless of the time it takes, patience and attention to detail will help you have a smooth and successful setup experience.
Mistakes To Avoid When Setting Up Your New Cricut?
Here are some common mistakes to avoid when setting Up Your New Cricut-
Skipping the Manual
One of the most common mistakes is disregarding the user manual or setup guide that comes with your Cricut machine. These documents provide essential instructions tailored to your specific model, so overlooking them can lead to errors in the setup process.
Neglecting Calibration
Failing to calibrate your Cricut is a significant mistake. Calibration ensures precise cutting and scoring, so skipping this step can result in misaligned or incomplete projects. Follow the calibration process provided by Cricut for the best results.
Not Updating Software
Newer versions of the Cricut Design Space software are periodically released to enhance functionality and fix bugs. Neglecting to update your software can lead to compatibility issues and glitches that could disrupt your crafting experience.
Ignoring Material Settings
Selecting the wrong material setting in Cricut Design Space can lead to cutting mistakes. Always choose the correct material setting based on the material you’re working with, as this ensures proper pressure and speed settings for your projects.
Poor Cutting Mat Preparation
Incorrectly loading or preparing your cutting mat can result in materials shifting or not feeding properly, leading to misalignment or incomplete cuts. Take your time to ensure your material is secure on the mat and correctly loaded into the machine.
Rushing Bluetooth or USB Setup
When connecting your Cricut to a device via Bluetooth or USB, avoid rushing through the setup process. Follow the steps carefully, as mistakes in this phase can lead to connectivity issues that hinder your crafting.
Failing to Test and Practice
Jumping into complex projects without testing your Cricut’s basic functions and settings can lead to frustration and wasted materials. Always begin with simple test cuts and practice runs to become familiar with your machine’s capabilities and limitations.
By avoiding these common mistakes and taking a methodical approach to setting up your new Cricut, you’ll maximize your chances of a successful and enjoyable crafting experience from the start.
Be patient and thorough, and don’t hesitate to consult the user manual or seek help if needed.
FAQs
Do I need any special tools to set up my new Cricut machine?
No, you don’t need any specialized tools. Your Cricut machine typically comes with the necessary components, including the power cord. However, it’s essential to have a computer, tablet, or smartphone and an internet connection to download the design software and set up your Cricut.
Can I set up my Cricut without any prior experience or technical skills?
Yes, you can. Cricut machines are designed with user-friendliness in mind. The setup process is well-documented in the user manual, and the software is intuitive.
While some technical familiarity may help, many newcomers find the setup process straightforward and manageable.
Is calibration necessary for setting up my Cricut, and how do I do it?
Calibration is important for ensuring precise cutting, especially for intricate designs. The Cricut setup process typically includes calibration steps, guided by the software.
What should I do if my Cricut machine isn’t connecting to my device during setup?
If your Cricut doesn’t connect via Bluetooth or USB, start by checking if your device’s Bluetooth is enabled. Ensure you’re within a reasonable range of the machine.
Can I set up my Cricut without an internet connection?
While an internet connection is necessary for downloading the Cricut Design Space software, once the software is installed, you can use it offline.
However, an internet connection may be required for software updates and accessing new project ideas and resources through the software.
Conclusion
Congratulations, you’ve successfully navigated the process of setting up your new Cricut machine, and your creative journey is now ready to begin.
As you’ve discovered, the steps involved are relatively straightforward, whether it’s unboxing, powering on, connecting to your device, or calibrating for precise cuts.
Remember that patience, attention to detail, and a willingness to learn and practice are your allies on this crafting adventure. With your Cricut ready, you’re now equipped to dive into a world of personalized gifts, intricate paper crafts, vinyl designs, and more.
As you explore the endless creative possibilities, let your imagination run wild, and let your Cricut bring your artistic visions to life.
Leave a Reply