Embarking on an embroidery project with iron-on patterns introduces a concern: do these intricate designs withstand washing?
The longevity of iron-on embroidery patterns is a crucial consideration for craft enthusiasts.
The question “Do iron-on embroidery patterns wash out?” arises from the desire for designs that endure frequent laundering.
This inquiry delves into the quality of transfers and their ability to withstand washing without fading or peeling.
Let’s explore the factors influencing the permanence of these patterns and understand the measures one can take to ensure their endurance against the wear and tear of regular washing.
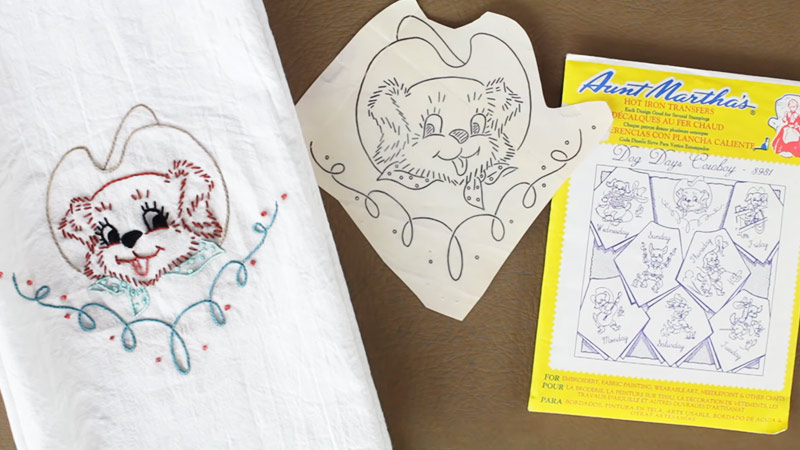
Do Iron-On Embroidery Patterns Wash Out?
Iron-on embroidery patterns are convenient and popular for adding intricate designs to fabrics without the need for intricate stitching. However, the longevity of these designs can be a concern.
When it comes to the question, “Do iron-on embroidery patterns wash out,” it’s essential to consider the quality of the transfer. In some cases, lower-quality transfers may fade or peel after washing.
However, high-quality iron-on embroidery transfers, when applied correctly, tend to withstand washing and maintain their vibrancy.
It’s crucial to follow care instructions diligently, using mild detergents and avoiding harsh washing conditions to ensure the longevity of the design.
When done right, the concern about “do iron-on transfers wash off” is mitigated, allowing for lasting and beautifully embellished fabrics.
How To Remove Iron On Embroidery Pattern?
Embarking on a project only to realize the need for a change? Whether you want to refresh your fabric or start anew, knowing how to wash embroidery patterns off or how to remove embroidery patterns from fabric is essential.
Here are seven simple methods to undo your iron-on embroidery and reclaim your fabric.
Hot Iron Method

Gently place a hot iron over a clean cloth atop the embroidery. The heat helps loosen the adhesive, making it easier to peel off. Be cautious not to scorch the fabric; repeat as needed.
Freezer Technique
Pop the fabric into a plastic bag and place it in the freezer for a few hours. The cold temperature makes the adhesive brittle, allowing you to peel off the embroidery pattern with minimal effort.
Vinegar Soak
Mix equal parts vinegar and water and soak the fabric for about 30 minutes. The acidity of the vinegar can break down the adhesive, making it easier to remove the iron-on pattern.
Rubbing Alcohol Dab
Dabbing a cotton ball with rubbing alcohol and gently rubbing it over the embroidery can help dissolve the adhesive. Take care not to saturate the fabric excessively.
Hairspray Method
Spray a small amount of hairspray onto the embroidery, allowing it to sit for a few minutes. The alcohol content in hairspray can help loosen the adhesive, making removal more manageable.
Commercial Adhesive Remover
Apply a commercial adhesive remover following the product’s instructions. These specialized solutions are designed to dissolve adhesives, providing an effective and straightforward way to remove iron-on patterns.
Boiling Water Rinse
Pour boiling water over the back of the embroidery pattern. The heat softens the adhesive, making it easier to peel off. This method is suitable for fabrics that can withstand hot water.
Choose the method that best suits your fabric and preferences, ensuring a seamless transition from old to new on your textile canvas.
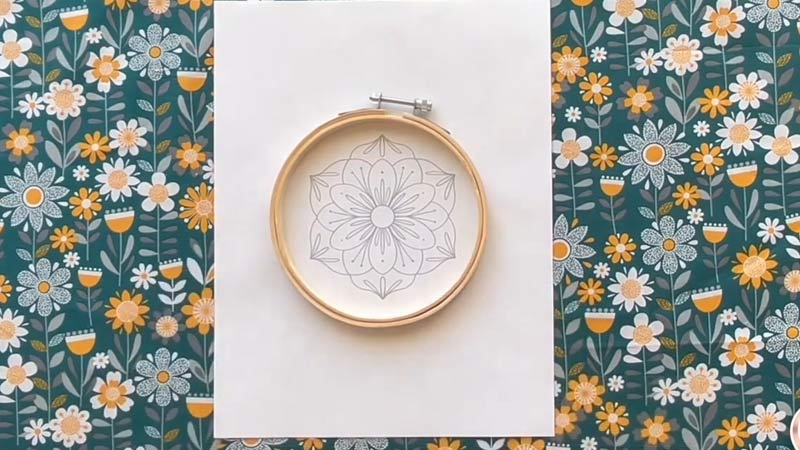
How To Do Iron On Transfers For Embroidery?
Are you embarking on an embroidery project and eager to seamlessly transfer your design onto fabric using embroidery iron-on transfers?
Here are seven simple methods to guide you through the process, ensuring your designs are accurately and effectively transferred using washable embroidery transfer paper.
Printable Transfer Paper
Utilize printable transfer paper designed for inkjet or laser printers. Print your design on the transfer paper, cut it out, and iron it onto your fabric, following the product instructions.
Tracing with Pencil
Place your design under the fabric and trace it onto the fabric using a soft pencil. Once traced, go over the lines with a hot iron, transferring the pencil marks onto the fabric.
Transfer Pen Method
Trace your design directly onto the fabric with a transfer pen. Once traced, place a protective sheet over the design and iron it to set the ink, creating a permanent transfer.
Freezer Paper Technique
Secure a printed design to fabric using freezer paper. Iron the freezer paper onto the fabric, creating a temporary bond. Trace the design onto the fabric and remove the paper.
Heat Transfer Pencil
Draw your design on a piece of paper using a heat transfer pencil. Place the pencil side down on the fabric and iron over it. The heat transfers the design onto the fabric.
Water-Soluble Stabilizer
Print or trace your design onto a water-soluble stabilizer. Affix it to the fabric and stitch through both layers. Once done, soak the fabric to dissolve the stabilizer, leaving only your embroidered design.
Carbon Paper Method
Place carbon paper between your design and the fabric, facing down. Trace the design with a stylus or pencil, transferring the carbon to the fabric. This method is suitable for dark fabrics.
Experiment with these methods to find the one that best suits your design and fabric, ensuring a successful and enjoyable iron-on transfer for your embroidery project.
FAQs
How can I ensure my iron-on embroidery patterns stay intact after washing?
Follow care instructions diligently. Use mild detergents, wash in cold water, and avoid harsh washing conditions. Additionally, pre-wash fabrics before applying transfers to enhance adhesion.
Will iron-on embroidery patterns fade over time with washing?
While lower-quality transfers may fade, high-quality ones are designed to maintain vibrancy through multiple washes. Proper application and care contribute to long-lasting designs.
Can I use any fabric for iron-on embroidery patterns?
Most fabrics are suitable, but natural fibers like cotton work best. Ensure the fabric can withstand the heat required for ironing the transfer.
Is there a difference in washing outcomes between DIY and professionally done iron-on embroidery patterns?
Not necessarily. The key is the quality of the transfer and proper application. Both DIY and professionally done transfers can withstand washing if done correctly.
How should I care for fabrics with iron-on embroidery patterns?
Machine wash fabrics with iron-on patterns inside out in cold water. Avoid bleach and fabric softeners. Tumble dry on low heat or air dry to preserve the design further.
Conclusion
The resilience of iron-on embroidery patterns during washing is influenced by various factors, including the quality of the transfer, the fabric type, and proper application.
While lower-quality transfers may pose a risk of fading or peeling, when applied correctly, high-quality transfers can withstand washing. To maximize the longevity of these designs, following care instructions diligently is crucial.
The concern about iron-on embroidery patterns washing out can be mitigated by choosing quality transfers and adopting appropriate washing practices, allowing for enduring and beautifully embellished fabrics that stand the test of time.
Leave a Reply