Embarking on a quilting journey invites many creative decisions, and one pivotal choice is whether to quilt before or after appliqué. This decision holds the key to your quilt’s visual and textural aspects.
Quilting before appliqué provides a smooth canvas, facilitating a more straightforward process and the potential for a dimensional trapunto effect.
On the contrary, quilting after appliqué unleashes design freedom, allowing intricate patterns without the need to navigate around appliqué shapes.
In this exploration, we delve into both approaches’ considerations, advantages, and nuances, offering insights to guide you through the artistry of quilt-making.
Do You Quilt Before Or After Appliqué?
Yes, deciding to quilt before or after appliqué is subjective and depends on personal preference and project requirements.
Some quilters choose to quilt before appliqué for a smoother quilting process and the option to create a trapunto effect. This method involves adding dimension by placing batting under the appliqué pieces.
On the other hand, quilting after appliqué provides design freedom, allowing for intricate quilting patterns without constraints. The background fabric remains free of quilting stitches until after attaching the appliqué pieces.
Ultimately, the choice between the two methods depends on individual creative preferences and the desired outcome for each quilting project.
How To Quilting Before Appliqué? Step-By-Step Guide
Quilting before appliqué involves stitching the quilted background before adding the appliqué pieces. Here’s a step-by-step guide to help you navigate this process:
Materials and Tools
- Background fabric for quilting
- Batting
- Backing fabric
- Appliqué fabric
- Appliqué templates or patterns
- Needle and thread
- Sewing machine
- Quilting ruler
- Pins or basting spray
Steps:
Prepare Your Quilt Sandwich
Layer your background, batting, and backing fabric to create the quilt sandwich. Ensure they are smooth and free of wrinkles.
Quilt the Background Fabric
- Decide on your quilting design. This could be straight lines, free-motion quilting, or any other pattern.
- Use your sewing machine to quilt the entire background fabric. Ensure even stitches and secure the layers together.
Trim Excess Fabric
Trim the excess batting and backing fabric to match the size of your quilted background.
Prepare Appliqué Pieces
Cut out your appliqué pieces from the chosen fabric, following the templates or patterns you have. You can use needle-turn, raw-edge, or fusible appliqué techniques.
Position Appliqué Pieces
Arrange your appliqué pieces on the quilted background. Pin or use basting spray to secure them in place temporarily.
Secure Appliqué Pieces
Stitch down the appliqué pieces. This can be done by hand using a needle and thread or by machine, depending on your preference and the desired look.
Conceal Stitches
If you’re hand-sewing, conceal your stitches under the edges of the appliqué pieces. Choose a thread color that blends well with the fabric.
Add Dimension (Optional)
To create a trapunto effect, add small amounts of batting or stuffing under the appliqué pieces before securing them. This will create a raised, three-dimensional look.
Final Touches
Ensure all your appliqué pieces are securely stitched down. Trim any excess threads and make any necessary adjustments.
Consider Binding
Decide whether you want to add binding to finish the edges of your quilt. This step is optional but adds a polished look to your project.
Finishing
Your project is complete once you’re satisfied with the quilting and appliqué! Consider washing and blocking your quilt for a finished appearance.
Pros for Quilting Before Appliqué
Quilting before appliqué has several advantages, and these pros may influence your decision-making process when planning your quilting project. Here are some key benefits:
Ease of Quilting
Quilting the background fabric before adding appliqué allows for a smoother quilting process. There’s no need to navigate around or over the appliqué pieces, which can be particularly advantageous for intricate or detailed designs.
Dimension and Texture
This method allows for creating more dimension and texture by incorporating batting or stuffing under the appliqué pieces. This technique, called trapunto, adds a raised effect, enhancing the overall visual appeal.
Versatility in Appliqué Techniques
Whether using needle-turn, raw-edge, or fusible appliqué, quilting before appliqué provides flexibility in choosing the appliqué technique that best suits the design.
Cons for Quilting Before Appliqué
While quilting before appliqué has its advantages, there are also some potential challenges and drawbacks associated with this approach. Here are some cons to consider:
Risk of Distortion
Care must be taken to prevent distortion or stretching of the quilted background fabric during the appliqué process. Pinning or gluing becomes crucial to maintaining the fabric’s integrity.
Securing Appliqué Pieces
Properly securing the appliqué pieces is essential to prevent shifting or peeling. This often involves stitching them down securely or using fusible web.
Concealing Stitches
Hiding appliqué stitches under the edges of the pieces can be challenging, especially with contrasting thread colors or thicker threads.
How To Quilting After Appliqué? Step-By-Step Guide
Quilting after appliqué involves adding the appliqué pieces to the quilted background and then quilting the entire quilt sandwich. Here’s a step-by-step guide to help you through the process:
Materials and Tools
- Quilted background fabric (with or without batting)
- Backing fabric
- Appliqué fabric
- Appliqué templates or patterns
- Needle and thread
- Sewing machine
- Quilting ruler
- Pins or basting spray
Steps:
Prepare Your Quilt Sandwich
If you haven’t already quilted your background fabric, do so now. This could involve straight-line quilting, free-motion quilting, or any other design you prefer.
Trim Excess Fabric
Trim the excess batting and backing fabric to match the size of your quilted background.
Prepare Appliqué Pieces
Cut out your appliqué pieces from the chosen fabric, following the templates or patterns you have. You can use needle-turn, raw-edge, or fusible appliqué techniques.
Position Appliqué Pieces
Arrange your appliqué pieces on the quilted background. Pin or use basting spray to secure them in place temporarily.
Secure Appliqué Pieces
Stitch down the appliqué pieces. This can be done by hand using a needle and thread or by machine, depending on your preference and the desired look.
Conceal Stitches (Optional)
If you’re hand-sewing, make sure to conceal your stitches under the edges of the appliqué pieces. Choose a thread color that blends well with the fabric.
Quilting the Entire Quilt
- Load the quilt sandwich into your sewing machine.
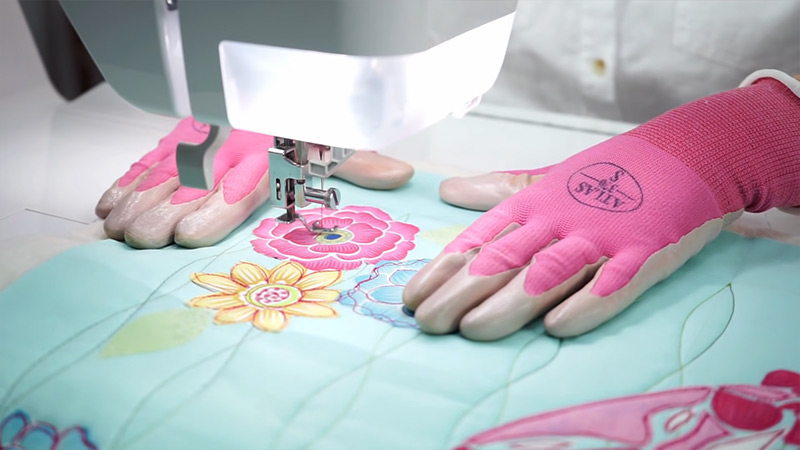
- Choose a quilting design that complements the appliqué shapes. This could be simple straight-line quilting, free-motion quilting, or any custom design you prefer.
- Quilt over the entire quilt sandwich, ensuring the stitches secure the background fabric and the appliqué pieces.
Be Mindful of Appliqué Pieces
Take care when quilting around or over the appliqué pieces. Be mindful of their placement to avoid catching them with the needle.
Final Touches
Once the quilting is complete, check for any loose threads or areas needing additional stitching. Trim excess threads.
Binding (Optional)
Consider adding binding to finish the edges of your quilt. This step is optional but adds a polished look to your project.
Finishing
Consider washing and blocking your quilt to give it a finished appearance.
Pros for Quilting After Appliqué
Quilting after appliqué also has advantages, providing unique benefits for certain projects. Here are some pros to consider when choosing to quilt after appliqué:
Preservation of Background Fabric
Quilting after appliqué eliminates concerns about distorting or stretching the background fabric during the appliqué process. This is particularly beneficial when working with delicate or intricate designs.
Freedom in Quilting Design
Quilting after appliqué allows for a wide range of quilting designs, including free-motion and decorative stitches. This freedom can enhance the appliqué shapes and add visual interest to the quilt.
Thread and Color Choices
Since the quilting won’t be visible under the appliqué pieces, there’s flexibility in choosing any thread color or thickness for the quilting process.
Cons for Quilting After Appliqué
While quilting after appliqué has advantages, this approach has some potential challenges and drawbacks. Here are some cons to consider:
Challenges in Quilting Around Appliqué
Quilting around or over the appliqué pieces can be time-consuming and requires precision, especially with small or intricate shapes.
Avoiding Damage to Appliqué Pieces
Care must be taken during the quilting process to avoid catching or snagging the appliqué pieces with the needle or foot, which could lead to damage or unwanted puckering.
Limitations in Dimension
Unlike quilting before appliqué, this method does not offer the option to create a trapunto effect by adding batting under the appliqué pieces.
FAQs
Can I mix different appliqué techniques in the same quilt project?
Yes, you can mix various appliqué techniques in a single project. This adds versatility and allows creative expression by combining needle-turn, raw-edge, or fusible appliqué methods.
How can I secure appliqué pieces without stitching them down?
Besides stitching, appliqué pieces can be secured using fusible web or fabric glue. These methods provide alternatives for attaching pieces without visible stitches.
Are there specific considerations for quilting large appliqué projects?
For larger projects, consider breaking down the quilting process into manageable sections. Secure appliqué pieces thoroughly, and use proper support to handle the weight and size of the quilt.
What types of thread are suitable for quilting around appliqué shapes?
Use a thread that complements both the background fabric and the appliqué pieces. Choosing a thread color that blends well helps conceal stitches and maintains a cohesive look.
What are some tips for overcoming challenges associated with each quilting approach?
For quilting before appliqué, secure the background and avoid distortion. When quilting after appliqué, stitch carefully around shapes, preventing catching or snagging on appliqué edges.
To Recap
In the rich tapestry of quilt-making, the choice between quilting before or after appliqué is a deeply personal, each method weaving its unique charm into the fabric of creativity.
As we conclude this exploration, the essence lies in the beauty of choice – the freedom to sculpt dimensions or dance freely with designs.
Whether embracing the ease of quilting before or relishing the liberty of quilting after, the journey celebrates individual expression.
As your needle weaves through threads and stories, may the quilt you create reflect not just warmth, but the warmth of your artistic spirit, echoing through the stitches of time.
Leave a Reply