Most of us know about embroidery from our grandmothers. The details and the beautiful craftsmanship could draw anyone’s attention.
When we look at it, we want to learn it! If you are someone who has plenty of time and wants an opportunity with embroidery, we are here for you.
This is exclusive to the embroidery stitch guide. For beginners who are starting with embroidery, our guide can help you! Not only that, professionals can also benefit from this guide!
So, what’s in it? You’ll have to read it till the end to learn it! Let’s begin.
Did You Know?
- The oldest embroidered item is a piece of clothing from the Cro-Magnon period, dating back over 30,000 years.
- The term satin stitch comes from its similarities to the shiny appearance of satin fabric. It has dense stitches.
- Tambour embroidery was popular in France in the 18th century. It is a technique made with a hooked needle.
- Embroidery guilds were founded in medieval Europe. The most skilled embroiders worked on long garments for royalty and nobility.
- The sewing machines became popular in the 19th century. Also, the pre-built patterns contributed to the spread of embroidery as a popular hobby during this time.
- Today, embroidery is more than handcrafts. It has evolved to digital and computerized embroidery machines that offer any detailed and complex design.
Embroidery Stitch Guide
Where to begin as an embroider? There are so many embroidery types. You should start with them first! Our guide will help you determine the basic to advanced level embroidery and how you can craft them.
Basic Embroidery Stitch
You can start with the basic embroidery stitch, especially if you have no prior experience and have never tried any embroidery before. You can try the simple embroidery stitches,
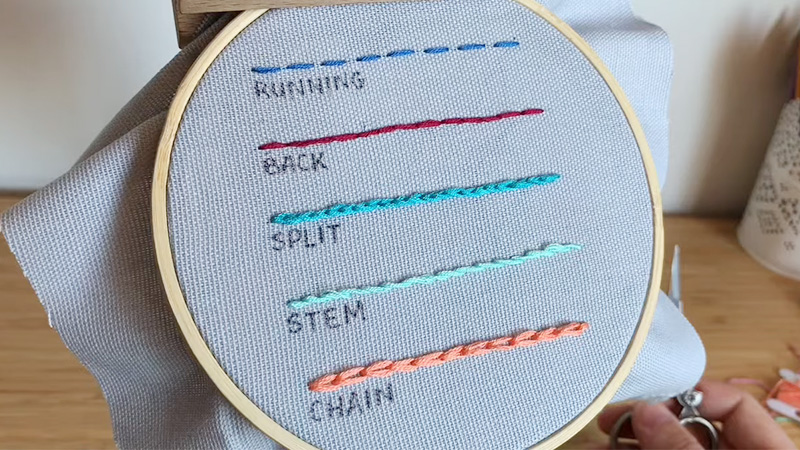
Running Stitch:

It’s the most basic embroidery stitch. You must create a series of even-spaced and straight stitches along a line. It’s quick and fresh to start, ideal for simple outlines, and can add texture to your design.
Backstitch:
It’s a versatile stitch and excellent for outlines and lettering. Backstitch involves continuous lines. You must stitch backward one stitch length and then bring the needle forward. It will deliver a solid and repetitive pattern.
Split Stitch:
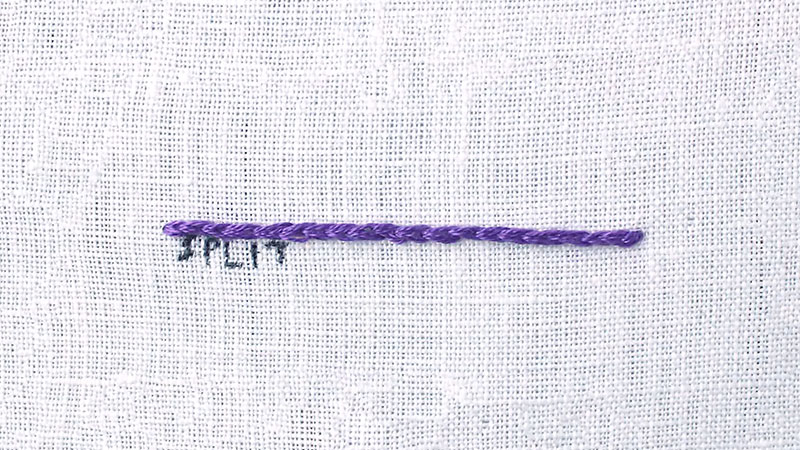
It is a variation of the backstitch but with a unique twist. In split stitch, as you make a stitch, you split the previous stitch with your needle. Ultimately, you have the texture of a rope.
If you are a depth fan, the split stitch will be good for you. In addition to depth, you can add versatile dimensions to your fabric. It is often ideal for decorative lines and contours.
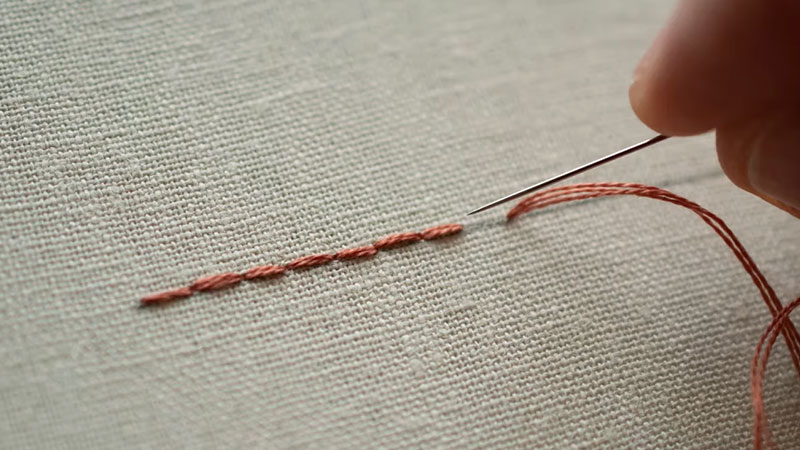
Stem Stitch:
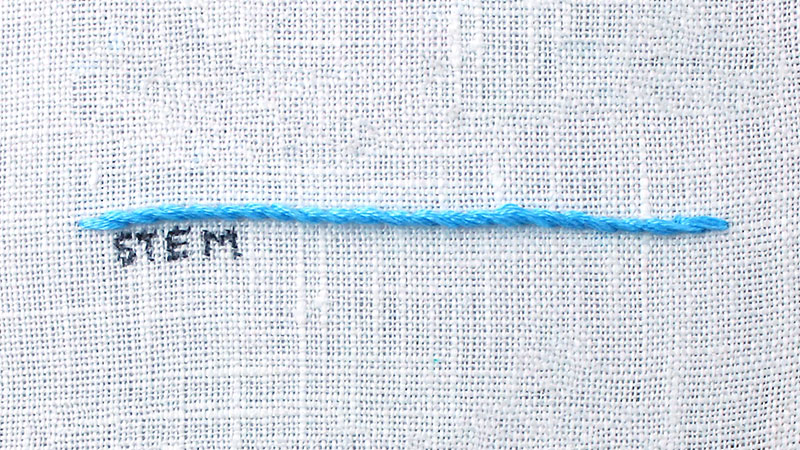
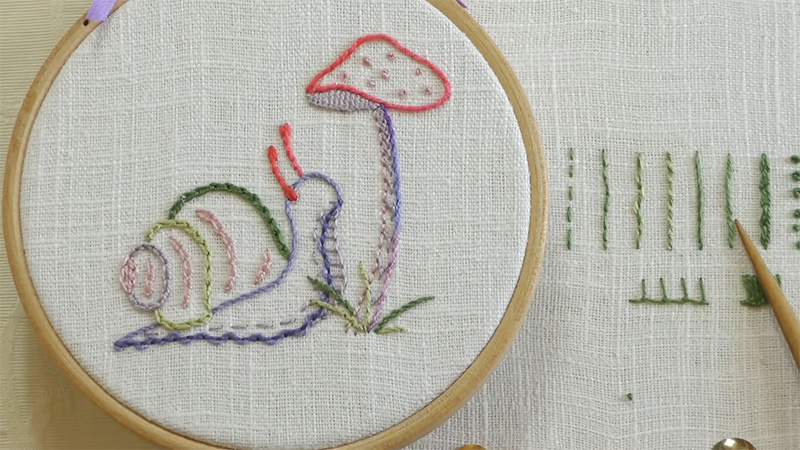
Embroidery is not limited to lines and numbers. Soon, you must get down to curves and any other organic shape.
If you want to bring a beautiful twisted rope effect, consider the stem embroidery stitch to follow the contour of your design. It is perfect for floral design and any other element with graceful lines.
Satin Stitch:
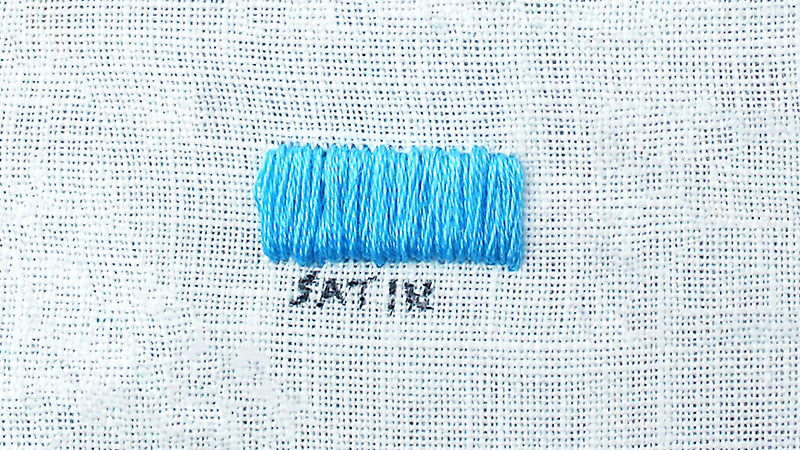
It is all about filling shapes with smooth, shiny stitches. The Satin Stich is ideal for solid areas and makes a soft and satin-like surface. You can add vibrant colors and more depth to your embroidery.
Stem Stitch is okay for floral patterns, but the satin stitch is my favorite for filling in flower petals, leaves, and other details.
French Knot:
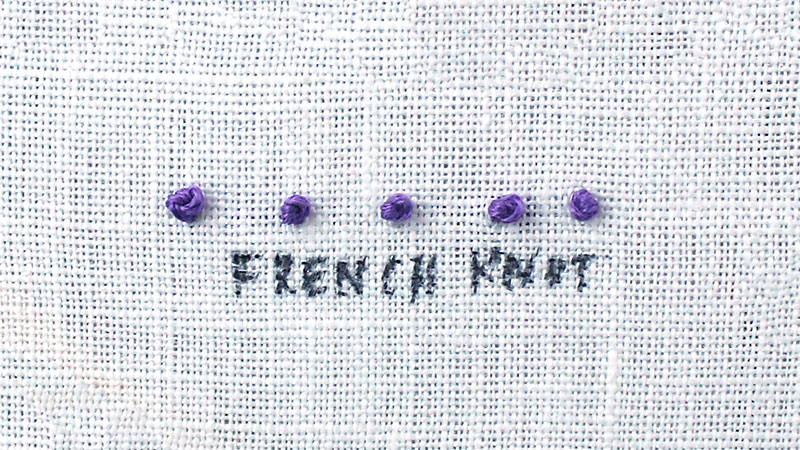
They are small and decorative. The French knot can easily add texture and details to your embroidery. As it is of the basic level, it is not too hard for beginners to learn. You must wrap the thread around the needle multiple times before pulling it through the fabric.
Unlike Stem Stitch or Satin Stitch, the French Knots fit right to the tiny details like the center of flowers and stars of the sky or add texture to animal fur.
The basic embroidery stitch provides a strong foundation for other embroidery projects. Since our article highlights the essential embroidery stitch guide, here’s a trial of the intermediate and advanced stitch. Let’s follow.
Intermediate Embroidery Stitch
- Chain Stitch: It forms a linked chain suitable for curves and lines.
- Lazy Daisy Stitch: You can make beautiful petals and leaf shapes.
- Feather Stitch: Excellent for borders. It resembles a row of open feathers.
- Fishbone Stitch: You can make leafy, v-shaped patterns for foliage.
- Blanket Stitch: Ideal for edging, this stitch has a neat interlocking appearance.
- Couching: It involves stitching one thread over another.
Once you have fully mastered the basic embroidery stitch, we will offer an intermediate embroidery stitch guide. So, what are the advanced embroider stitch types? Take a look for more.
Professional Embroidery Stitch
- Bullion Knot: It forms long, cylindrical knots. You can use it for flowers and more.
- Spider Web Stitch: You have beautiful web-like patterns. People use this stitch to make dreamcatchers.
- Crewelwork: A historical technique that uses a wool thread for beautiful designs.
- Goldwork: Defines metallic threads and materials for a luxurious look.
- Blackwork: You can make repetitive geometric patterns in black thread.
- Raised Embroidery: Ideal for adding dimension by layering stitches for a 3D effect.
We are almost at the end of our article. With our embroidery stitch guide, we hope you know the basic embroidery stitches and start first. You will eventually follow the intermediate and advanced embroidery stitches, and we will be here to guide you through.
A Small Note:
Please take note of what you should do to bring out some perfect outcome; let’s take a look.
- Always wash and iron your fabric before the embroidery.
- Secure knots at the back of your work. It prevents unraveling.
- Always maintain a stable tension while stitching. It delivers a polished look.
- Patience is essential. Take your time to reach the goal.
Final Words
Congratulations! You now know the essential embroidery stitch guides and how to master them, along with some other options for intermediate and advanced embroidery stitch.
We offer regular guides on embroidery and fabrics. Keep an eye on our blog section; you will get what you want for your next sewing project. We are here for you. Also, don’t forget to share our article with your friends and others to help us grow.
Leave a Reply