Embroidery is a timeless craft that allows you to transform plain fabrics into works of art.
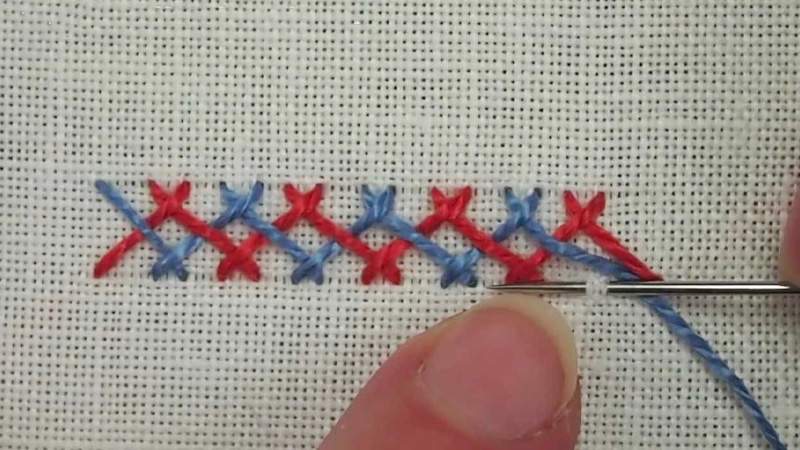
Among the various embroidery techniques, the herringbone stitch stands out for its elegant, interlocking pattern. It’s a classic choice for adding texture, depth, and visual interest to your projects.
In this comprehensive guide, we will discuss how to do herringbone stitch embroidery. Whether you’re a beginner eager to learn the basics or an experienced embroiderer looking to refine your skills, you’ll find valuable insights and tips here.
We’ll start with the fundamental principles of the herringbone stitch, explaining the materials you’ll need and the basic terminology.
As we progress, you’ll discover how to create the stitch, troubleshoot common issues, and explore variations to add your unique flair to your embroidery projects.
Join us on this creative journey as we unravel the art of herringbone stitch embroidery, opening doors to a world of artistic possibilities.
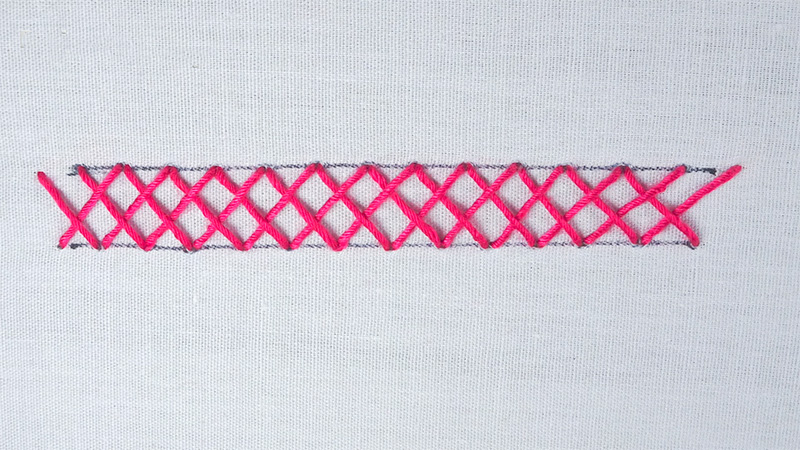
How to Do Herringbone Stitch Embroidery? 7 Steps
Embroidery enthusiasts and beginners alike, get ready to embark on a creative journey with herringbone stitch embroidery!
This timeless and elegant technique adds texture and sophistication to your fabric projects. Here’s a step-by-step guide on how to do herringbone stitch embroidery:
Materials You’ll Need
Embroidery hoop, fabric, embroidery floss in your chosen colors, embroidery needle, scissors, a nice pattern or design (optional).
Step 1: Prepare Your Fabric
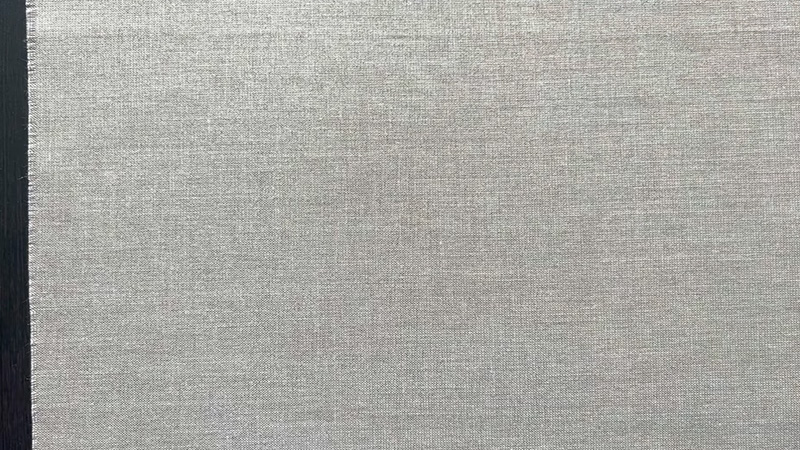
Place your fabric in the embroidery hoop, making sure it’s taut but not overly stretched. Select a fabric that’s not too delicate as it might easily get damaged by the needle. Cotton fabrics are always best for practicing.
Step 2: Thread the Needle
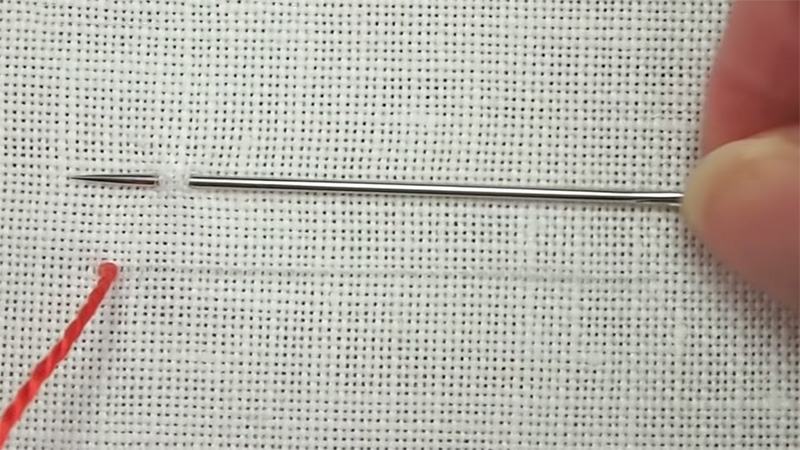
Cut a length of embroidery floss (typically about 18 inches) and thread it through the embroidery needle. Knot the end. Bring the needle up from the back of the fabric to the front at the starting point of your design.
Step 3: Create the First Stitch
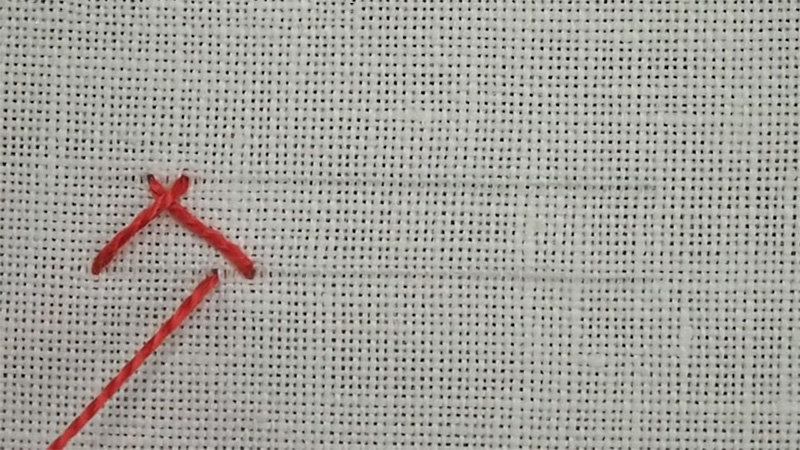
Make a diagonal stitch from the starting point, moving to the opposite side. Bring the needle back down through the fabric, forming a slanted line. This is the very first stitch that we’ll follow.
Step 4: Create the Second Stitch

Bring the needle up again, a short distance away from the end of the first stitch. Make another diagonal stitch, crossing over the first stitch. Bring the needle back down to create an “X” shape.
Step 5: Continue Stitching

Repeat steps 4 and 5, working your way along the base line. Keep the stitches baselined and make sure they cross in the center of the previous stitch.
When you reach the end of the row, secure the last stitch with a small knot on the backside of the fabric.
Step 6: Start the Next Row

To start a new row, bring the needle up a short distance from the end of the last stitch. Create stitches that slant in the opposite direction of the previous row.
Continue this pattern, alternating the direction of the stitches in each row. Repeat steps 6-8 until you’ve completed your herringbone stitch design.
Step 7: Secure the Thread
To finish your embroidery, secure the thread on the backside of the fabric with a knot. Trim any excess thread.
Carefully remove the fabric from the embroidery hoop, and your herringbone stitch embroidery is complete!
Remember, practice makes perfect with embroidery. Experiment with different thread colors and fabric types to create unique and stunning designs. Enjoy your journey into the world of herringbone stitch embroidery!
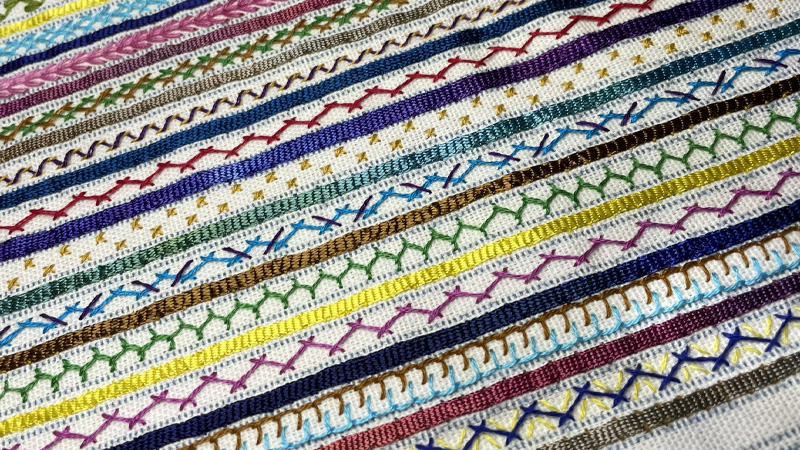
What Are the Styles and Variations of Herringbone Stitch Embroidery?
Herringbone stitch embroidery offers various styles and variations, allowing you to create unique and intricate designs.
Here are some popular styles and variations of herringbone stitch embroidery:
Basic Herringbone Stitch
This is the standard herringbone stitch, where the stitches create a slanted “V” shape.
It’s a foundation for many other herringbone variations. You can start with this variation as a beginner.
Double Herringbone Stitch
In this style, you work two rows of herringbone stitches close together, creating a dense, textured pattern. Similar to the double herringbone, the stitches in the second row are offset, creating a brick-like pattern.
Chevron and Interlocking Herringbone Stitch
Instead of straight rows, create a chevron or zigzag pattern by alternating the direction of your herringbone stitches.
Interlocking herringbone stitch herringbone stitches that interlock with each other, creating a complex, woven appearance.
Open and Closed Herringbone Stitch
In the open variation, you leave a small gap between the stitches, giving your design a more open and airy feel. A closed herringbone stitch is the opposite of an open herringbone, where the stitches are tightly packed together, creating a solid and filled-in look.
Lattice and Doubled Herringbone Stitch
The lattice style combines herringbone stitches with small vertical stitches to create a lattice or grid-like pattern. Work two herringbone stitches side by side, then repeat in the opposite direction for a unique braided effect.
Radiating and Layered Herringbone Stitch
For radiating stitch, start with a central point and work herringbone stitches radiating outward, creating a sunburst or floral effect.
Stack herringbone rows on top of each other, creating a layered, three-dimensional texture.
Color Variations
Experiment with different thread colors to create gradient effects, color transitions, or multi-colored herringbone designs. These styles and variations offer endless possibilities for your herringbone stitch embroidery projects.
Feel free to mix and match them, combine techniques, and let your creativity shine as you explore the world of herringbone stitch embroidery.
Can You Make Herringbone Stitch in a Sewing Machine?
Creating a true herringbone stitch using a sewing machine can be challenging because the herringbone stitch in hand embroidery involves a specific interlocking pattern of diagonal stitches.
Sewing machines are typically designed for straight stitches, zigzag stitches, and other basic stitch types. However, you can achieve a herringbone-like effect on a sewing machine by using a zigzag stitch with some adjustments. Here’s how to do it:
Set Your Sewing Machine to a Zigzag Stitch
Adjust the width and length of the zigzag stitch to your desired size. A narrower width will create a tighter herringbone-like pattern, while a wider width will result in a looser pattern.
Use Contrasting Thread Colors
To enhance the herringbone effect, use two contrasting thread colors. One thread color will represent the “up” stitches, and the other will represent the “down” stitches.
Stitch at an Angle
Sew rows of zigzag stitches at an angle to each other, creating a diagonal pattern. The stitches in each row should overlap slightly with the stitches in the previous row.
Experiment
Practice on scrap fabric to adjust the stitch width, length, and angle until you achieve the herringbone-like effect you desire.
While this technique can mimic the appearance of a herringbone stitch, it won’t be an exact replica of the hand-embroidered herringbone stitch.
If you’re looking for an authentic hand-embroidered herringbone stitch, it’s best to do it by hand.
How to Do Open and Closed Herringbone Stitch?
Open and closed herringbone stitch are two variations of the herringbone stitch commonly used in embroidery.
Practice both closed and open herringbone stitches on scrap fabric to get a feel for the tension and spacing. Here’s how to do both:
Closed Herringbone Stitch
Start with a Base Line
Bring the threaded needle up from the back of the fabric at the starting point of your design. Make a diagonal stitch from the starting point, moving to the opposite side.
Create the First Stitch
Bring the needle back down through the fabric, forming a slanted line. Make sure the stitches cross in the center, creating a “V” shape. It’s important to enhance the look.
Create Subsequent Stitches
Continue making diagonal stitches along the base line, crossing each stitch at the center.
Ensure that the stitches are close together for a dense, filled-in look. When you reach the end of the row, secure the last stitch with a small knot on the backside of the fabric.
Open Herringbone Stitch
Start with a Base Line
Bring the threaded needle up from the back of the fabric at the starting point. You can vary the angle of your stitches and experiment with different thread colors to create unique effects.
Create the First Stitch
Make a diagonal stitch from the starting point, moving to the opposite side. Bring the needle back down through the fabric, forming a slanted line.
Unlike closed herringbone, leave a small gap between the first stitch and the next one.
Create Subsequent Stitches
Continue making diagonal stitches along the base line, leaving gaps between them. The gaps give the design an open, airy appearance. When you reach the end of the row, secure the last stitch with a small knot on the backside of the fabric.
These stitches can be used to fill shapes, create borders, or add texture and dimension to your embroidery projects. With these instructions, you can add the beauty of closed and open herringbone stitches to your embroidery repertoire.
FAQs
Can I use any type of fabric for herringbone stitch embroidery?
Yes, you can use various types of fabric for herringbone stitch embroidery. Common choices include cotton, linen, and even canvas. The choice of fabric depends on your project and personal preference.
What is the ideal thread count for herringbone stitch embroidery?
There’s no strict thread count requirement for herringbone stitch. You can adapt the stitch to different thread counts, but finer fabrics often work well with finer embroidery floss, while thicker fabrics may require heavier thread.
How can I ensure even spacing and alignment of herringbone stitches?
To maintain even spacing, consider using an embroidery hoop to keep your fabric taut.
You can also lightly mark guidelines on your fabric to help with alignment, but these markings should be easily removable.
What are some common mistakes to avoid when doing herringbone stitch embroidery?
Common mistakes include inconsistent stitch angles, uneven tension, and not securing stitches properly. Pay attention to stitch direction and spacing to achieve a neat and uniform appearance.
Can herringbone stitch be combined with other embroidery stitches?
Absolutely! Herringbone stitch pairs well with many other embroidery stitches, such as satin stitch, chain stitch, or French knots. Combining different stitches can create intricate and eye-catching designs.
Conclusion
The herringbone stitch embroidery is a versatile and captivating technique that can elevate your textile creations to new heights.
With practice and patience, you can harness its beauty to embellish clothing, accessories, or home decor items.
Remember, embroidery is not just a craft; it’s a form of self-expression. As you hone your herringbone stitch skills, don’t be afraid to experiment, mix colors, and explore different fabrics. Your unique touch will breathe life into your projects.
So, gather your supplies, embrace the rhythm of the herringbone stitch, and embark on a journey of creativity and craftsmanship. With dedication, you’ll watch your creations flourish, turning simple fabrics into exquisite pieces of art.
Whether you’re embroidering as a hobby or for professional pursuits, the herringbone stitch is a timeless technique that will continue to captivate and inspire for generations to come.
Leave a Reply