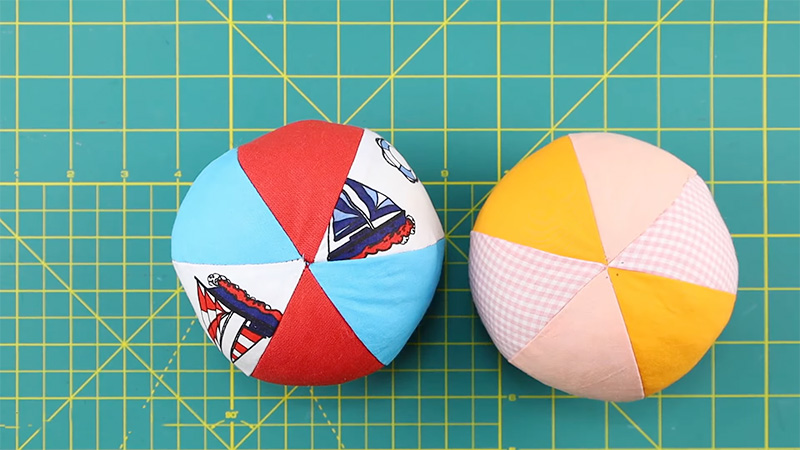
Sewing a captivating fabric ball with two pieces is a creative endeavor that yields delightful decorative items, charming toys, or elegant ornaments.
This crafting technique involves skillfully stitching together two fabric circles to form a three-dimensional sphere. Through careful selection of fabrics, precise cutting, and meticulous sewing, you can achieve a polished and professional-looking final product.
This guide unravels the step-by-step process of creating such a ball, offering valuable insights into folding, stitching, stuffing, and shaping. Alongside these instructions, it outlines essential precautions to ensure a successful and safe sewing experience.
Whether you’re a seasoned crafter or a beginner eager to explore new horizons, sewing a fabric ball with two pieces promises a gratifying journey of creativity and craftsmanship.
What is a Ball With 2 Pieces?
A ball with two pieces refers to a three-dimensional spherical object that is constructed by sewing together two fabric pieces. This sewing technique allows you to create a rounded shape by sewing along the curved edges of the two fabric circles.
Once sewn and turned right-side-out, the ball can be stuffed with filling material to give it volume and shape. The two pieces are sewn together in a way that conceals the raw edges and results in a smooth, finished appearance on the surface of the ball.
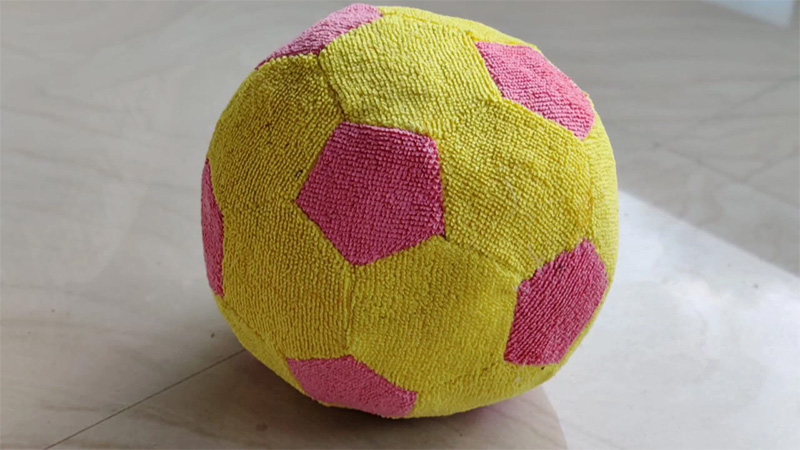
This type of crafting is often used to make decorative fabric balls, soft toys, or ornaments. The process involves careful sewing, shaping, and stuffing to achieve the desired final result.
How Do I Sew a Ball With 2 Pieces?
Sewing a ball with two fabric pieces is a delightful craft that allows you to create charming decorative items, toys, or ornaments. This process involves assembling two fabric shapes to form a three-dimensional sphere.
Here’s a comprehensive guide on how to sew a fabric ball with two pieces:
Material Selection
Begin by selecting suitable fabrics for your project. Choose colors, patterns, and textures that align with your desired aesthetic. The fabric you choose will influence the final look and feel of your fabric ball.
Cutting the Fabric Circles
Using a circular template or a compass, carefully cut out two identical fabric circles. These circles will serve as the two halves of your fabric ball.
Pay attention to precision during cutting to ensure a symmetrical final result.
Folding the First Circle
Take one of the fabric circles and fold it in half, ensuring that the right sides of the fabric are facing each other. This fold creates the foundation for the interior layer of your fabric ball.
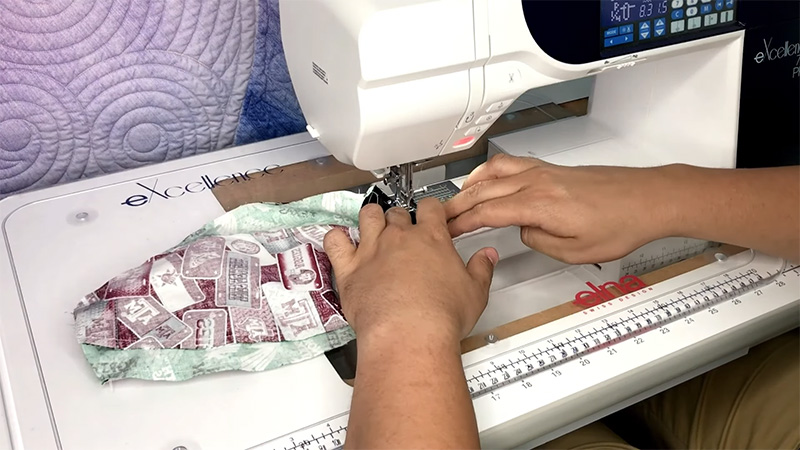
Stitching the First Seam
Using a sewing machine or hand stitching, sew along the curved edge of the folded fabric, leaving a small opening at the end. This opening is crucial for later steps, allowing you to turn the ball right-side-out and insert the stuffing.
Pressing and Finishing the First Seam
Gently open the seam you’ve just stitched and use an iron to press it open. This step helps the fabric lie flat and contributes to a clean and polished appearance when the ball is completed.
Positioning the Second Circle
Lay the second fabric circle (the exterior layer) on top of the first one, aligning their edges and ensuring that the right sides of the fabric are facing each other.
This layering sets the stage for enclosing the ball’s raw edges.
Stitching the Second Seam
Sew around the curved edge of the two fabric circles, leaving a small opening similar to the first seam. This opening is essential for turning the ball right-side-out and adding stuffing.
Turning the Fabric Right-side-out
Gently push the sewn fabric through the opening, turning it right-side-out. Carefully use your fingers to smooth out the seams and shape the ball’s rounded form.
Filling the Ball
Begin stuffing the fabric ball with your preferred filling material, whether it’s polyester fiberfill, cotton, or another suitable material. Gradually add stuffing, ensuring the ball is firm and evenly filled.
Closing the Opening
Once the ball is stuffed to your satisfaction, hand stitch the opening closed using a ladder stitch or slip stitch. Make sure your stitches are secure to prevent the stuffing from escaping.
Shaping and Final Touches
Gently shape the fabric ball with your hands to ensure it’s evenly filled and has a smooth appearance. Trim any loose threads for a tidy finish. At this point, your fabric ball with two pieces is complete and ready to be displayed, played with, or used as you envision!.
What Are Some Precautions I Should Take While Sewing a Ball With 2 Pieces?
When sewing a ball with two fabric pieces, several precautions ensure a successful and safe crafting process. Attention to these steps guarantees a well-crafted final result.
Here are some precautions to keep in mind while sewing a ball with two fabric pieces:
Accurate Cutting
Precise cutting is vital when sewing a ball with two fabric pieces. Take your time to cut out perfectly symmetrical fabric circles, as any inconsistencies can lead to difficulties when sewing the pieces together and affect the final shape of the ball.
Secure Pinning
Pinning the fabric circles together is essential to maintain alignment throughout the sewing process. Make sure to place pins perpendicular to the curved edge, ensuring that the fabric layers don’t shift as you sew.
Adequate pinning will help you achieve a well-matched seam.
Mind Seam Allowances
Consistency in seam allowances is crucial for a seamless assembly. Check that you’re using the same seam allowance on both fabric circles to ensure that they align properly when stitched together.
This attention to detail will help avoid puckering or misalignment.
Sew Slowly and Steadily
Sewing along curved edges requires patience and a steady hand. It’s better to sew slowly and maintain control than to rush and risk uneven stitches. Slow and steady sewing will contribute to neat, even curves and a professionally finished ball.
Clip Curved Seams
After sewing the curved seams, carefully clip small notches into the seam allowance. These notches will help the fabric lie flat when turned right-side-out, reducing bulk and allowing for smoother shaping of the ball.
Select Appropriate Needle and Thread
Choosing the right needle and thread for your fabric is crucial. Different fabrics require different needle sizes and thread types. Using the appropriate tools will prevent breakage and ensure a secure and durable seam.
Practice First
If you’re new to sewing curved seams, it’s wise to practice on scrap fabric before tackling your final project. This practice will help you get comfortable with sewing curves and make any necessary adjustments before working on the actual fabric pieces.
Mind Decorative Embellishments
If you plan to add decorative elements to your fabric ball, consider their placement carefully. Make sure they won’t interfere with the sewing process or cause difficulties when turning the ball right-side-out.
Securely attach embellishments to ensure they stay in place.
Avoid Overstuffing
When stuffing your ball, be cautious not to overstuff it. Gradually add stuffing and shape the ball as you go to achieve the desired roundness without distorting the fabric or creating lumps.
Safe Stuffing Materials
Choose stuffing materials that are safe and non-toxic, especially if the ball is intended for children or pets. Make sure the stuffing won’t cause any harm if accidentally exposed.
Secure the Opening Seam
When closing the opening after stuffing, use secure stitches to prevent the stuffing from escaping. Double-check the seam to ensure it’s well-sewn and won’t come apart with handling.
Check for Loose Threads
Trim any loose threads before turning the fabric right-side-out to prevent tangling in the sewing machine or affecting the ball’s appearance. A neat finish ensures a polished final product.
Use Turning Tools
Utilize a turning tool, like a chopstick or knitting needle, to gently push the fabric through the turning opening. This prevents fabric tears and helps you achieve a clean, wrinkle-free exterior.
Personal Protective Equipment
If you’re using a sewing machine, consider wearing eye protection, such as safety goggles. This precaution guards against any accidental needle-related incidents that could cause injury.
Take Breaks
Sewing intricate shapes can strain your eyes and hands. Remember to take breaks to rest and recharge, preventing fatigue and maintaining focus.
Enjoy the Process
Ultimately, crafting is a creative endeavor meant to be enjoyable. Take your time, enjoy each step, and embrace the experience of creating something unique and beautiful.
How Long Does It Take to Sew a Ball With 2 Pieces?
The time needed to sew a two-piece fabric ball varies based on skill level and ball complexity. Generally, crafting a basic ball takes about 1-2 hours.
Factors such as sewing expertise, design intricacy, fabric type, and finishing touches influence the timeframe. Beginners may take longer as they learn curved seams, while experienced sewers might work more efficiently.
Ultimately, the creative process and attention to detail are essential for a successful outcome.
FAQs
Choose fabrics that are durable and appropriate for your intended use. Cotton, felt, and lightweight upholstery fabrics are commonly used. Avoid fabrics that fray easily.
Yes, a sewing machine can be used for sewing the curved seams. Use a matching thread and adjust your machine’s settings for curved sewing, if necessary.
While stuffing, use small amounts of filling at a time and distribute it evenly. Gently push the stuffing into the ball’s crevices to achieve a uniform shape.
To sew a ball with four pieces, cut four identical curved fabric shapes. Pair two pieces, right sides facing, and sew along the curved edge. Repeat with the other pair. Then sew the two halves together, leaving a small opening. Turn right-side-out, stuff, and sew the opening shut.
It depends on the fabric and filling you’ve used. If both are washable, you may be able to hand wash the ball gently. Ensure it’s fully dry before using or displaying it again.
To Recap
Sewing a ball with two fabric pieces is a fulfilling and imaginative way to craft unique decorative items or treasured toys. As you master the art of aligning, stitching and shaping, you’ll discover the joy of turning ordinary fabric into captivating spherical creations.
Remember to embrace the journey, from the careful selection of materials to the final touches that bring your ball to life. By following the steps and precautions outlined in this guide, you’ll not only achieve a beautifully sewn fabric ball but also gain a deeper appreciation for the art of sewing.
So, let your creativity flourish, your skills evolve, and your projects inspire – for every fabric ball you sew is a testament to your craftsmanship and a tangible embodiment of your imaginative spirit.
Leave a Reply