Cleaning vintage embroidery requires a delicate touch to preserve its intricate beauty and historical significance.
These timeless pieces, often crafted with meticulous care and attention to detail, serve as tangible artifacts of bygone eras, showcasing the artistry and craftsmanship of embroiderers from decades past.
However, over time, dust, dirt, and stains can accumulate, dulling the vibrancy of the threads and fabrics. This guide will explore the best practices for cleaning vintage embroidery, from gentle dust removal to careful hand-washing techniques.
By following these steps with care and patience, you can restore your cherished embroidery pieces to their former glory while maintaining their integrity for generations.
What Is Vintage Embroidery?
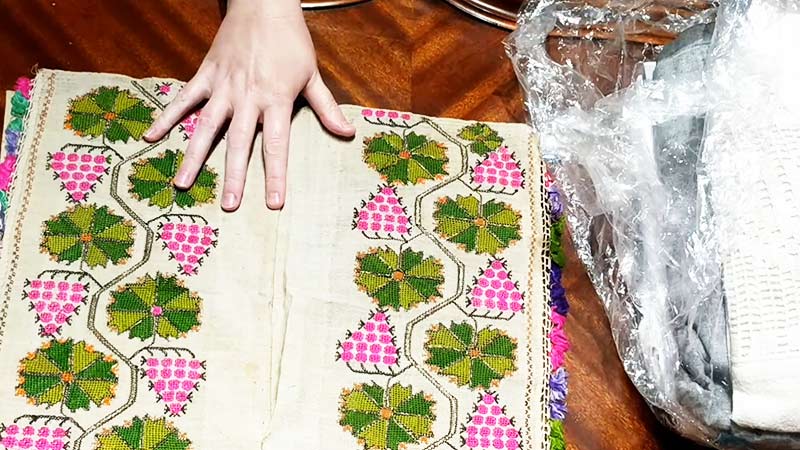
Vintage embroidery refers to handcrafted textile embellishments created decades ago, typically before the mid-20th century.
It encompasses intricate stitching techniques such as cross-stitch, crewel work, and needlepoint, often executed on delicate fabrics like linen, silk, or cotton.
Vintage embroidery pieces may feature elaborate designs, ranging from floral motifs to scenic landscapes, showcasing the artistic skill and creativity of the embroiderer.
These timeless creations hold historical and sentimental value, serving as cherished heirlooms or decorative accents in homes.
Each vintage embroidery piece tells a story of craftsmanship, tradition, and artistic expression, preserving a rich legacy of textile artistry from bygone eras.
How Do You Clean Vintage Embroidery? A Step-By-Step Guide
Cleaning vintage embroidery requires a delicate touch and careful attention to detail to keep the intricate stitching and delicate fabric intact.
Here’s a step-by-step guide to safely clean vintage embroidery:
Supplies Needed
- A soft brush or lint roller
- Mild detergent or soap
- Lukewarm water
- White vinegar
- Clean towels
- Drying rack or flat surface
- Iron and ironing board (optional)
Step 1. Preparation
Lay the vintage embroidery flat on a clean, dry surface. If the embroidery is framed, carefully remove it from the frame.
Step 2. Dust Removal
Use a soft brush or lint roller to gently remove any dust, lint, or loose debris from the surface of the embroidery. Work delicately to avoid damaging the threads or fabric.
Step 3. Colorfastness Test
Before washing, it’s essential to test a small, inconspicuous area of the embroidery for colorfastness. Dampen a clean cloth with lukewarm water and gently dab the area.
If the colors bleed or transfer onto the cloth, the embroidery is not colorfast and should not be washed.
Step 4. Hand Washing
Fill a basin or sink with lukewarm water and add a small amount of mild detergent or soap. Swirl the water gently to create suds.
Step 5. Cleaning
Submerge the embroidery in the soapy water and gently agitate it with your hands. Avoid rubbing or scrubbing, as this can cause damage to the delicate threads and fabric. Pay special attention to any areas with stains or discoloration.
Step 6. Rinsing
After cleaning, drain the soapy water and refill the basin with clean lukewarm water. Rinse the embroidery thoroughly to remove any soap residue. Adding a splash of white vinegar to the rinse water can help neutralize any remaining soap and brighten the colors.
Step 7. Drying
Lay a clean towel flat on a table or other flat surface. Carefully transfer the wet embroidery onto the towel, arranging it in its original shape. Gently press another clean towel over the embroidery to absorb excess water.
Step 8. Air Drying
Allow the embroidery to air dry completely on a drying rack or flat surface away from direct sunlight and heat sources. Avoid hanging the embroidery while wet, as this can cause distortion.
Step 9. Optional Ironing
Once the embroidery is dry, iron it on a low setting. Place a clean or pressing cloth over the embroidery to protect it from direct heat and steam. Iron gently, using a pressing motion, and avoid ironing over any beads, sequins, or metallic threads.
Step 10. Final Inspection
After cleaning and drying, inspect the embroidery for any remaining stains or damage. Repeat cleaning or seek professional assistance for stubborn stains or delicate fabrics if necessary.
Why Is It Important To Clean Vintage Embroidery Carefully?
Cleaning vintage embroidery carefully is of paramount importance due to several significant reasons:
Preservation of Artistry
Vintage embroidery often represents intricate handiwork and artistic expression. Cleaning it carefully ensures that the delicate stitches, threads, and fabrics are preserved, maintaining the integrity and beauty of the artwork.
Prevention of Damage
Vintage embroidery pieces are typically made from delicate materials such as silk, linen, or cotton and may include fragile elements like beads, sequins, or metallic threads.
Harsh cleaning methods or chemicals can damage these materials, causing discoloration, fraying, or tearing.
Retaining Historical Value
Vintage embroidery pieces may hold historical or sentimental value. Careful cleaning helps retain their historical significance and ensures they can be passed down through generations as heirlooms.
Avoiding Color Bleeding
Some vintage embroideries may be susceptible to color bleeding when exposed to water or cleaning agents. Careful testing and gentle cleaning techniques help prevent color bleeding, preserving the original vibrancy of the colors.
Prevention of Mold and Mildew
If vintage embroidery is stored in damp or humid conditions, it can become susceptible to mold and mildew growth. Proper cleaning and drying techniques help eliminate mold or mildew and prevent future growth, prolonging the lifespan of the embroidery.
Maintaining Structural Integrity
Dust, dirt, and oils from handling can accumulate on vintage embroidery over time, leading to deterioration of the fabric and weakening of the stitches. Gentle cleaning removes these contaminants, helping maintain the embroidery’s structural integrity.
What Are Some Common Mistakes To Avoid When Cleaning Vintage Embroidery?
When cleaning vintage embroidery, it’s essential to proceed with caution to avoid damaging the delicate fabric and intricate stitching.
Here are some common mistakes to avoid:
Using Harsh Chemicals
Avoid harsh chemicals such as bleach, ammonia, or strong detergents, as they can damage the fabric, cause discoloration, or weaken the stitching.
Skipping Spot Testing
Always perform a spot test on a small, inconspicuous area of the embroidery before applying any cleaning solution. This helps ensure the cleaning method is safe and won’t cause further damage.
Rubbing or Scrubbing Vigorously
Avoid rubbing or scrubbing the embroidery vigorously, as this can cause the fabric to fray, the threads to break, or the stitching to unravel. Instead, gently dab or blot the stained area with a soft cloth or brush.
Using Hot Water
Avoid using hot water when cleaning vintage embroidery, as it can cause colors to bleed, fabrics to shrink, and delicate threads to weaken. Opt for lukewarm or cool water instead.
Wringing or Twisting the Fabric
Avoid wringing or twisting the fabric to remove excess water, as this can distort the shape of the embroidery and stretch the fabric. Instead, gently press the fabric between clean towels to absorb moisture.
Skipping Rinse Steps
After cleaning the embroidery, rinse it thoroughly with clean water to remove any leftover soap or cleaning solution. Skipping this step can leave a residue that can attract dirt and cause discoloration.
Using Direct Heat
Avoid using a high heat setting when ironing vintage embroidery, as it can damage delicate threads, beads, or sequins. Use a low heat setting and a pressing cloth to protect the fabric and stitching.
Ignoring Special Instructions
Pay attention to any special care instructions provided by the manufacturer or previous owner of the embroidery. Some pieces may require specific cleaning methods or precautions to avoid damage.
Skipping Professional Help
If you’re unsure how to clean a particular vintage embroidery piece or if it has significant stains or damage, consider seeking advice from a professional cleaner or textile conservator specializing in vintage textiles.
FAQs
Can vintage embroidery be safely washed in a washing machine?
Washing vintage embroidery in a washing machine is generally not recommended, as it can damage delicate stitching and fabrics.
How often should vintage embroidery be cleaned?
The frequency of cleaning depends on usage and visible dirt or stains, but generally, it’s recommended to clean vintage embroidery as needed to maintain its appearance.
Is it safe to use baking soda to clean vintage embroidery?
Baking soda can be effective for removing odors from vintage embroidery. However, it’s essential to use it sparingly and test it in a small area first to ensure it doesn’t cause discoloration or damage to the fabric.
How do you remove stains from vintage embroidery?
Spot cleaning with a mild detergent solution or specialized stain remover, followed by gentle blotting, effectively removes stains from vintage embroidery.
Should I avoid washing vintage embroidery that contains silk or woolen thread?
Yes, it’s best to avoid washing vintage embroidery containing silk or woolen thread, as these delicate fibers can be damaged by water.
To Recap
Cleaning vintage embroidery requires a thoughtful approach and careful attention to detail. Following the steps outlined in this guide, you can effectively remove dust, dirt, and stains while preserving the delicate fabrics and intricate stitching of these cherished heirlooms.
Continually assess the materials and techniques used in the embroidery, perform spot tests before cleaning, and avoid harsh chemicals or aggressive scrubbing.
With patience and gentle care, you can restore the beauty of vintage embroidery pieces, allowing them to continue to be admired and cherished for years.
Embrace the opportunity to connect with the rich history and artistry woven into each stitch, ensuring these treasures endure for future generations.
Leave a Reply