Embroidering eyes on dolls is an artful endeavor that elevates handmade creations to new levels of expression and charm.
As the focal point of a doll’s face, embroidered eyes bring personality and life to your masterpiece.
This intricate process involves choosing suitable materials, selecting stitches, and adding thoughtful details to capture the desired look.
Whether aiming for realism, whimsy, or fantasy, the journey of embroidering eyes on dolls invites creativity and meticulous craftsmanship.
This guide explores the step-by-step process, providing insights and tips to help you infuse your dolls with unique and captivating gazes.
How Do You Embroider Eyes on Dolls? Step-By-Step Guide
Embroidering eyes on dolls is a creative and rewarding way to add personality and character to your handmade creations whether you’re crafting a plush toy, a fabric doll, or any other textile-based figure, embroidered eyes can bring your creation to life.
Below is a step-by-step guide on how to embroider eyes on dolls:
Materials Needed
- Needle and Thread: Choose embroidery floss, cotton thread, or wool yarn based on the size and style of your doll. Ensure the thread colors complement the doll’s features.
- Scissors: A small pair of sharp scissors for cutting thread.
- Marking Tools: Use a pencil or disappearing ink marker to mark the desired eye positions on the doll’s face.
- Fabric: The main fabric for the doll’s face. Optionally, you can use a contrasting color for the eyes or a separate fabric if you plan to embroider them separately.
- Embroidery Hoop: Optional but recommended for maintaining fabric tension and making the stitching process more manageable.
- Fabric Glue: Optional for securing knots and attaching embroidered eyes if you choose to make them separately.
Step 1: Prepare the Doll
Before diving into the embroidery process, ensure the doll’s face fabric is clean and appropriately prepared. A clean canvas ensures a smooth and polished finish for your embroidered eyes.
Step 2: Choose Eye Shape and Size
Take the time to decide on the shape and size of the eyes. This step can involve sketching on paper or using templates to ensure consistency and achieve the desired expression for your doll.
Step 3: Mark Eye Positions
Using a pencil or disappearing ink marker, mark the positions of the eyes on the doll’s face. Precision is critical here to achieve symmetry and proper alignment with the nose and mouth.
Step 4: Thread the Needle
Please select your preferred embroidery floss or thread, and thread your needle, securing it with a knot at the end. The choice of thread color should complement the doll’s features.
Step 5: Start Embroidering
Commence the embroidery process from the back of the doll’s head, bringing the needle up through the fabric at the starting point of the first eye. This step establishes the foundation for the entire eye embroidery.
Step 6: Choose a Stitch
Carefully select an embroidery stitch that suits your desired style. Options include the satin stitch for a smooth fill, backstitch for outlining, chain stitch for texture, or French knots for intricate details.
Step 7: Stitch the Eye Outline
Begin stitching along the marked outline of the eye, filling the space with your chosen stitch. Ensure stitches are close together for a solid and well-defined eye shape.
Step 8: Repeat for the Other Eye
Mirror the embroidery process for the second eye, maintaining symmetry. This step is crucial for achieving a balanced and harmonious facial expression.
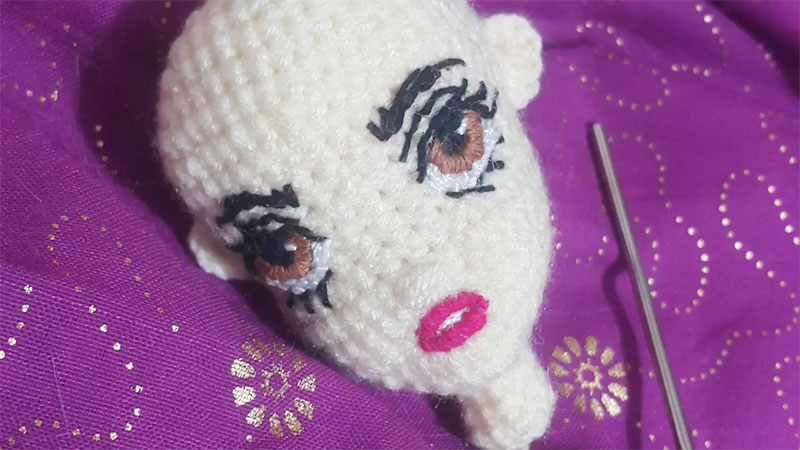
Step 9: Add Details
Enhance the eyes by introducing details like pupils, irises, eyelashes, or eyebrows. Experiment with different colors and stitches to bring depth and character to the eyes.
Step 10: Secure the Thread
After completing the embroidery, secure the thread by making a small knot at the back of the doll’s head. Trim any excess thread carefully for a neat and finished look.
Step 11: (Optional) Glue Separate Eyes
If you’ve opted to embroider eyes on a separate fabric, cut them out and use fabric glue to attach them to the doll’s face. This step can help achieve intricate details or a different texture.
Step 12: Inspect and Adjust
Conduct a thorough inspection of your work, making any necessary adjustments to ensure symmetry and the desired level of detail. Take the time to appreciate your handiwork and the unique personality the embroidered eyes bring to your doll.
How Do You Select the Perfect Eye Shape and Size for Your Dolls?
Choosing the right eye shape and size for your doll is crucial in giving it a unique and expressive appearance. Here are some tips to guide you in selecting the perfect eye design:
Consider the Doll’s Proportions
Take into account the overall size and proportions of your doll. Larger dolls may require more extensive and more detailed eyes, while miniature dolls may look better with smaller, more straightforward eyes.
Think About the Doll’s Style
Consider the style of your doll. For example, realistic dolls may benefit from more detailed and natural-looking eyes, while whimsical or fantasy dolls may allow for more creative and exaggerated eye shapes.
Review Design Templates
Look for eye design templates or sketches to help you visualize different shapes and sizes. Templates can provide a starting point and ensure consistency between the two eyes.
Experiment on Paper
Sketch various eye shapes on paper before committing to embroidery. This allows you to explore possibilities and refine your design without permanently changing the doll.
Match the Expression
Match the eye shape to the expression you want your doll to convey. Almond-shaped eyes may convey a calm and gentle expression, while round eyes may give a more playful or innocent look.
Consider the Character’s Personality
Think about the personality of your doll. If it’s meant to be mischievous, you might opt for a diagonal or quirky eye shape. For a serene character, a more classic shape may be suitable.
Symmetry is Key
Aim for symmetry between the two eyes. Symmetrical eyes contribute to a balanced and aesthetically pleasing appearance. Use measuring tools if necessary to ensure accuracy.
Test on the Doll’s Face Fabric
Once you have a design in mind, lightly mark the eye positions on the doll’s face fabric. Step back and assess how the eyes complement the overall look. Adjust as needed before committing to embroidery.
Consider Cultural Influences
Take inspiration from cultural influences. Different cultures may have traditional eye shapes associated with specific character traits or emotions.
Look for Inspiration
Browse through doll-making communities, art, or reference images for inspiration. Seeing how others have approached eye design can spark new ideas for your creation.
Personalize for Uniqueness
Don’t be afraid to inject your style and creativity into the design. Your doll’s eyes should reflect your unique artistic vision.
Adapt Based on Doll Type
Consider the type of doll you’re creating. Porcelain dolls may have different eye aesthetics compared to fabric or plush dolls. Tailor your design to suit the doll’s material and construction.
Tips and Tricks for Perfectly Embroidered Doll Eyes
Embroidering doll eyes requires precision and attention to detail to achieve a lifelike and expressive result.
Here are some tips and tricks to help you perfect the art of embroidering doll eyes:
Start with a Clean Surface
Ensure the doll’s face fabric is clean and free from dust or debris before starting the embroidery. A smooth surface provides better results.
Choose the Right Thread
Select embroidery floss, cotton thread, or wool yarn in colors that complement the doll’s features. Consider using different shades for the eyes, pupils, and highlights to add depth.
Use an Embroidery Hoop
If possible, use an embroidery hoop to keep the fabric taut. This helps maintain even tension and ensures that the stitches lay flat, resulting in a neater finish.
Practice on Scrap Fabric
Before embroidering the eyes directly on the doll, practice the chosen stitches on a scrap piece of fabric. This helps you refine your technique and get comfortable with the chosen stitches.
Sketch the Eye Design
Plan the eye design by sketching it on paper. This allows you to visualize the size, shape, and details before starting the embroidery.
Mark Eye Positions on the Doll
Use a pencil or disappearing ink marker to mark the positions of the eyes on the doll’s face. This ensures proper alignment and symmetry.
Opt for Satin Stitch for Smooth Fill
Use the satin stitch for a smooth and solid fill of the eye shape. This stitch creates a polished surface and is commonly used for realistic-looking eyes.
Experiment with Different Stitches
Depending on the style of your doll, experiment with different stitches for eye details. For example, use backstitch for outlining, French knots for pupils, or long stitches for eyelashes.
Focus on Symmetry
Aim for symmetry between the two eyes. Measure and mark carefully to ensure that both eyes are aligned and have consistent shapes.
Add Details Gradually
Add details to the eyes gradually. Start with the bare eye shape, then add pupils, irises, and eyelashes. This allows you to control the level of detail and prevent overcrowding.
Consider Using Fabric Paint
If you find it challenging to achieve intricate details with embroidery alone, consider using fabric paint for smaller elements like pupils or highlights. This can add dimension to the eyes.
Secure Knots Carefully
When securing the thread at the end of the embroidery, make tiny knots at the back of the doll’s head. Trim the excess thread neatly for a professional finish.
Inspect and Adjust
Regularly step back and inspect your work to ensure that the eyes look symmetrical and convey the desired expression. Make any necessary adjustments before finalizing.
Use a Light Source
Work under good lighting conditions or use a small light source to illuminate your work if possible. This helps you see details more clearly and ensures accurate stitching.
Enjoy the Process
Embroidering doll eyes is a creative and enjoyable process. Take your time, enjoy experimenting with different techniques, and let your creativity shine through in the final result.
FAQs
Can I use different threads for embroidery?
Yes, you can choose from various threads based on the size and style of your doll. Options include embroidery floss, cotton thread, or wool yarn.
Are specific stitches recommended for embroidered eyes?
Yes, stitches like satin, backstitch, chain stitch, or French knots are commonly used for embroidering eyes, each offering different effects.
Can I embroider eyes on different types of dolls or plush toys?
Yes, the process is versatile and can be adapted for various doll types, sizes, and styles.
What’s the significance of embroidered eyes in doll-making?
Embroidered eyes add expression, realism, and individuality to dolls’ overall appeal and character.
How to care for dolls with embroidered eyes?
Gently spot clean dolls with embroidered eyes using a mild soap solution. Avoid excessive moisture, and store in a dry place away from direct sunlight to preserve their charm.
To Recap
In the intricate world of doll-making, the embroidered eyes serve as captivating windows to the soul, breathing life into each creation.
As we conclude this guide on embroidering eyes on dolls, remember that every stitch and detail contributes to the individuality of your handmade masterpiece.
The personalized expressions you craft tell stories, evoke emotions and establish a connection between your dolls and those who encounter them.
Through meticulous artistry and thoughtful choices, you’ve transformed fabric into characters with soulful gazes.
Embrace the joy of creating, experiment with diverse techniques, and let your imagination continue to weave enchanting narratives through the eyes of your cherished dolls.
Leave a Reply