Embarking on the journey of embroidering your apron can be a creative and rewarding experience.
Whether you’re a seasoned crafter or just starting, this guide will walk you through the steps to achieve beautiful and personalized apron designs.
From selecting the right materials to mastering essential embroidery techniques, we’ve got you covered with our guide on ‘How do you embroider on an apron?’
Discover the intricate world of needlework as we explore various stitches, color combinations, and design considerations that will elevate your apron into a unique piece of wearable art.
Unleash your creativity and add a personal touch to your kitchen attire. No prior embroidery expertise is required – we’ll guide you every step of the way.
Get ready to transform a simple apron into a canvas for self-expression. Let’s delve into the fascinating process and bring your creative visions to life!
How Do You Embroider On An Apron? 10 Steps
Embroidering on an apron can be a delightful and creative endeavor, allowing you to add a personal touch to a practical garment.
Here’s a step-by-step guide to help you learn how to make an apron with needle and thread.
Step 1: Prepare Your Apron
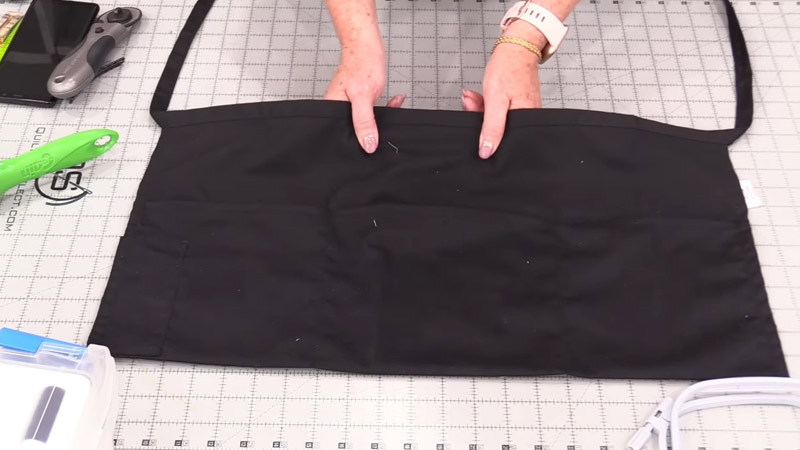
Start by washing and ironing your apron to ensure a clean and smooth working surface. This step prevents any dirt or wrinkles from interfering with the embroidery process.
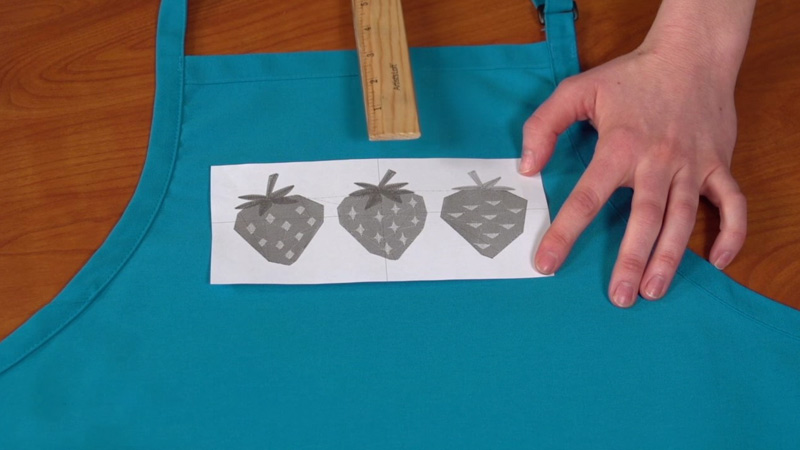
Step 2: Choose Your Design
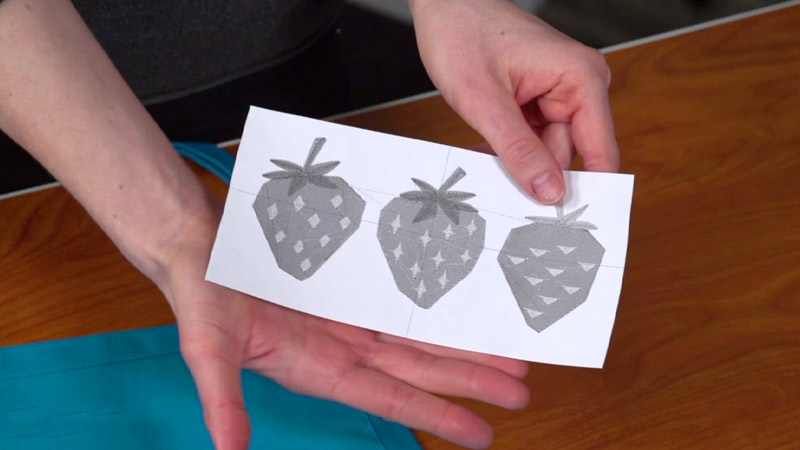
Select a design that suits the size and style of your apron. If you’re a beginner, opt for simpler designs with fewer details.
You can find numerous embroidery patterns online or create your own. Once chosen, transfer the design onto the apron using a water-soluble fabric marker or a pencil.
Step 3: Secure the Apron in the Hoop
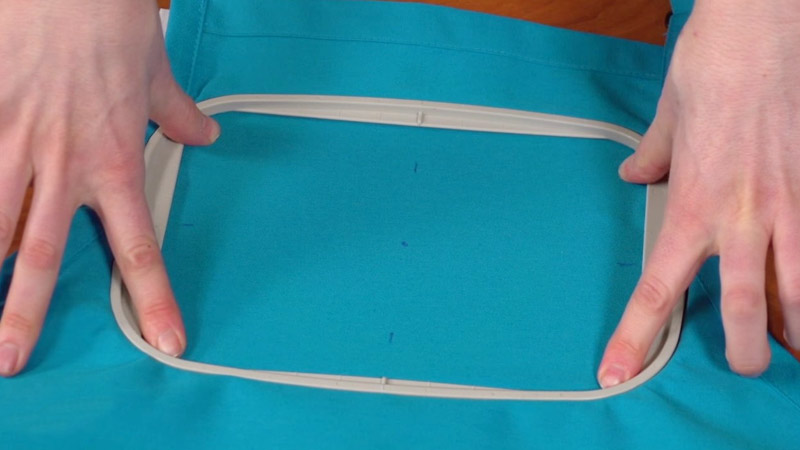
Place the chosen section of your apron within the embroidery hoop, ensuring the marked design is centered. Tighten the hoop to secure the fabric, ensuring it is stretched taut. This not only facilitates stitching but also prevents puckering.
Step 4: Thread the Needle
Cut a length of embroidery floss or thread (usually about 18 inches) and thread it through the needle. You can use all strands of embroidery floss for a thicker look or separate them for a finer finish, depending on your design.
Step 5: Knot the thread
Tie a small knot at the end of the thread to secure it. If you’re using embroidery floss, you can use all six strands or separate them based on your preference and design requirements.
Step 6: Start Stitching
You can use various embroidery stitches, but let’s start with a basic one: the backstitch. Bring the needle up from the back of the fabric, leaving the knot hidden. Then, insert the needle back into the fabric a short distance away, creating a single straight stitch.
Continue this process, bringing the needle up just ahead of the last stitch and inserting it back into the fabric until your design is complete. The backstitch outlines your design and creates crisp, clean lines.
Step 7: Experiment with Different Stitches
Feel free to experiment with other stitches once you’re comfortable with the backstitch. Satin stitch is ideal for filling in larger areas, while French knots can add texture and detail. There are numerous online tutorials and resources demonstrating various embroidery stitches.
Step 8: Pay Attention to Tension
Maintain consistent tension in your stitches to ensure a uniform appearance. Be mindful of the spacing between stitches, especially when outlining or filling in your design.
Step 9: Secure the Thread
The last step of exploring how to hand embroider an apron is to fix the loose threads. When you reach the end of a thread or need to switch colors, secure the thread on the backside of the apron by making a small knot. Conceal the knot within the fabric layers to keep the backside neat.
Step 10: Finalize Your Embroidery
Once your design is complete, remove the apron from the hoop and carefully trim any excess threads. If you used a water-soluble fabric marker, wash the apron to remove the markings.
Congratulations! You’ve successfully learned how to embroider. Remember that practice enhances your skills, so don’t be discouraged if your first attempt isn’t perfect.
Can You Embroider Using a Sewing Machine?
As you’ve explored how to sew an apron with needle and thread, let’s find out about embroidery with a machine. Embroidering on an apron using a sewing machine is a fantastic way to efficiently achieve intricate and detailed designs.
While hand embroidery allows for a more personal touch, machine embroidery offers speed and precision. Here’s a comprehensive guide on embroidering an apron using a sewing machine.
Step 1: Choose and Prepare Your Design
Select a design suitable for machine embroidery. Most machines have built-in designs, but you can also purchase or download additional patterns online. Ensure the design fits within the dimensions of your apron.
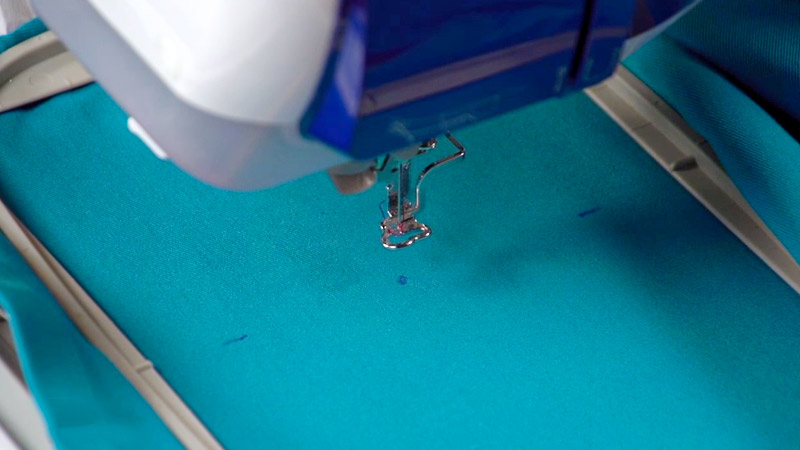
Step 2: Hoop the Stabilizer and Apron
Place the chosen section of your apron in the embroidery hoop, ensuring it’s centered. Sandwich the apron and stabilizer between the inner and outer rings of the hoop. Tighten the hoop to secure the layers, keeping the fabric taut.
Step 3: Thread the Machine
Thread your embroidery machine following the manufacturer’s instructions. Use the embroidery thread color corresponding to your design’s first part. Load a filled bobbin in a matching color.
Step 4: Load the Design
Load the chosen design into your embroidery machine. If you have a custom design, transfer it to the machine according to the manufacturer’s instructions. Make sure the design is appropriately positioned within the hoop.
Step 5: Test the Setup
Before embroidering on the apron, do a test run on a scrap piece of fabric to ensure the machine is correctly threaded and the design is aligned. This helps you identify any issues before working on the actual apron.
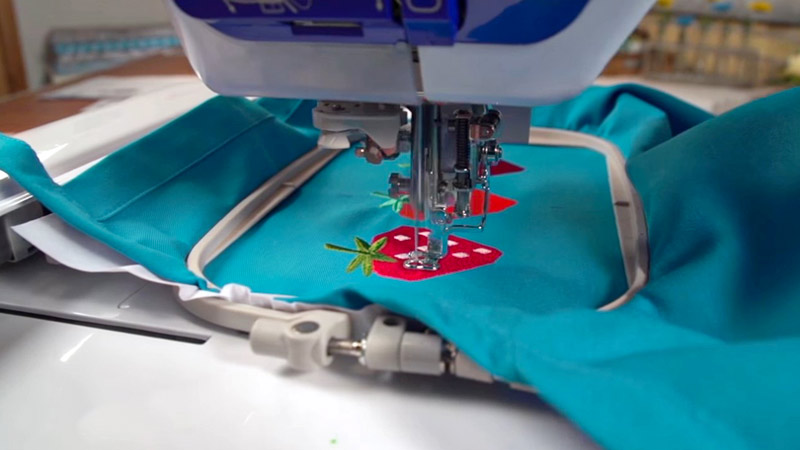
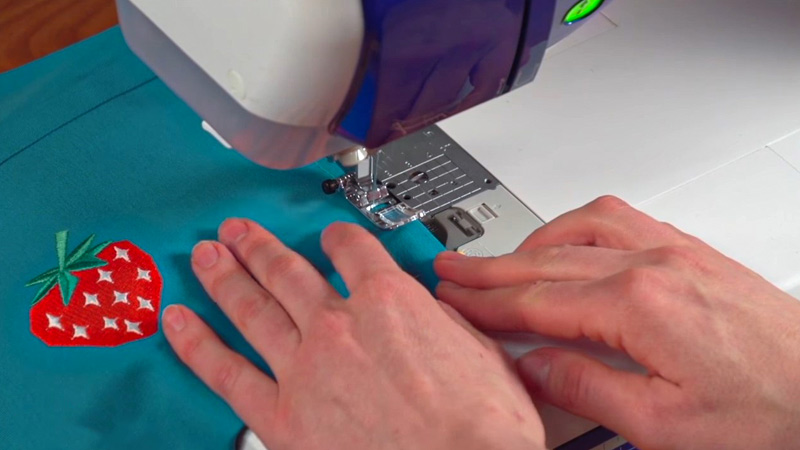
Step 6: Embroider the Design
Once you’re satisfied with the test, begin the embroidery process. Allow the machine to work through the design and monitor the progress to ensure it aligns correctly with the marked area on the apron.
Step 7: Change Thread Colors as Needed
If your design includes multiple colors, follow the machine’s prompts to change thread colors. Pause the machine, change the thread, and resume according to the instructions displayed on the machine’s screen.
After completing each color segment, trim any excess thread on the surface and back of the apron.
Step 8: Remove the Hoop and Stabilizer
Once the machine has finished embroidering the design, remove the hoop and stabilizer from the apron. Be cautious not to pull or stretch the fabric during this process.
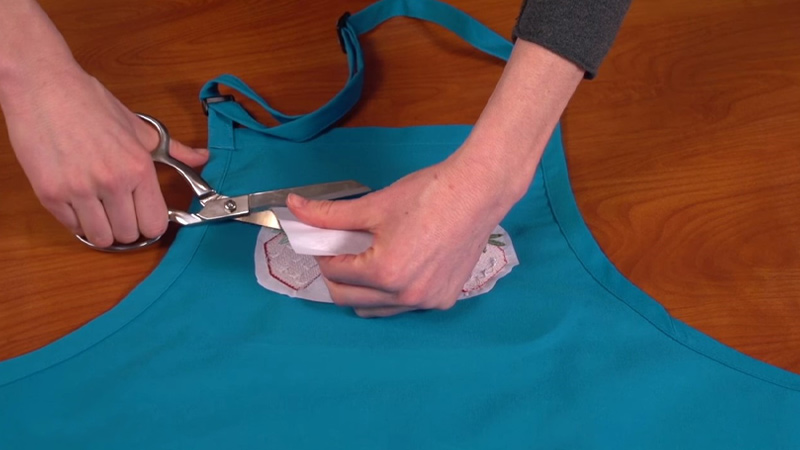
Step 9: Clean Up Loose Threads
Trim any loose threads on the front and back of the embroidered area for a neat finish. Depending on the stabilizer used, you might need to wash the apron to remove any residue. Follow the stabilizer manufacturer’s instructions.
If no washing is required, lightly press the embroidered area using a pressing cloth.
Tips for Learning How to Embroider An Apron with a Machine
Achieving successful machine embroidery on your apron requires attention to detail. Here are essential tips to guide you through the process:
Use the Right Needle h4
Choose an embroidery needle appropriate for your fabric to prevent damage and ensure smooth stitching. Selecting the right needle is a critical aspect of machine embroidery.
Stabilize Properly
Proper stabilizing is crucial to prevent distortion and achieve clean embroidery. Choose the appropriate stabilizer for your fabric type. Stabilizers provide essential support during embroidery, preventing the fabric from stretching or distorting. Different stabilizers suit different fabrics and designs.
Thread Tension
Adjust the machine’s thread tension according to the manufacturer’s recommendations for embroidery. Proper thread tension is crucial for achieving balanced and even stitches.
Refer to your machine’s manual for guidance on adjusting thread tension, as it varies between machines. Incorrect tension can lead to loose or tight stitches.
Machine Maintenance
Keep your embroidery machine well-maintained, including regular cleaning and oiling, to ensure optimal performance. A well-maintained embroidery machine is essential for consistent and trouble-free stitching.
Regularly clean out lint and debris from the machine, especially around the bobbin area and feed dogs. Regular maintenance extends the life of your machine.
Hoop Stability
Ensure the fabric is securely hooped to prevent misalignment or puckering during embroidery. Proper hooping is fundamental for maintaining the stability of your fabric during the embroidery process.
Choose Suitable Thread h4
Use high-quality embroidery thread that complements your design and fabric. The type of thread you use significantly influences the final result of your embroidery.
FAQs
What materials are suitable for machine embroidery on an apron?
Cotton and cotton-polyester blends are ideal for machine embroidery on aprons. These fabrics provide a stable surface and hold embroidery well. Ensure the fabric is clean and free of wrinkles before starting.
Can I use any sewing machine for embroidery on an apron?
While some regular sewing machines offer basic embroidery stitches, dedicated embroidery machines provide more advanced features. If you’re serious about machine embroidery, investing in a specialized embroidery machine is recommended for greater design flexibility.
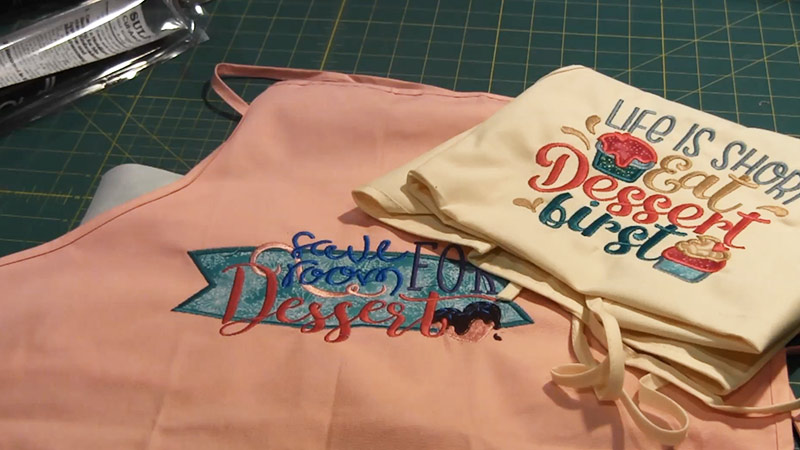
What designs work best for apron embroidery?
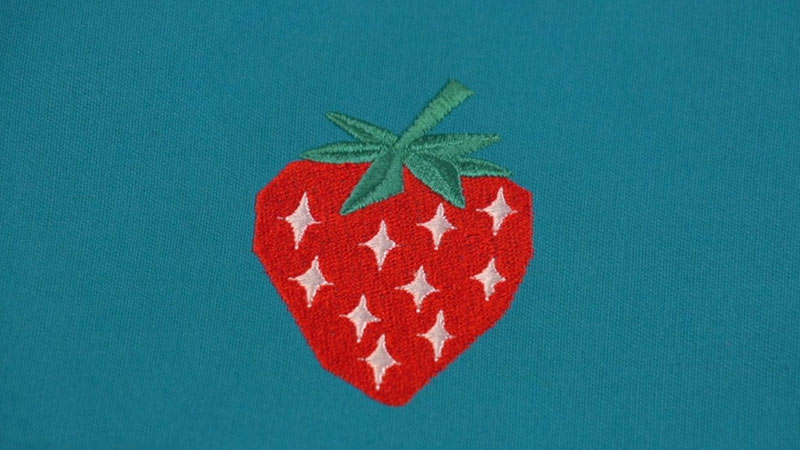
Simple and bold designs often work best on aprons. Consider food-related motifs, kitchen utensils, or personalized monograms. Ensure the design complements the size and shape of the apron to achieve an aesthetically pleasing result.
How do I choose the right embroidery thread for apron projects?
Opt for high-quality embroidery thread that complements your design and fabric. Threads specifically designed for machine embroidery offer durability and colorfastness. Consider the weight of the thread based on the intricacy of your design and the desired finished look.
What else can I embroider on besides aprons?
Beyond aprons, you can explore embroidering on various textiles such as tablecloths, napkins, and kitchen towels. Garments like T-shirts, tote bags, and denim jackets are popular choices.
Conclusion
Embroidering on an apron is not just a craft; it’s a form of self-expression that transforms a simple garment into a personalized masterpiece. This guide covered the essential steps, from choosing the right materials to exploring diverse embroidery techniques.
As you embark on your creative journey, remember that each stitch tells a story and adds a unique touch to your apron.
Whether you’re crafting for yourself or creating a thoughtful gift, the satisfaction of seeing your designs come to life is unparalleled. With patience and practice, you’ll develop the skills needed to turn any apron into a canvas for your imagination.
Now that you’ve learned the art of apron embroidery let your creativity soar. Experiment with different patterns, colors, and styles to make each piece distinctly yours.
Leave a Reply