Embarking on a needlepoint project can be therapeutic and rewarding, especially when the result is a heartfelt creation. So, how do you needlepoint a heart?
Mastering the art requires several techniques to follow. Otherwise, you won’t get the perfect finish like a professional. In this guide, we’ll explore the art of needlepoint, explicitly focusing on crafting a beautiful heart design.
Whether you’re a seasoned needlepoint enthusiast or a beginner eager to try this timeless craft, this step-by-step tutorial will walk you through creating a stunning needlepoint heart.
From selecting suitable materials to mastering essential stitches, we’ll cover everything you need to know to infuse your needlepoint project with love and creativity.
Get ready to weave threads together and bring a symbol of affection to life as we delve into the intricacies of needlepointing a heart.
How Do You Needlepoint a Heart? Explore the Step-By-Step Process
This comprehensive guide will explore the step-by-step process of needlepointing a heart, from gathering materials to mastering essential stitches.
So, let’s dive into the world of needlepoint heart stitches and discover how to do needlepoint with the artful precision it deserves.
Gather Your Materials
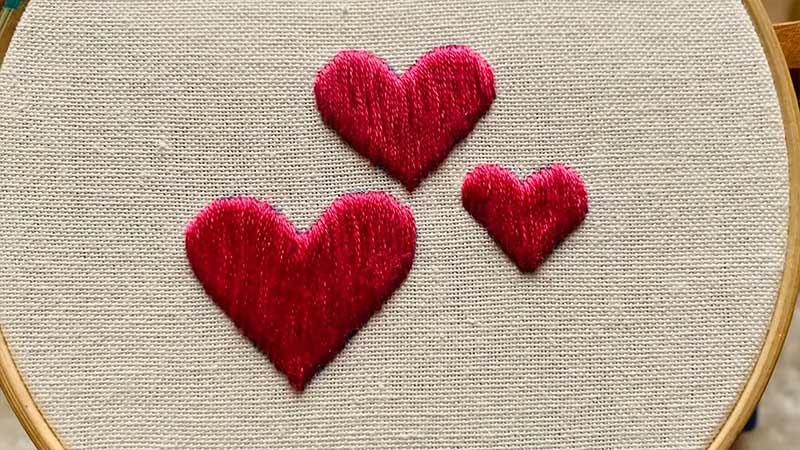
To begin your heart needlepoint stitch journey, gather the necessary materials. You’ll need a canvas, embroidery threads in desired colours, needlepoint needles, scissors, and an embroidery hoop. Choose a canvas with a heart outline or sketch one for a personalized touch.
Select Your Colors
Choosing the right colours is crucial for conveying the emotions tied to your heart design. Consider vibrant reds for passion, soft pinks for tenderness, or a mix of shades to represent various feelings.
Ensure your embroidery threads complement each other and create a harmonious palette.
Prepare Your Canvas
Secure your canvas in an embroidery hoop to maintain tension while stitching. This step ensures your needlepoint stays even and avoids warping.
If your canvas doesn’t have pre-printed guidelines, create a simple grid with a water-soluble pen to guide your stitches.
Start with a Basic Outline Stitch Needlepoint
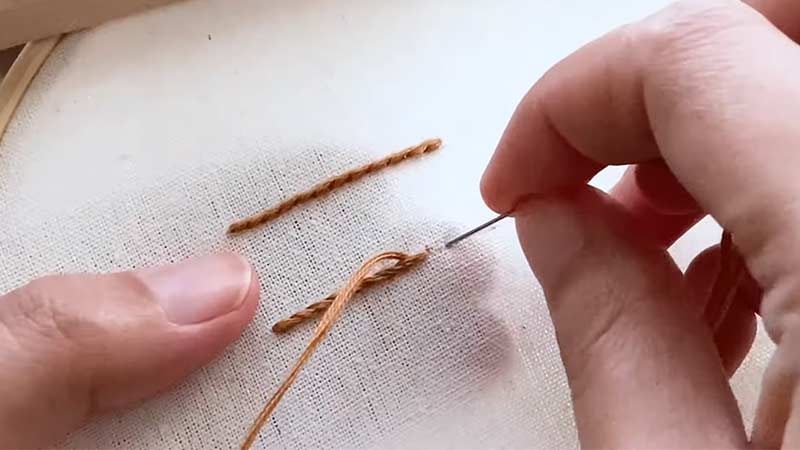
Begin by outlining the heart shape using a simple running stitch. This will serve as your guide throughout the needlepoint process.
Keep the stitches loose; they are temporary and will be removed later. This initial outline helps maintain the proportions of your heart design.
Choose Basic Needlepoint Stitches
Explore different needlepoint stitches to add texture and dimension to your heart. Common stitches include the tent stitch, basketweave, and continental stitch.
Experiment with combinations to create unique patterns that enhance the visual appeal of your needlepoint heart pattern.
Fill in the Heart
Once the outline is in place, start filling the heart with your chosen stitches. Work methodically, row by row, ensuring even coverage.
Adjust the tension as needed to create a smooth and cohesive surface. Allow the colours to blend seamlessly, capturing the essence of your emotional expression.
Add Details and Accents
To elevate your needlepoint heart, consider adding details or accents. Introduce contrasting stitches, create patterns within the heart, or incorporate metallic threads for a touch of sparkle. These personalized elements will make your needlepoint genuinely one-of-a-kind.
Incorporate Text or Symbols
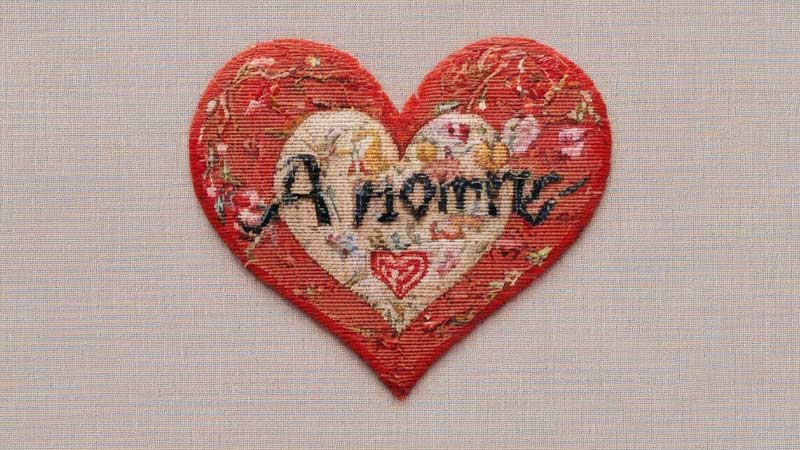
If you desire, add meaningful text or symbols within the heart. Whether it’s initials, a particular date, or a symbolic image, these additions enhance the sentimental value of your needlepoint creation. Plan the placement carefully to ensure balance and visual appeal.
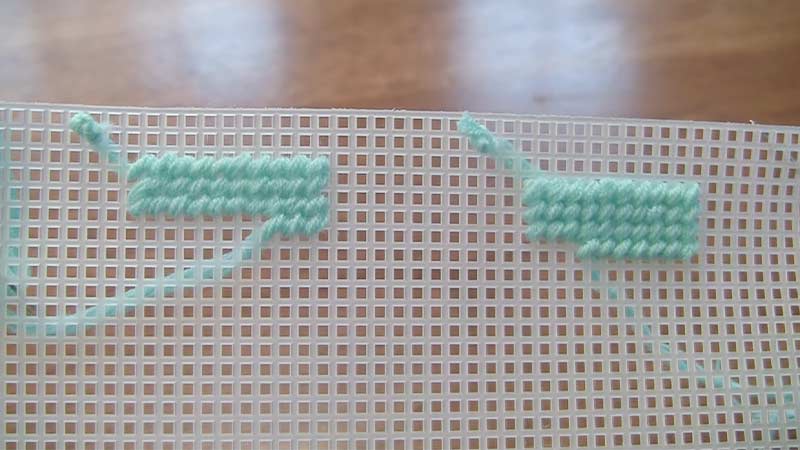
Secure Loose Threads
As you progress, periodically secure loose threads on the back of your canvas. This practice maintains a tidy appearance and prevents tangling.
Neatly weave the threads through existing stitches to conceal them, ensuring a polished finish for your needlepoint’s front and back.
Finalize and Frame
Once you’ve filled the entire heart with your chosen stitches, carefully remove the temporary outline stitches.
This step unveils the completed needlepoint heart. Trim any excess canvas and consider framing your masterpiece to protect and showcase your work.
Select a frame that complements the colours and style of your needlepoint. And your job is done! Now you know how to do needlepoint.
Most Popular Stitches in Needlepoint
While there are numerous stitches to explore, some have gained popularity for their versatility and aesthetic appeal.
Let’s delve into the needlepoint world and discover some popular stitches enthusiasts often incorporate into their creations.
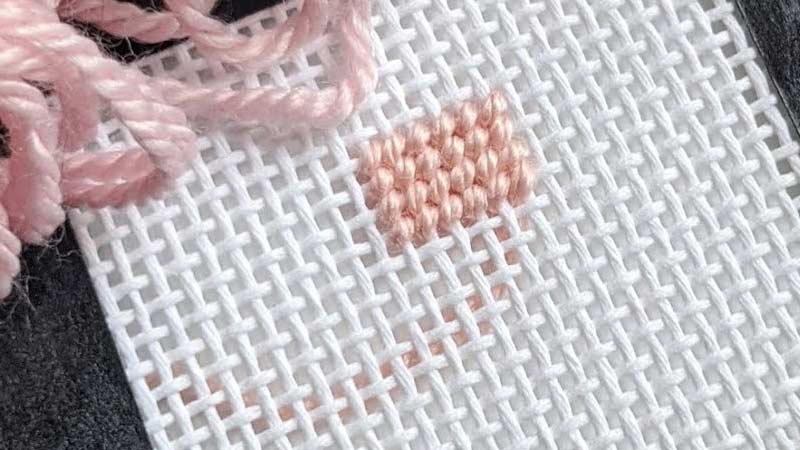
Tent Stitch
Also known as the half-cross stitch, the tent stitch is one of the most basic and commonly used needlepoint stitches. It involves working diagonal stitches across the canvas, creating a smooth and even surface.
The simplicity of the tent stitch makes it ideal for both beginners and experienced needlepointers, and it serves as the foundation for many other stitches.
Basketweave Stitch
The basketweave stitch is a variation of the tent stitch that provides additional coverage, making it particularly useful for large areas.
By working the stitches in a diagonal pattern that alternates directions, this stitch helps distribute tension evenly, reducing distortion and ensuring a well-balanced final piece.
Continental Stitch
The continental stitch is a straightforward, horizontal needlepoint stitch that covers a single canvas intersection. It creates a solid, textured surface, making it suitable for various designs.
While this stitch is easy to master, it offers versatility in colour placement, allowing for intricate patterns and shading.
Gobelin Stitch
Named after the French tapestry weaver Gobelins, this stitch is a variation of the continental stitch.
The gobelin stitch involves creating horizontal and vertical stitches over multiple canvas intersections, resulting in a dense and tightly woven appearance. This stitch is often used for making intricate details and backgrounds.
Bargello Stitch
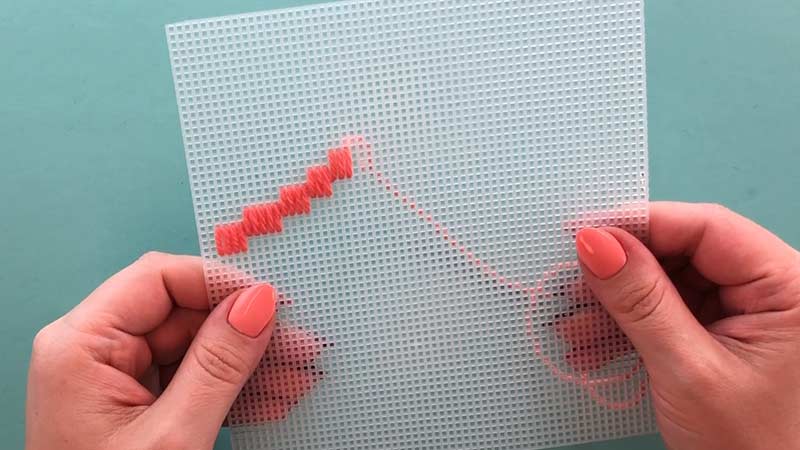
Bargello, a flame stitch, is a needlepoint technique characterized by geometric patterns created through straight stitches.
These stitches are usually worked in a repeating pattern, producing a mesmerizing, zigzag effect. Bargello designs can range from simple and elegant to complex and vibrant, making it a favourite among needlepoint enthusiasts.
Cross Stitch
While cross stitch is more commonly associated with other forms of embroidery, it can also be adapted for needlepoint. This stitch creates “X” shapes with the needle and thread, resulting in a distinctive and recognizable texture.
Cross stitch can be used for small details or as a primary stitch, depending on the desired effect.
Long Stitch
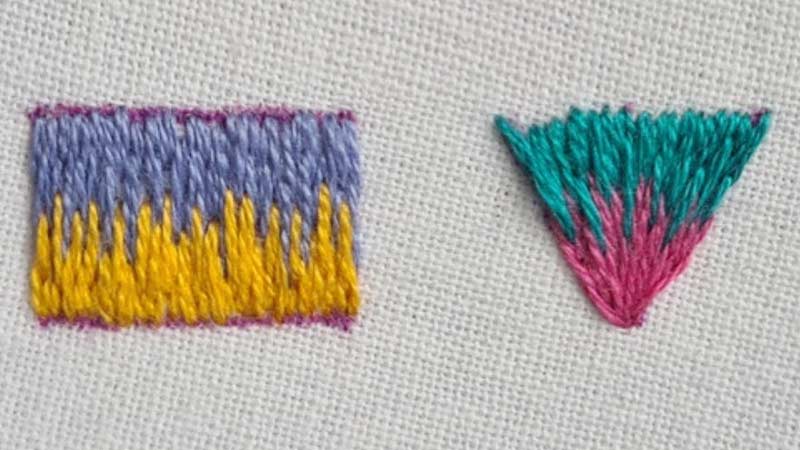
As the name suggests, a long stitch involves creating longer stitches that cover multiple canvas intersections.
This stitch is excellent for creating bold, linear designs and is often used for backgrounds, borders, or large areas of solid colour.
Long stitch allows for quick coverage and connects contemporary and abstract needlepoint designs well.
Scotch Stitch
The Scotch stitch is a small, square-shaped needlepoint stitch that provides texture and interest to a design. By varying the colours and orientation of these square stitches, intricate patterns and effects can be achieved.
The Scotch stitch is versatile and can be adapted for different design elements, making it a popular choice among needlepointers.
Jessica Stitch
The Jessica stitch is a group of decorative stitches that add dimension and complexity to a needlepoint piece.
Named after Jessica Tromp, a needlepoint designer, these stitches often involve combinations of diagonal, straight, and cross stitches to create geometric patterns and textured effects. Jessica stitches are commonly used for floral motifs and intricate details.
Rhodes Stitch
The Rhodes stitch is a decorative needlepoint stitch with a square or diamond shape. It involves a series of diagonal stitches intersecting to form the desired shape.
The Rhodes stitch is versatile and can be adapted to different sizes and orientations, making it suitable for creating eye-catching embellishments and focal points.
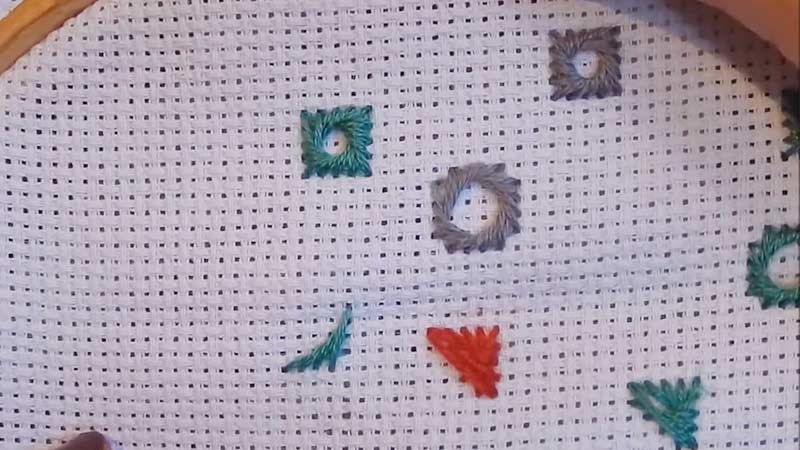
Turkey Work (Ghiordes Knot)
Turkey Work, also known as the Ghiordes Knot, is a textured stitch that adds a fluffy and three-dimensional quality to a needlepoint piece.
It involves creating loops with the needle, resembling tiny knots, which can be left as is or trimmed for a more defined look.
Turkey Work is often used for creating realistic textures in designs like animal fur, grass, or other soft elements, making it a versatile and visually appealing stitch in the needlepoint repertoire.
FAQs
What materials do I need for needlepointing a heart?
You’ll need a canvas, embroidery threads, needlepoint needles, scissors, and an embroidery hoop. Choose a canvas with a heart outline or sketch one for a personalized touch.
Can I use any colours for needlepointing a heart?
Absolutely! Choose colours that resonate with the emotions you want to convey. Vibrant reds for passion, soft pinks for tenderness, or a mix of shades to represent various feelings can all create a beautiful needlepoint heart.
Is needlepointing suitable for beginners?
Yes, needlepointing can be enjoyed by beginners. Start with basic stitches like tent stitch and gradually explore more intricate techniques. Many tutorials and guides are available to help you start your needlepoint journey.
How do I secure loose threads while needlepointing?
Periodically secure loose threads on the back of your canvas by weaving them through existing stitches. This maintains a tidy appearance and prevents tangling. Ensuring neatness on both sides contributes to a polished finish.
Can I frame my needlepoint heart?
Framing your needlepoint heart is a great way to protect and showcase your work. Choose a frame that complements the colours and style of your needlepoint. It adds a finishing touch, turning your creation into a cherished piece of art.
Conclusion
Needlepointing a heart is not just a creative exercise; it’s a journey of expressing emotion through meticulous craftsmanship. As you complete your project, take pride in the artistry and dedication poured into every stitch.
Whether you choose chosen hues or subtle shades, each colour symbolizes a facet of the emotions woven into the fabric. The final piece is not merely a needlepoint creation; it’s a manifestation of your sentiment and effort.
As your needlework masterpiece unfolds, remember that the process is as significant as the outcome. Embrace the imperfections, relish the learning curve, and celebrate the uniqueness of your handmade heart.
Whether it graces your home or becomes a heartfelt gift, the needlepointed heart will forever carry the warmth and sincerity invested in its creation.
So, pick up your needle, thread your emotions, and let your heart take shape in the artful needlepoint tapestry.
Leave a Reply