Wrapping a back stitch in embroidery is a crucial finishing technique that elevates the aesthetic and durability of embroidered projects.
As an artful method, it involves securing the ends of back stitches to prevent unraveling and adding a polished touch to the reverse side of the fabric.
The process entails weaving the embroidery thread beneath the existing stitches, creating secure knots that encapsulate the last back stitch.
This meticulous approach not only fortifies the embroidery but also contributes to a professional, refined appearance.
Understanding how to wrap a backstitch ensures that your needlework remains intact over time, showcasing a harmonious blend of craftsmanship and attention to detail in embroidery.
What Is Back Stitching in Embroidery?
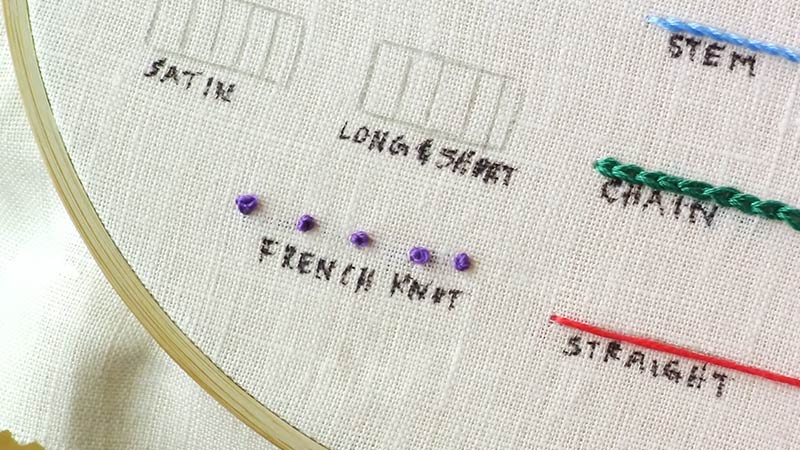
Back stitching in embroidery is a hand-sewing technique that involves creating a continuous line of straight stitches on a fabric.
It is commonly used to outline designs, add fine details, or create text. In back stitching, each stitch is made backward into the previous one, forming a solid and durable line.
This method provides a clear and defined outline for embroidery projects, enhancing the overall appearance and ensuring the longevity of the stitched design.
Back stitching is a fundamental skill in embroidery, valued for its precision and versatility in creating intricate patterns and adding structure to various textile projects.
How Do You Wrap a Back Stitch Embroidery? Step-By-Step Guide
Wrapping a back stitch in embroidery is used to secure and finish the ends of the stitches neatly, preventing them from unraveling over time. This method adds a professional and polished look to your embroidery project.
Here’s a step-by-step guide on how to wrap a back stitch:
Materials Needed:
- Fabric with back stitches
- Embroidery thread
- Embroidery needle
Steps:
Complete the Back Stitch
Start your embroidery by selecting a design and transferring it onto your fabric. To begin the back stitch, bring the needle up through the fabric at the starting point of your pattern.
Then, take a small stitch backward, piercing the fabric with the needle at the end of the previous stitch.
Continue this process, creating a series of straight stitches that connect like a chain. The back stitch is commonly used for outlining and adding fine details in embroidery.
Leave a Tail
As you approach the end of your back stitch line or reach a point where you need to change the thread, leave a small tail of thread (approximately 1-2 inches) on the backside of the fabric.
This tail will secure and wrap the back stitch to prevent it from unraveling.
Insert the Needle Under the Previous Stitches
Once you’ve completed your back stitch line, turn the fabric over to the backside. Bring the needle to the back of the fabric, positioning it just below the last backstitch.
Insert the needle under the previous stitches, ensuring you don’t pull the tail entirely through to the front of the fabric.
Create a Loop
With the needle now positioned under the previous stitches, pull it through to the back side, leaving a thread loop on the fabric’s wrong side. This loop will form the basis for the knot that secures the back stitch.
Pass the Needle Through the Loop
Insert the needle through the loop you’ve created. Pulling the needle through, the loop will tighten around the last backstitch, forming a secure knot. Ensure the knot is snug but not overly tight, as excessive tension may distort the fabric.
Tighten the Knot
After passing the needle through the loop and forming the knot around the last back stitch, gently pull the thread to tighten the knot.
It’s crucial to exercise caution during this step to avoid pulling too tightly, as excessive tension could potentially distort the fabric.
The goal is to secure the stitches without causing any visible changes to the surface of the embroidered area.
Repeat the Process
If your embroidery pattern involves multiple sections of back stitches or if you need to change thread colors, repeat the wrapping process for each segment.
Insert the needle under the previous stitches, create a loop, and pass the needle through the loop to form a knot.
This repetition ensures that each section of back stitches is individually secured, contributing to the overall stability and durability of the embroidery.
Trim Excess Thread
Trim any excess thread close to the fabric once you’ve successfully wrapped all the back stitches and secured them with knots.
Use sharp scissors to cut the thread, leaving a small tail carefully. Exercise caution not to cut into the stitches or the knot, as this could compromise the integrity of the wrapped ends.
A neatly trimmed thread adds to the overall tidiness and professionalism of the finished embroidery.
Press the Embroidery
Consider pressing the fabric with a cool iron on the reverse side to give your completed embroidery a polished and professional appearance.
Lay the embroidered piece face down on a clean cloth and press with gentle, even pressure. This step helps set the stitches and smooth out any wrinkles or creases that may have formed during the stitching process.
Follow any specific fabric care instructions to avoid damage, and allow the embroidered fabric to cool before handling.
Why Do You Wrap a Back Stitch Embroidery?
Wrapping a back stitch in embroidery serves both practical and aesthetic purposes, contributing to the overall quality and longevity of the embroidered piece.
Here are the primary reasons why one might choose to wrap a back stitch:
Securing the Stitch
The act of wrapping a backstitch plays a crucial role in fortifying the integrity of each stitch. Embroidery stitches, especially those positioned along the edges of a design, are often subjected to wear and tension.
By incorporating the wrapping technique, embroiderers create a more robust and durable connection between the thread and the fabric.
This significantly diminishes the likelihood of stitches coming undone over time, extending the embroidery’s lifespan and ensuring its resilience against daily wear and tear.
Preventing Unraveling
Back stitches can be vulnerable to unraveling when left unsecured, particularly in areas that undergo frequent handling or friction.
The wrapping technique is a protective measure, encapsulating the stitches and forming a knot that acts as a barrier against the thread slipping out.
This is especially critical in projects like clothing or accessories, where regular use might subject the embroidery to strains and stresses.
The wrapping not only preserves the aesthetic appeal but also reinforces the practical functionality of the stitches.
Enhancing Neatness and Professionalism
The meticulous act of wrapping back stitches contributes significantly to an embroidery project’s overall neatness and professionalism.
While the front side of the embroidery often takes the spotlight, the backside should not be neglected, mainly if it’s visible or if the piece is intended for framing.
The wrapping technique creates a clean, tidy finish on the reverse side, showcasing craftsmanship and attention to detail. This attention to both sides of the embroidery elevates the overall quality of the finished piece.
Managing Thread Ends
In addition to securing the stitches, wrapping provides an elegant solution for managing thread ends.
Instead of leaving loose tails or resorting to knots, the wrapping technique offers a refined way to secure thread ends, preventing them from tangling or creating unsightly bumps on the reverse side of the fabric.
This becomes particularly advantageous when changing thread colors or concluding a section of the embroidery, allowing for a seamless transition between different design elements.
Adding a Decorative Touch
While the primary purpose of wrapping a back stitch is functional, it also introduces a subtle decorative element to the back of the embroidery.
This decorative touch is especially relevant in projects where the reverse side might be visible, such as in openwork or on lightweight fabrics.
The wrapped stitches can enhance the overall aesthetic appeal, showcasing the embroiderer’s skill and dedication to creating a piece of art that is visually pleasing on the front and exhibits finesse on the reverse side.
How to Embroider Back Stitch?
Embroidering with the back stitch is a fundamental technique commonly used in hand embroidery to create outlines, lettering, and intricate details in a design. The back stitch is known for its simplicity and the clean lines it produces.
Here’s a step-by-step guide on how to embroider using the back stitch:
Materials Needed:
- Fabric of your choice
- Embroidery hoop
- Embroidery floss or thread
- Embroidery needle
- Scissors
Steps:
Prepare Your Fabric
Start by securing your fabric in an embroidery hoop to achieve optimal results in your embroidery. Place the fabric over the smaller hoop and position the larger hoop on top, ensuring the fabric is taut but not stretched.
Tightening the screw on the embroidery hoop will maintain even tension on the fabric, making it easier to create precise and consistent back stitches.
Thread the Needle
Select the appropriate embroidery floss or thread for your project. Cut a thread length, typically between 18-24 inches, and thread it through the eye of the embroidery needle.
The choice of using a single strand or multiple strands depends on your stitches’ desired thickness and texture. Thicker threads create bolder lines, while finer threads suit delicate details.
Start with a Knot
Before beginning your backstitch, secure the thread at the back of the fabric. You can achieve this by making a small knot at the end of the thread.
Alternatively, if you prefer a smoother finish on the back of your embroidery or want to avoid visible knots, leave a tail of thread and use the wrapping technique described earlier to secure it later.
Bring Needle Up Through Fabric
Position the needle at the starting point of your design on the fabric’s front side. Bring the needle up through the fabric, ensuring it emerges precisely where you want the first stitch of the back stitch to begin. This step marks the initiation of your embroidery.
Make the First Stitch
Take a small stitch backward With the needle on the fabric’s front side. Insert the needle into the fabric at the end of the desired stitch length, piercing through to the back.
This initial backward stitch creates the foundation for the subsequent back stitching. For a standard back stitch, keep the lengths relatively short and consistent for a clean and uniform appearance.
Continue Back Stitching
After completing the first back stitch, continue by bringing the needle up through the fabric a length away from the end of the last stitch.
This involves moving along the design and maintaining a consistent distance between each stitch. As you work, pay attention to the flow of your design, ensuring that the stitches form a continuous line.
Insert the needle back down into the end of the previous stitch, essentially stitching backward. Repeat this sequence, creating a chain of back stitches that follows the contours of your pattern.
Consistent Stitch Length
Maintaining a consistent stitch length is crucial for achieving a neat and uniform appearance in your back stitch embroidery.
Consistency is critical when navigating smooth curves or adding intricate details.
A steady hand and focus on keeping the stitch lengths even contribute to your embroidery’s overall professional and polished look.
Complete Your Design
Follow the pattern or outline of your design diligently, connecting the back stitches to form a continuous line. Adjust the stitch length to accommodate curves, sharp turns, or straight lines.
As you progress through your design, the back stitches will come together to outline and define the shapes and details of the pattern you’re creating.
Secure the End
When you reach the end of your design or need to change thread colors, securing the end of your back stitching is essential. This can be done by making a small knot at the back of the fabric.
Alternatively, if you prefer a cleaner finish, use the wrapping technique mentioned earlier to secure the thread neatly. This step ensures that your stitches remain intact and don’t unravel over time.
Finish and Secure
As you conclude your back stitching, whether it’s the end of your design or a point where you want to change threads, finish by securing the thread.
This can be accomplished by making a small knot at the back of the fabric or by using the wrapping method described in a previous response.
Properly securing the end of your back stitching is essential for preserving the integrity of your embroidery and preventing any unintended unraveling.
FAQs
What Is Wrapped Stitches Knitting?
Wrapped stitches in knitting refer to a technique where the yarn is intentionally wrapped around the base of a stitch, creating a decorative or textural element in the fabric.
How to End a Stitch Embroidery?
To end a stitch in embroidery, bring the needle to the back of the fabric and make a small knot, securing the thread tightly.
Trim any excess thread close to the knot, ensuring your embroidery work has a neat and finished appearance.
Do I need special tools to wrap back stitches?
No special tools are required. All you need is your embroidery needle, thread, and fabric. The wrapping technique involves weaving the thread under the existing stitches to create secure knots.
To Recap
Mastering the art of wrapping a back stitch in embroidery is a skill beyond securing threads; it embodies the commitment to precision and the pursuit of a flawless finish.
The deliberate process of encasing each back stitch with a neatly tied knot ensures the embroidered piece’s visual appeal and structural integrity.
The embroidery gains a professional touch through this meticulous technique, showcasing the artisan’s dedication to craftsmanship.
As the final act in the embroidery journey, wrapping back stitches not only safeguards the intricacies of the design but also elevates the overall quality, leaving behind a testament to the meticulous care invested in every stitch and detail.
Leave a Reply