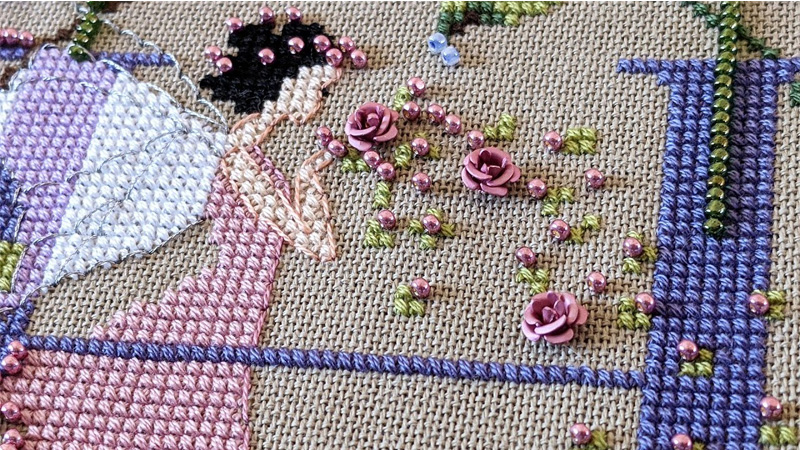
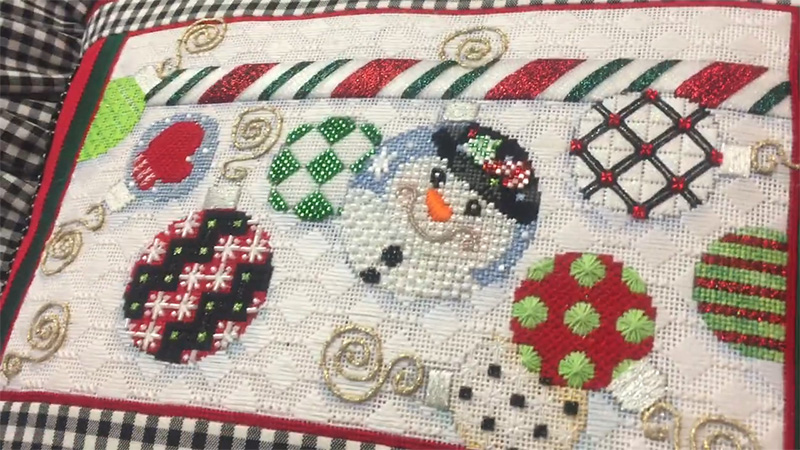
Adding beads to cross stitch projects can elevate their visual appeal and add a touch of elegance and dimension to your creations.
Whether you’re aiming to create sparkling stars in a night sky or intricate floral embellishments, incorporating beads into your cross stitch work can open up a world of creative possibilities.
This artful technique allows you to infuse your designs with texture and shimmer, transforming ordinary cross stitch patterns into extraordinary works of art.
In this guide, we’ll walk you through the steps of selecting the right beads, planning their placement, and securely attaching them to your cross stitch fabric.
With a few simple techniques, you can master the art of adding beads to cross stitch and take your stitching projects to the next level.

How to Add Beads to Cross Stitch?
Adding beads to a cross stitch project can elevate its visual appeal and add a touch of elegance and dimension to your design.
Here’s a guide on how to add beads to cross stitch:
Choosing the Right Beads
Begin by selecting the beads that best match your cross stitch project. Consider factors such as color, size, and style. Make sure the beads have holes large enough to accommodate your chosen needle and thread.
Whether you opt for classic seed beads or more intricate bugle beads, ensure they complement your fabric and thread colors.
Planning Bead Placement
Before diving in, carefully plan where you want to incorporate beads into your cross stitch design. Beads can accentuate specific elements, fill empty spaces, or create intricate patterns.
Visualize the placement, ensuring it enhances your design’s aesthetics and overall balance.
Thread Your Needle
Thread your needle with a single strand of embroidery or beading thread that matches either the bead color or your fabric. To prevent slippage, tie a knot at the end of the thread.
This step prepares your needle for securing the beads.
Position the First Bead
Start by bringing the needle up from the backside of your cross stitch fabric at the central point of your intended bead placement. This initial position is crucial, as it anchors your first bead securely in the desired location.
Adding the Bead
Gently slide your chosen bead onto the needle, allowing it to descend gracefully until it rests on the fabric at your predetermined spot. The bead should sit snugly against the fabric, ready to catch the light and add dimension to your design.
Securing the Bead
Insert the needle back into the fabric very close to the point where it initially emerged, ensuring it doesn’t pass through the same hole as the bead.
This action secures the bead in place, preventing it from slipping or coming loose. Pull the thread gently but firmly to ensure the bead is tightly anchored.
Continue Adding Beads
Repeat steps four and five for each additional bead you wish to incorporate. You can choose to add beads one at a time or string several onto the thread before inserting the needle back into the fabric.
Consistency in spacing and alignment is essential to maintain a polished look.
Tie Off the Thread
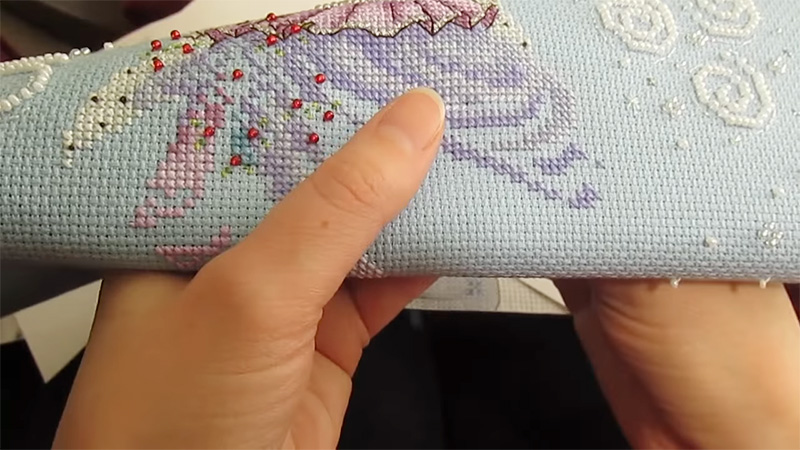
Once you’ve added all the desired beads, flip your cross stitch fabric over to the backside. Secure the thread by tying a tight knot on the back of the fabric.
Ensure it’s firmly anchored to prevent any bead-related mishaps. Trim any excess thread close to the knot for a neat finish.
Final Check
Before considering your cross stitch project complete, conduct a meticulous inspection. Verify that all the beads are securely attached, and there are no loose threads or potential issues on the back of your work.
This final step ensures your beads remain in place and your cross stitch looks its best.
What Beads Are Used for Cross Stitch?

In cross stitch, various types of beads can be used to add embellishments and enhance the overall design. The choice of beads depends on your project’s specific requirements, including the desired look, size, and style.
Here are some common types of beads used for cross stitch:
Seed Beads
Seed beads are small, spherical beads that come in various sizes, typically referred to as “11/0” or “8/0.” They are incredibly versatile and are often used in cross stitch to add delicate accents, create tiny flowers, or outline specific elements.
Their size allows for fine detailing in your design.
Bugle Beads
Bugle beads are elongated, tube-shaped beads that can vary in length. These beads are ideal for adding linear elements to your cross stitch work, such as borders, stems, or tree branches.
They create a unique texture and can make your design stand out with their elongated shapes.
Glass Beads
Glass beads are available in a wide range of shapes, sizes, and colors. These versatile beads can be used to add a touch of elegance and dimension to your cross stitch projects.
Whether you want to create a sparkling sky full of stars or delicate flowers, glass beads offer endless creative possibilities.
Cylinder Beads (Delica Beads)
Cylinder beads, such as Delica beads, are known for their uniform shape and size. They are a favorite among cross stitch enthusiasts for creating precise patterns, intricate details, and realistic designs.
These beads allow for accurate color placement and precise outlining.
Metallic Beads
Metallic beads, often made from materials like brass, can introduce a touch of luxury and shine to your cross stitch projects. They are particularly useful when you want to add metallic accents or highlight special elements like jewelry or armor in your design.
Pearl Beads
Round and smooth, pearl beads resemble genuine pearls and can lend a classic and elegant appearance to your cross stitch creations. They are often chosen for projects with a vintage or romantic theme and can be used for embellishing wedding or anniversary designs.
Crystal Beads
Crystal beads are renowned for their clarity and light-catching properties. When used in cross stitch, they create a dazzling effect, making your project sparkle and shimmer.
They are perfect for adding a touch of brilliance to designs featuring water, snow, or any element where light reflection is desired.
Gemstone Beads
For more artistic and intricate cross stitch projects, gemstone beads like quartz, amethyst, or jade can be a unique choice. These natural materials add a touch of sophistication and earthiness to your design, perfect for nature-inspired or spiritually-themed works.
What Size Beads to Use for Cross Stitch?

The size of beads to use for cross stitch depends on your design’s intricacy and the visual effect you desire. For delicate details and subtle accents, opt for small beads like 11/0 seed beads, which are about 2.1mm in diameter.
Slightly larger 8/0 seed beads (around 3mm) are great for more noticeable embellishments. If you intend to create bold lines or borders, consider bugle beads, with sizes ranging from 4mm to 6mm or longer.
Versatile glass beads, available in various sizes, can add sparkle and dimension. In essence, choose bead sizes that harmonize with your design’s scale and your artistic intent.
What is the Best Thread for Cross Stitch Beading?
The best thread for cross stitch beading typically depends on your specific project and personal preferences.
Two commonly used types of thread for cross-stitch beading are:
Embroidery Floss
Embroidery floss is a versatile choice for cross stitch beading. It’s available in a wide range of colors, which allows you to match the thread closely to the bead color or your fabric.
When using embroidery floss for beading, you can separate the strands to use a single strand for delicate work. Make sure to tie a knot at the end of the thread to prevent slippage.
Dedicated Beading Thread
Beading thread is specifically designed for beadwork and is a popular choice for adding beads to cross stitch. It’s available in various thicknesses, such as Nymo or FireLine, and is known for its strength and durability.
Beading thread is less likely to fray or tangle and can handle the wear and tear of beadwork.
How to Prevent Beads From Slipping or Coming Loose in Cross Stitch?

Preventing beads from slipping or coming loose in cross stitch is essential to ensure the longevity and overall appearance of your project.
Here are some tips to help you secure beads effectively:
Use the Right Thread
Use a strong and appropriate thread for beadwork. Beading thread, like Nymo or FireLine, is specifically designed for bead projects and is less likely to fray or break.
If using embroidery floss, use a single strand for added strength.
Knot the Thread
Begin your beadwork by tying a knot at the end of your thread. This initial knot acts as an anchor, preventing beads from slipping off prematurely during the stitching process.
Anchor Beads Securely
When adding a bead to your cross stitch, ensure it is snugly nestled against the fabric. Gently press the bead in place using your needle or fingertip to firmly secure it.
Stitch Securely
After adding a bead, insert the needle back into the fabric as close as possible to where it first emerged, avoiding the same hole the bead went through.
This action effectively locks the bead in place and prevents any unwanted shifting.
Maintain Tension
Consistency in thread tension is crucial to keeping beads secure. If the thread is too loose, beads may move more freely, so strive to maintain even tension throughout your cross stitch.
Check Knots Regularly
Periodically inspect the backside of your work to ensure that knots are tight and secure. If any knots appear loose, promptly tighten them to prevent any potential bead slippage.
Use a Bead Mat or Tray
Employing a bead mat or tray can help keep your beads organized and prevent them from rolling or scattering. This organization streamlines the bead placement process and minimizes the risk of beads becoming dislodged.
Avoid Overloading the Needle
Be cautious when stringing beads onto your thread, avoiding the temptation to add too many at once. Overloading the needle can lead to tangles and make it challenging to secure each bead individually.
Consider Using Thread Conditioner (Optional)
For smoother, less tangling thread, you may consider using a thread conditioner like beeswax or Thread Heaven. This optional step can contribute to more secure bead attachment.
Regularly Inspect Your Work
Periodically, turn your project over and examine the backside. Verify that all beads remain securely attached and check for any loose threads, knots, or potential issues that could compromise the integrity of your beadwork.
FAQs
Are there any specific techniques for adding beads to cross stitch?
Yes, specific techniques include securing beads by anchoring, maintaining tension, and consistent placement while stitching to prevent slippage and achieve a polished look.
What are some creative ways to incorporate beads into cross stitch designs?
Beads can highlight elements, create patterns, add sparkle to skies or water, embellish jewelry, or enhance specific areas for dimension and visual interest in cross stitch designs.
Can I mix different types of beads in one cross stitch project?
Yes, mixing different types and sizes of beads in a single cross stitch project can add dimension and visual interest, allowing for creative design variations.
Is there a specific order for adding beads to my cross stitch project?
Start by planning bead placement in your cross stitch design, then follow a systematic process of adding beads while securing them in place for a polished finish.
Can I remove and reposition beads if needed?
Beads can typically be gently removed and repositioned if necessary, but it’s best to avoid this to maintain the integrity of your cross stitch.
To Recap
Adding beads to cross stitch is a delightful way to enhance the beauty and intricacy of your stitching projects. It opens up a realm of creativity, allowing you to infuse your designs with charm and elegance.
By choosing the right beads and mastering the techniques of precise placement and secure attachment, you can create cross stitch pieces that captivate the eye and elevate your craftsmanship.
Whether you’re crafting delicate floral accents or crafting elaborate scenes, beads can transform your work from ordinary to extraordinary.
So, embrace this embellishment technique, experiment with different bead types and sizes, and watch as your cross stitch projects shimmer and shine, leaving a lasting impression on both you and those who admire your artistic creations.
Leave a Reply