Stem stitch embroidery is an enchanting and time-honored craft that transforms ordinary fabric into exquisite works of art.
This versatile embroidery technique creates delicate, rope-like lines that are perfect for outlining designs, embellishing clothing, or adding intricate details to your handcrafted projects.
Whether you’re a novice seeking to embark on a creative journey or an experienced artisan looking to refine your skills, mastering the art of stem stitch embroidery opens up a world of possibilities.
In this guide, we will unravel the secrets of this elegant craft, providing you with step-by-step instructions and valuable tips to help you create beautifully embroidered designs that capture the essence of timeless handiwork.
What Is Stem Stitch?
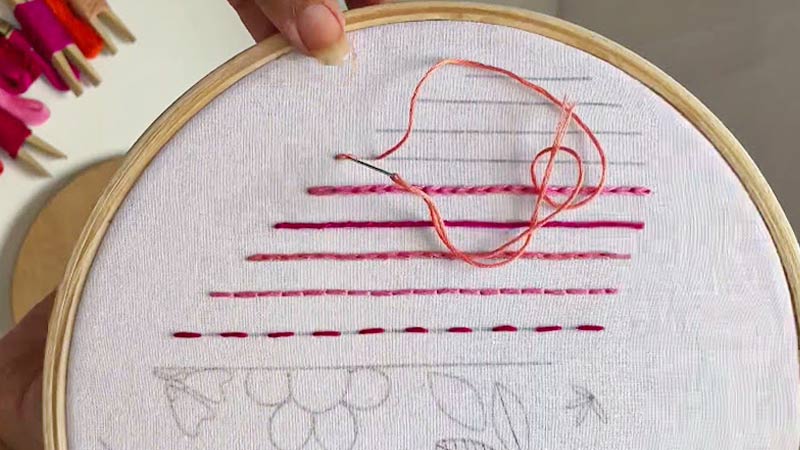
Stem stitch is a classic hand embroidery technique used to create delicate, rope-like lines and outlines in needlework.
It involves stitching a continuous line of slanted stitches, with each new stitch starting from the midpoint of the previous one.
This method produces a twisted or braided effect, making it ideal for outlining shapes, creating flowing lines, or adding text and lettering to fabric projects.
Stem stitch is favored for its versatility and ability to add a touch of elegance to various embroidery designs and patterns.
11 Steps to Do Stem Stitch Embroidery Practically
Stem stitch embroidery is a classic and versatile hand embroidery technique that creates a beautiful rope-like effect. It’s commonly used to outline shapes, create flowing lines, or add text and lettering to fabric projects.
Whether you’re a beginner or an experienced embroiderer, learning how to do stem stitch embroidery can be a rewarding and enjoyable craft.
Here’s a step-by-step guide to help you get started:
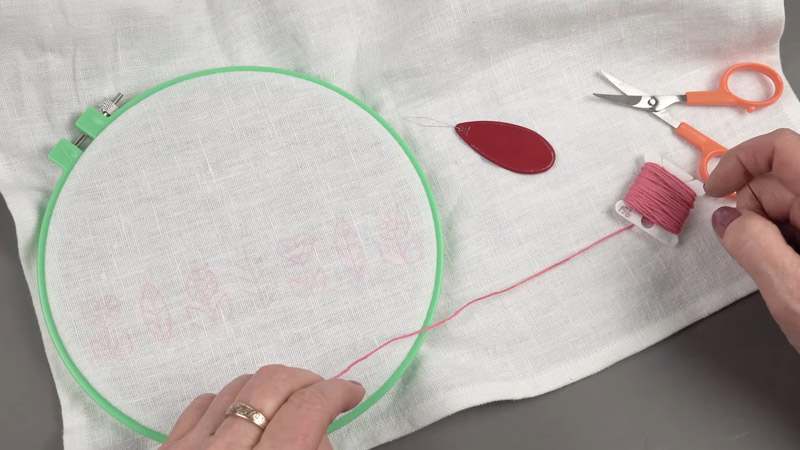
Materials You’ll Need:
- Fabric
- Embroidery Hoop
- Embroidery Thread
- Embroidery Needles
- Scissors
- Pattern
Step-by-Step Instructions for Stem Stitch Embroidery:
1. Prepare Your Fabric
Before you start embroidering with the stem stitch, it’s crucial to choose the right fabric for your project. Consider factors like texture and color that will complement your design.
Once you’ve selected your fabric, place it securely within an embroidery hoop. Ensure that the fabric is evenly stretched and smooth.
To do this, tighten the hoop’s screw or clasp. This step is essential as it keeps the fabric taut and prevents any wrinkling or distortion during embroidery.
2. Thread Your Needle
To get your needle ready, cut a manageable length of embroidery thread, typically ranging from 18 to 24 inches.
Threading your needle is the next step, making sure that the tail end of the thread is secured on the fabric’s backside.
If you’re using stranded embroidery floss, consider separating the strands according to your desired thickness. Stem stitch usually employs one or two strands, depending on the look you’re aiming for.
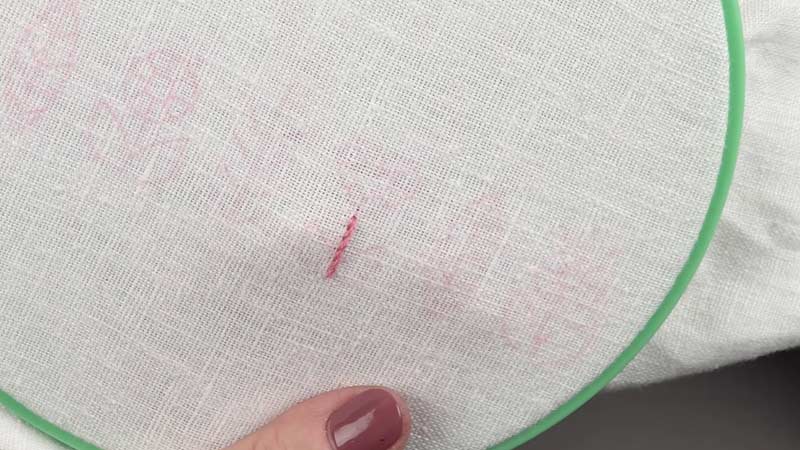
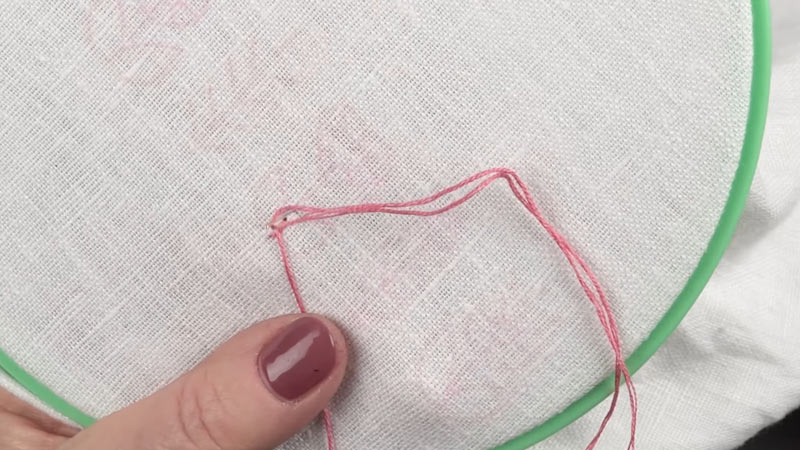
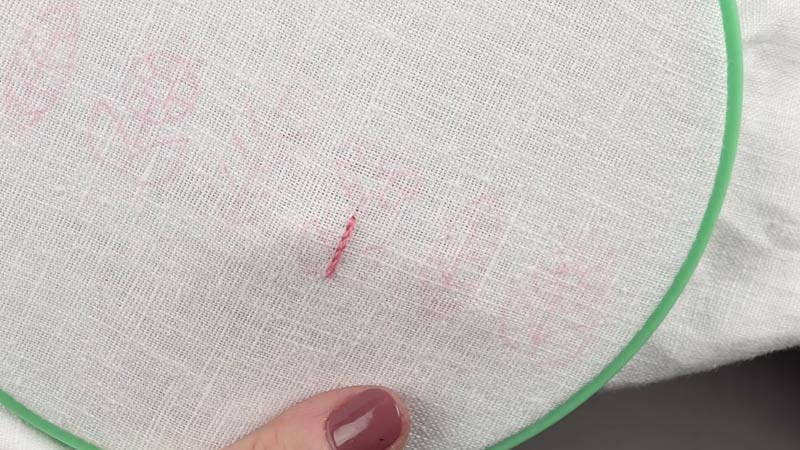
3. Start Stitching
Initiating your embroidery project involves bringing the threaded needle up from the backside of the fabric to the front at the chosen starting point. This initial stitch serves as your embroidery’s anchor point.
4. Form the First Stitch
Create a small straight stitch by inserting your needle back into the fabric, positioning it approximately one stitch length away from where you emerged. This initial straight stitch acts as an anchor for the subsequent stem stitches.
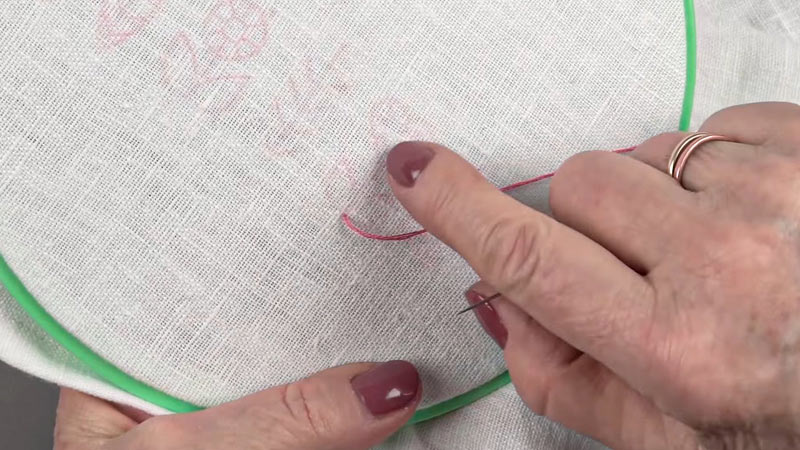
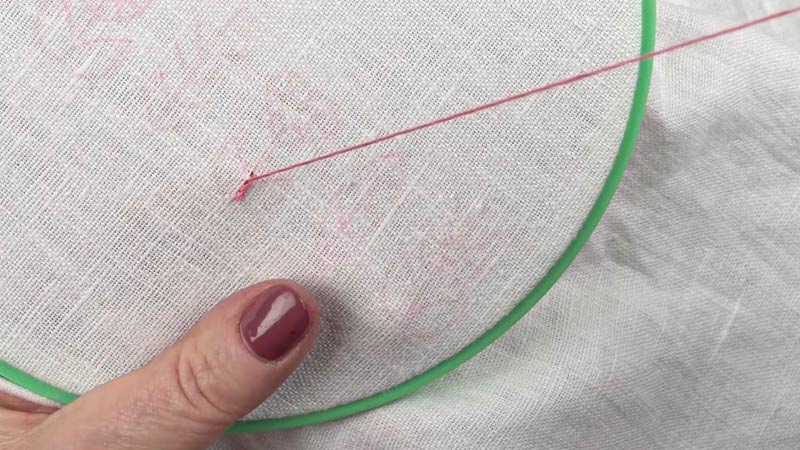
5. Begin the Stem Stitch
Differing from a standard straight stitch, the stem stitch begins by bringing your needle back up through the fabric.
However, this should be done at a point that’s equidistant between the start and end points of your first stitch. This placement will give your stem stitch its characteristic slanted appearance.
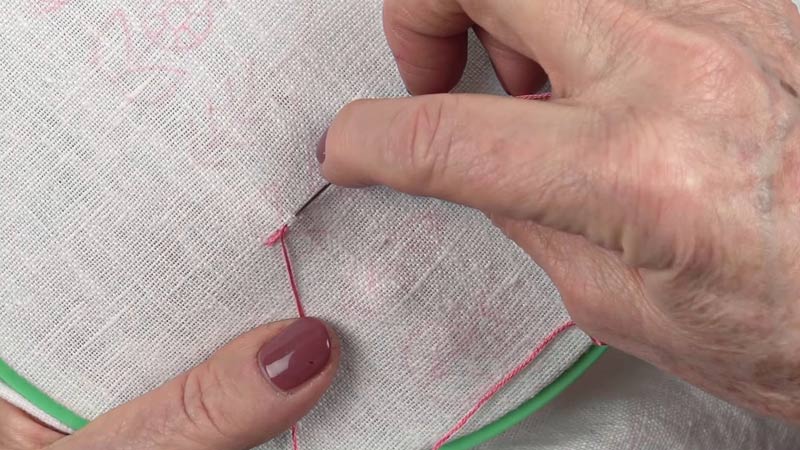
6. Complete the Stitch
After bringing the needle up and positioning the thread along the fabric’s surface, gently pull the needle and thread through until the thread lies flat and smooth on the fabric.
Then, insert the needle back down into the fabric at the end point of your first stitch, creating a diagonal stitch.
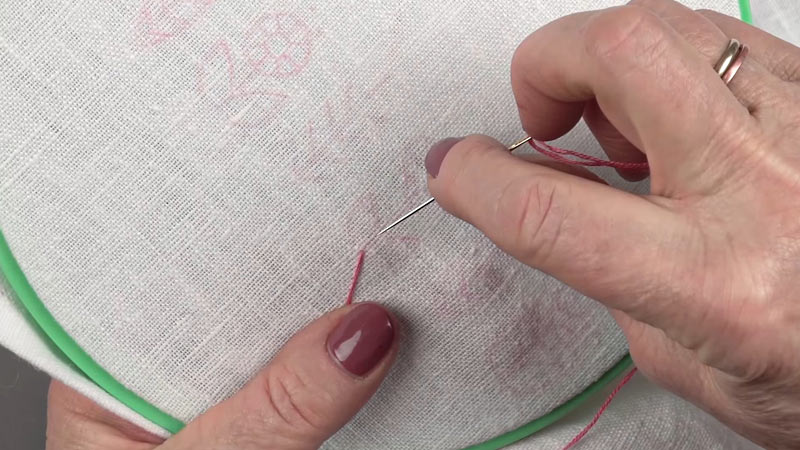
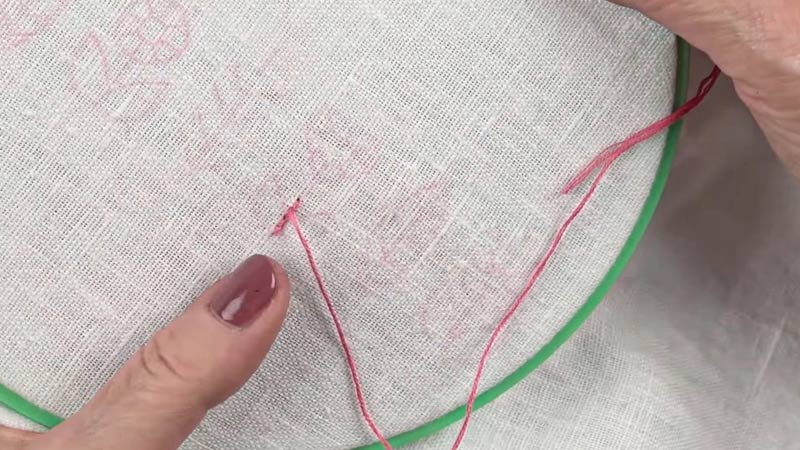
7. Repeat the Process
Continue this stitching pattern along your design’s outline or desired path. Each new stitch should begin from the midpoint of the previous one, creating a continuous line that closely resembles a twisted rope.
8. Maintain Consistency
Consistency is key to achieving a polished look. Keep the length and angle of your stitches uniform throughout the project.
Pay close attention to the tension of your thread; it should be taut enough to lie flat on the fabric without pulling or distorting it.
9. Finishing
As you reach the end of your stem stitch design, complete it by making a small anchor stitch. Insert your needle to the fabric’s backside and secure the thread by creating a knot or weaving it through previous stitches.
10. Secure the Threads
To neatly finish your work, trim any excess thread using sharp embroidery scissors. Be sure not to accidentally cut any of your carefully crafted stitches.
11. Clean Up
To put the final touches on your embroidered piece, remove the fabric from the embroidery hoop gently, taking care not to tug or distort the stitches. Then, iron the finished embroidery on the reverse side using a low heat setting.
Consider using a pressing cloth if necessary to avoid damaging the threads. This step will remove any wrinkles and create a smooth, polished appearance for your completed stem stitch embroidery project.
Mistakes to Avoid When Stem Stitch Embroidering
Avoiding common mistakes can help you achieve better results in stem stitch embroidery.
Here are some mistakes to watch out for and tips on how to avoid them:
Uneven Tension
Ensure that you maintain consistent tension on the embroidery floss throughout the stitching process. Uneven tension can lead to an irregular and messy appearance. Practice keeping the tension steady as you work.
Knots and Tangles
Be cautious of knots and tangles in your embroidery thread. These can create unsightly bumps or interruptions in your stitching. Regularly check your thread for tangles and keep it untangled as you work.
Inconsistent Stitch Length
Aim for even and consistent stitch lengths when doing stem stitch. Varying stitch lengths can make your lines look wobbly and uneven. Practice making stitches of the same length to achieve a smooth result.
Wrong Thread Thickness
Choosing the right thread thickness for your fabric is crucial. Using thread that is too thick can cause your stitches to pucker the fabric, while thread that is too thin may not provide enough coverage. Match the thread thickness to your fabric for the best results.
Skipping Stitches
Make sure you don’t skip any stitches along your embroidery line. Skipping stitches can create gaps in your design and disrupt the flow of your pattern. Pay attention to each stitch and space them evenly.
Incorrect Needle Placement
Ensure your needle goes through the fabric at the correct angle. A common mistake is angling the needle too steeply or too shallowly, which can result in irregular lines. Keep the needle at a consistent angle for a neat appearance.
Not Securing the Thread
Always secure the starting and ending points of your thread. Failure to do so can cause your stitches to unravel over time. You can use small backstitches or knots on the reverse side to secure your thread ends.
Using the Wrong Fabric
Select an appropriate fabric for stem stitch embroidery. Too thin or delicate fabrics may not hold up well to the embroidery process, while overly thick fabrics can be challenging to stitch through. Test your fabric with a scrap piece before starting your project.
Lack of Planning
Plan your design in advance and mark guidelines on your fabric. Winged or haphazard stitching can result in a messy, inconsistent look. Having a clear plan and following your design lines will yield better results.
Not Maintaining Clean Hands
Keep your hands clean while embroidering to prevent dirt, oils, or stains from transferring onto your fabric. Dirty hands can soil your embroidery and may be difficult to clean afterward.
Impatience
Take your time with stem stitch embroidery. Rushing can lead to mistakes and uneven stitching. Enjoy the process and focus on each stitch to create a polished final piece.
Lack of Practice
Like any skill, embroidery improves with practice. Don’t be discouraged by initial mistakes; instead, use them as learning opportunities. Regular practice will help you become more proficient in stem stitch embroidery.
10 Unique Stem Stitch Embroidery Design Ideas
Stem stitch embroidery offers endless possibilities for creating beautiful designs.
Here are ten design ideas to inspire your next embroidery project:
Botanical Delights
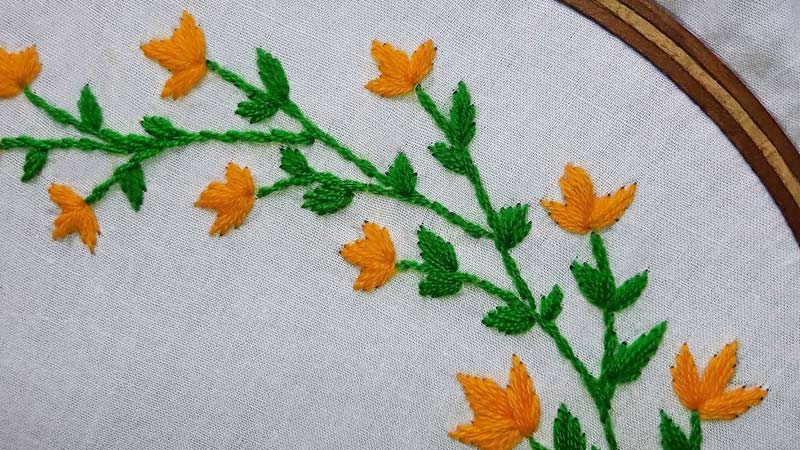
Consider creating an embroidered garden filled with a variety of botanical elements. Use stem stitch to craft elegant stems, lush leaves, and vibrant flowers.
Experiment with thread colors to capture the natural beauty of different flora, from the delicate petals of roses to the intricate veins of leaves. Combining various plants and flowers can result in a lush, multi-dimensional design.
Elegant Monograms
Personalize your embroidery with elegant monograms using stem stitch. Incorporate the initials into a decorative border or frame them with meticulously stitched floral motifs.
This design idea adds a touch of sophistication to linens, handkerchiefs, and other personalized items.
Animal Portraits
Capture the beauty of animals through lifelike portraits created with stem stitch. The smooth, flowing lines of this stitch are well-suited for rendering the contours of creatures.
Choose from a range of animals, from graceful birds to adorable pets, and focus on the intricate details of their features, fur, or feathers.
Geometric Patterns
Design contemporary and visually striking patterns using geometric shapes and stem stitch. Experiment with bold and modern shapes like triangles, hexagons, and chevrons. Alternatively, delve into intricate tessellations that create captivating optical illusions.
Quirky Quotes
Inject personality and humor into your embroidery with quirky quotes. Utilize stem stitch to write your favorite inspirational sayings or witty phrases.
Play with different fonts and lettering styles to convey the message in an aesthetically pleasing way, and consider adding decorative flourishes.
Vintage-Inspired Designs
Pay homage to different eras with vintage-inspired embroidery motifs. Emulate the elegance of the Victorian era with delicate roses and lacey patterns, or capture the geometric glamour of the Art Deco period.
Alternatively, evoke the retro charm of the 1950s with atomic-inspired designs using stem stitch.
Underwater Scenes
Dive into the depths of creativity by embroidering underwater scenes. Use stem stitch to depict colorful fish, intricate coral formations, and gently swaying seaweed.
The fluid lines of stem stitch are perfect for conveying the graceful movements of aquatic life and the play of light in the ocean depths.
Celestial Wonders
Embark on an astronomical journey by embroidering celestial objects like stars, planets, and galaxies.
Stem stitch can help you create the curved lines and intricate details of outer space, whether you’re aiming to replicate the constellations or capture the mesmerizing beauty of the Milky Way.
Abstract Art
Give free rein to your creativity with abstract embroidery designs. Experiment with unique shapes, colors, and textures to express your artistic vision through stem stitch.
Abstract embroidery allows for endless possibilities and encourages you to push the boundaries of traditional embroidery.
Whimsical Landscapes
Create whimsical and enchanting landscapes using stem stitch. Craft dreamy forests with towering trees, magical castles nestled in rolling hills, or fairy-tale scenes with charming characters.
The versatility of stem stitch enables you to add intricate details and textures that bring these imaginative worlds to life on your fabric canvas.
FAQS
Is stem stitch suitable for all types of fabric?
Stem stitch works well on a wide range of fabrics, but it’s particularly effective on medium-weight and heavy fabrics like cotton, linen, denim, and wool. It may be less suitable for very delicate or sheer materials.
Can I reverse stitch when using stem stitch?
Stem stitch is typically worked in one direction along a design’s outline. Reversing the direction may result in a less uniform appearance, so it’s advisable to plan your stitching path carefully.
Are there any variations of stem stitch I should know about?
Yes, there are variations like outline stitch and split stitch that resemble stem stitch.
What’s the best way to transfer a design onto fabric for stem stitch embroidery?
You can transfer a design onto fabric using methods such as tracing paper, transfer pencils, or iron-on transfers.
Is stem stitch suitable for small, intricate designs?
While stem stitch is versatile, very small or intricate designs may be challenging due to the need for consistent tension and stitch length.
To Recap
Mastering the art of stem stitch embroidery can be both a fulfilling and creative journey for craft enthusiasts. This timeless hand embroidery technique offers the means to add intricate and elegant designs to various fabric projects.
By selecting the right fabric, mastering thread handling, and practicing the stitching process, you can achieve a polished and professional look.
Attention to consistency in stitch length and tension is crucial for creating beautiful, rope-like lines that enhance your designs.
Completing the embroidery with care, securing threads, and finishing with a gentle press ensures a refined result.
With dedication and practice, stem stitch embroidery becomes a rewarding craft, allowing you to infuse your projects with unique, handcrafted beauty.
Leave a Reply