Drawing on acrylic sheets offers a unique and captivating canvas for artistic expression. Acrylic sheets, often referred to as plexiglass, provide a smooth, transparent surface that opens up a world of creative possibilities.
Whether you’re a seasoned artist or an aspiring one, this art form combines the versatility of acrylic materials with the transparency of glass, resulting in stunning and eye-catching artwork.
In this guide, we will delve into the fascinating world of drawing on acrylic sheets, exploring the materials, techniques, and step-by-step instructions to help you bring your visions to life on this captivating and durable medium.
What Is an Acrylic Sheet?
An acrylic sheet, often referred to as plexiglass or acrylic glass, is a transparent thermoplastic material. It is derived from acrylic acid and is known for its exceptional clarity, high durability, and versatility.
Unlike traditional glass, acrylic sheets are lightweight, impact-resistant, and less prone to shattering, making them a popular alternative for various applications.
They come in a range of thicknesses and can be easily cut, shaped, and molded to suit specific needs. Acrylic sheets find extensive use in industries such as construction, signage, automotive, and art.
Their optical clarity and UV resistance also make them a preferred choice for protective barriers, display cases, and artwork.
Additionally, they are available in various colors, providing a wide array of design possibilities.
How to Draw on Acrylic Sheet?
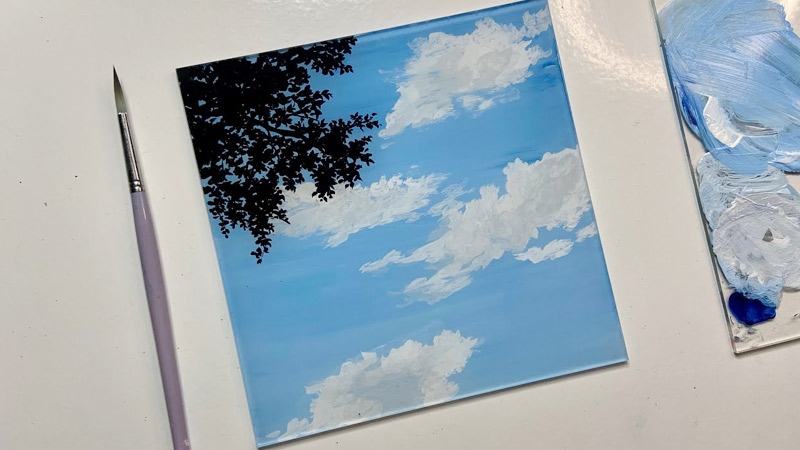
Drawing on an acrylic sheet can be a creative and visually striking way to express your ideas or create unique artwork. Acrylic sheets are versatile and durable, and provide a smooth surface for drawing.
Whether you’re a seasoned artist or just starting with acrylic sheets, here’s a step-by-step guide on how to draw on them effectively:
Materials Needed:
- Acrylic Sheet.
- Markers or Pens.
- Pencil.
- Eraser.
- Ruler or Straightedge.
- Paper Towels or Cloth.
Step-by-Step Guide:
Prepare your workspace
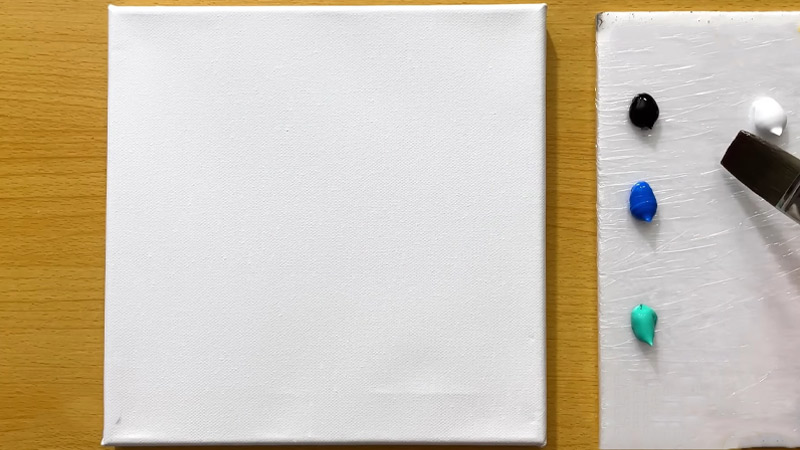
Ensure you have adequate lighting, as this will help you see the details clearly. Ventilation is crucial, especially if you’re using markers with strong odors.
Lay down a clean, flat surface to prevent any unwanted imprints on your artwork.
Clean the acrylic sheet
Gently wipe the acrylic sheet with a non-abrasive cleaner. If the sheet is particularly dusty or has fingerprints, consider washing it with mild soap and water. Allow it to dry completely before starting your drawing.
Plan your design
Consider factors like composition, balance, and focal points. If it helps, create a rough sketch on paper first to get a sense of how your design will translate onto the acrylic sheet.
Start with a pencil sketch
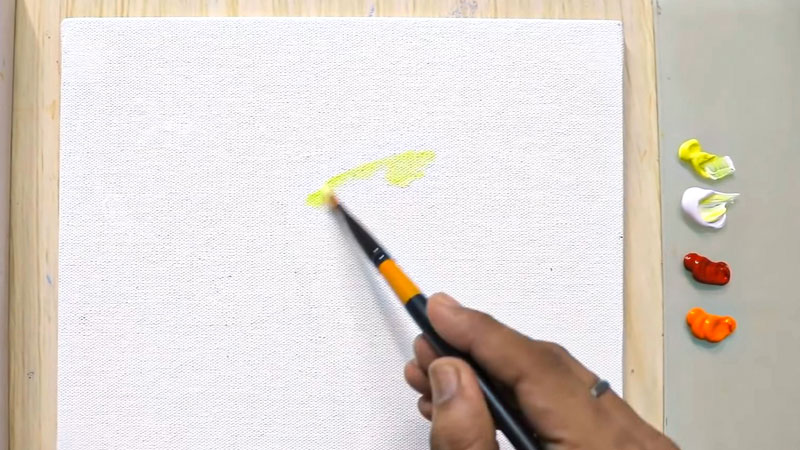
Use a light touch when sketching on the acrylic. Avoid pressing too hard, as this can create indentations on the surface. Keep your lines loose and easily erasable in case of mistakes.
Use acrylic markers
Start by outlining the finer details of your design. If you’re using multiple colors, plan your order of operations to minimize smudging.
Allow each section to dry before proceeding to the next to avoid unintended blending.
Layering and shading
To create depth and dimension, consider using cross-hatching or stippling techniques. Experiment with layering colors to achieve the desired shades and tones. Remember to allow each layer to dry before adding another.
Experiment with colors
Acrylic markers offer a wide range of colors. Take your time to select the right hues for your artwork. Keep in mind that colors may appear slightly different on the acrylic surface compared to paper.
Let it dry

Even though acrylic markers dry relatively quickly, it’s important to exercise patience. Depending on the thickness of the layers and the humidity in your environment, complete drying may take several hours.
Protect your artwork
Apply a clear acrylic varnish or sealant to safeguard your artwork from scratches and UV damage. Make sure to use a varnish specifically designed for acrylic surfaces and follow the manufacturer’s instructions for application.
Display your artwork

Decide on the best way to showcase your creation. Consider framing it with UV-protective glass or acrylic to further safeguard it from environmental factors.
What to Do When You Make Mistakes in Drawing on Acrylic Sheets?
Making mistakes while painting on acrylic sheets is common, but there are ways to address them.
Follow these steps to effectively correct errors:
Stay Calm
It’s crucial to approach mistakes with a calm and composed mindset. Getting flustered can lead to rushed decisions, potentially exacerbating the error. Remind yourself that mistakes are a natural part of the creative process and an opportunity for learning.
Identify the Mistake
Take a moment to analyze what went wrong. Is it a color that doesn’t fit, a misplaced detail, or a perspective issue? Understanding the nature of the mistake will guide you in determining the best course of action.
Act Quickly
When dealing with wet acrylic paint, time is of the essence. Acrylic paint dries relatively fast, so addressing the mistake promptly allows for easier adjustments. Delicately working on wet paint is generally more forgiving.
Use a Clean
Select a clean cloth or sponge and dampen it slightly. Gently blot or wipe the mistake. Avoid excessive pressure or vigorous rubbing to prevent damage to the acrylic sheet or smudging of surrounding areas.
Blot with Paper Towel
After removing the mistake, lightly blot the area with a dry paper towel. This helps soak up any residual moisture, ensuring the corrected area dries uniformly.
Reapply Paint
Once the area is dry, reapply the correct color or make the necessary adjustments. Use a fine brush for precise work. Be patient and apply thin layers to avoid overloading the area.
Blend if Necessary
To seamlessly integrate the correction, blend the newly applied paint into the surrounding areas. Pay attention to the texture and color to ensure a harmonious finish.
Let it Dry
Allow the correction to air dry thoroughly. Rushing this step can lead to further mistakes or uneven surfaces. Depending on the thickness of the paint and environmental conditions, this may take a few hours.
For mistakes on dried paint:
Evaluate the Severity
Consider the nature and extent of the mistake. Light adjustments may only require additional layers of paint, while more significant errors might call for more involved techniques.
Sand the Surface
Use fine-grit sandpaper to gently smooth the surface of the mistake. Take care not to apply too much pressure, as acrylic sheets can scratch. The goal is to create a smooth canvas for repainting.
Clean and Prime
After sanding, wipe away any residue with a clean, damp cloth. Apply a thin layer of acrylic gesso to the sanded area. This primes the surface, ensuring the new paint adheres properly and matches the surrounding areas.
Repaint and Blend
Carefully repaint the corrected area, paying close attention to color matching and texture. Blend the edges to create a seamless transition between the correction and the existing paint.
Let it Dry
Allow the correction to dry completely before proceeding. Patience in this step ensures that the corrected area is stable and ready for further work.
How Do You Remove Scratches From Acrylic Sheets?
Removing scratches from acrylic sheets can be done with some careful techniques
Here’s a step-by-step guide:
Materials Needed:
- Mild soap or dishwashing detergent
- Warm water
- Clean microfiber cloth or sponge
- Fine-grit sandpaper (around 600-1200 grit)
- Acrylic polish or plastic scratch remover
- Clean, soft cloth or microfiber towel
Step-by-Step Guide:
Clean the Acrylic Sheet
Mix a small amount of mild soap or dishwashing detergent with warm water.
Gently clean the entire surface of the acrylic sheet using a clean microfiber cloth or sponge. Rinse thoroughly with clean water and pat dry.
Assess the Scratches
Examine the scratches to determine their depth and severity. Light surface scratches are easier to remove than deep gouges.
Wet Sanding
For light surface scratches, wet sanding can be effective. Wet the scratched area and the sandpaper with water.
Using gentle, circular motions, sand the scratched area with a fine-grit sandpaper (600-1200 grit). Keep the sandpaper wet at all times.
Continue sanding until the scratch is no longer visible. This process gradually smoothens the surface.
Rinse and Dry
Rinse the sanded area thoroughly with clean water to remove any residue. Pat the area dry with a clean, soft cloth or microfiber towel.
Apply Acrylic Polish or Scratch Remover
Apply a small amount of acrylic polish or plastic scratch remover to a clean cloth.
Gently rub the scratched area using circular motions. Follow the manufacturer’s instructions for the specific product you’re using.
Buff the Surface
Using a clean part of the cloth, buff the area in circular motions to remove any excess polish or scratch remover.
Inspect and Repeat
Check the area to see if the scratch is still visible. If it is, you may need to repeat steps 3-6 until the scratch is completely gone.
Clean and Protect
Clean the entire acrylic sheet again with a mild soap solution and water to remove any remaining polish or scratch remover.
Apply a clear acrylic cleaner or polish to the entire sheet for an even finish and to help prevent future scratches.
Final Rinse and Dry
Rinse the sheet thoroughly with clean water and pat dry with a soft cloth. Consider applying a clear acrylic protective coating to further safeguard the surface from scratches and UV damage.
Tips for Long-Time Preservation
Preserving acrylic sheet artwork or any acrylic-based creations requires careful handling and storage.
Here are some tips to ensure their longevity:
Avoid Direct Sunlight
Prolonged exposure to direct sunlight can cause fading and deterioration of acrylic materials. Display your artwork in a location where it won’t receive harsh or constant sunlight.
Keep Away from Heat Sources
Avoid placing acrylic pieces near sources of heat, such as radiators or heating vents. Extreme temperatures can cause warping or other forms of damage.
Handle with Clean Hands
Always clean your hands before handling acrylic pieces. Oils, dirt, or chemicals on your skin can transfer onto the surface, potentially causing damage over time.
Use Soft Materials for Cleaning
When cleaning acrylic sheets, use a soft, lint-free cloth or microfiber towel. Avoid paper towels, as they may contain abrasive particles that could scratch the surface.
Avoid Harsh Chemicals
Refrain from using strong chemicals, solvents, or alcohol-based cleaners on acrylic surfaces, as they can cause damage. Stick to mild soapy water or specific acrylic cleaners.
Store Properly
If you need to store acrylic pieces, protect them by covering with a clean cloth or acid-free paper to prevent dust and scratches. Store them in a cool, dry place away from direct sunlight and moisture.
Protect from Impact
Handle acrylic pieces with care to avoid accidental drops or bumps. Use protective padding or bubble wrap during transportation or storage.
FAQs
Can I use regular markers or pens on acrylic sheets?
It’s recommended to use markers specifically designed for acrylic surfaces. Acrylic markers or permanent markers work best as they adhere well and provide vibrant, long-lasting results.
Can I erase mistakes when drawing on an acrylic sheet?
Yes, you can use a soft eraser to correct pencil sketches or use a clean, damp cloth for minor mistakes on wet acrylic paint. For dried paint, consider sanding and repainting the area.
Do I need to prepare the acrylic sheet before drawing?
Yes, cleaning the acrylic sheet with a mild cleaner or soapy water and ensuring it’s completely dry will provide a smooth surface for drawing.
Can I layer colors on an acrylic sheet like I do on paper?
Yes, you can layer colors on acrylic sheets to create depth and achieve different shades. Allow each layer to dry before adding another to prevent smudging.
How can I protect my artwork on an acrylic sheet from scratches or fading?
Apply a clear acrylic varnish or sealant once the artwork is complete and fully dry. Display the artwork away from direct sunlight and avoid placing heavy objects on it to prevent damage.
To Recap
Drawing on acrylic sheets is a captivating and versatile artistic endeavor that allows for boundless creativity.
These transparent surfaces provide a unique canvas for artists to explore, offering a blend of transparency and vivid colors that can breathe life into any artistic vision.
By following the steps outlined in this guide, you can master the art of drawing on acrylic sheets, from selecting the right materials to creating intricate designs and correcting mistakes.
The possibilities are endless, and with practice, you can unlock the full potential of this remarkable medium, producing breathtaking artworks that showcase your skills and imagination. So, embrace the world of acrylic sheet art and let your creativity shine!
Leave a Reply