The purl stitch is a fundamental and versatile technique in the world of knitting. It forms the basis for creating captivating textures, patterns, and designs, making it an essential skill for knitters of all levels.
In this comprehensive guide, we will explore the intricacies of knitting the purl stitch.
From the basics of tension and needle placement to troubleshooting common mistakes, we’ll provide step-by-step instructions and valuable tips to help you perfect this technique.
Whether you’re a beginner eager to expand your knitting repertoire or an experienced crafter looking to refine your purling skills, this guide will empower you to create stunning and intricate knitwear.
What Is the Purl Stitch?
The purl stitch is a fundamental knitting technique that creates a textured pattern in a fabric. Unlike the knit stitch, which produces a smooth “V” pattern, purling results in a bumpy surface often referred to as a “pearl” pattern.
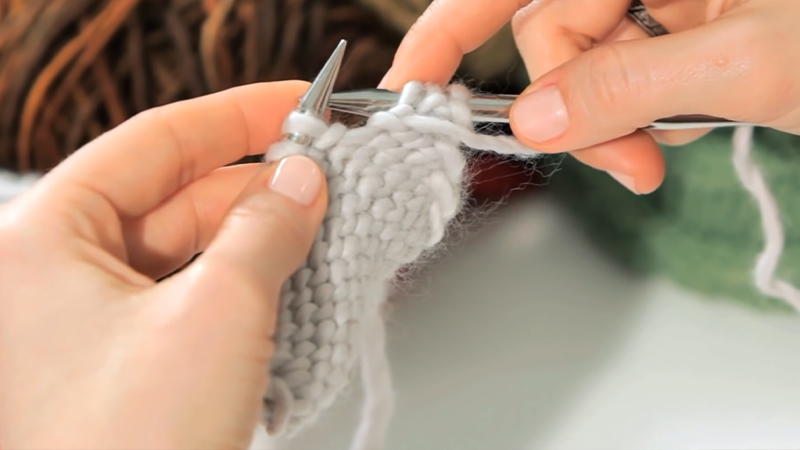
To execute a purl stitch, the knitter inserts the needle from right to left into the front of a stitch, winds the yarn counterclockwise around the needle, and pushes it through, creating a loop.
The old stitch is then slipped off the left needle. This process is integral for various knitting patterns, allowing the creation of diverse textures, ribbing, and intricate designs.
Purling, in conjunction with knitting, forms the basis for an array of beautiful and versatile knitting projects.
How to Knit the Purl Stitch? 9 Steps
The purl stitch is one of the basic building blocks of knitting and is essential for creating a wide variety of textures, patterns, and designs in your knitting projects.
Here are the steps to knit the purl stitch:
Materials You’ll Need:
- Yarn.
- Knitting Needles.
- Comfortable Seating.
Step-by-Step Guide to Knitting the Purl Stitch:
Step 1: Hold the Needles
Grip the knitting needles in a way that feels comfortable for you. The needle with the stitches, called the “working needle,” is typically held in your left hand.
The empty needle, called the “non-working needle,” is held in your right hand. Find a grip that allows you to control the needles easily and comfortably.
Step 2: Prepare Your Yarn
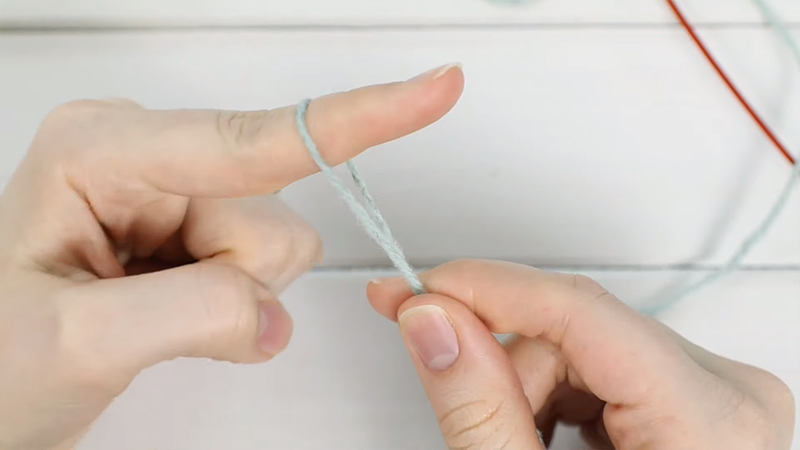
Ensure that the yarn is positioned correctly. The yarn tail should be hanging down from your work. It’s essentially the loose end of the yarn.
The working yarn, which is the yarn connected to the ball, should be behind the needles. This setup allows for smooth movement of the yarn as you work.
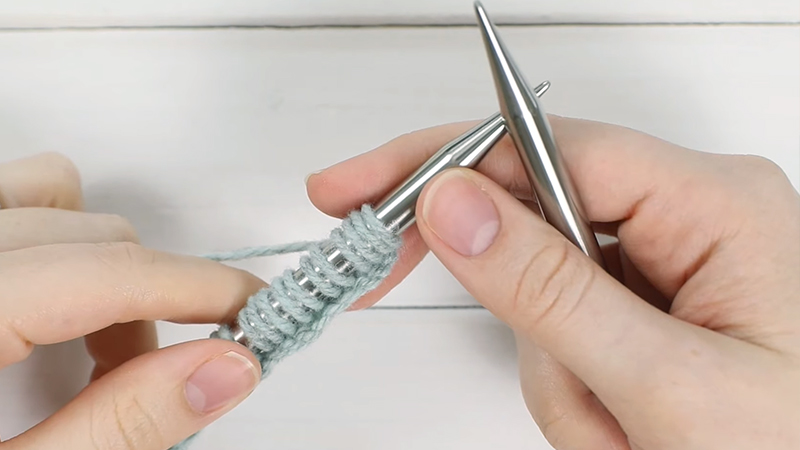
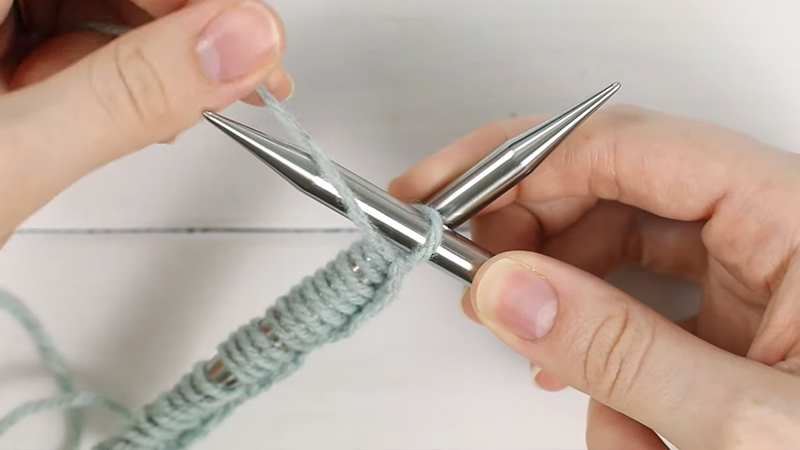
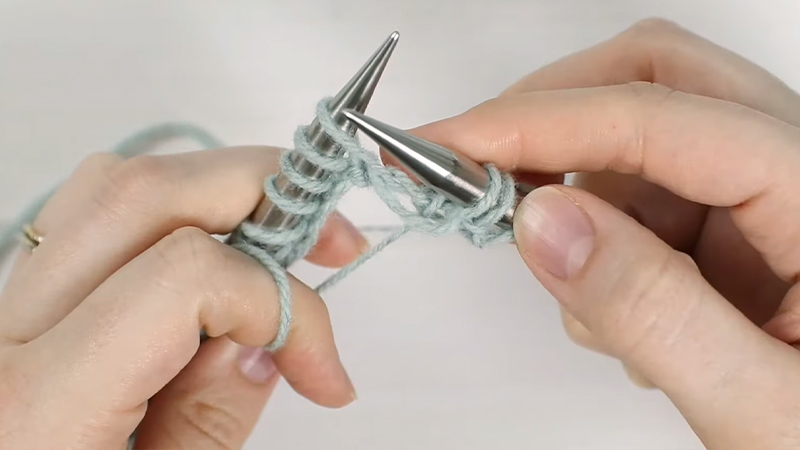
Step 3: Insert the Right Needle
Insert the right needle from the right side to the left side into the first stitch on the left needle. The right needle should pass behind the left needle, allowing it to slide smoothly through the stitch. This action sets up the stitch for the next maneuver.
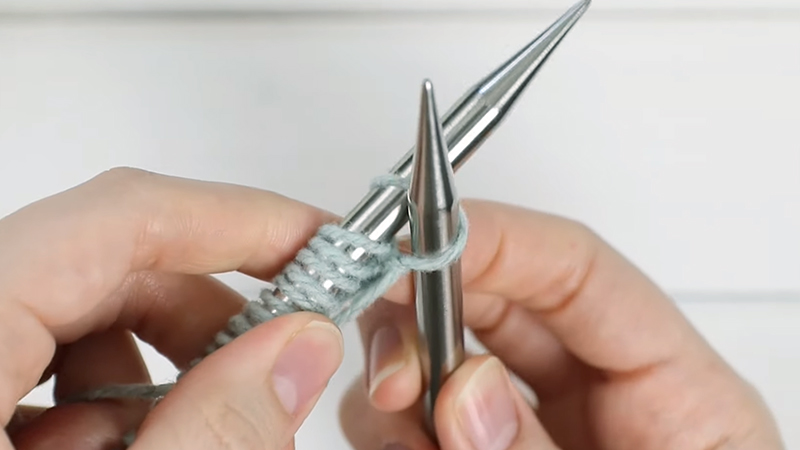
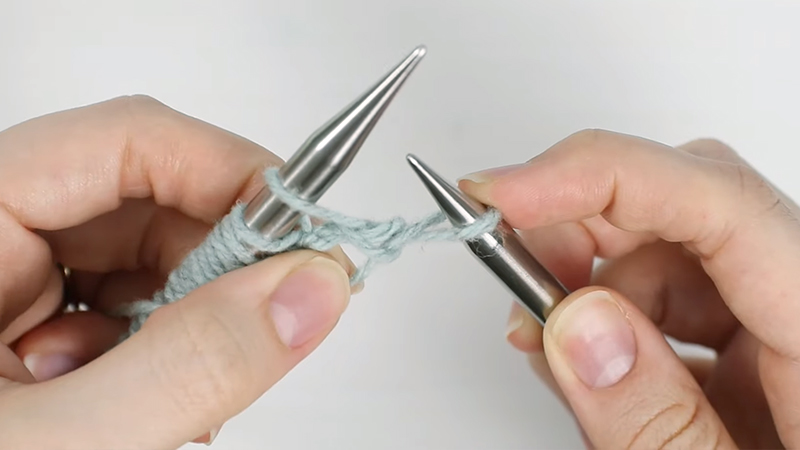
Step 4: Wrap the Yarn
With the working yarn in your dominant hand, bring it counterclockwise around the right needle. This motion creates a loop around the right needle. It’s crucial to maintain a consistent tension on the yarn to avoid overly tight or loose stitches.
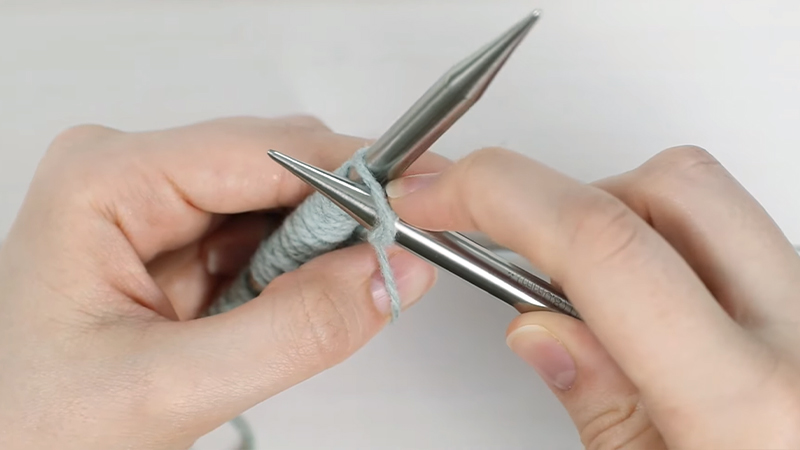
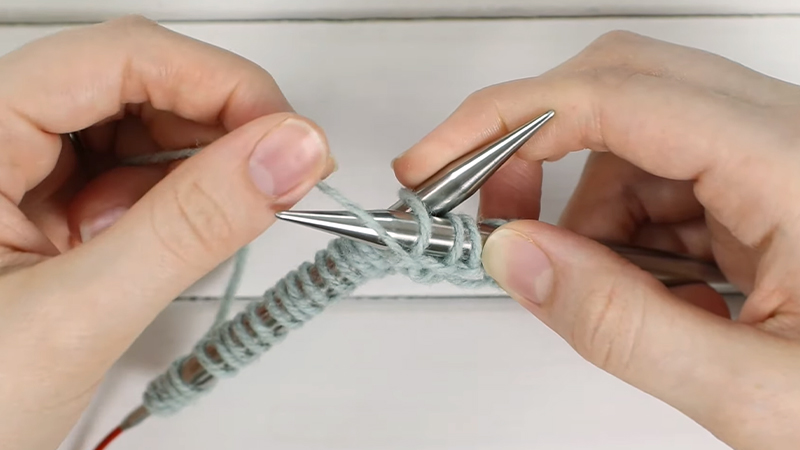
Step 5: Purling
Hold the yarn gently but firmly in your hand, ensuring there’s enough slack to work with. Now, use the right needle to gently push the looped yarn through the stitch on the left needle, moving from the right side to the left side. This action forms a new loop on the right needle.
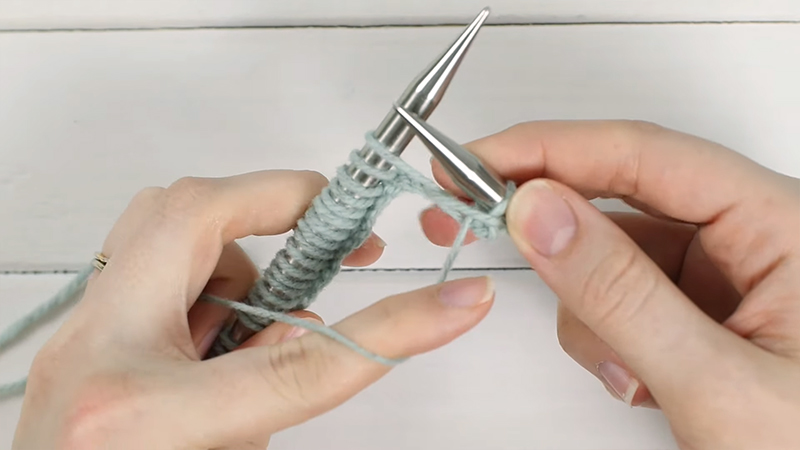
Step 6: Slip the Stitch
After you’ve threaded the yarn through the stitch, carefully slide the old stitch off the left needle. This action completes the purling process for that particular stitch. It’s a satisfying step as you see your work progress.
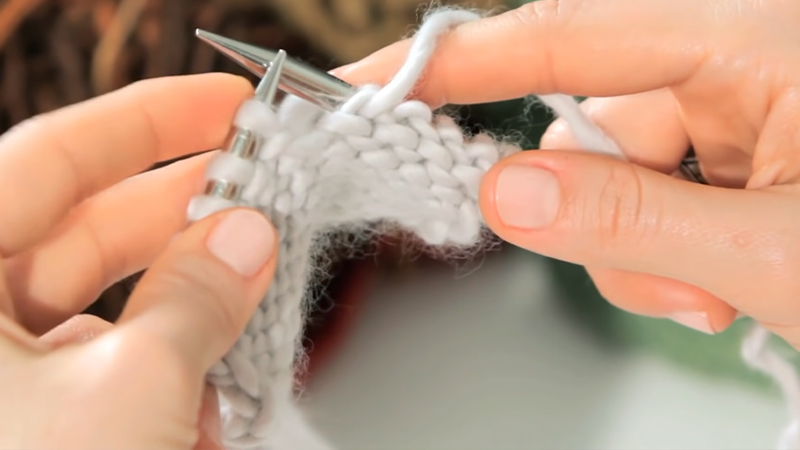
Step 7: Repeat
Continue these steps for each stitch on the left needle. Insert the right needle, wrap the yarn, purl, and then gently slip off the old stitch. This rhythmic process becomes smoother and more intuitive with practice.
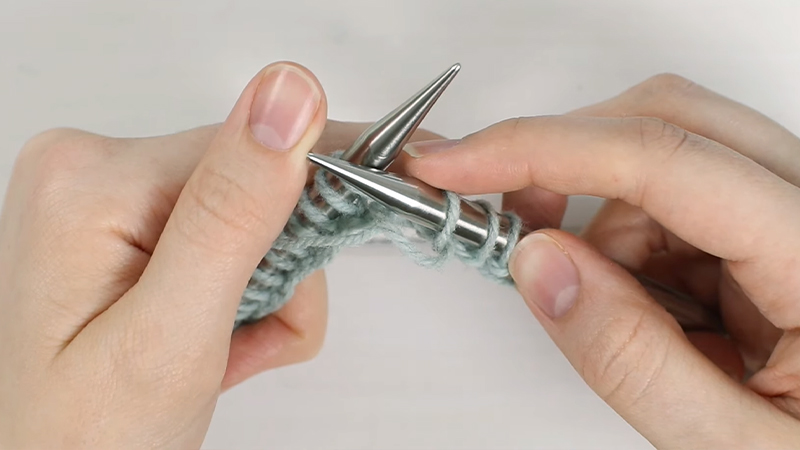
Step 8: Check Your Tension
While purling, constantly monitor the tension of your yarn. Be cautious not to pull it too tightly, as this could result in overly compact stitches. Conversely, avoid leaving it too loose, which could lead to uneven, loose knitting.
Step 9: Practice
The key to becoming proficient in knitting, especially in purling, is practice. Experiment with different yarns and needle sizes to understand how they interact. As you gain experience, you’ll develop a sense of the right tension and motion for your knitting style.
Difference Between Purl Stitch and Kitchener Stitch
The purl stitch and Kitchener stitch are two distinct techniques in knitting, each with its own unique purpose and application. Understanding the differences between these stitches is essential for knitters seeking to expand their repertoire of skills.
Here are:
Definition
- Purl Stitch: The purl stitch is a fundamental knitting stitch that creates a textured pattern, distinct from the smooth “V” pattern formed by the knit stitch.
- Kitchener Stitch: The Kitchener stitch, also known as grafting, is a technique used to seamlessly join two sets of live stitches, mimicking the appearance of uninterrupted knitting
Technique
- Purl Stitch: To execute a purl stitch, the knitter inserts the needle from right to left into the front of a stitch, wraps the yarn counterclockwise around the right needle, and pushes it through. This process creates a loop on the right needle, and the old stitch is then slipped off the left needle.
- Kitchener Stitch: Unlike typical knitting stitches, the Kitchener stitch doesn’t involve knitting needles. Instead, a tapestry needle is threaded with yarn, and a specific sequence of steps is followed to create a smooth, continuous seam.
Result
- Purl Stitch: The purl stitch results in a textured pattern, often described as a “pearl” pattern, characterized by raised bumps on the fabric’s surface.
- Kitchener Stitch: When executed correctly, the Kitchener stitch creates an invisible join that blends seamlessly with the surrounding knitting, ideal for finishing sock toes, closing the top of a hat, or joining sections of lace knitting
Common Use
- Purl Stitch: Purl stitches are employed to create various patterns, textures, and designs in knitting, forming an integral part of many knitting projects.
- Kitchener Stitch: The Kitchener stitch is primarily employed for projects that require a professional, polished finish, where an inconspicuous seam is desired.
7 Beginner-Friendly Purl Stitch Projects

When you’re a beginner knitter looking to practice your purl stitch, there are plenty of fun and accessible projects to get you started. These projects not only help you master the purl stitch but also result in useful and delightful creations.
Purl Stitch Scarf
A simple scarf is an excellent project for purl stitch practice. You can create a cozy and stylish accessory by alternating rows of knit and purl stitches. Experiment with different yarn colors and textures to make it uniquely yours.
Purl Stitch Dishcloth
Knitting dishcloths is a practical way to practice purling. These small, square projects are quick to complete and provide you with functional kitchen items. You can vary the patterns by incorporating stripes or other stitch combinations.
Purl Stitch Headband
A wide headband is a great beginner project. By knitting a rectangle in purl stitch and then sewing the ends together, you’ll have a warm and fashionable accessory.
Purl Stitch Baby Blanket
For a larger project, consider making a baby blanket with purl stitches. The repetitive nature of the purl stitch is soothing, making it perfect for larger projects. You can create a classic, soft blanket that’s ideal for a baby shower gift.
Purl Stitch Hat
Knitting a hat with purl stitches adds texture and warmth. Begin with a simple beanie pattern and incorporate purl rows for a cozy and stylish winter accessory.
Purl Stitch Boot Toppers
Boot toppers are a trendy way to add some pizzazz to your footwear. Create these small cuffs using the purl stitch to achieve a ribbed texture. They knit up quickly and make a thoughtful gift.
Purl Stitch Coffee Cozy
When you’re a coffee or tea enthusiast, knitting a cozy for your cup is a charming project. Use the purl stitch to create a textured sleeve that keeps your hands cool and your drink hot.
Common Mistakes When Making a Purl Stitch
While learning to purl in knitting can be incredibly rewarding, it’s not uncommon to encounter some stumbling blocks along the way. Understanding these common mistakes and how to rectify them will help you become a more proficient knitter.
Uneven Tension
- Mistake: Pulling the yarn too tightly or leaving it too loose while purling can lead to uneven stitches.
- Solution: Practice maintaining consistent tension in your yarn. Experiment with different grips and find a tension that works best for you. Be mindful of your yarn tension as you work each stitch.
Wrapping the Yarn Incorrectly
- Mistake: Wrapping the yarn in the wrong direction around the needle can result in twisted or crossed stitches.
- Solution: Ensure you’re wrapping the yarn counterclockwise around the needle for a standard purl stitch. If you want to create a twisted purl stitch, wrap the yarn clockwise.
Forgetting to Move Yarn to the Front
- Mistake: Neglecting to bring the yarn to the front before purling can lead to tangled and messy stitches.
- Solution: Always make sure the working yarn is in front of your needles before starting a purl stitch. This ensures that the yarn is in the right position to create the purl.
Inserting the Needle Incorrectly:
- Mistake: Inserting the needle incorrectly can make it difficult to work the stitch properly.
- Solution: Ensure that you’re inserting the needle from right to left into the front of the stitch on the left needle. The right needle should pass behind the left needle.
Pulling Too Hard on the Yarn
- Mistake: Applying excessive force while pulling the yarn through the stitch can distort the tension and create uneven stitches.
- Solution: Gently guide the yarn through the stitch. Avoid yanking or pulling too hard. A smooth, controlled motion will produce even purl stitches.
Inconsistent Stitch Size
- Mistake: Allowing the size of your purl stitches to vary can result in an uneven fabric.
- Solution: Pay attention to the way you wrap the yarn and the pressure you apply when working the stitch. Practice until you achieve a uniform size for your purl stitches.
Dropping Stitches
- Mistake: Accidentally letting a stitch slip off the needle can lead to dropped stitches and potentially unraveling your work.
- Solution: If you notice a dropped stitch, use a spare needle or your working needle to pick it up and return it to the left needle. Pay close attention to prevent future drops.
Rushing the Process
- Mistake: Trying to work too quickly can lead to mistakes and uneven tension.
- Solution: Take your time and work at a comfortable pace. Focus on each step of the purl stitch to ensure accuracy and uniformity in your knitting.
Tips and Tricks for Knitting the Purl Stitch
Mastering the purl stitch is a crucial skill in knitting, allowing you to create a wide range of textures and patterns in your projects.
Here are some valuable tips to make your purling experience more enjoyable and efficient.
Maintain Consistent Tension:
Consistent tension is the cornerstone of even and polished purl stitches. Avoid the temptation to pull the yarn too tightly, which can lead to tight, uneven stitches.
Similarly, don’t leave it too loose, as this results in loopy, uneven knitting. Practice finding that sweet spot that complements your knitting style.
Practice Makes Perfect
Initially, purling may feel a bit awkward, but don’t be discouraged. Like any skill, practice is the key to improvement. Dedicate time to honing your purling technique, and experimenting with different yarns and needle sizes to understand their impact on your stitches.
Use Proper Needles
Select needles that feel comfortable in your hands. A smooth surface on the needles can make purling much smoother. If you find tension challenging, consider bamboo or wooden needles; they provide more friction, offering greater control over your stitches.
Mind Your Wrapping Direction
The direction you wrap the yarn during purling matters. The standard purl stitch involves a counterclockwise wrap. Experiment with a clockwise wrap for a twisted purl stitch, adding an intriguing texture to your knitting.
Count Your Stitches
Frequent stitch counting is a crucial habit to avoid mistakes and maintain pattern integrity. Employ stitch markers or place distinctive markers every ten stitches for easy tracking, especially in complex projects.
Fixing Mistakes
Mistakes are part of the knitting process. If you slip up while purling, stay calm. Many errors can be rectified by gently undoing a few stitches and reworking them.
Familiarize yourself with “tinking” (knitting backward), a valuable skill in the knitter’s toolkit.
Practice Stitch Patterns
Once you’ve mastered the basic purl stitch, delve into combining purls and knits to create intricate stitch patterns. Experiment with ribbing, seed stitch, or basketweave to infuse texture and visual interest into your knitting.
Relax Your Hands
Maintain a relaxed posture, keeping your hands and wrists supple while purling. Tension or strain in your hands can lead to irregular stitches. Take regular breaks to prevent fatigue.
Stay Patient
Patience is a virtue in knitting. Embrace the learning process and don’t be disheartened by mistakes or slow progress. With time and dedication, your purling skills will improve.
Enjoy the Process
Ultimately, knitting is a creative and fulfilling endeavor. Revel in each stitch, recognizing that every purl adds to the tapestry of your unique knitting project.
Embrace the journey, knowing that each creation is a testament to your craftsmanship and creativity.
FAQS
What is the purl stitch in knitting?
The purl stitch is a basic knitting technique that creates a textured pattern, distinct from the smooth “V” pattern produced by the knit stitch.
How is the purl stitch executed?
To purl, insert the right needle from right to left into the front of a stitch, wrap the yarn counterclockwise around the right needle, and push it through.
What are common mistakes when purling?
Common mistakes include uneven tension, wrapping the yarn incorrectly, and forgetting to move the yarn to the front.
How can I improve my purling technique?
Practice regularly to refine your purling skills. Experiment with different yarns and needles to understand their impact.
What are some advanced techniques involving the purl stitch?
Once you’ve mastered the basic purl stitch, explore combining purls and knits to create intricate stitch patterns. Ribbing, seed stitch, and basketweave are excellent starting points for more advanced knitting projects.
To Recap
Mastering the purl stitch is a rewarding journey that opens up a world of creative possibilities in knitting. It’s a skill that offers depth and texture to your projects, transforming simple patterns into intricate works of art.
By focusing on maintaining consistent tension, practicing regularly, and being mindful of common mistakes, you can refine your purling technique.
Whether you’re crafting scarves, sweaters, blankets, or more, the purl stitch will be your ally in bringing your knitting visions to life.
So, embrace the process, enjoy the rhythm of your stitches, and take pride in the beautiful and unique pieces you’ll create with this invaluable knitting skill.
Leave a Reply