Creating a doll pillow is a delightful craft that adds a personalized touch to a cherished toy’s world. This simple yet rewarding project invites both adults and children to engage their creativity and sewing skills.
This guide will walk you through the step-by-step process, from selecting the right materials to adding those special finishing touches.
Whether it’s for a beloved childhood companion or a special gift, crafting a doll pillow offers a unique opportunity to infuse love and individuality into a cherished playtime accessory.
So, gather your materials, set up your workspace, and let’s embark on this delightful crafting journey together.
Making a Pillow for Your Doll with Love
Making a doll pillow is a delightful and creative project that can be enjoyed by both adults and children.
Whether you’re a parent looking to create a special accessory for your child’s favorite toy or a craft enthusiast, crafting a doll pillow is a simple and fun endeavor.
This guide will walk you through the steps to make a charming doll pillow.
Materials You’ll Need:
- Fabric.
- Scissors.
- Needle and Thread.
- Polyester Fiberfill.
- Pins.
- Doll Pillow Pattern.
Steps to Make a Doll Pillow:
Prepare Your Workspace
Designate a comfortable, well-lit crafting area. Ensure it’s clutter-free and has enough room to spread out your materials.
Consider using a large cutting mat if you have one to protect your work surface. Organize your tools, such as scissors, pins, and thread, within arm’s reach to maintain a smooth workflow.
Create the Pattern
When designing your pattern, take precise measurements to fit your doll’s size. You can use graph paper or a ruler to create a symmetrical shape.
Think about the style you want – whether it’s a basic square, heart-shaped, or even custom-designed with curves and corners.
Cut the Fabric
Place your chosen fabric flat on your workspace. Secure the pattern on top with pins, ensuring it doesn’t shift while cutting.
Use sharp fabric scissors to make clean, accurate cuts. Be meticulous when following the pattern lines, especially when creating intricate shapes.
Pin the Fabric
Align the two fabric pieces with their right sides facing inwards. Begin pinning around the edges, leaving an opening of about 1-2 inches for stuffing. Ensure your pins are perpendicular to the edge to facilitate easy removal during sewing.
Sew the Pillow
Set up your sewing machine or thread your needle with matching thread. Start sewing along the edge of the fabric, maintaining a consistent seam allowance (usually 1/4 inch) from the edge.
Backstitch at the beginning and end of your sewing to secure the stitches. Take it slow around curves and corners to maintain a straight seam.
Trim Excess Fabric
After sewing around the pillow’s perimeter, carefully trim any excess fabric along the seam allowance.
Trim corners diagonally to reduce bulk and make turning easier. Be cautious not to cut through your stitches.
Turn the Pillow Inside Out
Gently push the fabric through the unsewn gap to turn the pillow inside out. Use the blunt end of a pencil or a chopstick to help with this process. Take your time to ensure all corners and edges are fully turned.
Stuff the Pillow
Start adding polyester fiber to fill through the gap. Begin with small amounts, distributing the stuffing evenly as you go.
Use your fingers or a stuffing tool to reach the corners and edges. Continuously adjust the firmness to achieve your desired level of plumpness.
Close the Gap
Fold the fabric edges of the gap inward and pin them together. Thread a needle with matching thread and use a slip stitch to neatly close the gap. Ensure your stitches are tight and secure to prevent the stuffing from escaping.
Finishing Touches
Personalize your doll pillow by adding decorative elements. You can hand-embroider the doll’s name or a design, attach fabric appliqués, or use fabric paint to create patterns or images.
Let your creativity shine as you embellish the pillow to make it unique and special.
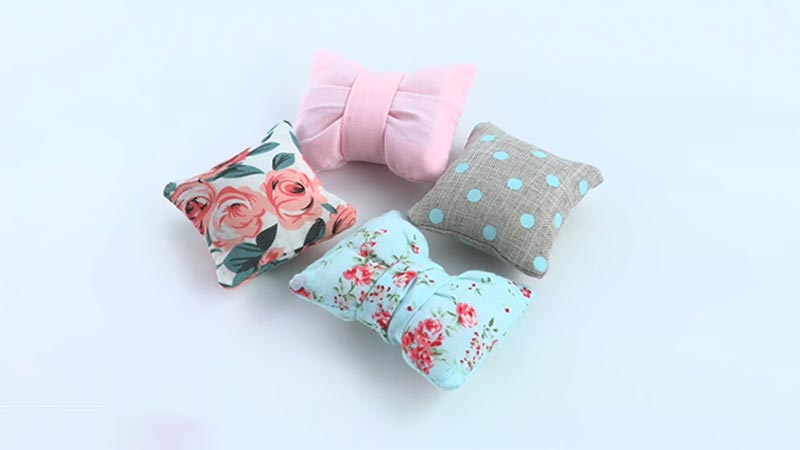
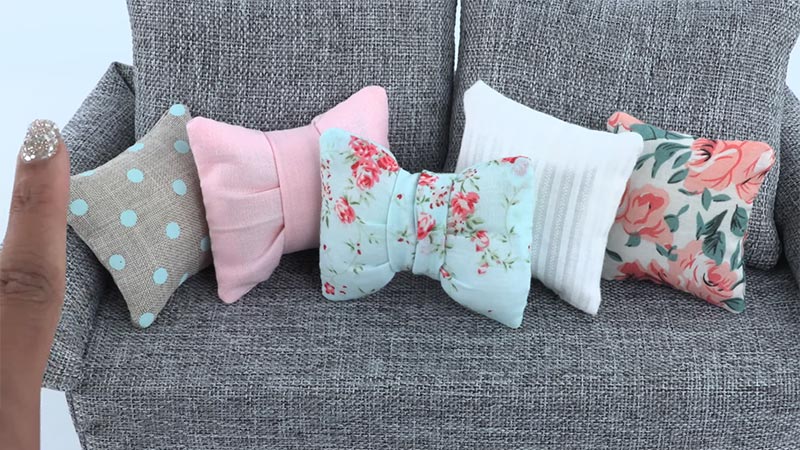
Creative Pillow Decorating Ideas: How Can You Decorate?
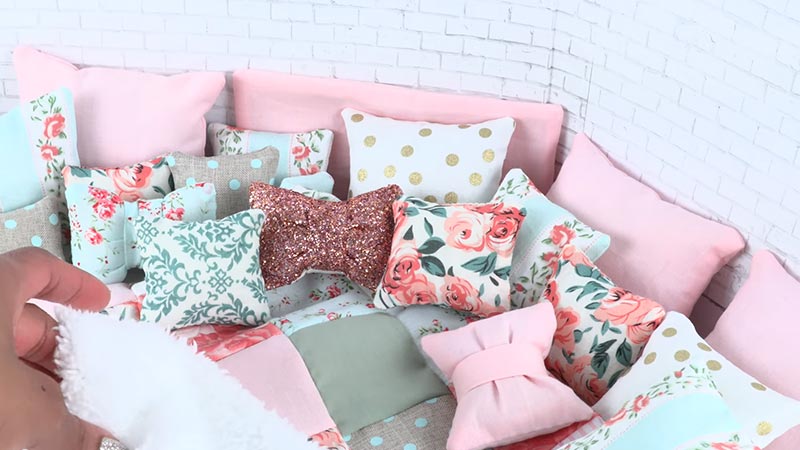
Decorating a doll pillow allows you to add a personal touch and make it uniquely yours.
Here are several creative ways to decorate your doll pillow:
Embroidery
Use colorful embroidery floss to stitch designs, patterns, or even the doll’s name onto the pillow. You can use various stitches like backstitch, satin stitch, or French knots for different textures and effects.
Fabric Appliqué
Cut out shapes or designs from contrasting or complementary fabric and attach them to the pillow using fabric glue or by stitching around the edges. This can add a playful and whimsical element.
Fabric Paint or Markers
Use fabric paints or markers to draw designs, patterns, or even scenes on the pillow’s surface. Fabric markers allow for precise detailing, while fabric paints can be used for more elaborate designs.
Fabric Decoupage
Apply small pieces of printed or patterned fabric to the pillow’s surface using fabric glue. This technique allows for intricate and detailed designs.
Ribbon or Trim
Attach ribbon, lace, pom-poms, or other decorative trims around the edges or in patterns on the pillow’s surface. This adds texture and visual interest.
Buttons or Beads
Sew on buttons or beads to create patterns, shapes, or even images. This adds a tactile element to the pillow’s surface.
Fabric Transfers
Use iron-on transfers or printable fabric sheets to transfer images or designs onto the pillow. This allows for highly detailed and colorful decorations.
Patchwork
Create a patchwork design by sewing together small pieces of different fabrics. This can be a great way to use up fabric scraps and create a visually dynamic pillow.
Felt Cutouts
Cut out shapes from colorful felt and attach them to the pillow using fabric glue or stitching around the edges. Felt is a versatile material that can add depth and texture to the design.
Post Care for the Pillow
Taking proper care of your doll pillow ensures it stays in good condition and remains a cherished accessory.
Here are some post-care tips:
Spot Cleaning
Spot cleaning is often sufficient when your doll pillow gets a small stain or spill. Use a mild detergent and a soft cloth or sponge to dab at the stain gently. Avoid rubbing, as this can spread the stain.
Hand Washing
When the pillow is made from a washable fabric, you can hand wash it in cold water with a gentle detergent.
Gently agitate the water to clean the fabric, then rinse thoroughly. Squeeze out excess water and let it air dry.
Machine Washing
Some fabrics are machine washable. Use a delicate or gentle cycle with cold water if your doll pillow’s fabric allows it. Use a mild detergent and avoid using bleach or harsh chemicals. After washing, reshape the pillow and let it air dry.
Avoid Excessive Sunlight
Prolonged exposure to direct sunlight can cause fading and weaken the fabric over time. Store your doll pillow in a shaded area, or use curtains or blinds to protect it from harsh sunlight.
Regular Fluffing
Periodically fluff and reshape the pillow to maintain its original shape and plumpness. Gently knead and squeeze the pillow to distribute the stuffing evenly.
Avoid Sharp Objects
Keep the pillow away from sharp objects or surfaces that could potentially puncture or tear the fabric.
Store Properly
Store the doll pillow in a clean, dry place when not in use. Avoid storing it in damp or humid areas, leading to mold or mildew.
Avoid High Heat
Do not expose the pillow to high heat sources like radiators or heaters, as this can damage both the fabric and the stuffing.
Check for Wear and Tear
Periodically inspect the pillow for any signs of wear, such as loose stitches or fraying fabric. If you notice any damage, repair it promptly to prevent further deterioration.
Use a Pillow Cover or Case
Consider using a removable pillow cover or case when your doll pillow is regularly handled or used by children. This can provide an additional layer of protection and make cleaning easier.
FAQs
What materials do I need to make a doll pillow?
You’ll need fabric, scissors, needle, thread (or a sewing machine), polyester fiberfill, pins, and a doll pillow pattern.
Can I use different fabrics for the front and back of the pillow?
Yes, mixing fabrics can add a unique touch. Just ensure both fabrics are suitable for sewing and compatible in terms of texture and weight.
Do I need advanced sewing skills to make a doll pillow?
Not at all! This project is suitable for beginners with basic sewing skills. It’s a great way to practice fundamental techniques.
Can I wash a doll pillow once it’s made?
Yes, but it depends on the fabric you choose. Some fabrics are machine washable, while others may require hand washing. Always check the care instructions for your chosen fabric.
How can I add extra embellishments to my doll pillow?
You can embroider, appliqué, paint, or even attach buttons, beads, or ribbons. These embellishments add a personal touch and enhance the pillow’s charm.
To Recap
In the art of crafting a doll pillow, you’ve embarked on a journey of creativity and care. With each stitch and choice of fabric, you’ve imbued a piece of yourself into this tiny accessory.
Whether it graces the arms of a cherished doll or becomes a treasured gift, it’s a testament to your skill and love. Remember, the possibilities for personalization are endless – from embroidery to appliqué, every detail tells a story.
As you admire your handiwork, take pride in the unique touch you’ve added to a world of play. Embrace this craft and let it continue to inspire your creative endeavors.
Leave a Reply