A kneaded eraser is a type of eraser that is made from a soft, pliable material that can be molded and shaped to erase specific areas or details in a drawing or other art medium.
They are commonly used by artists because they are able to pick up and remove graphite, charcoal, and other media without damaging the surface of the paper.
However, kneaded erasers can become hard and difficult to use if they are not kept soft and pliable. If a kneaded eraser becomes too hard, it may be difficult to mold and shape it into the desired form, and it may not be able to effectively erase or remove the media from the paper. Therefore, it is important to keep a kneaded eraser soft and pliable in order to maintain its effectiveness as an erasing tool.
Common Methods for Softening a Kneaded Eraser
Kneaded erasers are a popular tool for artists, designers, and other creatives because of their versatility and ability to be molded into different shapes. However, over time, kneaded erasers can become hard and difficult to use.
In order to restore their softness, there are several methods that you can use.
Rolling and Kneading
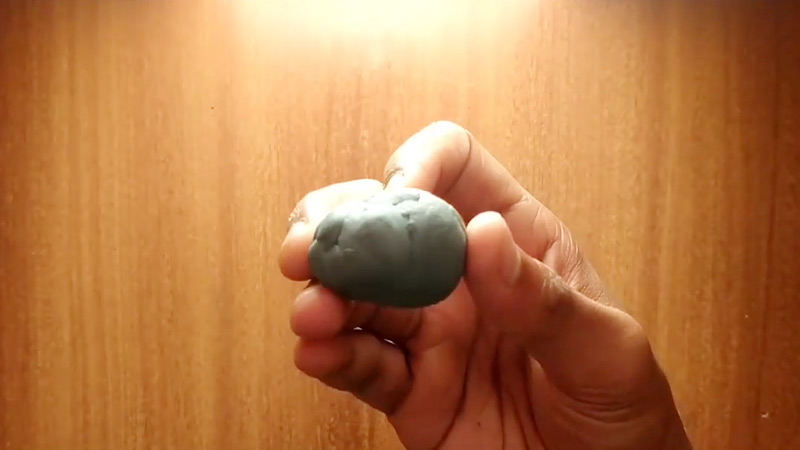
Rolling and kneading is the most straightforward method for softening a kneaded eraser. The process involves rolling the eraser between your hands for several minutes, generating heat and making the eraser more pliable.
This method is easy to perform and doesn’t require any additional materials, making it a convenient option. However, the effectiveness of this method may vary depending on the age and condition of the eraser.
If the eraser is particularly hard or has been used for an extended period, it may require additional methods or a longer rolling and kneading time to reach the desired level of softness.
Warm, Damp Cloth
The method of using a warm, damp cloth is another option for softening a kneaded eraser. This method involves placing the eraser in a container with a warm, damp cloth, allowing it to sit for a few minutes, and then removing it and kneading it until it reaches the desired level of softness.
The moisture from the cloth helps to moisturize the eraser, making it softer and more pliable. This method is easy to perform and can be done with materials that are commonly found around the house.
However, it is important to make sure that the cloth is not too damp, as excessive moisture can damage the eraser. Additionally, the effectiveness of this method may vary depending on the age and condition of the eraser.
Heat
Using heat to soften a kneaded eraser is another option. This method involves exposing the eraser to a heat source, such as a hair dryer or warm water, for a short period of time. The heat helps to soften the eraser and make it more pliable.
However, it is important to be cautious when using heat, as exposing the eraser to too much heat can damage it. When using a hair dryer, hold the eraser at a safe distance to avoid overheating, and when immersing it in warm water, make sure that the water is not too hot.
Additionally, the effectiveness of this method may vary depending on the age and condition of the eraser, so it may be necessary to experiment with different heat sources and temperatures to find what works best for you.
It is important to note that the effectiveness of these methods may vary depending on the age and condition of the eraser.
Some erasers may be more resistant to softening than others, so you may need to try a combination of these methods or experiment with different techniques to find what works best for you.
Tips for Maintaining the Softness of a Kneaded Eraser
There are several tips that can help to maintain the softness of a kneaded eraser:
- Store the eraser in a container with a lid or wrap it in plastic wrap to prevent it from drying out. This can help to keep the eraser soft and pliable over time.
- Avoid storing the eraser in extreme temperatures, such as in a hot car or in the freezer. Extreme temperatures can cause the eraser to become hard and difficult to use.
- If the eraser has become hard or dry, try kneading it before use to soften it up. This can help to restore its pliability and effectiveness as an erasing tool.
It is also a good idea to occasionally check on the condition of your kneaded eraser and make sure it is still soft and pliable. If you notice that it has become hard or difficult to use, try one of the methods for softening it to restore its effectiveness.
Comparison of Eraser Types
Here is a comparison table that compares different types of erasers and their suitability for different uses:
| Eraser Type | Best for | Not Recommended for |
|---|---|---|
| Kneaded eraser | Graphite, charcoal, pastels | Ink, permanent media, smooth paper |
| Vinyl eraser | Graphite, ink, permanent media | Charcoal, pastels |
| Gum eraser | Graphite, charcoal, pastels | Ink, permanent media |
| Art gum eraser | Charcoal, pastels | Graphite, ink, permanent media |
| White eraser | Graphite, ink, permanent media | Charcoal, pastels |
FAQs
The lifespan of a kneaded eraser depends on how frequently it is used and how well it is maintained. In general, a kneaded eraser can last for several years if it is kept soft and pliable and is not subjected to extreme temperatures or other harsh conditions.
Yes, you can clean a kneaded eraser by kneading it and rolling it between your hands to remove any debris or excess media that has accumulated on the surface. You can also use a soft brush or a cloth to gently remove any dirt or debris from the eraser. Avoid using water or any other liquid to clean a kneaded eraser, as this can cause it to become too soft or disintegrate.
Kneaded erasers are primarily designed for use on paper, but they can also be used on other surfaces such as wood or cardboard. However, be aware that the eraser may not work as well on these surfaces and may leave marks or residue behind. It is best to test the eraser on a small, inconspicuous area before using it on a larger surface.
Kneaded erasers are not effective at removing ink or other permanent media. They are primarily designed for use with pencils and other media that can be easily erased. If you need to remove ink or other permanent media, you will need to use a different type of eraser or a different cleaning method.
Kneaded erasers can be used to remove or lighten colored pencils and pastels, but they may not be as effective as other types of erasers. They are more commonly used with graphite and charcoal, as they are able to pick up and remove these media without damaging the surface of the paper. If you are using colored pencils or pastels, you may want to consider using a different type of eraser, such as a vinyl eraser, which is more effective at removing these media.
Conclusion
A kneaded eraser is an important tool for artists and others who use pencils and other media that need to be erased. It is important to keep a kneaded eraser soft and pliable in order to maintain its effectiveness as an erasing tool.
There are several methods that can be used to soften a kneaded eraser, including rolling and kneading it between your hands, placing it in a container with a warm, damp cloth, and using heat.
There are also several tips that can help to maintain the softness of a kneaded eraser, such as storing it in a container with a lid or wrapped in plastic wrap and avoiding extreme temperatures.
We hope that this outline has provided useful information on how to soften and maintain a kneaded eraser. Remember to experiment with different methods and find what works best for you and your specific needs.
Leave a Reply