A puffer jacket is a trusty companion during chilly winters, providing warmth and comfort. However, over time, wear and tear can take their toll, leaving your favorite puffer jacket in need of some TLC.
But fear not – in this comprehensive guide, we’ll show you how to repair a puffer jacket with simple repair techniques. From patching up small tears and fixing broken zippers to refreshing the jacket’s fluffiness, we’ll walk you through each step of the process.
Whether you’re a seasoned DIY enthusiast or just looking to extend the life of your beloved puffer, these tips and tricks will help you achieve a successful jacket rescue mission.
So, grab your tools and let’s embark on a journey to restore warmth and style to your puffer jacket. With a little effort and some basic sewing skills, you’ll be snuggled up in your rejuvenated jacket in no time.
How to Repair a Puffer Jacket?
Repairing a puffer jacket is a practical and sustainable way to extend its lifespan. These cozy winter garments can suffer from wear and tear over time, such as ripped seams, damaged zippers, or lost down filling.
In this comprehensive guide, we’ll walk you through the step-by-step process of repairing a puffer jacket to keep you warm and stylish for seasons to come.
Materials You’ll Need
Before you begin, gather the following materials. Puffer jacket in need of repair. Identify the areas of your jacket that require fixing, such as torn seams, damaged zippers, or flattened down filling.
Choose a strong thread that matches the color of your jacket for nearly invisible repairs. A sewing needle suitable for your chosen thread and the thickness of the jacket fabric.
Sharp scissors for cutting thread and trimming excess fabric. Sewing pins to hold fabric layers together while working. Depending on the damage, you may need a matching fabric patch or adhesive repair tape.
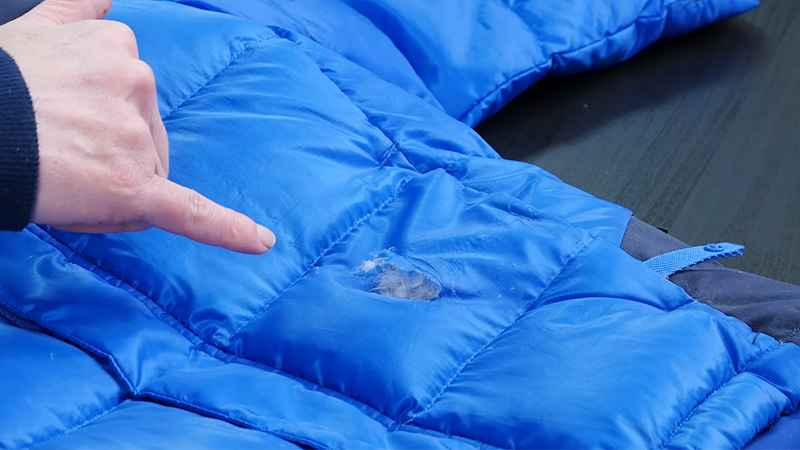
Assess the Damage
Examine your puffer jacket to identify the areas that need repair. Common issues include torn seams, broken zippers, and flat or clumped down filling. Once you’ve identified the problems, collect the necessary materials mentioned above.
Repairing Torn Seams
Double-thread your needle and tie a knot at the end. Carefully align the torn edges of the seam, making sure the fabric layers match up. Use a simple running stitch or a backstitch to sew along the torn seam, keeping your stitches close together.
Ensure the stitches are
secure but not too tight to prevent puckering. At the end of the repaired seam, knot the thread and trim any excess. Be sure to secure the ends of the thread to prevent unraveling.
Repairing a Broken Zipper
Remove the old zipper first. If the zipper is beyond repair, carefully remove it using a seam ripper. Be cautious not to damage the surrounding fabric.
Acquire a replacement zipper of the same length and style as the original. Align it with the jacket opening, ensuring that the teeth of the zipper match up with the edges of the fabric.
Use sewing pins to secure the new zipper in position along the jacket opening. Thread your needle and use a backstitch to sew the new zipper in place, making sure to sew through the fabric and the zipper tape.
At the top and bottom of the zipper, secure the thread with knots and trim any excess. Test the zipper to ensure it functions smoothly.
Reviving Flat Down Filling
Over time, the down filling in your puffer jacket can become flattened or clumped together. To revive it, vigorously shake and fluff the jacket to redistribute the down filling evenly.
Place the jacket in a dryer with a few clean tennis balls. Use a low heat setting, and periodically check the jacket until the down has fully fluffed.
If you don’t have a dryer, you can manually fluff the down by gently kneading and massaging the jacket.
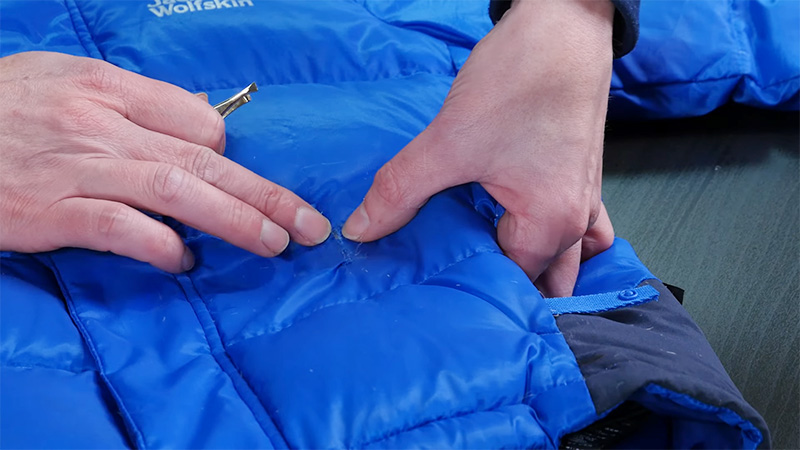
Patching Small Holes
If your puffer jacket has small holes or tears, ensure the damaged area is clean and free from loose threads. If you have a matching fabric patch or adhesive repair tape, cut it to size and apply it over the hole.
Follow the product’s instructions for the best results. If you don’t have a patch or tape, you can sew the hole closed using small, tight stitches. Knot and trim the thread when finished.
Final Inspection
Once you’ve completed all necessary repairs, give your puffer jacket a thorough inspection. Ensure that seams are secure, zippers function correctly, and any holes or tears are patched or sewn.
Finally, give your jacket a gentle cleaning according to the manufacturer’s instructions. Once it’s dry, use the fluffing techniques mentioned earlier to restore the down filling’s loftiness.
By following these steps, you can effectively repair your puffer jacket and extend its life, saving money and reducing waste. With a little patience and basic sewing skills, you can enjoy your cozy puffer jacket for many more cold seasons to come.
Different Ways to Patch a Puffer Jacket
Patching a puffer jacket can be a practical and creative way to mend small holes or tears while adding a unique touch to your outerwear. Here are several different ways to patch a puffer jacket:
Fabric Patch
Cut a fabric patch from a matching or contrasting fabric. Place the patch on the inside of the jacket, aligning it with the hole or tear. Sew the patch in place using a sewing machine or hand-stitching, ensuring it covers the damaged area completely.
Iron-On Patch
Choose an iron-on patch with a design or color that complements your puffer jacket. Position the patch over the hole or tear on the outside of the jacket.
Follow the patch manufacturer’s instructions to apply it using an iron. Typically, this involves applying heat for a specific duration with a protective cloth or paper in between.
Adhesive Repair Tape
Use adhesive repair tape designed for outdoor gear or jackets. Cut a piece of tape to cover the damaged area, ensuring there’s some overlap. Apply the tape directly to the outside of the jacket, pressing it down firmly to ensure a secure bond.
Embroidered Patch
Select an embroidered patch with a design you like. Position the patch over the hole or tear on the outside of the jacket. Hand-sew the patch onto the jacket using a whipstitch or other decorative stitch, securing it firmly.
Quilted Patch
Create a quilted patch by sewing together layers of fabric and batting. Cut the quilted patch into a shape that covers the damaged area. Hand-stitch or machine-stitch the patch onto the jacket, ensuring it’s securely attached.
Puffer Material Patch
If you have an old or damaged puffer jacket that you’re willing to part with, cut out a patch from it. Align the patch with the damaged area on your current jacket and sew it in place.
Decorative Stitching
Instead of using a patch, consider using decorative stitching to mend the hole or tear. Use contrasting thread and create a decorative pattern or design over the damaged area.
Felted Wool Patch
Cut a patch from a piece of felted wool fabric. Place the patch over the damaged area and hand-stitch it in place with a contrasting color of embroidery thread for a cozy and unique look.
Appliqué Patch
Create an appliqué patch by cutting out a shape or design from fabric. Stitch the appliqué onto the jacket, either by hand or using a sewing machine, for a personalized touch.
DIY Fabric Paint Patch
Mix fabric paint to match your jacket’s color. Apply the paint over the hole or tear, creating a solid-colored patch. You can add texture or designs for a unique look.
Remember to consider the size, shape, and location of the damage when choosing your patching method. Each of these patching techniques allows you to mend your puffer jacket while adding a personal touch or unique style to your outerwear.
FAQs
Can I fix a puffer jacket with a small tear or hole myself, or do I need to take it to a professional?
You can often fix a puffer jacket with a small tear or hole yourself using patching methods like fabric patches, iron-on patches, or adhesive repair tape. These DIY solutions are effective for minor damage.
Can I machine-wash my puffer jacket after patching it?
In most cases, you can machine-wash your patched puffer jacket, but it’s essential to follow the care instructions on the jacket’s label. Use a gentle cycle and mild detergent, and consider turning the jacket inside out to protect the patched area.
Will patching a puffer jacket affect its insulation or warmth?
Properly patched small holes or tears should not significantly affect the insulation or warmth of your puffer jacket. However, if you’re patching larger areas or multiple holes, it’s possible that the insulation’s effectiveness could be compromised.
Can I patch a puffer jacket made of waterproof material without compromising its water resistance?
Patching a puffer jacket made of waterproof material can be done while preserving its water resistance. Look for waterproof adhesive repair tape or patches designed for outdoor gear. Ensure that the patch fully covers the damaged area and adheres securely.
Can I patch a puffer jacket if the downfilling is coming out?
Yes, you can patch a puffer jacket with a down filling coming out. First, carefully clean the area around the tear or hole. Then, use a fabric patch or adhesive repair tape to seal the hole.
Ensure that the patch covers the opening and adheres well to prevent further down leakage.
Conclusion
With the guidance provided in this tutorial, you’ve learned how to breathe new life into your puffer jacket. The art of repairing and renewing your beloved jacket not only saves you money but also contributes to a sustainable approach to fashion.
Remember, whether it’s mending a tear, replacing a zipper, or reviving the fluffiness of your puffer, the key is patience and attention to detail.
As you confidently wear your freshly repaired puffer jacket, you’re not just bundled up in warmth; you’re wrapped in the satisfaction of a job well done. Continue exploring the world of garment repair and customization, and let your creativity shine.
Now, armed with the knowledge and skills you’ve gained here, you can confidently tackle any repair project and keep your favorite garments in tip-top shape. Happy repairing, and may your puffer jacket keep you cozy for many winters to come!
Leave a Reply