Zipper pouches are versatile and endlessly practical. Whether you need a stylish accessory, a handy makeup bag, or a thoughtful gift, sewing your own zipper pouch allows you to express your creativity while crafting something functional.
Don’t worry if you’re new to sewing; making a zipper pouch is an excellent project for beginners and experienced sewers alike.
In this step-by-step guide, we will demystify how to sew a zipper pouch. From choosing your fabric to adding finishing touches, we’ll walk you through the process.
You’ll discover that sewing a zipper pouch is not only satisfying but also an excellent way to sharpen your sewing skills.
So, gather your fabric, pick out a zipper that matches your style, and let’s embark on this sewing adventure together. By the end of this tutorial, you’ll have a fabulous, handmade zipper pouch to call your own or share with someone special. Let’s get started!
How to Sew a Zipper Pouch?
Sewing a zipper pouch is a fun and practical sewing project. Here’s a step-by-step guide to help you create your own stylish zipper pouch:
Prepare Your Fabric
Wash, dry, and iron your fabric to remove any wrinkles and shrinkage. Decide on the size of your pouch and cut two fabric rectangles: one for the exterior and one for the lining. Ensure they are the same size.
Prepare the Zipper
If your zipper is longer than needed, you’ll need to shorten it. To do this, sew a few stitches over the zipper teeth where you want it to end, then cut off the excess zipper tape. Be sure to leave about 1 inch of unsewn tape on each end.
Place the Fabric and Zipper
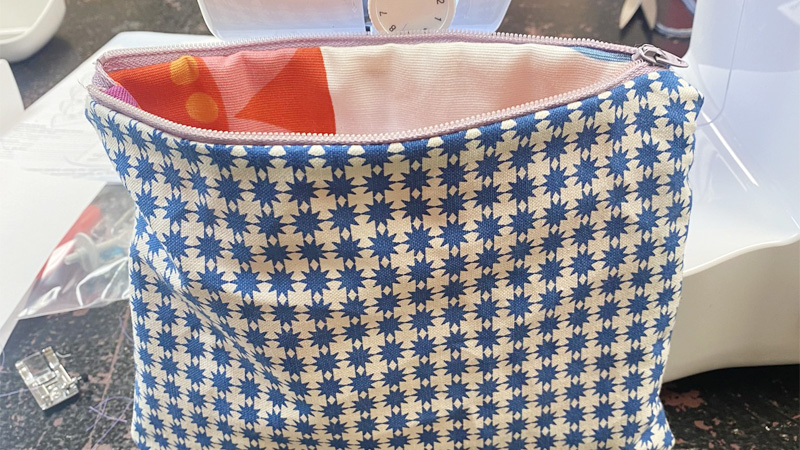
Place the exterior fabric piece right-side up on your work surface. Lay the zipper face down on top of it, aligning the zipper tape with the top edge of the fabric.
Then, place the lining fabric right-side down on top of the zipper, creating a “fabric sandwich” with the zipper in the middle.
Pin or Clip the Layers
Pin or use sewing clips to secure the layers together along the top edge. Make sure everything is aligned neatly.
Sew the First Side
Attach your zipper foot to your sewing machine. Stitch along the pinned edge, about ¼ inch away from the edge. You’re sewing through all layers. Backstitch at the beginning and end to secure the seam.
Open up the fabric layers and press them away from the zipper. Topstitch along the fabric edge, close to the zipper teeth, to give it a clean finish.
Repeat for the Other Side
Fold the exterior and lining fabrics to the other side of the zipper, creating another fabric sandwich. Pin or clip, then sew, as you did for the first side. Trim any excess zipper tape extending beyond the fabric edges.
Finish the Pouch
Open the zipper halfway so that you can turn the pouch right-side out later. Fold the pouch so that the exterior fabrics are right sides together, and the lining fabrics are right sides together. Pin or clip the sides and bottom edges together.
Sew the Sides and Bottom
Sew around the sides and bottom of the pouch, leaving a small opening (about 3 inches) along the bottom edge of the lining. Use a ½ inch seam allowance. Backstitch at the beginning and end.
Clip Corners and Turn Right-Side Out
Clip the excess fabric at the corners to reduce bulk. Then, carefully turn the pouch right-side out through the opening in the lining.
Close the Lining Opening
Fold the raw edges of the lining opening inside and hand-stitch it closed using a blind stitch or ladder stitch.
Press and Final Touches
Give your pouch a final press to smooth out any wrinkles. Push out the corners for a neat finish. Your DIY zipper pouch is complete! Whether you use it to organize your essentials or give it as a thoughtful gift, you’ve created a functional and stylish accessory through your sewing skills.
Zipper Pouch Patterns You Can Try Today!
Creating zipper pouches with different patterns can be a fun way to express your creativity and make personalized gifts. Here are some popular zipper pouch patterns you can try:
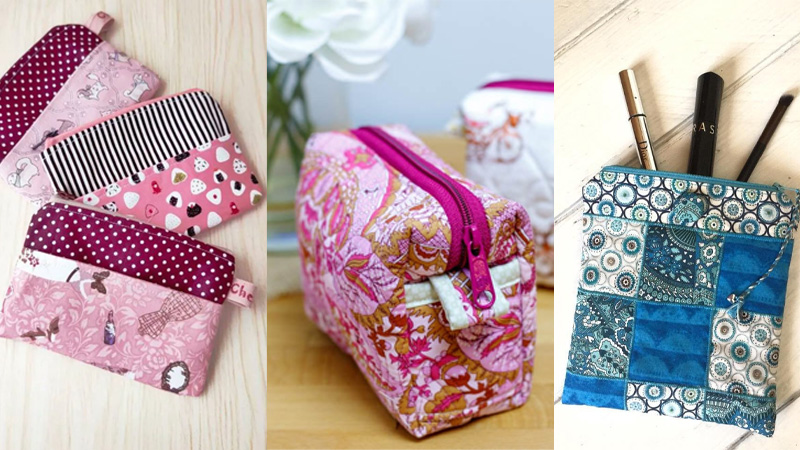
Basic Zipper Pouch
This is a simple rectangular pouch with a zipper closure. It’s perfect for beginners and can be customized with various fabrics and sizes.
Boxy Pouch
The boxy pouch has squared-off corners that create a roomier interior. It’s great for storing cosmetics, toiletries, or small sewing supplies.
Zipper Pouch with Pockets
Add interior or exterior pockets to your pouch for extra organization. You can sew divided pockets, slip pockets, or zippered pockets.
Quilted Zipper Pouch
Quilted pouches have a padded, quilted exterior, providing both style and protection. Quilt as you go or use pre-quilted fabric for this design.
Patchwork Zipper Pouch
Combine small fabric scraps or quilt blocks to create a patchwork effect on your pouch. This pattern adds a charming, handmade touch.
Fold-Over Zipper Pouch
This design features a flap that folds over the pouch and secures with a snap or button. It’s great for adding a decorative element to your pouch.
Lined Zipper Pouch
Make a lined pouch by sewing an inner and outer layer separately, then sewing them together. This creates a neat, finished look on the inside.
Curved Zipper Pouch
Create a unique look by adding curved seams to your pouch. This can be a bit more challenging but results in a distinctive shape.
Boxed Zipper Pouch with Handles
Make a boxy pouch with added handles for easy carrying. This pattern is ideal for a portable toiletry bag or small handbag.
Animal-Shaped Zipper Pouch
Get creative by sewing a zipper pouch in the shape of an animal, such as a cat, dog, or owl. These can be great gifts for children or animal lovers.
Eco-Friendly Zipper Pouch
Craft a pouch using recycled materials, like old jeans or fabric scraps. This pattern promotes sustainability and reduces waste.
Holiday-Themed Zipper Pouch
Sew pouches with festive fabric patterns for holidays like Christmas, Halloween, or Valentine’s Day. They make great seasonal gifts.
Embellished Zipper Pouch
Add embellishments like appliqué, embroidery, or fabric paint to personalize your pouch and make it uniquely yours.
Each of these patterns offers a different style and level of complexity, allowing you to tailor your zipper pouch to your preferences and skill level. Enjoy experimenting with various fabrics, colors, and patterns to create beautiful and functional pouches.
How Do I Make a Boxed Zipper Pouch with Handles?
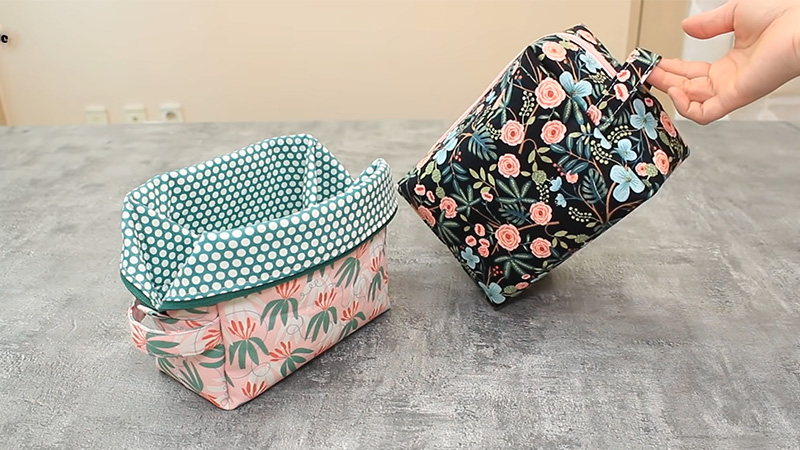
Creating a boxed zipper pouch with handles is a delightful project that combines functionality with style. Here’s a step-by-step guide, including a unique method for making the handles:
Prepare Your Fabric
Wash, dry, and press your fabrics. Cut two rectangles from your exterior fabric and two from your lining fabric, all the same size. If using interfacing, cut two rectangles of the same size.
Attach Interfacing (if desired)
If you want your pouch to have added structure, follow the manufacturer’s instructions to fuse the interfacing pieces onto the wrong side of your exterior fabric rectangles.
Mark and Cut Handles
On one of the exterior fabric rectangles, mark the center along the top edge. Measure and mark two points on either side of the center, creating a handle shape.
Cut out the handle, leaving about 1 inch of fabric between the top edge and the start of the handle curve.
Prepare the Zipper
Lay one lining fabric rectangle right side up on your work surface. Place the zipper face down along the top edge, aligning the zipper tape with the fabric edge.
Then, lay one of the exterior fabric rectangles right side down on top of the zipper. Ensure that the handle is facing away from the zipper. Pin or clip the layers together.
Sew the Zipper
Using your zipper foot, sew along the pinned edge, about ¼ inch from the edge. This attaches the zipper to the fabric layers. Remember to backstitch at the beginning and end of your stitching.
Press and Topstitch
Flip the fabric layers right side out and press them away from the zipper. Topstitch along the fabric edge, close to the zipper teeth, to give it a clean finish.
Repeat for the Other Side
Lay the remaining lining fabric rectangle right side up. Attach the other side of the zipper by placing it face down, and aligning the zipper tape with the top edge.
Place the remaining exterior fabric rectangle right side down on top. Sew, press, and topstitch as you did for the first side.
Box the Corners
With the exterior fabric right side, fold the pouch in half with the right sides together, aligning the side seams. Pin or clip the side seams.
Then, measure and mark a line 1 inch from the corner along the side seam. Sew along this line, backstitching at the start and finish. Repeat for the other corner.
Finish the Lining
With the lining fabric right side out, fold the pouch in half with the right sides together, just as you did for the exterior. Pin or clip the side seams and sew them together, leaving a 3-inch opening in the bottom seam for turning.
Turn the Pouch
Turn the entire pouch right side out through the opening in the lining. Push out the corners to create a neat shape.
Close the Lining Opening
Fold the raw edges of the opening inside and hand-stitch it closed using a blind stitch or ladder stitch.
Create Handle Loops
To make unique handle loops, cut two fabric strips, each about 4 inches long and 2 inches wide. Fold them in half lengthwise with right sides together, then sew along the long edge. Turn them right side out and press them flat.
Attach the Handles
Pin or clip the handle loops to the exterior fabric near the top edges. Ensure they’re securely attached. Press your boxed zipper pouch with handles to smooth out any wrinkles and give it a finished look.
Your boxed zipper pouch with handles is complete! This unique method of adding handles creates a stylish and functional accessory for carrying your essentials. Enjoy your handmade creation!
FAQs
Yes, you can use different fabrics to achieve a contrasting or complementary look for your pouch. Just ensure that both fabrics are compatible in terms of weight and structure.
Interfacing adds stability and structure to the exterior fabric, giving your pouch a more polished look and helping it maintain its shape.
Absolutely! You can customize the handle size to your preference by cutting longer or shorter fabric strips. Just make sure they are securely attached to the pouch.
Yes, you can add interior pockets to your pouch. Before sewing the lining pieces together in step 9, sew pockets onto one of the lining fabric rectangles, ensuring they are right-side up and facing the exterior fabric when assembling the pouch.
To clean your pouch, spot clean any stains with a mild detergent and water. Gently hand wash and air dry if necessary. Avoid machine washing to preserve its shape and structure.
Conclusion
Crafting your own zipper pouch is a delightful journey that combines creativity with practicality. Through this tutorial, you’ve learned how to select fabric, attach zippers, and sew a stylish and functional pouch.
As you admire your finished creation, take pride in the skills you’ve acquired and the unique design you’ve brought to life. Zipper pouches make wonderful gifts, personalized accessories, or handy organizers, and you now have the knowledge to create them with ease.
Remember that sewing is a skill that grows with practice, so continue to explore new projects, experiment with different fabrics and designs, and let your creativity shine through your sewing endeavors.
With each stitch, you’re not only crafting beautiful items but also nurturing your passion for sewing. Enjoy your new zipper pouch and the endless possibilities it brings!
Leave a Reply