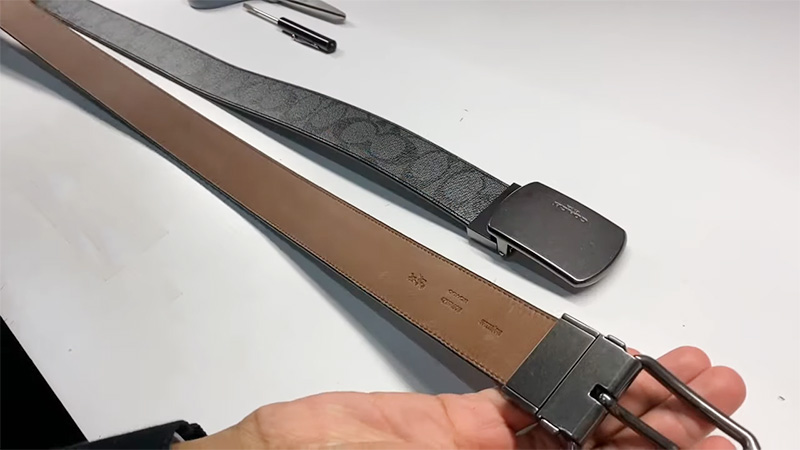
Shortening a belt is a valuable skill that empowers you to customize your wardrobe, ensuring that your belts fit comfortably and complement your style.
Whether you’ve recently lost weight, purchased a belt that’s too long, or simply want to adapt your accessories to different outfits, the process of shortening a belt can make a significant difference.
This step-by-step guide will walk you through the essential steps, from determining the desired length to sealing the cut end, allowing you to achieve a precise fit with a polished finish.
With the ability to tailor your belts, you’ll have the flexibility to accentuate your attire with confidence and style.
How to Shorten a Belt? 8 Steps
Shortening a belt is a practical skill that can help you achieve a better fit for your clothing and accessories. Whether you’ve lost weight, purchased a belt that’s too long, or simply want to customize your belt length to match a specific outfit, shortening a belt is a relatively straightforward process.
Here’s a step-by-step guide on how to shorten a belt:
Step 1: Determine the Desired Length
The first step in shortening a belt is to put it on and fasten it to your desired tightness. Make sure it fits comfortably around your waist, and then mark the spot where the buckle prong fits into the hole.
This marked spot will serve as your reference point for the belt’s new length, ensuring it’s just right for your size and comfort.
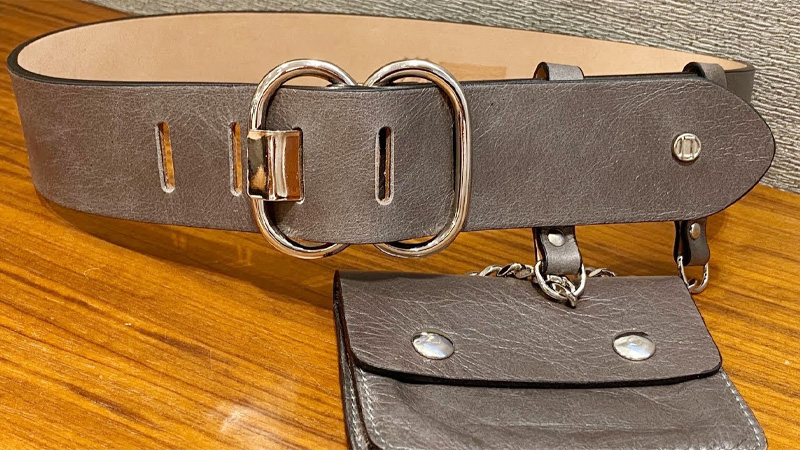
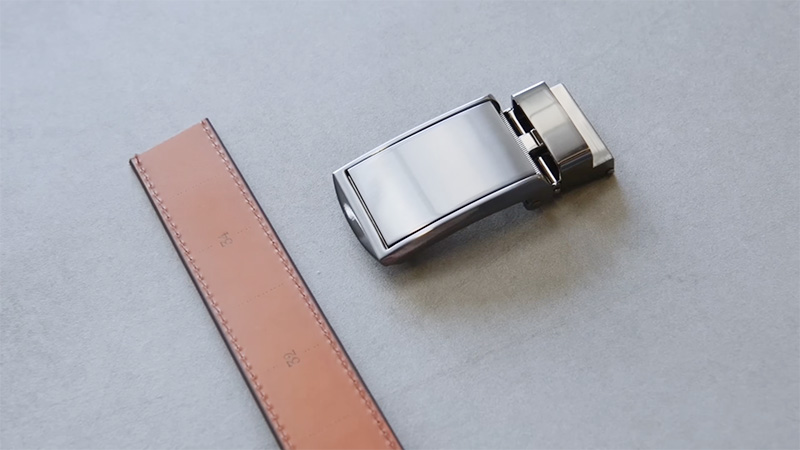
Step 2: Remove the Buckle (if Applicable)
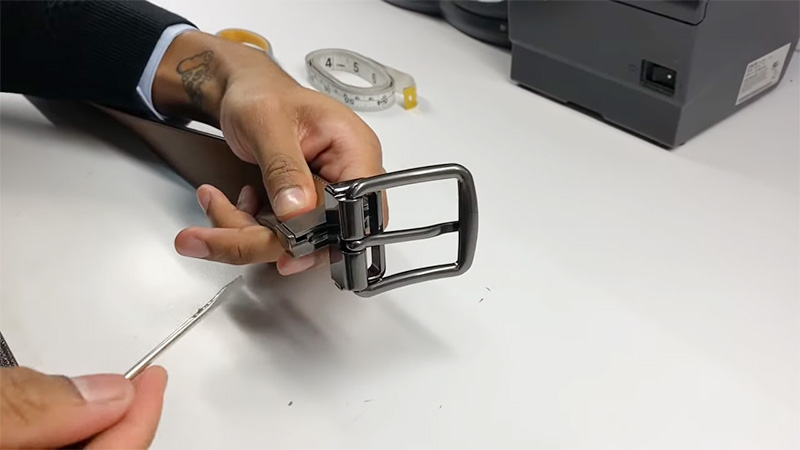
Some belts come with removable buckles, which can make the shortening process more straightforward. Using a screwdriver, carefully remove the screws that attach the buckle to the belt.
Set the buckle aside; you will reattach it later once the belt has been shortened to your desired length.
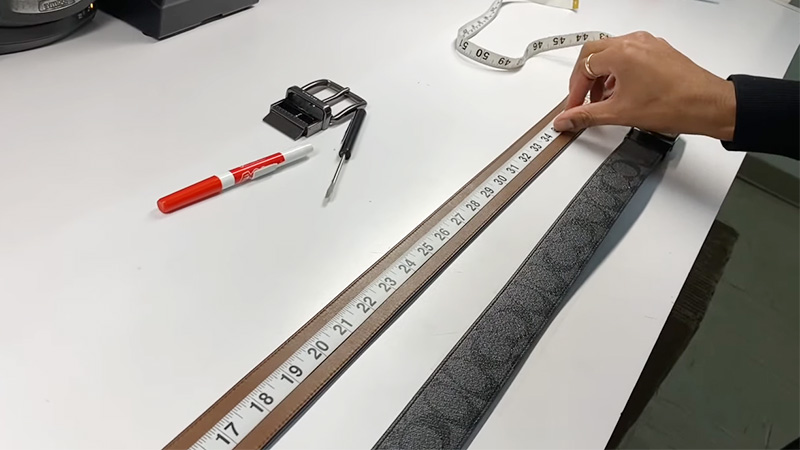
Step 3: Measure and Mark
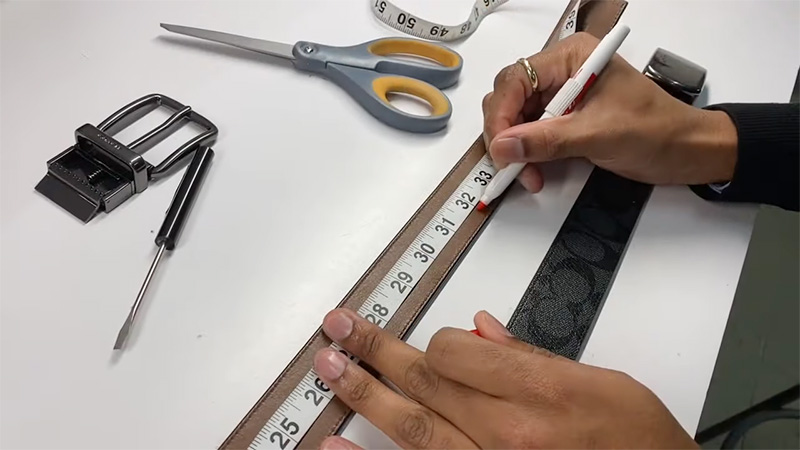
Using a measuring tape, precisely measure the length you want to shorten from the end of the belt that does not have the buckle. Take your time to ensure the measurement is accurate, as this will determine how much length you need to remove to achieve the perfect fit.
Step 4: Cut the Excess Length
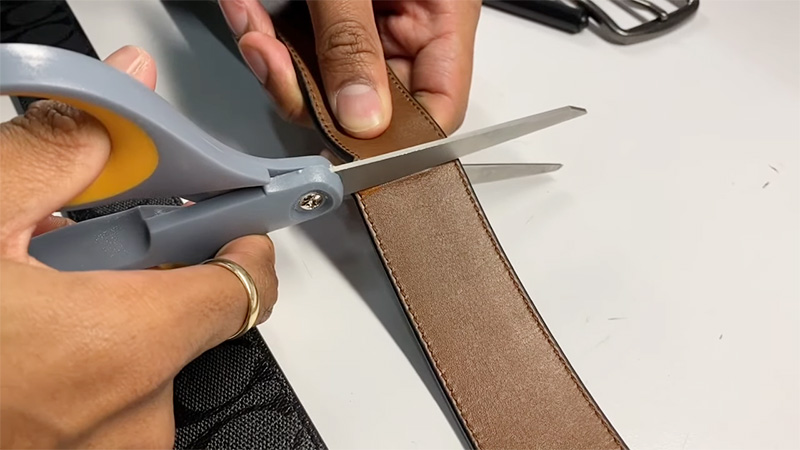
With a pair of sharp scissors or a utility knife, carefully cut off the excess length of the belt along the marked line you made in step 1. It’s wise to cut slightly longer initially to prevent accidentally making the belt too short.
You can always trim more if needed, but you can’t add back the length once it’s cut.
Step 5: Seal the Belt End
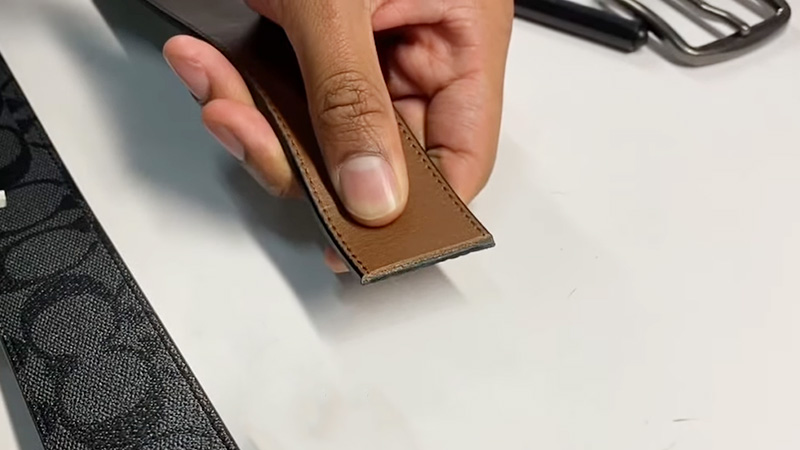
To prevent fraying, use a lighter, matches, or a dedicated belt tip sealer to gently melt and seal the end of the belt that you’ve just cut. Be cautious not to burn the belt; simply hold it near the flame, allowing the heat to seal the fibers.
Optionally, you can use sandpaper to smooth the melted edge for a cleaner and more polished look.
Step 6: Reattach the Buckle (if Applicable)
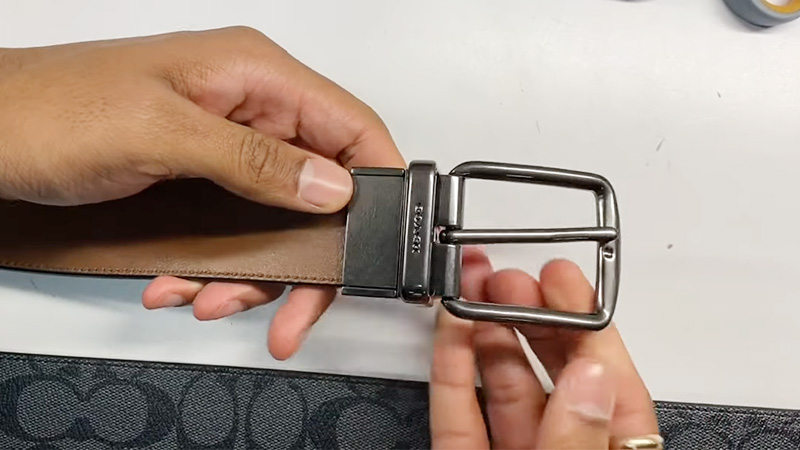
If you removed the buckle earlier in step 2, it’s time to reattach it to the newly shortened end of the belt using the same screws you removed. Ensure the buckle is securely fastened to prevent any mishaps or discomfort when wearing the belt.
Step 7: Test the Fit
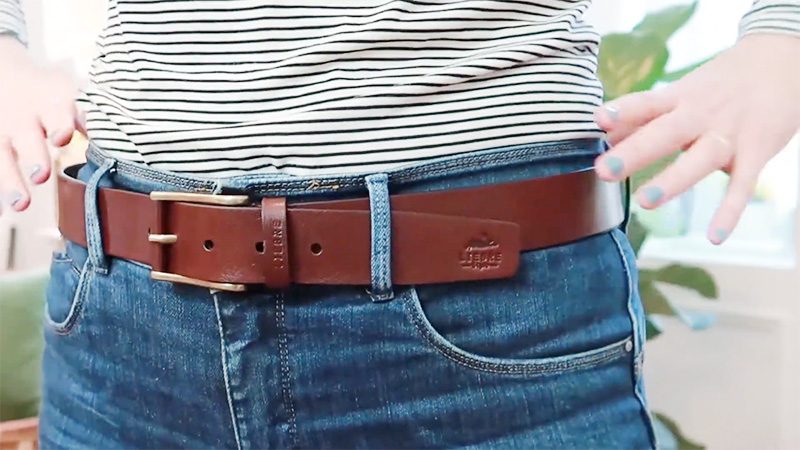
Put on your newly shortened belt and fasten it to your preferred tightness. Test it out to ensure it fits comfortably and securely around your waist.
Make any necessary adjustments to the tightness to achieve the perfect fit for your comfort and style.
Step 8: Final Adjustments (if Needed)
If, after testing the belt, you find that it’s still too long or too short, you can repeat the process, cutting off or adjusting additional length as required.
However, exercise caution not to make the belt too short, as it can be challenging to correct once cut.
How Do I Know How Much to Shorten My Belt?
Determining the right amount to shorten your belt is crucial for achieving the perfect fit. Whether you’ve lost weight, purchased a belt that’s too long, or simply want to adapt your accessories to different outfits.
Here’s how you can accurately gauge how much to shorten your belt:
Measure Your Waist
Start by wrapping a measuring tape around your waist where you usually wear your belt. Make sure it’s snug but not overly tight, and note down the measurement in inches or centimeters.
This measurement is referred to as “Measurement A” and forms the basis for adjusting your belt.
Measure the Belt
Lay your belt flat on a surface and measure from the end of the buckle to the hole where you usually fasten it. This section of the belt, known as “Measurement B,” represents the part that encircles your waist.
Determine Buckle Length
Recognize that the buckle typically adds 1 to 2 inches to the overall length of the belt. Keep this in mind for a more accurate calculation.
Consider Excess Length
Take into account any excess length of the belt beyond the last hole you use. This excess can affect the overall fit.
Calculate Shortening Length
Use the formula: Shortening Length = B (belt length) – Buckle Length – Excess Length. This formula helps you determine the precise amount by which you need to shorten your belt for a proper fit.
Make Adjustments
Armed with the calculated shortening length, you can either take the belt to a tailor or use a belt hole punch tool to create a new hole at the right length.
Ensure that the new hole provides a comfortable, secure fit around your waist.
How Long Does It Take to Shorten a Belt?
The time required to shorten a belt depends on your experience, the complexity of the belt, and the tools used. On average, the process can take approximately 15 to 30 minutes.
Measuring, cutting, and sealing the belt end usually consumes the most time. If the belt has a removable buckle, that can add a few extra minutes for removal and reattachment.
More intricate belts or those with multiple layers might take longer. It’s essential to work carefully and precisely to achieve a clean and professional result, so don’t rush the process.
What Are Some Tips for Shortening a Belt?
Shortening a belt is a practical skill that can help you achieve the perfect fit for your clothing and accessories. Whether you’ve lost weight, purchased a belt that’s too long, or simply want to customize your belt length to match a specific outfit.
Here are some essential tips to ensure a successful belt-shortening process:
Measure Twice, Cut Once
Before you start cutting, carefully measure the length you want to shorten. Double-check your measurements to avoid any costly mistakes. It’s always easier to cut more later if needed, but you can’t add length back once it’s removed.
Start With a Little Extra
When cutting the belt, leave a bit of extra length beyond your measured mark. This precautionary approach prevents accidentally making the belt too short.
You can trim more if necessary but can’t reverse an overly short cut.
Use the Right Tools
Sharp scissors or a utility knife are essential for making clean, precise cuts. If your belt is made of thick material like leather, consider using specialized leather-cutting tools for the best results.
For adding extra holes, a leather hole punch is invaluable.
Seal the Cut End
After cutting, it’s crucial to seal the cut end to prevent fraying. You can use heat, such as a lighter or dedicated belt tip sealer, to melt and seal the fibers.
Be cautious not to burn the belt; just apply enough heat to secure the edge. Optionally, you can use sandpaper to smooth the melted edge for a cleaner look.
Practice Patience
Take your time during each step of the process, especially if it’s your first time shortening a belt. Rushing can lead to mistakes, so be patient and meticulous in your approach.
Test the Fit
Put on the newly shortened belt and fasten it to your preferred tightness. Walk around and make sure it fits comfortably and securely. Make any necessary adjustments to the tightness to achieve the perfect fit for your comfort and style.
Consider Professional Help
If you’re uncertain about shortening your belt or if it’s a valuable or intricate belt, consider seeking assistance from a professional leatherworker or tailor.
They have the expertise and tools to ensure a clean and polished result.
FAQs
What tools do I need to shorten a belt?
Tools needed to shorten a belt: measuring tape, sharp scissors or utility knife, lighter or belt tip sealer, screwdriver (if buckle is removable), sandpaper (optional), leather hole punch (if adding holes).
Can I shorten a leather belt without cutting it?
Shortening a leather belt without cutting is possible by adding extra holes for adjustment using a leather hole punch tool, preserving the belt’s original length.
What if I make a mistake while shortening my belt?
If you make a mistake while shortening your belt, you can’t undo it. To fix it, consider adding extra holes or consulting a professional for assistance.
How do I remove the buckle from my belt?
To remove a belt buckle, locate and unscrew the screws or fasteners securing it to the belt. Use a screwdriver to unfasten them, then carefully detach the buckle.
Can I use glue to shorten my belt?
Using glue to shorten a belt is not recommended. While it may temporarily hold the belt together, it won’t provide a secure and lasting solution like proper sealing methods.
To Recap
Mastering the art of shortening a belt grants you the power to refine your fashion choices with precision and flair. This skill ensures that your belts not only hold your garments in place but also accentuate your individual style and comfort.
By following the steps outlined in this guide, you’ve learned to measure, cut, and seal your belt for a customized fit and a polished finish. Whether it’s adapting to changing waistlines or tailoring your accessories for various outfits, shortening a belt empowers you to express your unique taste effortlessly.
So, confidently stride forward, secure in the knowledge that your belts will always complement your look, providing the perfect finishing touch to your ensemble.
Leave a Reply