Starting and stopping a seam in sewing is a fundamental skill that every sewer should master. These critical steps ensure the integrity and aesthetics of your sewing projects.
Whether you’re a novice or an experienced seamstress, understanding how to begin and conclude a seam correctly is key to achieving professional results.
Starting a seam involves careful preparation, thread selection, and securing the initial stitches. Stopping a seam demands precision to prevent fraying and ensure a clean finish.
In this guide, we will walk you through the essential techniques for starting and stopping a seam, empowering you to create flawless and durable sewing projects with confidence.
How to Start a Seam?
Starting a seam is a fundamental step in sewing, and doing it correctly is essential to ensure your stitches are secure and your project turns out well.
Here’s a step-by-step guide on how to start a seam:
Thread Your Sewing Machine
Begin by preparing your sewing machine for the task at hand. Select the appropriate thread color and type that matches your fabric. Ensure that your bobbin is correctly wound and securely inserted into the machine.
Threading your machine correctly is essential to achieving smooth and even stitches in your seam.
Choose the Stitch
Before you start sewing, take a moment to consider the type of stitch that suits your project. Most often, a straight stitch is used for basic seams.
However, for specialized sewing tasks, you may need to select a different stitch from your sewing machine’s options. Carefully adjust the settings on your machine to match your chosen stitch.
Prepare Your Fabric
The condition of your fabric and how it’s positioned can significantly impact the quality of your seam. Place the fabric pieces you intend to sew together with their right sides facing each other.
This means the sides of the fabric you want to show in the finished project should be touching. Align the raw edges of the fabric pieces evenly, making sure they match up along the entire length of the seam.
You can use pins or clips to secure the fabric in place, keeping it stable during stitching.
Set Your Machine
To ensure your stitches are of the right length and tension, adjust your sewing machine settings accordingly. The ideal settings may vary depending on the fabric type and the type of seam you’re creating.
Refer to your sewing machine’s user manual for specific recommendations. Proper machine setup is key to achieving professional-looking seams.
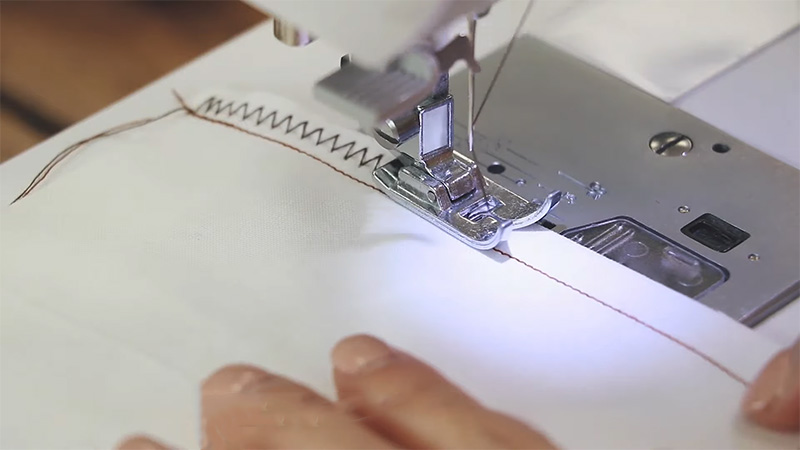
Position the Needle
With your fabric pieces aligned and ready, lower the presser foot onto the fabric at the starting point of your seam. Typically, this starting point is at the very edge of the fabric where you want your seam to begin.
Ensuring the needle is correctly positioned is essential for precise stitching and seam accuracy.
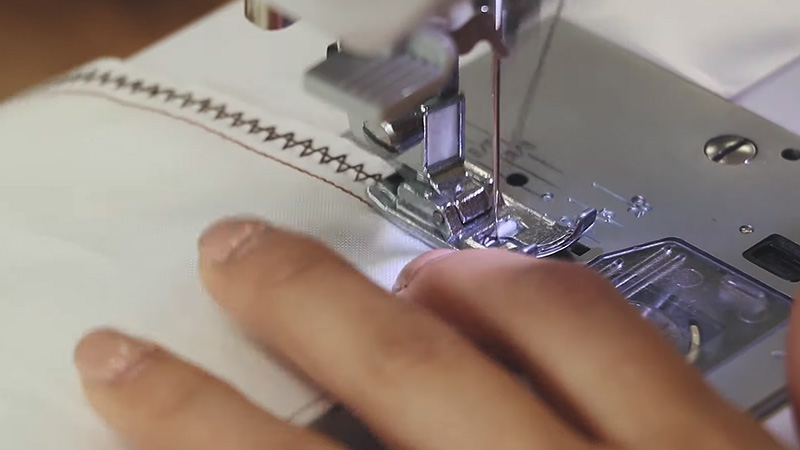
Start Sewing
Gently depress the foot pedal of your sewing machine to initiate the stitching process. To secure the beginning of your seam, start by stitching a few forward stitches.
This usually involves sewing about 2-3 stitches in the forward direction. These initial stitches prevent the thread from unraveling and anchor the thread securely to the fabric.
Backstitch
After completing the initial forward stitches, engage the sewing machine’s reverse or backstitch function. Sew backward over the same stitches for a few stitches (typically about 2-3).
This backstitching creates a reinforced starting point for your seam, preventing it from coming undone or unraveling.
Continue Sewing
Once you’ve completed the backstitch, switch your sewing machine back to forward stitching. You’re now ready to continue sewing along the length of the seam, following your predetermined seam allowance and ensuring the fabric moves evenly under the presser foot.
By following these steps, you ensure that your seam starts off securely, providing a strong foundation for the rest of your sewing project.
How to Stop a Seam?
Stopping a seam properly is just as important as starting one to ensure your sewing projects have clean, secure, and professional-looking finishes.
Here’s a step-by-step guide on how to stop a seam:
Sew to the End
As you approach the end of your sewing project, continue stitching along the seam, following the predetermined seam allowance. Ensure that your stitches are consistent and aligned with the fabric edges.
Sewing to the very end is crucial for completing your seam accurately.
Backstitch for Reinforcement
When you’re approximately 2-3 stitches away from the end of your seam, transition your sewing machine into reverse or backstitch mode. By doing this, you’ll reinforce the end of the seam, preventing it from unraveling or coming apart over time.
Sew backward over the last few stitches, usually about 2-3, to secure the seam’s ending point.
Lift the Presser Foot
After completing the backstitching at the end of your seam, gently lift the presser foot of your sewing machine. This action releases tension on the fabric and allows you to remove the fabric from the machine without any resistance.
Lifting the presser foot ensures that you can safely and smoothly complete this step.
Cut the Threads
With the presser foot raised, use a pair of sharp fabric scissors or a dedicated thread cutter to trim both the upper thread and the bobbin thread as close to the fabric as possible.
Take care not to cut the fabric itself. This precise trimming ensures that there are no loose threads to detract from the seam’s appearance.
Secure the Threads (Optional)
While cutting the threads is usually sufficient to secure the seam, you may choose to take additional measures to prevent the thread ends from unraveling.
One option is to manually tie a knot with the thread ends, forming a tight double knot close to the fabric edge. Alternatively, if you prefer a more discreet finish or are working with delicate fabrics, you can apply a small amount of fabric glue or fray-check to the thread ends.
This adhesive will keep the threads in place and provide extra security.
What is the Importance of Proper Seam Starting and Stopping in Sewing Projects?
The importance of proper seam starting and stopping in sewing projects cannot be overstated. These fundamental techniques play a crucial role in the overall quality, durability, and appearance of your sewing creations.
Here’s a closer look at why mastering these skills is essential:
Stability and Strength
Properly starting a seam involves securing the initial stitches, which is vital for preventing the thread from unraveling. Without a secure start, your entire seam could come apart, leading to frustration and rework.
This stability ensures that your project will stand the test of time.
Preventing Fraying
When you start a seam correctly, you’re not just preventing unraveling; you’re also inhibiting fraying. Raw fabric edges have a tendency to fray over time, especially when subjected to regular use or washing.
Proper seam starting and stopping keep these edges tidy and intact.
Professional Finish
Whether you’re sewing clothing, home decor items, or accessories, a clean and professional finish is often the goal. Neatly starting and stopping a seam is a hallmark of skilled sewing.
It contributes to the overall polished look of your project, making it more appealing and presentable.
Endurance
For seams that will undergo stress or tension, such as those in clothing or upholstery, proper starting and stopping are essential for ensuring that your stitches remain strong and endure repeated use.
Without reinforcement at the beginning and end of the seam, it’s more likely to come apart under pressure.
Accurate Sewing
Proper starting ensures that your stitches begin precisely where you want them. This accuracy is crucial for maintaining consistent seam allowances, pattern alignment, and overall project shape.
It helps prevent crooked or misaligned seams.
Confidence and Efficiency
When you know how to start and stop a seam correctly, you approach your sewing projects with confidence. You’re less likely to worry about seams unraveling, which can lead to more efficient and stress-free sewing.
How Can Practice and Improve Your Seam Starting and Stopping Skills?
Practicing and improving your seam starting and stopping skills is essential for achieving professional-quality sewing projects.
Here are some effective ways to hone these skills:
Use Scrap Fabric
Gather scraps of fabric similar to what you use in your projects. Practice starting and stopping seams on these scraps to get a feel for how different fabrics behave.
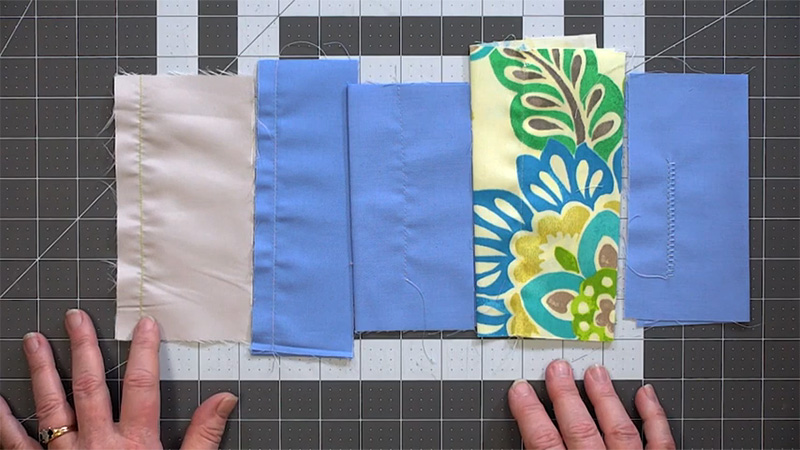
Sew Sample Seams
Create a series of small fabric squares or rectangles. On these samples, practice starting and stopping seams with different techniques and stitch lengths to see how they affect the outcome.
Focus on Backstitching
Backstitching is a critical part of seam starting and stopping. Spend time practicing this technique by sewing lines of forward stitches, backstitching, and then continuing forward.
Pay attention to the rhythm and pressure applied to the pedal for smooth transitions.
Vary Stitch Length
Experiment with different stitch lengths when starting and stopping seams. Longer stitches may work well for lightweight fabrics, while shorter stitches provide added strength for heavier materials.
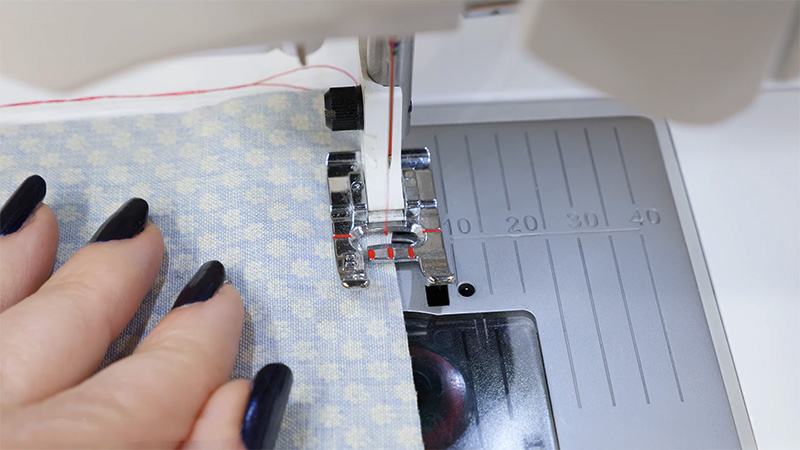
Seam Allowance Practice
Practice maintaining consistent seam allowances when starting and stopping seams. Use a seam gauge or a piece of tape on your machine as a guide to ensure accuracy.
Try Different Thread Types
Sew with various thread types (e.g., cotton, polyester, silk) to understand how they behave during starting and stopping. Different threads may require slight adjustments in your technique.
Sew Different Fabric Types
Practice on a variety of fabric types, including woven and knit fabrics. Each fabric may have unique characteristics that influence how you start and stop seams.
Focus on Precision
Pay close attention to the position of your needle when starting and stopping. Accuracy is crucial for achieving clean and polished seams.
Record Your Progress
Keep a sewing journal or take photos of your practice pieces. This will allow you to track your improvement over time and identify areas that need further work.
Online Tutorials and Classes
Explore online sewing tutorials and classes that specifically focus on seam starting and stopping techniques. Many sewing instructors offer valuable insights and demonstrations.
Ask for Feedback
If you have a sewing mentor or friends who are experienced in sewing, ask for feedback on your seam-starting and stopping techniques. Constructive criticism can be incredibly helpful.
Patience and Persistence
Remember that mastering these skills takes time and practice. Don’t get discouraged by initial challenges. Stay patient and persistent in your efforts to improve.
FAQs
Do I need special tools or equipment to start and stop seams effectively?
You don’t need special tools; however, sharp fabric scissors, pins or clips, and an adjustable sewing machine are helpful for effective seam starting and stopping.
What is backstitching, and why is it crucial when stopping a seam?
Backstitching is sewing backward over a few stitches at the end of a seam. It’s crucial to reinforce the seam’s end and prevent unraveling over time.
What are the ideal settings on a sewing machine for starting and stopping seams?
Ideal settings vary by fabric type and project. Refer to your sewing machine’s manual for recommendations on stitch length, tension, and other settings for precise starting and stopping.
Are there any additional measures I can take to secure the ends of my seams?
Yes, you can tie a knot with the thread ends, apply fabric glue or fray-check, or use a secure stitch like a locking stitch to further secure seam ends.
What common mistakes should I avoid when starting and stopping seams?
Common mistakes include skipping backstitching, improper thread tension, and accidentally cutting the fabric when trimming threads. Avoid these errors for successful seams.
To Recap
Mastering the art of starting and stopping a seam is a foundational skill in the world of sewing. These seemingly simple steps are the cornerstones of every successful sewing project, ensuring not only the structural integrity but also the visual appeal of your creations.
By carefully selecting your thread, setting up your machine, and executing the initial stitches, you establish a strong foundation for your seam. Meanwhile, properly concluding a seam with backstitching and precise thread trimming guarantees a neat, professional finish.
Whether you’re a beginner or an experienced seamstress, the techniques outlined in this guide will empower you to tackle sewing projects with confidence, producing garments and items that are as sturdy as they are beautiful.
With practice, you’ll refine these skills and unlock endless possibilities for your creative sewing endeavors.
Leave a Reply