The art of sewing is a delicate blend of precision and creativity, and the foundation of any successful sewing project lies in transferring a sewing pattern accurately onto fabric.
Among the various methods available, using freezer paper stands out as a cost-effective and reliable technique. Freezer paper, with its unique ability to temporarily adhere to fabric when heated, simplifies the process while ensuring meticulous results.
Whether you’re a seasoned seamstress or a beginner in the world of sewing, this guide will walk you through the steps to seamlessly transfer your sewing pattern onto fabric with freezer paper.
From preparing your workspace to the final cut, you’ll discover how this versatile tool can enhance your sewing projects and help you achieve a professional finish with ease.
What is Freezer Paper?
Freezer paper is a paper product coated with a thin layer of plastic or wax on one side. Primarily used for food preservation by wrapping and protecting items in the freezer, its moisture-resistant coating helps maintain the quality of stored foods.
In crafting and sewing, freezer paper is valued for its ability to temporarily adhere to fabric when heated with an iron, allowing for precise pattern transfer and accurate cutting.
This makes it a versatile tool for creative projects, including quilting, appliqué, and other fabric-based endeavors.
Why Use Freezer Paper to Transfer a Sewing Pattern?
Freezer paper is a versatile tool in the realm of sewing and crafting. Its unique qualities, such as temporary adhesion, durability, and cost-effectiveness, make it a preferred choice for transferring sewing patterns onto fabric.
Durability
Freezer paper is notably sturdier than tissue paper or other tracing materials often used for patterns. Its robust construction can withstand the demands of multiple uses without tearing or deteriorating, ensuring a longer-lasting tool for your sewing projects.
Temporary Adhesion
When freezer paper is ironed onto fabric, it adheres temporarily but can be effortlessly removed without leaving any residue. This feature allows for precise placement and adjustments of pattern pieces, making it easier to achieve the desired fit and design accuracy.
Clarity and Precision
Freezer paper provides a clear, smooth surface for tracing patterns. This clarity ensures that pattern lines and intricate details are accurately replicated on the fabric, reducing the chances of errors and misalignment during cutting and sewing.
Cost-effectiveness
Freezer paper is an economical option compared to specialized tracing materials or tools designed for pattern transfer. It offers a budget-friendly solution without compromising on quality or precision.
Versatility
Freezer paper is compatible with various fabric types, making it suitable for a wide range of sewing projects, from delicate garments to sturdy home decor items.
Its adaptability adds to its appeal, as it can be used across different creative endeavors.
Ease of Use
Using freezer paper for pattern transfer is a straightforward process that doesn’t require complex tools or equipment. Sewers of all skill levels can quickly grasp the technique, making it accessible and convenient for beginners and experienced crafters alike.
How to Transfer a Sewing Pattern to Fabric With Freezer Paper?
Transferring a sewing pattern onto the fabric with freezer paper is a practical and precise technique that helps ensure accurate cutting and sewing. Whether you’re a beginner or an experienced seamstress, this method can make your sewing projects more manageable and efficient.
Here’s a guide on how to transfer a sewing pattern to fabric using freezer paper:
Prepare Your Work Surface
Begin by ensuring you have a clean and flat work surface. This is essential for laying out your sewing pattern without wrinkles or distortions. A clutter-free workspace is key to staying organized during the entire process.
Cut the Freezer Paper to Size
Take a piece of freezer paper and roll it out, making sure it’s large enough to cover your sewing pattern entirely. Using scissors, carefully cut the freezer paper to the appropriate size.
This ensures you have adequate coverage to trace all the necessary pattern pieces accurately.
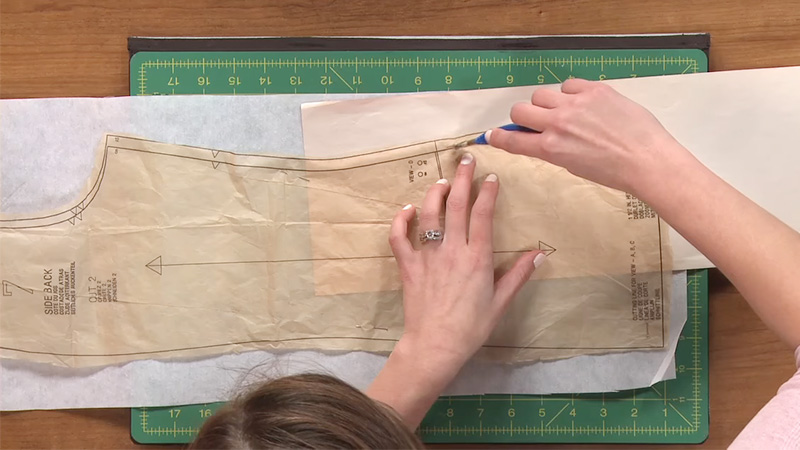
Trace the Pattern Onto the Freezer Paper
Place the shiny, waxy side of the freezer paper facing down over your sewing pattern. This shiny side will adhere temporarily to the fabric later on.
With a pencil and a clear ruler, trace the outline of each pattern piece onto the matte side of the freezer paper. If needed, use a light source like a window for better visibility while tracing.
Label and Cut Out the Pattern Pieces
After tracing all the pattern pieces onto the freezer paper, meticulously cut out each piece along the traced lines. Precision in cutting is vital for maintaining accuracy.
To stay organized, label each freezer paper pattern piece with the name of your pattern and the specific piece’s name (e.g., “Front Bodice,” “Sleeve,” etc.).
Assemble Larger Pattern Pieces
If your sewing pattern includes larger pieces printed on multiple sheets, use the original pattern as a guide to tape together the corresponding freezer paper pieces.
This step ensures you have complete pattern pieces ready for your project. Align the edges carefully and secure them with scotch tape.
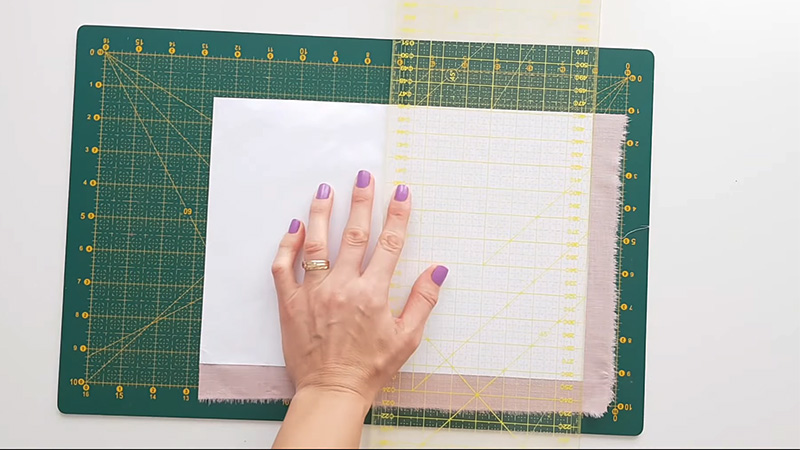
Prepare Your Fabric
Lay out your fabric on a clean, smooth surface. Ensure it’s free from wrinkles or distortions, and verify that the fabric’s grainline is correctly aligned.
Properly preparing your fabric is crucial for achieving the desired fit and finish in your sewing project.
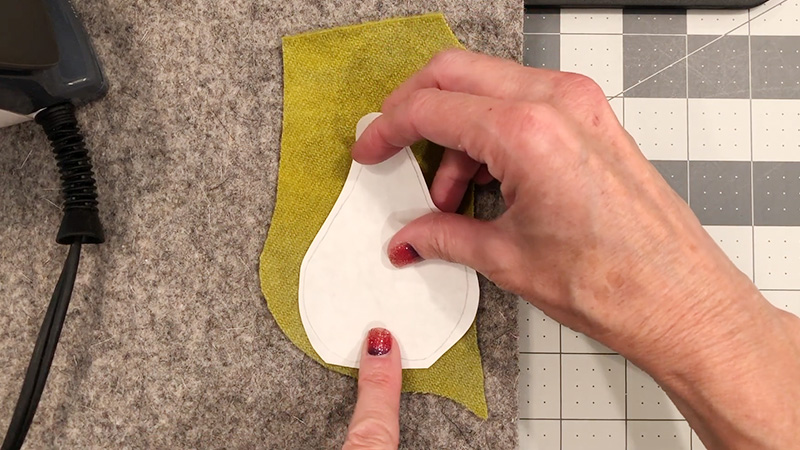
Adhere the Freezer Paper to the Fabric
Place each freezer paper pattern piece, shiny side down, onto your fabric in the designated location following your pattern’s layout instructions. Pay close attention to grainlines, fit markings, and other pattern notations.
Set your iron to a low to medium heat setting without steam. Press each freezer paper pattern piece onto the fabric for approximately 10 to 15 seconds.
The heat will cause the freezer paper to temporarily adhere to the fabric, preventing it from shifting during the cutting process.
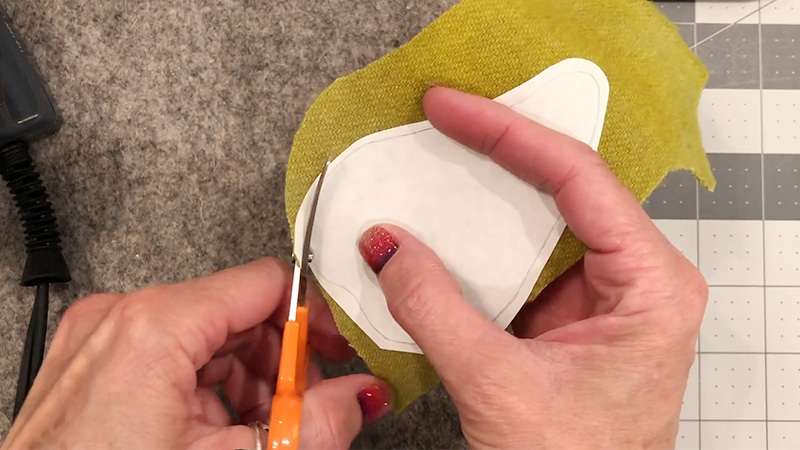
Cut the Fabric
With the freezer paper securely adhered to the fabric, use scissors or a rotary cutter and a cutting mat to precisely cut around the pattern pieces. The freezer paper provides stability and ensures your fabric pieces are cut accurately, aligning with the traced pattern lines.
Remove the Freezer Paper
Once you’ve finished cutting, gently peel off the freezer paper from the fabric. It should come off easily and cleanly, leaving your fabric pieces ready for sewing without any residue.
Begin Sewing
With your accurately cut fabric pieces, you’re now prepared to follow the sewing instructions in your pattern to assemble your project. The precise cutting achieved with the freezer paper method will contribute to a professional and polished finish to your sewing project.
What Are Some Common Mistakes to Avoid When Transferring a Sewing Pattern?
When transferring a sewing pattern, several common mistakes can potentially lead to inaccuracies and difficulties during the sewing process.
To ensure a smooth and error-free transfer, here are some common mistakes to avoid:
Pattern Preparation Neglect
Skipping the step of preparing your sewing pattern can lead to inaccuracies. Ensure your pattern is free from wrinkles, tears, or distortions before transferring.
Misalignment
Incorrectly aligning your pattern pieces on the fabric can result in misshapen or poorly fitting garment components. Always follow the layout instructions carefully.
Incomplete Tracing
Inadequate or faint tracing of pattern lines onto the fabric can cause confusion during cutting and sewing. Use a clear and consistent tracing method for better results.
Ignoring Grainlines
Neglecting to transfer grainline markings can affect the fabric’s drape and the fit of your garment. Pay attention to these critical indicators.
Not Marking Notches and Match Points
Forgetting to transfer essential markings such as notches and match points can make it challenging to assemble your project correctly. These markers are crucial for aligning pattern pieces accurately.
Using the Wrong Transfer Method
Selecting an inappropriate transfer method for your fabric type can lead to damage or distortion. Be mindful of the material you’re working with and choose a suitable method accordingly.
Overlooking Pattern Markings
Neglecting important pattern markings like dart placements, buttonhole locations, or pocket placements can result in sewing errors. Double-check and transfer all necessary markings accurately.
Rushing the Process
Taking shortcuts or rushing through the pattern transfer can lead to errors. It’s essential to follow each step of the transfer process carefully and patiently.
Neglecting Testing
Failing to test your chosen pattern transfer method on a scrap piece of fabric, especially with new techniques or unfamiliar materials, can lead to unexpected issues.
Improper Storage
Poor storage of sewing patterns can cause damage or loss. Organize and protect your patterns to ensure they remain in good condition for future use.
FAQs
While freezer paper is designed for multiple uses, it may lose some of its adhesion after several transfers. For the best results, consider using a fresh piece of freezer paper for intricate or important projects.
Yes, freezer paper is compatible with various fabric types, making it suitable for a wide range of sewing projects, from delicate garments to sturdy home decor items.
Yes, freezer paper can be used for transferring embroidery or appliqué designs to fabric. Simply trace your design onto the freezer paper and adhere it to the fabric for precise placement.
Yes, the shiny, wax-coated side of the freezer paper should face down onto the fabric when adhering to it. This side will temporarily stick to the fabric when heated.
To Recap
In the world of sewing, precision is the key to creating beautifully crafted garments and projects. The use of freezer paper as a pattern transfer tool has proven to be a valuable ally, providing a cost-effective, precise, and accessible solution for sewists of all levels.
Through this guide, we’ve explored the step-by-step process of transferring sewing patterns onto fabric with freezer paper, from the initial tracing to the final cut.
By incorporating this technique into your sewing repertoire, you not only enhance the accuracy of your projects but also gain a versatile tool that streamlines your creative process.
As you embark on your sewing endeavors, remember that the small details, like using freezer paper, can make a significant difference in achieving professional and polished results.
Happy sewing!
Leave a Reply