Navigating the intricacies of a sewing machine, especially a reliable workhorse like the Nelco, can greatly enhance your sewing experience.
It is paramount to understand how to troubleshoot common issues, oil the machine for smooth operation, and thread it correctly.
This guide will delve into comprehensive Nelco sewing machine troubleshooting, along with step-by-step instructions on proper oiling and threading techniques.
These fundamental skills will not only help rectify common hiccups but also extend the lifespan of your Nelco sewing machine, ensuring it remains a dependable companion for countless creative projects.
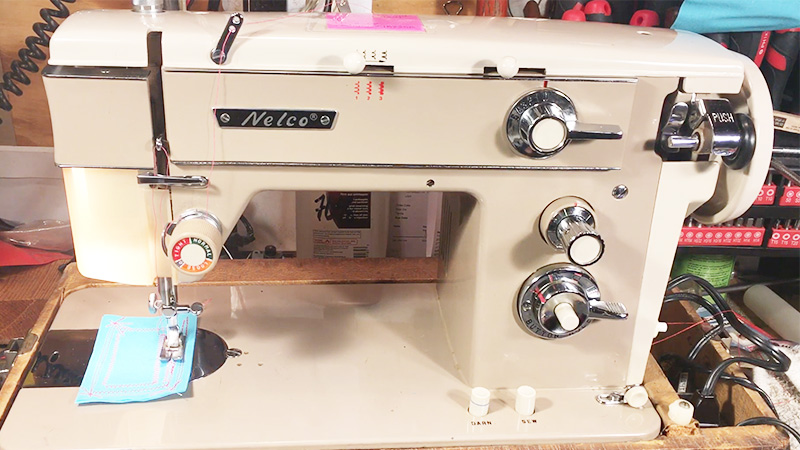
Nelco Sewing Machine Troubleshooting (How to Oil and Thread)
Nelco sewing machines have been trusted tools for sewing enthusiasts for decades. However, like any mechanical device, they may encounter issues from time to time.
Fortunately, many common problems can be resolved with some basic troubleshooting techniques.
In this guide, we’ll focus on two essential aspects of maintaining a Nelco sewing machine: oiling and threading.
Troubleshooting Nelco Sewing Machines
Nelco sewing machines are reliable tools, but like any machinery, they may encounter issues from time to time. Understanding how to troubleshoot common problems can save you time and frustration.
Here are some common issues you may encounter and how to address them:
Machine Not Starting
Ensure the machine is properly plugged in and the power source is functioning. Check the on/off switch and ensure it’s in the “on” position. Examine the foot pedal for any loose connections or damage. If needed, replace it.
Machine Jams
Use the correct type and size of needle for your sewing project. Check for any obstructions in the bobbin area or the feed dogs.
Remove lint, thread, or debris. Inspect the needle for damage and replace it if it’s bent or dull. Re-thread the machine correctly (see instructions below).
Uneven Stitching
Ensure that you’re using the appropriate thread and fabric combination. Check the upper and lower thread tensions. Adjust as needed for balanced stitching. Regularly clean the tension discs and the bobbin case area to prevent lint buildup.
Machine Making Unusual Noises
Investigate the source of the noise. Loose parts or foreign objects could be causing it. Check the bobbin and shuttle for any loose screws or misalignment.
Oiling Your Nelco Sewing Machine
Regular oiling is crucial to keep your sewing machine running smoothly. It helps reduce friction and prevents parts from wearing out prematurely.
Follow these steps to oil your Nelco sewing machine properly:
Gather Your Supplies
Before you begin, gather the necessary supplies for oiling your Nelco sewing machine. Ensure you have a bottle of machine oil specifically designed for sewing machines.
Additionally, have a clean, lint-free cloth ready for application. A small precision brush can be handy for reaching tight spots if available.
Prepare Your Machine
Safety is paramount. Start by turning off your sewing machine and unplugging it from the power source. This precaution ensures that there is no risk of accidental activation during maintenance.
Additionally, take a moment to remove any thread that might be currently threaded through the machine and the needle.
Locate Oil Points
Consult your machine’s manual to identify the specific areas that require lubrication. These points are typically highlighted in the manual.
Common areas include the bobbin case, needle bar, presser foot lever, and, if applicable, the shuttle race. Pay close attention to intricate parts that may benefit from a touch of oil.
Apply Oil
With the machine prepared, it’s time to apply the oil. Dip a corner of the clean cloth into the sewing machine oil. Alternatively, if using a brush, ensure it’s clean and lightly dipped in the oil.
Apply a small amount of oil to the designated points. Be meticulous and ensure you’re not over-oiling. Too much oil can lead to messy stitching and potential damage to your fabric.
Distribute the Oil
Turn on the sewing machine and set it to a slow speed without any fabric. This allows the machine to run, distributing the oil evenly throughout the internal components. It’s crucial to ensure that all necessary parts receive proper lubrication.
Wipe Off Excess Oil
Once the oil has been distributed, take a moment to inspect the oiled points. Use a clean section of the cloth to wipe off any excess oil. This step prevents any residual oil from transferring onto your fabric during sewing.
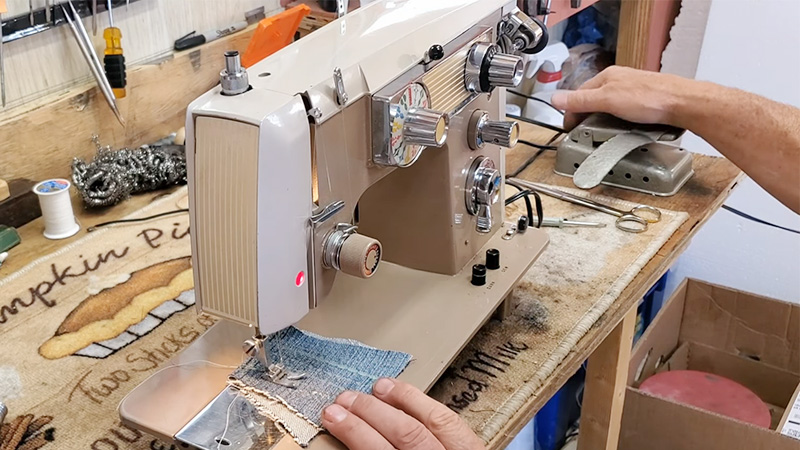
Threading Your Nelco Sewing Machine
Proper threading is essential for achieving smooth and even stitches.
Here’s a step-by-step guide to threading your Nelco sewing machine:
Consult the Manual
Refer to your sewing machine’s manual for specific threading instructions. This essential guide provides step-by-step directions tailored to your particular Nelco model.
If you don’t have the manual, finding digital copies online through official channels or sewing machine enthusiast communities is often possible.
Raise the Presser Foot
Before threading, raise the presser foot using the designated lever. This action releases the tension discs, allowing the thread to pass smoothly. It’s a simple step that can greatly facilitate the threading process.
Thread the Upper Thread
Begin by placing a spool of thread on the spool pin. Follow the path outlined in your manual as you guide the thread through any thread guides, tension discs, and the take-up lever.
Finally, thread the needle from the front to the back. If needed, use a needle threader to assist in this step.
Wind the Bobbin (if needed)
If you intend to use a bobbin thread, follow the winding instructions in your manual. Once the bobbin is properly wound, please insert it into the bobbin case and guide the thread through the specified channels.
Bring Up the Bobbin Thread
Hold the end of the upper thread with your left hand. With your right hand, gently turn the handwheel towards you.
This action lowers the needle and raises the bobbin thread through the needle plate. It’s important to ensure both threads are in position for sewing.
Pull Both Threads
Gently pull both the upper and bobbin threads towards the back of the machine. Leave a few inches of thread free. This ensures that both threads are properly engaged and ready for sewing.
Replace the Needle
Inspect the needle to ensure it’s in good condition. If necessary, replace it with a new or properly sharpened needle.
Ensure the needle is correctly oriented according to your sewing machine’s specifications, as outlined in the manual.
Maintenance Tips: Nelco Sewing Machine
Maintaining your Nelco sewing machine is essential to ensure its longevity and optimal performance.
Here are some maintenance tips to help you keep your machine in top condition:
Read the User Manual
Start by thoroughly reading and understanding your sewing machine’s user manual. It contains valuable information about your model, including maintenance guidelines and troubleshooting tips.
Regular Cleaning
After each sewing session, remove the needle plate and the bobbin case to clean out any accumulated lint, thread, and debris. A small brush or compressed air can be helpful for this.
Clean the tension discs and thread guides to prevent thread buildup, which can affect stitch quality.
Oil Your Machine
Refer to your user manual to identify the recommended oiling points on your sewing machine. Common points include the shuttle race, needle bar, and the main shaft.
Use sewing machine oil specifically designed for this purpose, as other oils can damage your machine. Oil your machine regularly, but avoid over-oiling, as excess oil can attract dust and lint.
Thread Properly
Always follow the correct threading sequence as outlined in your user manual. Incorrect threading can lead to stitching issues and thread jams. Ensure the presser foot is raised when threading to release tension on the thread.
Use Quality Needles and Thread
Choose the appropriate needle size and type for your fabric and project. Dull or bent needles can cause sewing problems.
Use high-quality thread that matches your project’s needs to prevent thread breakage and tension issues.
Replace Needles Regularly
Needles can become dull or bent over time, leading to poor stitch quality and fabric damage. Replace the needle after every project or sooner if needed.
Check Bobbin Tension
Ensure that the bobbin tension is correctly set according to your user manual. Improper bobbin tension can result in stitching problems.
Keep the Machine Covered
When not in use, cover your sewing machine to protect it from dust, debris, and sunlight, which can cause yellowing and deterioration of plastic parts.
Store with Care
If you need to store your machine for an extended period, clean it thoroughly, remove the needle, and place it in a protective case or cover to prevent dust and damage.
Regular Servicing
Consider having your sewing machine professionally serviced annually or as your user manual recommends. Experienced technicians can identify and address issues you might miss.
Avoid Forcing the Machine
Suppose you encounter resistance while sewing; stop immediately. Forcing the machine can lead to damage. Investigate the cause of the resistance and resolve it before continuing.
When to Seek Professional Help?
Prevent further damage and ensure that it continues to function properly.
Here are some situations in which it’s advisable to consult a professional:
Persistent Mechanical Issues
When you encounter recurring problems, such as tension issues, bobbin jams, or unusual noises, despite attempting basic troubleshooting, it’s best to consult a professional. They have the expertise to diagnose and fix more complex mechanical problems.
Electrical Problems
When you suspect an issue with the electrical components of your sewing machine, such as a faulty motor or wiring, it’s crucial to seek professional help. Attempting to fix electrical problems without expertise can be dangerous.
Timing and Alignment Issues
When the timing of your sewing machine is off, it can result in skipped stitches, broken needles, or other sewing malfunctions. Correcting timing and alignment requires specialized knowledge and tools.
Motor or Drive Belt Replacement
When you suspect an issue with the motor or drive belt, it’s best to have a professional technician inspect and replace these components. These parts are integral to the machine’s operation and should be handled by experts.
Specialized Repairs
For advanced features or specialized attachments unique to your Nelco sewing machine, seeking professional help is recommended. These components may require specific expertise to repair or replace.
In-Depth Cleaning and Lubrication
While the user can perform basic cleaning and oiling, thorough cleaning and lubrication of internal components may require professional attention. This ensures that all parts are properly maintained.
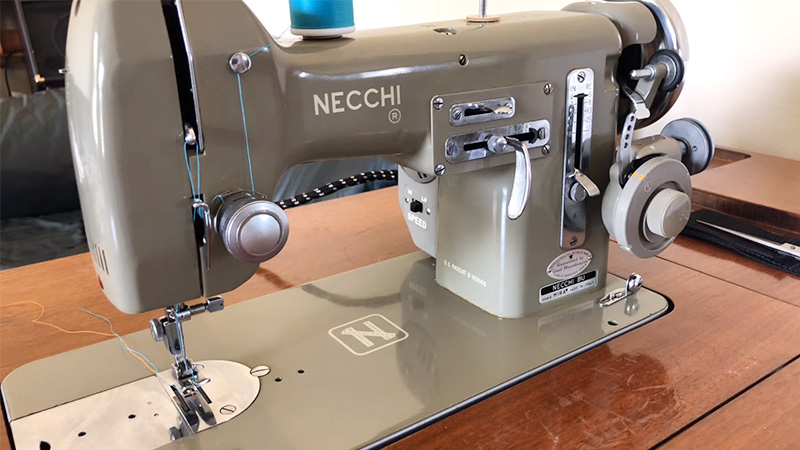
Vintage or Antique Machines
When you own a vintage or antique Nelco sewing machine, it’s advisable to consult a professional who specializes in restoring and maintaining older models. They will have the knowledge and experience to work with these unique machines.
Warranty Considerations
If your sewing machine is still under warranty, attempting DIY repairs may void the warranty. It’s recommended to consult the manufacturer or an authorized service center for any covered repairs.
Unusual Noises or Smells
When your sewing machine emits unusual noises or odors, it may indicate a more serious underlying issue. A professional can identify and address these problems safely.
Lack of User Manual
When you’ve acquired a used Nelco sewing machine without a user manual, seeking professional help is advisable for correct setup, maintenance, and troubleshooting.
FAQs
Why is oiling important for my Nelco sewing machine?
Oiling your Nelco sewing machine is crucial to reduce friction and prevent wear and tear on moving parts, ensuring its longevity and smooth operation.
How often should I oil my Nelco sewing machine?
The frequency of oiling depends on usage. As a general guideline, oil it after every 8 to 10 hours of sewing or as your user manual recommends.
Why is proper threading essential for sewing success?
Correct threading ensures the machine forms even-balanced stitches and prevents issues like thread breakage, jams, and tension problems.
What should I do if my Nelco sewing machine keeps jamming or breaking needles?
Check for obstructions in the bobbin area, use the correct needle type and size, and ensure proper threading. If issues persist, seek professional help.
Can I use oil for my Nelco sewing machine, or is sewing machine oil necessary?
Using sewing machine oil is essential because it’s formulated specifically for sewing machines. Other oils can damage the machine or attract dust and lint.
Wrap Up
You’ve gained invaluable skills to maintain and optimize your sewing companion by mastering the art of Nelco sewing machine troubleshooting, oiling, and threading.
By addressing common issues, you’ve empowered yourself to overcome hurdles and enjoy seamless stitching.
Properly oiling the machine ensures its longevity and smooth performance, while correct threading guarantees impeccable stitches every time. Remember, a well-maintained sewing machine is a tool and a partner in your creative endeavors.
With these skills, you can embark on a journey of limitless sewing possibilities.
Leave a Reply