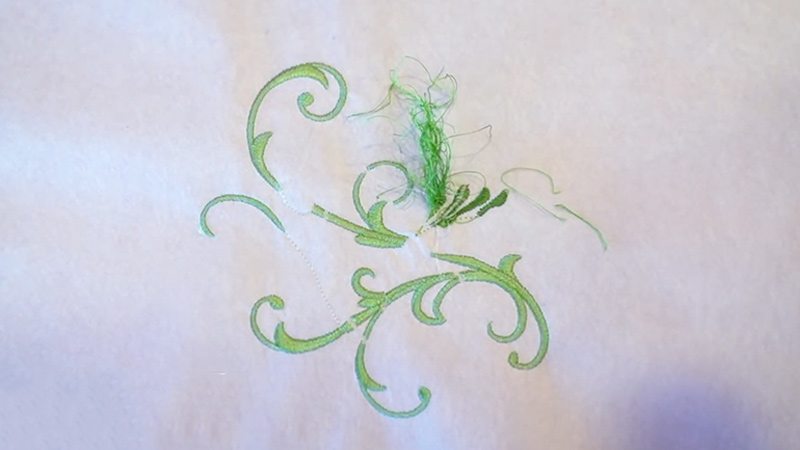
Bird nesting in embroidery, a frustrating phenomenon, occurs when thread bunches beneath the fabric, resembling a tangled bird’s nest. Understanding the causes of this issue is crucial for embroiderers seeking seamless results.
Common culprits include improper threading, incorrect tension settings, low-quality materials, and inadequate machine maintenance.
The delicate balance of these elements can lead to stitches going awry, impacting the overall quality and aesthetics of the embroidery project.
This introduction sets the stage for a comprehensive exploration of the factors contributing to bird nesting and provides a foundation for effective troubleshooting and prevention strategies in the art of embroidery.
What Is Bird Nesting in Embroidery?
Bird nesting in embroidery refers to the tangling of thread on the underside of fabric, resembling a bird’s nest. This frustrating issue occurs during machine embroidery when the thread bunches up, leading to uneven stitching and potential project ruin.
Causes include improper threading, tension issues, low-quality materials, bobbin and needle problems, inadequate machine maintenance, and poor fabric stabilization.
Preventive measures involve meticulous threading, adjusting tension settings, using quality materials, regular machine maintenance, and ensuring proper fabric hooping and stabilization.
Promptly addressing any issues during embroidery helps maintain smooth and flawless stitching.
What Causes Bird Nesting in Embroidery?
Bird nesting in embroidery, also known as thread nesting or thread bird’s nest, occurs when the thread on the underside of the fabric becomes tangled, forming a messy clump resembling a bird’s nest.
Several factors can contribute to this issue:
Incorrect Threading
One of the most common causes is improper threading of the embroidery machine. Ensure that the thread is correctly threaded through the machine and properly loaded in the bobbin.
Tension Issues
Incorrect tension settings for the thread or fabric can lead to bird nesting. Tension should be adjusted based on the type of thread and fabric you are using.
Bobbin Problems
A poorly wound bobbin, incorrect insertion, or a malfunctioning bobbin case can cause bird nesting. Make sure the bobbin is loaded correctly and is in good condition.
Thread Quality
Low-quality or damaged thread can contribute to bird nesting. Check the thread for any knots, tangles, or imperfections before starting your embroidery project.
Needle Issues
A dull, bent, or incorrect needle can lead to bird nesting. Ensure you are using the right type and size of needle for your fabric and thread, and replace it if it’s worn.
Machine Maintenance
Lack of regular cleaning and maintenance can result in lint buildup, affecting the proper functioning of the machine. Clean your machine regularly and follow the manufacturer’s maintenance guidelines.
Stabilization Problems
If the fabric is not properly hooped or stabilized, it may move during embroidery, causing uneven tension and bird nesting. Ensure your fabric is securely hooped and stabilized.
Software or Design Issues
Occasionally, issues with the embroidery design or software can cause bird nesting. Check your design file for any irregularities or errors.
Thread Breaks
Sudden thread breaks during embroidery can contribute to bird nesting. Ensure that your thread is not too old, and monitor for any breaks during the stitching process.
Machine Speed
Running the machine at excessively high speeds can sometimes lead to bird nesting. Adjust the speed settings according to the requirements of your embroidery project.
Consequences of Birds Nesting in Embroidery
Bird nesting in embroidery can have several consequences, affecting the overall quality and appearance of your embroidered projects. Some of the consequences include:
Stitch Quality
Bird nesting can result in uneven and poorly formed stitches. This compromises the overall quality of the embroidery, making it look messy and unprofessional.
Fabric Damage
The tangled thread from bird nesting can cause snags and pulls in the fabric. This damage may be irreversible and affect the integrity of the embroidered piece.
Wasted Materials
When bird nesting occurs, you may need to discard the portion of the project affected by the tangles. This leads to material wastage, including both the fabric and the thread.
Time Wastage
Dealing with bird nesting interrupts the embroidery process, leading to wasted time and effort. You may need to stop, troubleshoot the issue, and then restart the embroidery, which can be time-consuming.
Frustration and Stress
Dealing with consistent bird nesting issues can be frustrating and stressful for embroiderers. It can undermine the enjoyment of the craft and discourage individuals from pursuing further embroidery projects.
Machine Wear and Tear
The increased friction and strain caused by bird nesting can contribute to accelerated wear and tear on the embroidery machine. Components such as the needle, bobbin case, and hook may experience more stress, leading to the need for more frequent maintenance or repairs.
Inconsistent Appearance
Bird nesting can result in inconsistent tension and thread distribution, leading to variations in the appearance of the embroidery. This inconsistency is noticeable and detracts from the overall aesthetic of the design.
Project Failure
In severe cases, persistent bird nesting issues may lead to project failure. If the embroidery cannot be salvaged or if the frustration becomes too overwhelming, individuals may abandon the project altogether.
How To Prevent Bird Nesting in Embroidery?
Preventing bird nesting in embroidery involves a combination of proper machine setup, regular maintenance, and attention to detail.
Here are some steps you can take to minimize the likelihood of bird nesting:
Correct Threading
Ensure that both the upper thread and the bobbin are threaded correctly. Follow the machine manufacturer’s guidelines for threading, and make sure the thread is properly guided through all necessary points.
Proper Tension Settings
Adjust the tension settings on your machine according to the type of fabric and thread you are using. Experiment with small test stitches to find the optimal tension for your specific project.
Use Quality Materials
Invest in high-quality embroidery thread, needles, and bobbins. Poor-quality materials can contribute to bird nesting. Inspect the thread for any defects before use.
Regular Machine Maintenance
Clean and oil your embroidery machine regularly to prevent lint buildup. Check and replace any worn-out or damaged parts, such as needles, bobbin cases, or hooks.
Check Bobbin Winding
Ensure that the bobbin is wound evenly and correctly. Unevenly wound bobbins can lead to tension issues and bird nesting.
Choose the Right Needle
Use the correct type and size of needle for your embroidery project. A sharp, straight needle is essential for preventing skipped stitches and bird nesting.
Stabilize the Fabric
Hoop and stabilize your fabric securely. Proper stabilization prevents the fabric from shifting during embroidery, reducing the risk of bird nesting.
Monitor Thread Quality
Check the quality of your embroidery thread regularly. Avoid using old or damaged thread, as it can lead to issues like breakage and nesting.
Avoid High Machine Speeds
Running the machine at excessively high speeds may contribute to bird nesting. Adjust the machine speed according to the complexity of the design and the type of fabric.
Regularly Test Stitch
Before starting a large embroidery project, run a few test stitches on a scrap piece of fabric. This allows you to check for any tension or threading issues before working on your main project.
Use Quality Embroidery Designs
Ensure that the embroidery design files are of high quality and compatible with your machine. Poorly digitized designs may contribute to stitching problems.
Address Issues Promptly
If you notice any issues during embroidery, such as skipped stitches or tension problems, stop the machine immediately and address the issue before continuing.
How To Fix Bird Nesting in Embroidery?
Fixing bird nesting in embroidery requires a systematic approach to identify and address the underlying causes. Here are steps you can take to troubleshoot and fix bird nesting issues:
Stop the Machine
Pause or stop the embroidery machine immediately when you notice bird nesting.
Cut Away Excess Thread
Carefully cut away any excess thread around the bird nesting area, avoiding damage to the fabric.
Check Thread Tension
Adjust the tension settings on your machine. Experiment with small test stitches on a scrap piece of fabric to find the optimal tension for the specific thread and fabric you are using.
Re-thread the Machine
Carefully re-thread both the upper thread and the bobbin following the machine’s threading guide. Ensure that the thread is correctly loaded in the bobbin.
Check the Bobbin
Examine the bobbin for proper winding, correct insertion, and any signs of damage. Rewind the bobbin if necessary and ensure it is loaded correctly into the bobbin case.
Inspect the Needle
Check the needle for any signs of damage, dullness, or bending. Replace the needle with a new one that is appropriate for your fabric and thread.
Examine the Bobbin Case and Hook
Inspect the bobbin case and hook for any damage or wear. Clean any lint or debris that may have accumulated in these areas.
Check Fabric Stabilization
Ensure that the fabric is properly hooped and stabilized. If the fabric shifts during embroidery, it can contribute to bird nesting.
Verify Thread Quality
Examine the quality of the thread. Ensure it is not old, damaged, or of low quality. Use a good-quality thread that is suitable for your machine and project.
Review Design and Software
Check your embroidery design file for any errors or irregularities. If possible, re-digitize the design or use a different design to see if the issue persists.
Adjust Machine Speed
If you are running the machine at high speeds, consider reducing the speed. Slower speeds can sometimes help prevent bird nesting.
Perform Test Stitches
Before resuming your embroidery project, run a few test stitches on a scrap piece of fabric to ensure that the bird nesting issue has been resolved.
FAQs
Can the fabric type impact bird nesting in embroidery?
Yes, the type of fabric matters; using appropriate stabilizers and hooping techniques for different fabrics helps prevent bird nesting.
How does humidity affect embroidery and bird nesting?
High humidity can lead to thread swelling, affecting tension and potentially causing bird nesting; control humidity for optimal embroidery results.
Can the age of the thread contribute to bird nesting?
Yes, old or expired thread is more prone to breakage and tangling, increasing the likelihood of bird nesting during embroidery.
How does thread lubrication impact bird nesting?
Lack of lubrication on the thread can increase friction, leading to bird nesting; use appropriate thread lubricants for smoother embroidery.
Can digitizing errors in embroidery designs cause bird nesting?
Yes, poorly digitized designs may result in erratic stitching and contribute to bird nesting; use well-designed digitized files for optimal results.
To Recap
Unraveling the mystery of bird nesting in embroidery sheds light on the intricate interplay of machine mechanics, material quality, and meticulous technique.
Identifying causes such as improper threading, tension issues, and neglecting maintenance allows for proactive solutions.
By adhering to best practices, including correct threading, using quality materials, and regular machine upkeep, embroiderers can significantly minimize the occurrence of bird nesting.
This understanding empowers practitioners to troubleshoot effectively, ensuring smooth and flawless stitching.
As the thread gracefully weaves through fabric, mastering the prevention of bird nesting becomes an essential skill, promising a more enjoyable and rewarding embroidery experience with each carefully crafted stitch.
Leave a Reply