Embarking on a creative journey with your Viking Designer 1 sewing machine is an exciting endeavor, but navigating the realm of file formats can sometimes feel like traversing uncharted waters.
Whether you’re a seasoned seamstress or just beginning to explore the world of embroidery and stitching, understanding the file format compatibility of your machine is essential for bringing your designs to life.
In this guide on what file format the Viking Designer 1 sewing machine is, we’ll delve into the intricate details of the file format supported by the Viking Designer 1 sewing machine.
From uncovering the nuances of its capabilities to providing practical tips for optimizing your digital designs, we’ll equip you with the knowledge needed to seamlessly integrate your creative vision with the cutting-edge technology of your Viking Designer 1.
So, let’s embark on this expedition together as we unveil the secrets behind the file format of the Viking Designer 1 sewing machine.
What File Format Is Viking Designer 1 Sewing Machine?
If you own a Husqvarna Viking Designer 1 sewing machine, understanding its supported file formats is crucial for unleashing its full potential.
To seamlessly integrate digital designs into your sewing projects, knowing which file formats are compatible with your machine is essential.
Understanding the Husqvarna Viking Designer 1 Sewing Machine
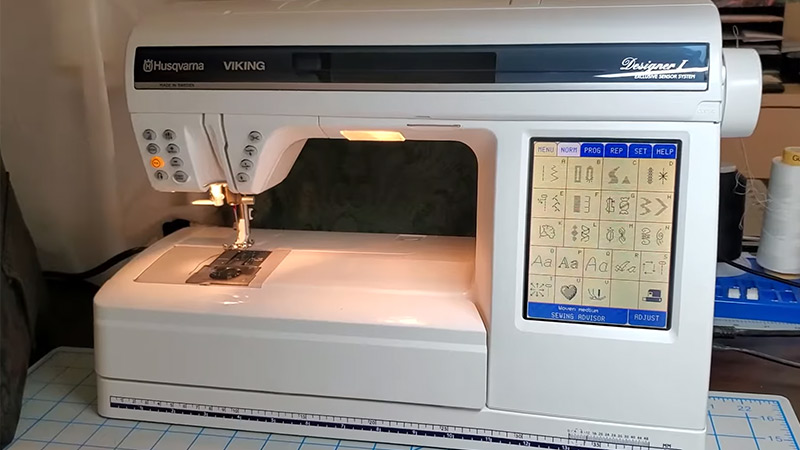
The Husqvarna Viking Designer 1 is a versatile and innovative sewing machine that caters to the needs of both beginners and experienced sewists.
With its wide range of features and functionalities, this machine can handle various sewing tasks, from basic stitching to intricate embroidery.
One of the standout features of the Designer 1 is its embroidery capabilities. Equipped with built-in embroidery designs and the ability to import custom designs, this machine opens up a world of creative possibilities for users.
Supported File Formats
To make the most of the embroidery features on the Husqvarna Viking Designer 1, it’s important to know which file formats are compatible with the machine. Here are the primary file formats supported by the Designer 1:
HUS
The HUS file format is the native format used by Husqvarna Viking machines, including the Designer 1. This format contains embroidery designs and can be directly read by the machine for stitching.
VP3
Another commonly supported file format for the Designer 1 is VP3. This format is widely used in the embroidery community and compatible with various software programs.
VIP
VIP is another file format that Designer 1 can recognize and stitch. It’s commonly used for storing embroidery designs and is supported by many software applications.
DST
The DST file format is also compatible with the Designer 1 sewing machine. It’s a popular format used for commercial embroidery and is supported by most embroidery software programs.
EXP
EXP is a file format commonly used by embroidery machines, including the Designer 1. It contains design data that the machine can interpret for stitching.
Tips for Using File Formats with the Designer 1
When working with embroidery designs on the Husqvarna Viking Designer 1, keep the following tips in mind:
Check the Compatibility
Before transferring a design to your Designer 1, save it in a compatible file format. Refer to the machine’s user manual for a list of supported formats.
Use Embroidery Software
Invest in embroidery software that converts designs into compatible file formats if needed. This gives you more flexibility in sourcing and customizing designs for your projects.
Test Stitch
Before stitching a design on your project, testing it on a scrap piece of fabric is a good idea. This allows you to make any necessary adjustments to thread colors, stitch density, and design placement before committing to the final piece.
Maintain Machine Compatibility
Keep your Designer 1 sewing machine well-maintained to ensure optimal performance when stitching embroidery designs. Regular cleaning and servicing can help prevent thread tension, needle alignment, and hoop stability issues.
How to Use the Husqvarna Viking Designer 1 USB Upgrade Kit?
If you’re a proud owner of the Husqvarna Viking Designer 1 sewing machine, you already know the power and versatility it offers for your sewing and embroidery projects.
However, to ensure that your machine stays up-to-date with the latest features and capabilities, it’s essential to leverage tools like the Husqvarna Viking Designer 1 USB Upgrade Kit.
Following the step-by-step instructions outlined in this guide, you can easily install firmware updates, access new embroidery designs, and optimize your sewing experience.
Step 1: Download Firmware Updates (If Available)
Check the Husqvarna Viking website or contact your local dealer to see if any firmware updates are available for your Designer 1 sewing machine.
If updates are available, download them onto your computer and follow any provided instructions for installation.
Step 2: Prepare the USB Drive
Insert the USB drive included in the Upgrade Kit into your computer’s USB port. Create a new folder on the USB drive and label it “Designer 1 Upgrade” or a similar name for easy identification.
Step 3: Transfer Embroidery Designs (If Desired)
If the Upgrade Kit includes new embroidery designs, transfer them to the USB drive by copying and pasting the design files into the “Designer 1 Upgrade” folder. Ensure that the designs are saved in a compatible file format (e.g., HUS, VP3, VIP) for your Designer 1 sewing machine.
Step 4: Safely Eject the USB Drive
Once you’ve transferred the firmware updates and any embroidery designs to the USB drive, safely eject the drive from your computer to avoid data corruption.
Step 5: Insert the USB Drive into the Designer 1
Turn off your Designer 1 sewing machine and locate the USB port, usually on the machine’s side or back. Insert the USB drive into the port, ensuring it is securely connected.
Step 6: Access the Upgrade Menu
Turn on your Designer 1 sewing machine and navigate to the main menu. Look for an option related to firmware updates or machine upgrades. Select this option to access the upgrade menu.
Step 7: Install Firmware Updates
If firmware updates are available, follow the on-screen instructions to install them onto your Designer 1 sewing machine. This process may take several minutes, so be patient and avoid interrupting the upgrade process.
Step 8: Access New Embroidery Designs (If Applicable)
If you transferred new embroidery designs to the USB drive, navigate to the embroidery design menu on your Designer 1 sewing machine. Use the machine’s controls to browse and select the desired designs for stitching.
Once you’ve installed any firmware updates and accessed new embroidery designs, safely remove the USB drive from your Designer 1 sewing machine.
Tips for Success
To ensure a smooth and successful upgrade process, following some essential tips for success is crucial.
Backup Your Data
Before diving into firmware updates, take a moment to safeguard your valuable data. Backing up any custom settings or cherished embroidery designs stored on your Designer 1 sewing machine can prevent potential loss during the upgrade process.
Follow Instructions Carefully
The key to a successful upgrade lies in attention to detail. Always consult the documentation provided with the USB Upgrade Kit and follow the instructions meticulously.
Whether installing firmware updates or transferring new embroidery designs, adhering to the prescribed steps ensures a seamless process.
Keep Your Machine Updated
Stay proactive in maintaining the performance and functionality of your Designer 1 sewing machine by regularly checking for updates.
Firmware updates introduce new features and improvements and address any potential issues or bugs.
Similarly, looking for new embroidery designs ensures a fresh and diverse selection to fuel your creative projects.
FAQs
Can I use the USB Upgrade Kit with any Husqvarna Viking sewing machine model?
The USB Upgrade Kit is designed explicitly for the Husqvarna Viking Designer 1 sewing machine. While other models may have similar features, checking compatibility before using the upgrade kit is essential.
How often should I check for firmware updates for my Designer 1 sewing machine?
Regularly checking for firmware updates’s a good practice to ensure that your Designer 1 remains optimized for performance and functionality. Aim to check for updates every few months or whenever you notice new features being released.
Can I transfer embroidery designs from my computer to the Designer 1 sewing machine using the USB Upgrade Kit?
The USB Upgrade Kit allows you to transfer embroidery designs from your computer to the Designer 1 sewing machine via a USB drive. Save the designs to the USB drive and follow the instructions provided with the kit to upload them to your machine.
Will installing firmware updates erase my custom settings on the Designer 1 sewing machine?
Firmware updates typically do not affect custom settings on the Designer 1 sewing machine. However, as a precautionary measure, it’s always a good idea to back up your settings before performing any updates.
How can I troubleshoot issues with the USB Upgrade Kit if I encounter difficulties during the upgrade process?
If you encounter any difficulties or issues with the USB Upgrade Kit, refer to the documentation for troubleshooting tips. Contact customer support or your local Husqvarna Viking dealer for assistance and guidance.
Conclusion
As we conclude our exploration into the file format compatibility of the Viking Designer 1 sewing machine, we hope you feel empowered and informed to embark on your creative endeavors with confidence.
By understanding the intricacies of the machine’s supported file formats, you can unlock a world of possibilities for your stitching and embroidery projects.
Whether importing designs from external sources or creating your own masterpieces from scratch, knowing which file formats are compatible with your Viking Designer 1 ensures a seamless and efficient workflow.
Always refer to the machine’s user manual for specific instructions and recommendations tailored to your needs.
With the proper knowledge and tools, there’s no limit to what you can achieve with your Viking Designer 1 sewing machine.
So, embrace your creativity, experiment fearlessly, and let your imagination soar as you stitch together a tapestry of endless possibilities.
Leave a Reply