A sewing clapper, a seemingly unassuming wooden tool, plays a crucial role in the sewing world, elevating the quality and precision of sewing projects. This versatile instrument with a flat surface and handle is more than meets the eye.
It transforms the mundane task of pressing seams into a work of art when meticulously wielded. The clapper’s primary function is to ensure that seams and hems lay flat and well-pressed, but its benefits extend far beyond.
It’s a guardian of delicate fabrics, a master of creating sharp creases, and an essential companion for achieving professional results in sewing. In this article, we’ll explore the various facets of what a clapper is used for in sewing.
What Is a Clapper in Sewing?
A clapper in sewing is a wooden tool with a flat surface and handle used to achieve well-pressed, flat seams. After sewing a seam and pressing it with an iron, the clapper is placed over it.
It absorbs heat and moisture when pressed down, allowing the fabric fibers to set, resulting in a crisp, smooth seam. It’s beneficial for bulky or heat-sensitive fabrics, preventing fabric damage and speeding up the cooling process.
The clapper is essential for creating professional-looking, polished sewing projects, making it a valuable tool in every sewist’s toolkit.
What Is A Clapper Used For In Sewing?
A clapper is an indispensable tool in sewing, often regarded as a seamstress’s best friend. This unassuming wooden block with a handle is vital in achieving well-pressed, flat seams and enhancing the quality of sewing projects.
Here’s a closer look at what a clapper is used for in sewing:
Seam Flattening
One of the primary functions of a clapper is to ensure seams lie perfectly flat and smooth. After sewing a seam, setting the stitches by pressing them with an iron is essential. However, fabrics can be stubborn, and ironing alone might not suffice.
This is where the clapper steps in. You open the seam with your fingers, place it on a hard surface, and then position the clapper over the seam.
As you press down firmly, the clapper absorbs the heat and moisture from the iron, effectively “flattening” the seam, making it appear crisp and well-defined.
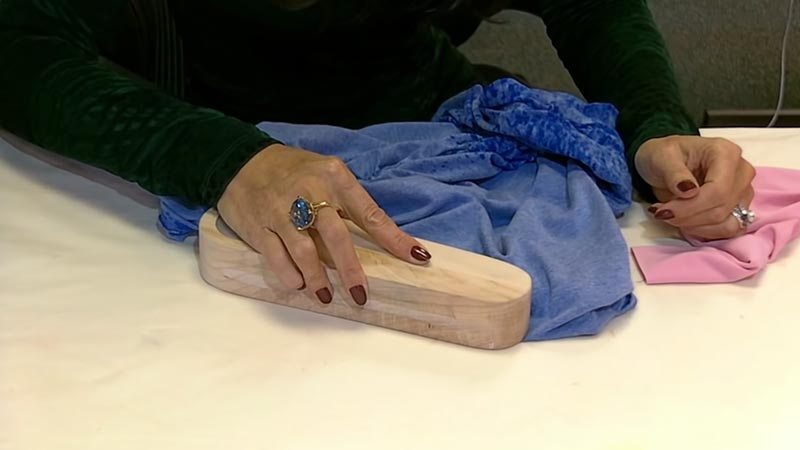
Taming Bulky Fabrics
Fabrics with some heft or thickness, like denim, wool, or multiple layers of fabric, can be challenging to press with an iron. The weight and absorbent nature of the clapper help compress the fabric fibers, eliminating wrinkles and folds and resulting in a smoother and flatter seam.
Protecting Delicate Fabrics
Some heat-sensitive fabrics can be damaged by direct contact with a hot iron. The clapper acts as a safeguard, preventing the iron from touching the fabric directly.
This reduces the risk of shiny or scorched spots on delicate materials, such as silks or synthetic fabrics.
Sharper Creases and Pleats
The clapper’s flat surface and weight make it perfect for enhancing creases and wrinkles in garments. After folding the fabric along the desired lines, you place the clapper over the fold to help create more pronounced, long-lasting creases and wrinkles.
Speeding Up the Cooling Process
The clapper accelerates the cooling process of the fabric after ironing. This is especially beneficial when working on multiple seams or pieces quickly, allowing you to move efficiently through your sewing projects.
Why Is a Clapper Important in Sewing Projects?
A clapper is a seemingly simple yet indispensable tool in the sewing world, and its importance in sewing projects cannot be overstated.
Here are the key reasons why a clapper is vital in sewing projects:
Enhanced Fabric Control
A clapper provides an extra level of control when pressing seams. By pressing the fabric with a clapper, you have greater control over the shaping and setting of the fabric, ensuring that it behaves as desired.
Professional Finish
A clapper helps achieve a professional finish in sewing projects. It’s precious when working on garments or items that require a crisp, polished appearance, such as formal wear, tailored clothing, or items for special occasions.
Time Efficiency
Using a clapper can save time in the sewing process. It reduces the need for multiple passes with the iron, as it helps set the stitches and flatten the fabric in one go, speeding up the sewing process.
Long-Lasting Results
The use of a clapper results in long-lasting, well-defined seams. This ensures that your sewing projects maintain quality and appearance, even after multiple washes and wears.
Professional-Looking Pleats and Darts
When sewing pleats and darts, a clapper is invaluable for achieving sharp and professional-looking results. It helps create precise and well-defined folds, enhancing the overall look of your garments.
Reduced Fabric Distortion
Some fabrics can become distorted or stretched when exposed to heat from an iron. A clapper minimizes this risk by drawing moisture away from the fabric, reducing the chances of distortion.
Wrinkle Removal
In addition to seam pressing, a clapper can remove wrinkles and creases from the fabric before cutting and sewing. This ensures the fabric is in its best condition before you start your sewing project.
Enhanced Accuracy
Using a clapper can improve the accuracy of your sewing. It helps ensure that seams are even and straight, and it aids in achieving precise seam allowances and hems.
How to Effectively Use a Clapper in Sewing?
Using a clapper in sewing is a simple and effective technique to achieve well-pressed, professional-looking seams and hems.
Here’s a step-by-step guide on how to use a clapper in your sewing projects:
Materials You’ll Need
- Sewing project with seams or hems that need pressing
- Iron and ironing board
- A wooden clapper
Steps:
Sew Your Seams or Hems
Begin by sewing the seams or hems of your project. Ensure that the stitching is secure and the fabric is ready for pressing.
Prepare Your Iron
Heat your iron to the appropriate temperature for your working fabric. Consult the fabric’s care label or guidelines to determine the correct temperature setting.
Press the Seam or Hem
Lay your fabric on the ironing board with the seam or hem facing up. Use the heated iron to press the seam or hem, ensuring it’s as flat as possible. Apply even pressure along the seam, moving from one end to another. You can use steam if necessary for the fabric type.
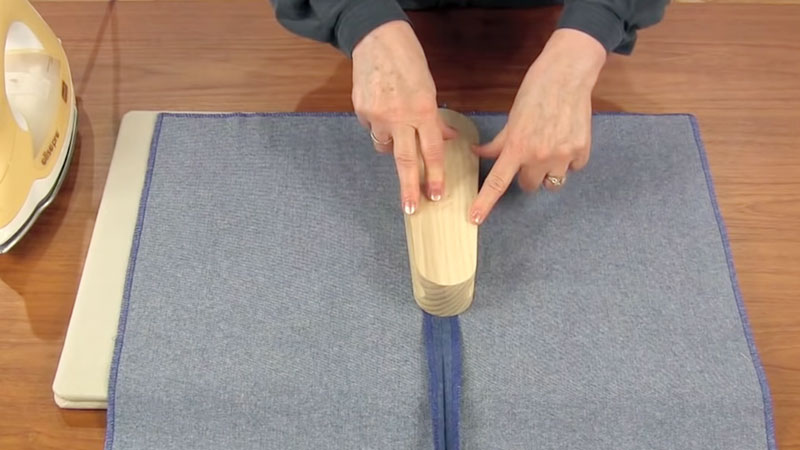
Place the Clapper
After pressing the seam or hem with the iron, quickly position the wooden clapper over the pressed area. The flat surface of the clapper should completely cover the seam or hem.
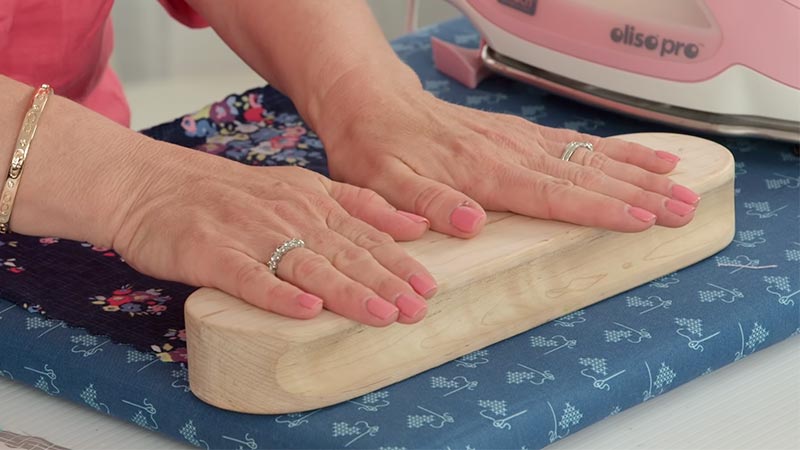
Apply Firm Pressure
Press firmly on the clapper, ensuring constant pressure over the seam or hem. The weight and flat surface of the clapper will help absorb the heat and moisture from the fabric.
Hold for a Few Seconds
Keep the clapper in place for approximately 15-30 seconds. This duration allows the wooden clapper to effectively absorb the heat and moisture, setting the fabric fibers and flattening the seam or hem.
Remove the Clapper
Carefully lift the clapper away from the fabric. You should notice that the seam or hem is now much flatter and crisper.
Allow the Fabric to Cool
Let the fabric cool naturally for a few seconds. The stitches and fabric fibers will become more secure as the fabric cools, ensuring the seam or hem remains flat.
Repeat as Needed
If your sewing project includes multiple seams or hems, repeat the clapper process for each one. Using a clapper helps you achieve consistent, professional results throughout your project.
Complete Your Sewing Project
With your seams or hems well-pressed and flat, please continue with the construction of your sewing project, whether it’s a garment, quilt, or any other item. The use of a clapper contributes to a polished and professional finish.
FAQs
Is a clapper suitable for both beginners and experienced sewers?
Yes, a clapper is a valuable tool for sewers of all levels. It’s easy to use and can significantly improve the quality of sewing projects.
Can a sewing clapper be used for quilting projects as well?
Yes, a clapper is a versatile tool that can be used for quilting projects to achieve well-pressed seams and enhance the quality of quilted items.
What types of fabrics benefit the most from using a clapper in sewing?
Clappers are particularly beneficial for bulky or heat-sensitive fabrics. They can also improve the results with various fabric types, including cotton, denim, and wool.
Can a clapper be used with delicate fabrics in sewing?
Yes, a clapper can protect delicate fabrics from heat damage during pressing, making it a versatile tool for various fabric types.
Are there alternatives to using a clapper in sewing?
While clappers are highly effective, some sewers use improvised alternatives like wooden dowels or heavy wooden objects to achieve similar results. However, a dedicated clapper is designed for the purpose and often yields better results.
To Recap
The sewing clapper is a humble yet indispensable tool in the hands of every dedicated sewist. Its ability to transform ordinary seams into crisp, flawless lines and its versatility in handling fabrics of all types make it a vital addition to any sewing toolkit.
Beyond achieving impeccably flat seams, the clapper protects delicate materials, is an enhancer of pleats and darts, and is a time-saving companion for bulkier fabrics. Its role in speeding the cooling process and maintaining stitch accuracy cannot be understated.
In the craft of sewing, where attention to detail is paramount, the clapper is a symbol of precision and professionalism, ensuring that your creations are nothing short of perfection.
Leave a Reply