Embroidery is a craft that’s stood the test of time, and one technique often overlooked is basting. It’s a simple yet crucial step in creating stunning embroidery designs.
Basting in embroidery is a guideline, ensuring the design stays put and doesn’t shift during stitching.
Whether you’re a seasoned embroiderer or a beginner dipping your toes into the craft, understanding basting is critical.
It’s often the difference between a design that’s perfectly in place and one that’s gone awry. So, let’s dive into the world of basting embroidery and see what it’s all about.
In the world of embroidery, basting is your secret weapon. A temporary stitch holds your fabric and design together before the work begins. It’s like a roadmap guiding you to your final destination – a beautifully completed embroidery piece.
What is Basting Embroidery?
Diving deeper into the topic, basting embroidery is a temporary running stitch that will guide you through your embroidery work.
It’s the unsung hero of the embroidery world. Basting is the technique to hold your fabric and design in place, ensuring they don’t shift during the stitching process.
Though essential, the basting technique is foundationally critical. It keeps your design from bunching up or distorting and saves you the trouble of constantly readjusting your fabric.
If you’ve ever faced the frustration of misaligned stitches, you’ll know how much of a lifesaver basting can be.
At its core, basting is all about preparation. Consider basting the pencil sketch before the colors are filled in if embroidery were a painting. It might seem minor but just as in painting, the sketch plays a crucial role.
5 Key Reasons Why Basting Is Essential in Embroidery
Basting in embroidery is a fundamental technique that is often overlooked but holds significant importance in the quality and success of a finished piece.
Basting stitches secure the fabric and design as a temporary anchor, preventing shifting and distortion during embroidery.
This seemingly simple step plays a crucial role in ensuring precision, efficiency, and the preservation of artistic integrity.
1. Precision and Stability
Basting is the backbone of embroidery, providing stability and a firm foundation for subsequent stitches. By anchoring the fabric securely, basting minimizes the risk of misalignment or distortion, allowing for the precise execution of intricate designs.
2. Prevention of Fabric Movement
Fabric movement can be a significant challenge in embroidery, especially when working with delicate or slippery materials.
Basting helps to keep the fabric taut and in place, eliminating the frustration of shifting fabric that can result in uneven stitches or misplaced elements.
3. Efficiency and Accuracy
A well-basted fabric streamlines the embroidery process by providing a clear and stable surface for stitching. This enhances efficiency and allows the embroiderer to focus on creating uniform stitches and intricate details without the distraction of constantly readjusting the fabric.
4. Facilitating Complex Designs
Complex embroidery designs require meticulous attention to detail and precise placement of stitches. Basting serves as a guide, marking the boundaries and outlines of the design, making it easier to navigate through intricate patterns and ensure consistency in the final piece.
5. Preservation of Artistic Integrity
Basting is a testament to the craftsmanship and dedication inherent in embroidery.
By basting a piece before stitching properly, embroiderers demonstrate a commitment to quality and respect for the traditional techniques passed down through generations.
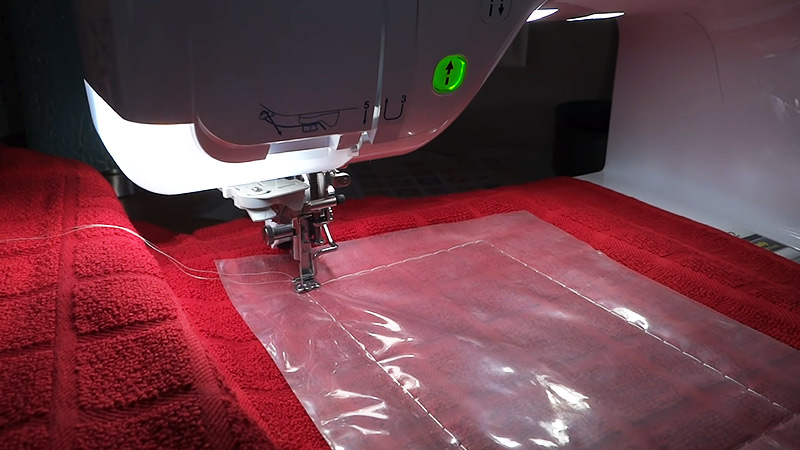
How to Baste Embroidery? Step-By-Step Guide for Stable and Accurate Stitching
Basting embroidery is a simple yet crucial step that ensures the stability and accuracy of your stitches. Follow these steps to baste embroidery effectively:
Prepare Your Materials
Set up your embroidery hoop with the fabric you’ll be working on. Ensure the fabric is stretched taut within the hoop to prevent distortion during stitching.
Choose Your Thread
Select a contrasting thread color for the fabric. This will make it easier to distinguish your basting stitches from your final embroidery. Thread your needle with this chosen thread.
Begin Basting
Starting from one corner or edge of your design area, bring the needle up through the back of the fabric to the front. Leave a small tail of thread at the back to secure it.
Make Running Stitches
Create running stitches along the perimeter of your design. These stitches should be temporary and relatively loose. Aim to keep them evenly spaced and consistent in length.
Continue Basting
Work around the entire design area, maintaining an even distance from the edge. Adjust the length and spacing of your stitches as needed, especially around intricate details or curves.
Finish Basting
Once you’ve completed basting around the entire design, leave a small tail of thread at the end, just like at the beginning. Do not knot or secure the thread as it will need to be easily removable later.
Embroider Your Design
With your fabric securely basted, you can now proceed with embroidering your design. The basting stitches will stabilize the fabric and prevent distortion as you work.
Remove Basting Stitches
After completing your embroidery, carefully snip each basting stitch with scissors or a seam ripper. Remove the basting thread, taking care not to disturb your embroidered stitches.
Finish Up
Inspect your finished embroidery for any loose threads or imperfections. Press the fabric if necessary to smooth out any wrinkles or creases.
Materials Needed for Basting Embroidery
Embarking on the journey of basting embroidery requires a few essential materials to ensure success. Let’s delve into the details:
Fabric
The choice of fabric is crucial for embroidery. Whether you opt for cotton, silk, linen, or another material, ensure it’s suitable for embroidery and can hold stitches well.
Embroidery Hoop
A sturdy embroidery hoop is essential for securing the fabric. Choose one that can be adjusted to accommodate different fabric thicknesses and provides a flat surface for stitching.
Embroidery Floss
Select embroidery floss in contrasting colors to your fabric. These contrasting colors will help the temporary basting stitches stand out, making them easier to remove once your embroidery is complete.
Sharp Scissors
A sharp pair of scissors is indispensable for cutting the basting stitches. Opt for precision scissors to minimize damage to your fabric and embroidered design while removing the temporary stitches.
Needle
Choose a handy needle suitable for basting. A longer needle is preferable, as it facilitates swift movement for creating the running stitch around the perimeter of your design.
Tips for Successful Basting in Embroidery
Achieving successful basting in embroidery is a matter of following a few essential tips. Here’s how to ensure your basting process goes smoothly:
Choose the Right Thread
Select a thread color that contrasts with your fabric. This will make your temporary basting stitches more visible, facilitating easier removal later.
Secure the Fabric Properly
When placing your fabric in the hoop, ensure it’s stretched enough to minimize movement during basting and stitching. However, avoid making it too tight, which can warp the fabric and distort your design.
Use the Running Stitch Method
Employ the running stitch technique for basting. Take your time to create firm and evenly spaced stitches around the perimeter of your design.
These stitches serve as the blueprint for your embroidery, guiding your needle and ensuring precision in your work.
Practice and Experiment
Practice makes perfect when it comes to basting. Experiment with different materials, thread tensions, and techniques until you find what works best. The more you practice, the more confident and proficient you’ll become in your basting skills.
FAQs
What is the focus of this article?
The article focuses on the importance of basting in embroidery, providing a comprehensive guide to basting techniques and tips for successful basting.
How can I baste embroidery according to the article?
The article advises securing the hoop, using a contrasting thread, and making a firm running stitch around the design as the steps to baste embroidery.
What tips are provided for successful basting?
Some tips for successful basting include selecting the right thread, correctly securing the fabric in the hoop, and creating a well-spaced running stitch.
What is the role of practice in enhancing basting skills?
According to the article, practice is crucial in bettering your basting skills. The more you practice, the better your basting technique will be.
Is it recommended to experiment with different materials and techniques?
The article concludes by encouraging readers to try different materials and techniques to determine what works best for them in basting embroidery.
To Recap
Basting in embroidery is far from optional; it’s a transformative technique that can turn good designs into exceptional ones.
By utilizing the right thread, securing your hoop properly, and mastering the running stitch, you unlock the potential to elevate your embroidery to new heights.
Practice is vital; experimentation with various materials and methods is encouraged to find your unique approach. Embrace the journey of discovery and refinement, for your embroidery will truly shine in the basting process.
So, armed with your needle and thread, dive into the world of basting and watch as your creations flourish with precision and beauty.
Leave a Reply