Plate and boxing sewing are fundamental techniques in the world of sewing and upholstery. These techniques play a pivotal role in creating well-fitted and visually appealing cushion covers, pillows, and other soft furnishings.
Plate sewing involves joining the front and back fabric panels together, while boxing sewing involves attaching the side panels, giving depth and structure to the cover.
These methods are crucial for achieving clean seams, ensuring a tailored fit, and providing the desired shape for your cushions.
Whether you’re a novice or an experienced seamstress, understanding plate and boxing sewing techniques is essential for producing professional-quality soft furnishings that enhance the comfort and aesthetics of your living spaces.
What Is Plate and Boxing Sewing? -The Definition
Plate Sewing: Plate sewing is a method commonly employed in bookbinding to secure the individual sections, or gatherings, of a book.
In this technique, each section is sewn together with thread or cord along the fold of the paper or parchment. The sections are then attached to each other through a common strip of fabric or leather called the “plate.”
Plate sewing provides strength and durability to the binding and allows the book to open easily without stressing the spine.
This method is often used in traditional bookbinding and results in a visually pleasing, classic appearance.
Boxing Sewing: Boxing sewing, on the other hand, is a technique commonly used in leatherworking to join pieces of leather together.
It involves stitching multiple pieces of leather along their edges to create a larger, composite piece. This method is popular for crafting items like bags, wallets, and belts.
Boxing sewing can be done with various types of stitches, such as saddle stitching or running stitching, depending on the desired aesthetic and strength.
How to Sew a Box Cushion Cover Without a Zipper
Sewing a box cushion cover without a zipper is a great way to create a simple, clean look for your cushions.
Here’s a step-by-step guide on how to do it:
Materials You’ll Need:
- Fabric for your cushion cover
- A sewing machine or a needle and thread
- Measuring tape
- Fabric scissors
- Straight pins
- Cushion foam or insert
Step-by-Step Instructions:
Measure and Cut Your Fabric
Measure the length, width, and depth of your cushion.
For the front and back panels of your cushion cover, cut two pieces of fabric:
- Length = cushion length + 1 inch (for seam allowances)
- Width = cushion width + 1 inch (for seam allowances)
For the side panels (the boxing), cut two pieces of fabric:
- Length = cushion length + cushion depth + cushion length + 1 inch (for seam allowances)
- Width = cushion depth + 1 inch (for seam allowances)
Pin and Sew the Side Panels
Pinning is a critical step to maintain alignment. Use plenty of straight pins along the edge to prevent any fabric shifting during sewing.
Begin sewing the side panel to the front panel with a secure backstitch to anchor the thread. Sew slowly and maintain a consistent 1/2-inch seam allowance for a clean and tidy seam.
Pin and Sew the Other Side Panel
Ensure that the side panels align perfectly with the back panel. Verify that the seams are straight and consistent with the front panel’s stitching.
Double-check the strength of the seams as they will bear the stress of inserting and removing the cushion.
Trim and Clip the Corners
After sewing the side panels, carefully trim any excess fabric from the seams, leaving a 1/4-inch allowance. While trimming, take care not to cut too close to the stitching, as this can weaken the seams.
To reduce bulk and allow the corners to turn smoothly when the cover is right side out, clip the corners diagonally at a 45-degree angle.
Turn Right Side Out
When turning the cover right side out, take your time to avoid stretching or stressing the seams.
Use a blunt tool such as a chopstick or the back of a spoon to gently push out the corners. This step is essential for achieving a crisp and professional appearance.
Insert the Cushion
Ensure that the cushion fits snugly inside the cover without any gaps or loose areas. Adjust the cushion as needed to evenly distribute the filling and create a full, plump look within the cover.
Close the Opening
If you’re hand-sewing the opening closed, consider using a slip stitch, also known as an invisible stitch. This type of stitch conceals the thread within the seam, making it nearly invisible.
When using a sewing machine to close the opening, maintain a consistent seam allowance to match the rest of the cover.
Finishing Touches
Before completing your project, take a moment to iron the cover. Use a pressing cloth to protect the fabric from direct heat, preventing scorch marks or damage.
Pay special attention to the corners and seams, ensuring they lay flat and appear well-pressed for a polished and professional look.
How to Sew Box Cushion Covers With Zippers and Piping
Sewing box cushion covers with zippers and piping adds a professional and decorative touch to your cushions.
Here’s a comprehensive guide on how to do it:
Materials You’ll Need:
- Fabric for your cushion cover
- Zipper (length matching the cushion’s width)
- Piping cord
- Sewing machine or a needle and thread
- Measuring tape
- Fabric scissors
- Straight pins
- Zipper foot for your sewing machine
- Piping foot for your sewing machine (optional)
- Cushion foam or insert
Step-by-Step Instructions:
Measure and Cut Your Fabric
Measure the length, width, and depth of your cushion.
For the front and back panels of your cushion cover, cut two pieces of fabric:
- Length = cushion length + 1 inch (for seam allowances)
- Width = cushion width + 1 inch (for seam allowances)
For the side panels (boxing), cut two pieces of fabric:
- Length = cushion length + cushion depth + cushion length + 1 inch (for seam allowances)
- Width = cushion depth + 1 inch (for seam allowances)
Cut two strips of fabric for the piping:
- Width = 1.5 to 2 inches, depending on the desired thickness of the piping cord.
- Length = the perimeter of the cushion plus a few extra inches for overlap.
Create the Piping
Begin by taking one of the piping strips and folding it lengthwise with the right sides of the fabric facing each other. This will create a tube.
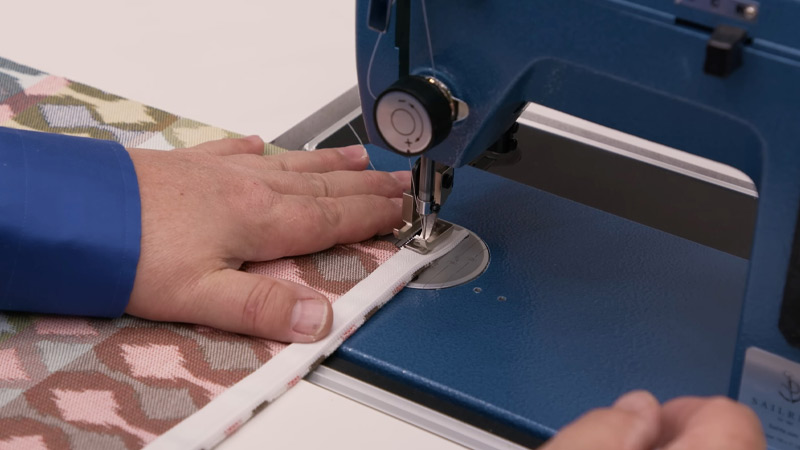
Insert the piping cord inside the fabric tube, making sure the raw edges of the fabric align with the cord’s edges. To secure the piping, use a zipper foot on your sewing machine and stitch as close as possible to the cord.
Attach the Piping to the Front Panel
Lay the front panel of your cushion cover flat with the right side facing up. Place the piping along the edge of the front panel, ensuring that the raw edges of the piping align with the raw edge of the fabric panel.
Using a zipper foot, carefully stitch the piping in place. Maintain the needle close to the cord, and when you reach corners, make small slits in the seam allowance of the piping to allow it to bend smoothly around the corners.
Sew the Side Panels
Take the side panels and align them with the front panel, ensuring that the right sides are facing each other while sandwiching the piping between them. Pin the layers together to secure them in place.
Sew along the pinned edge, stitching through the piping as well. Maintain a consistent seam allowance and keep the stitching close to the piping for a neat finish.
Attach the Back Panel
Position the back panel on the other side of the side panels, with right sides together, ensuring that the piping remains sandwiched between the layers.
Pin the layers together to hold them in place, and then sew the seam, ensuring you sew through the piping as well. Remember to leave the bottom open as this is where you will insert the zipper later.
Insert the Zipper
Open the zipper and pin one side of it to the seam allowance of the open edge, making sure that the zipper pull faces the fabric’s right side. Utilize your zipper foot to securely sew the zipper in place along the pinned edge.
Repeat the same process for the other side of the zipper, attaching it to the opposite seam allowance.
Close the Cushion Cover
Close the zipper to secure the cushion cover. Then, pin the open bottom of the cushion cover together. Stitch the bottom seam, and if you used a zipper foot for the previous steps, switch back to your regular presser foot if necessary.
Trim and Clip Corners
Trim any excess fabric from the seams, and then carefully clip the corners diagonally. This will help reduce bulk and allow the corners to turn out neatly.
Turn Right Side Out and Insert the Cushion
Gently turn the cushion cover right side out through the zipper opening, taking care not to damage the piping or stitching. Insert the cushion foam or insert into the cover, ensuring that it fits snugly and fills out the cover evenly.
Finishing Touches
Finish by pressing the cushion cover with an iron to remove any wrinkles and ensure a crisp, polished appearance. Adjust the cushion inside the cover to ensure it’s evenly distributed and provides a plump, finished look.
How to Make a Box Cushion Cover With Velcro
Making a box cushion cover with Velcro is a relatively straightforward sewing project that can be customized to fit your specific cushion dimensions.
Here’s a step-by-step guide to help you create a box cushion cover with Velcro closures:
Materials You’ll Need:
- Fabric of your choice
- Velcro strips or squares
- Sewing machine
- Matching thread
- Scissors
- Straight pins
- Measuring tape
- Iron and ironing board
Steps:
Measure Your Cushion
Begin by measuring your cushion’s length, width, and depth (thickness). Write down these measurements as they will determine the size of your cushion cover.
Cut Your Fabric
Using the measurements from Step 1, cut your fabric pieces. You’ll need two pieces for the top and bottom of the cushion cover. These should be cut to the exact dimensions of your cushion plus an extra 1 inch (2.5 cm) on each side for seam allowances.
Additionally, cut four pieces for the sides of the cover. The dimensions of these side pieces should match the width or length of your cushion plus the thickness of the cushion and an extra 1 inch (2.5 cm) for seam allowances.
Prepare the Velcro
Cut two strips of Velcro to the desired length for your closure. These Velcro strips will be used to secure the cushion cover once it’s complete.
Sew the Velcro
Take one of the top fabric pieces and sew one side of the Velcro strip near the edge of the fabric, centered along one side.
Sew the corresponding side of the Velcro strip on the edge of the other top fabric piece. Make sure they align properly when overlapped.
Assemble the Sides
Place two of the side fabric pieces (either the width or length pieces, depending on which side you’re working on) onto the top fabric piece that has the Velcro attached. Pin them right sides together.
Using your sewing machine, stitch along the pinned edges with a 1/2-inch (1.25 cm) seam allowance. Repeat this step with the other two side fabric pieces and the other top fabric piece.
Sew the Remaining Edges
With the side pieces attached to the top fabric piece, pin the remaining edges of the side pieces together, creating a rectangular box shape. Sew along these edges, maintaining a 1/2-inch (1.25 cm) seam allowance.
Clip Corners
Carefully clip the corners of your fabric diagonally, making sure not to cut into the stitching. This step helps reduce bulk and ensures neater corners when you turn the cover right-side out.
Turn It Right Out
Gently turn the fabric right-side out through the opening between the top and side fabric pieces. This will reveal the box cushion cover’s exterior.
Press and Insert the Cushion
Use an iron and ironing board to press the cushion cover, smoothing out any wrinkles or creases. Then, insert your cushion into the cover, making sure it fits properly.
Secure the Velcro Closure
Close the Velcro strips to securely fasten the cushion cover in place around your cushion.
Finishing Touches
Adjust the cushion cover as needed to ensure it fits snugly over your cushion. Trim any loose threads, and if necessary, give the cover a final press with the iron for a polished look.
FAQS
What materials are typically used for boxing in boxing sewing?
Boxing in boxing sewing is usually done with fabric that matches or complements the cushion or pillow cover fabric such as cotton, linen, or upholstery fabric.
Are there any special considerations for sewing curved or rounded cushions using plate and boxing sewing techniques?
Yes, when sewing curved or rounded cushions, you may need to create smaller, strategically placed seams to accommodate the shape.
Can plate and boxing sewing be used for outdoor cushions and upholstery?
Yes, plate and boxing sewing techniques can be adapted for outdoor projects.
Are there any shortcuts or tools that can simplify the plate and boxing sewing process?
Yes, using sewing clips or adhesive fabric tape can help hold layers of fabric and piping in place, making it easier to sew them together precisely.
Can plate and boxing sewing be used for other projects besides cushions and pillows?
Plate and boxing sewing techniques are versatile and can be applied to various sewing projects, such as creating tailored upholstery for furniture, sewing cylindrical bolster pillows, and making custom-sized mattress covers, among others.
Last Words
Plate and boxing sewing are indispensable skills in the realm of sewing and upholstery. These techniques empower crafters and designers to fashion exquisite and functional soft furnishings, from elegant throw pillows to comfortable cushion covers.
Plate sewing, which binds the front and back panels, lays the foundation for a well-structured and visually pleasing creation, while boxing sewing adds depth and dimension.
These methods not only contribute to neat seams and a tailored fit but also permit the creation of custom-made soft furnishings that elevate the comfort and aesthetics of any space.
Whether you’re a novice or a seasoned artisan, mastering plate and boxing sewing opens up a world of creative possibilities in the realm of home decor and upholstery.
Leave a Reply